Modifying the schema using the schema editor
You can create new attribute types or object classes in the schema editor.
When extending the schema, you shouldn’t modify native schema elements. Click the corresponding tab for the task that you want to perform.
Creating a new attribute type using the schema editor
You can create attribute types for any new properties that logically belong to objects in your directory. To create a new attribute type:
Steps
-
Sign on to the admin console.
-
In the sidebar, click LDAP Schema.
-
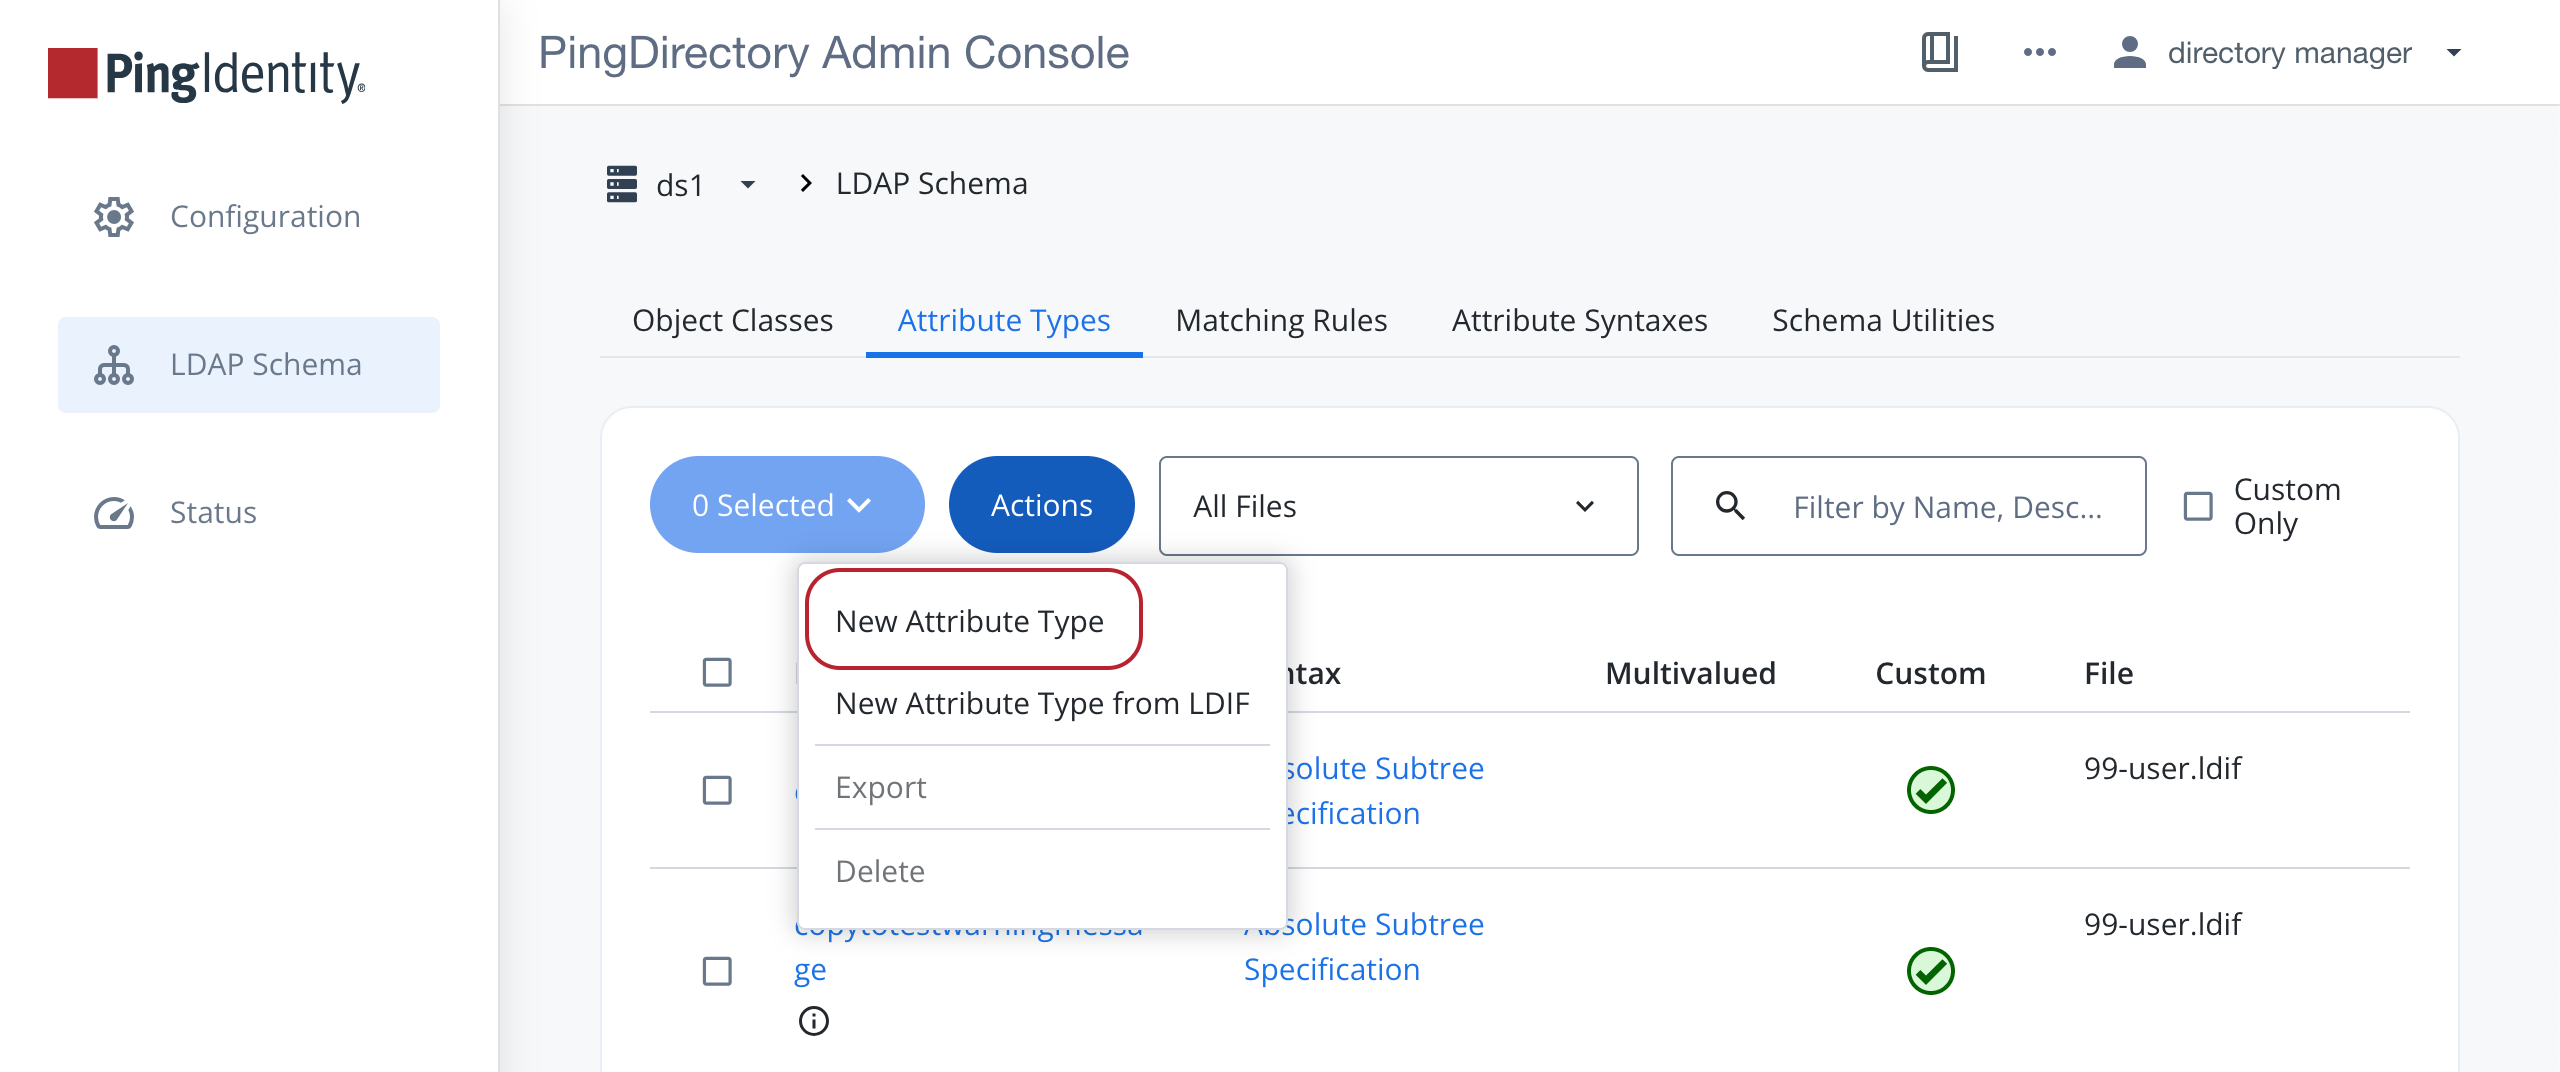
On the Attribute Types tab, click Actions and select New Attribute Type.
-
Enter the properties for the new attribute type according to the tooltips.
-
Click Save.
Creating a new object class using the schema editor
Creating a new object class is similar to creating a new attribute.
Before you begin
Make sure that any attributes that are part of the new object class are defined before creating the object class.
Steps
To create a new object class:
-
Sign on to the admin console.
-
In the sidebar, click LDAP Schema.
-
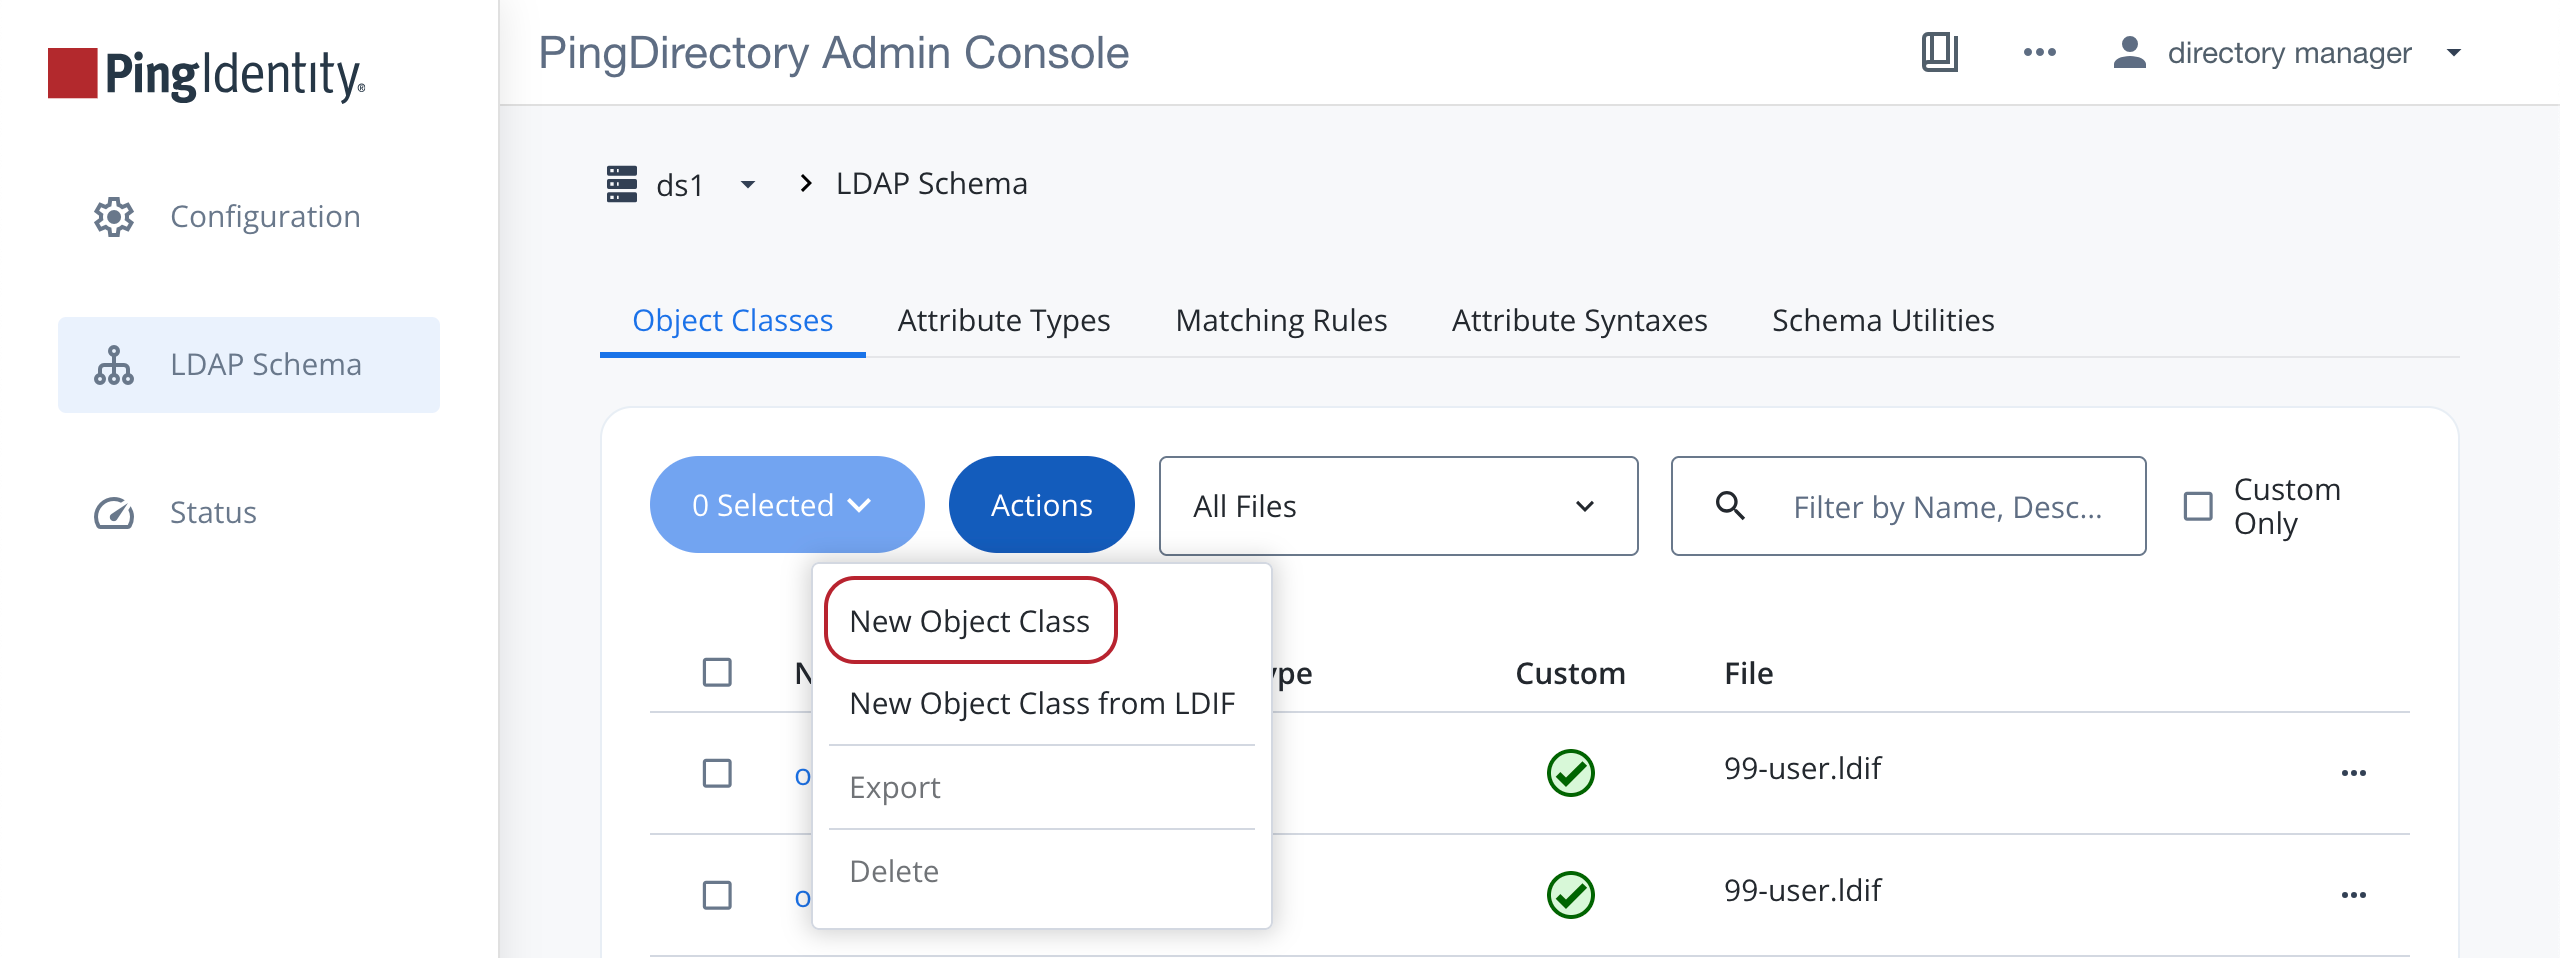
On the Object Classes tab, click Actions and select New Object Class.
-
Enter the properties for the new object class.
-
In the Attributes box, specify the types of attributes that are required or optional for the new object class:
-
In the Required Attributes list, select a required attribute.
-
In the Optional Attributes list, select an optional attribute.
-
Click the Plus icon () to add an item to either list. Click the Minus icon () to remove an item from either list.
-
-
Click Save to create the new object class.
Modifying a schema definition
You can only edit read-write schema definitions in the PingDirectory server. These are usually marked as Custom in the schema editor.
To modify a schema definition:
Steps
-
Sign on to the admin console.
-
In the sidebar, click LDAP Schema.
-
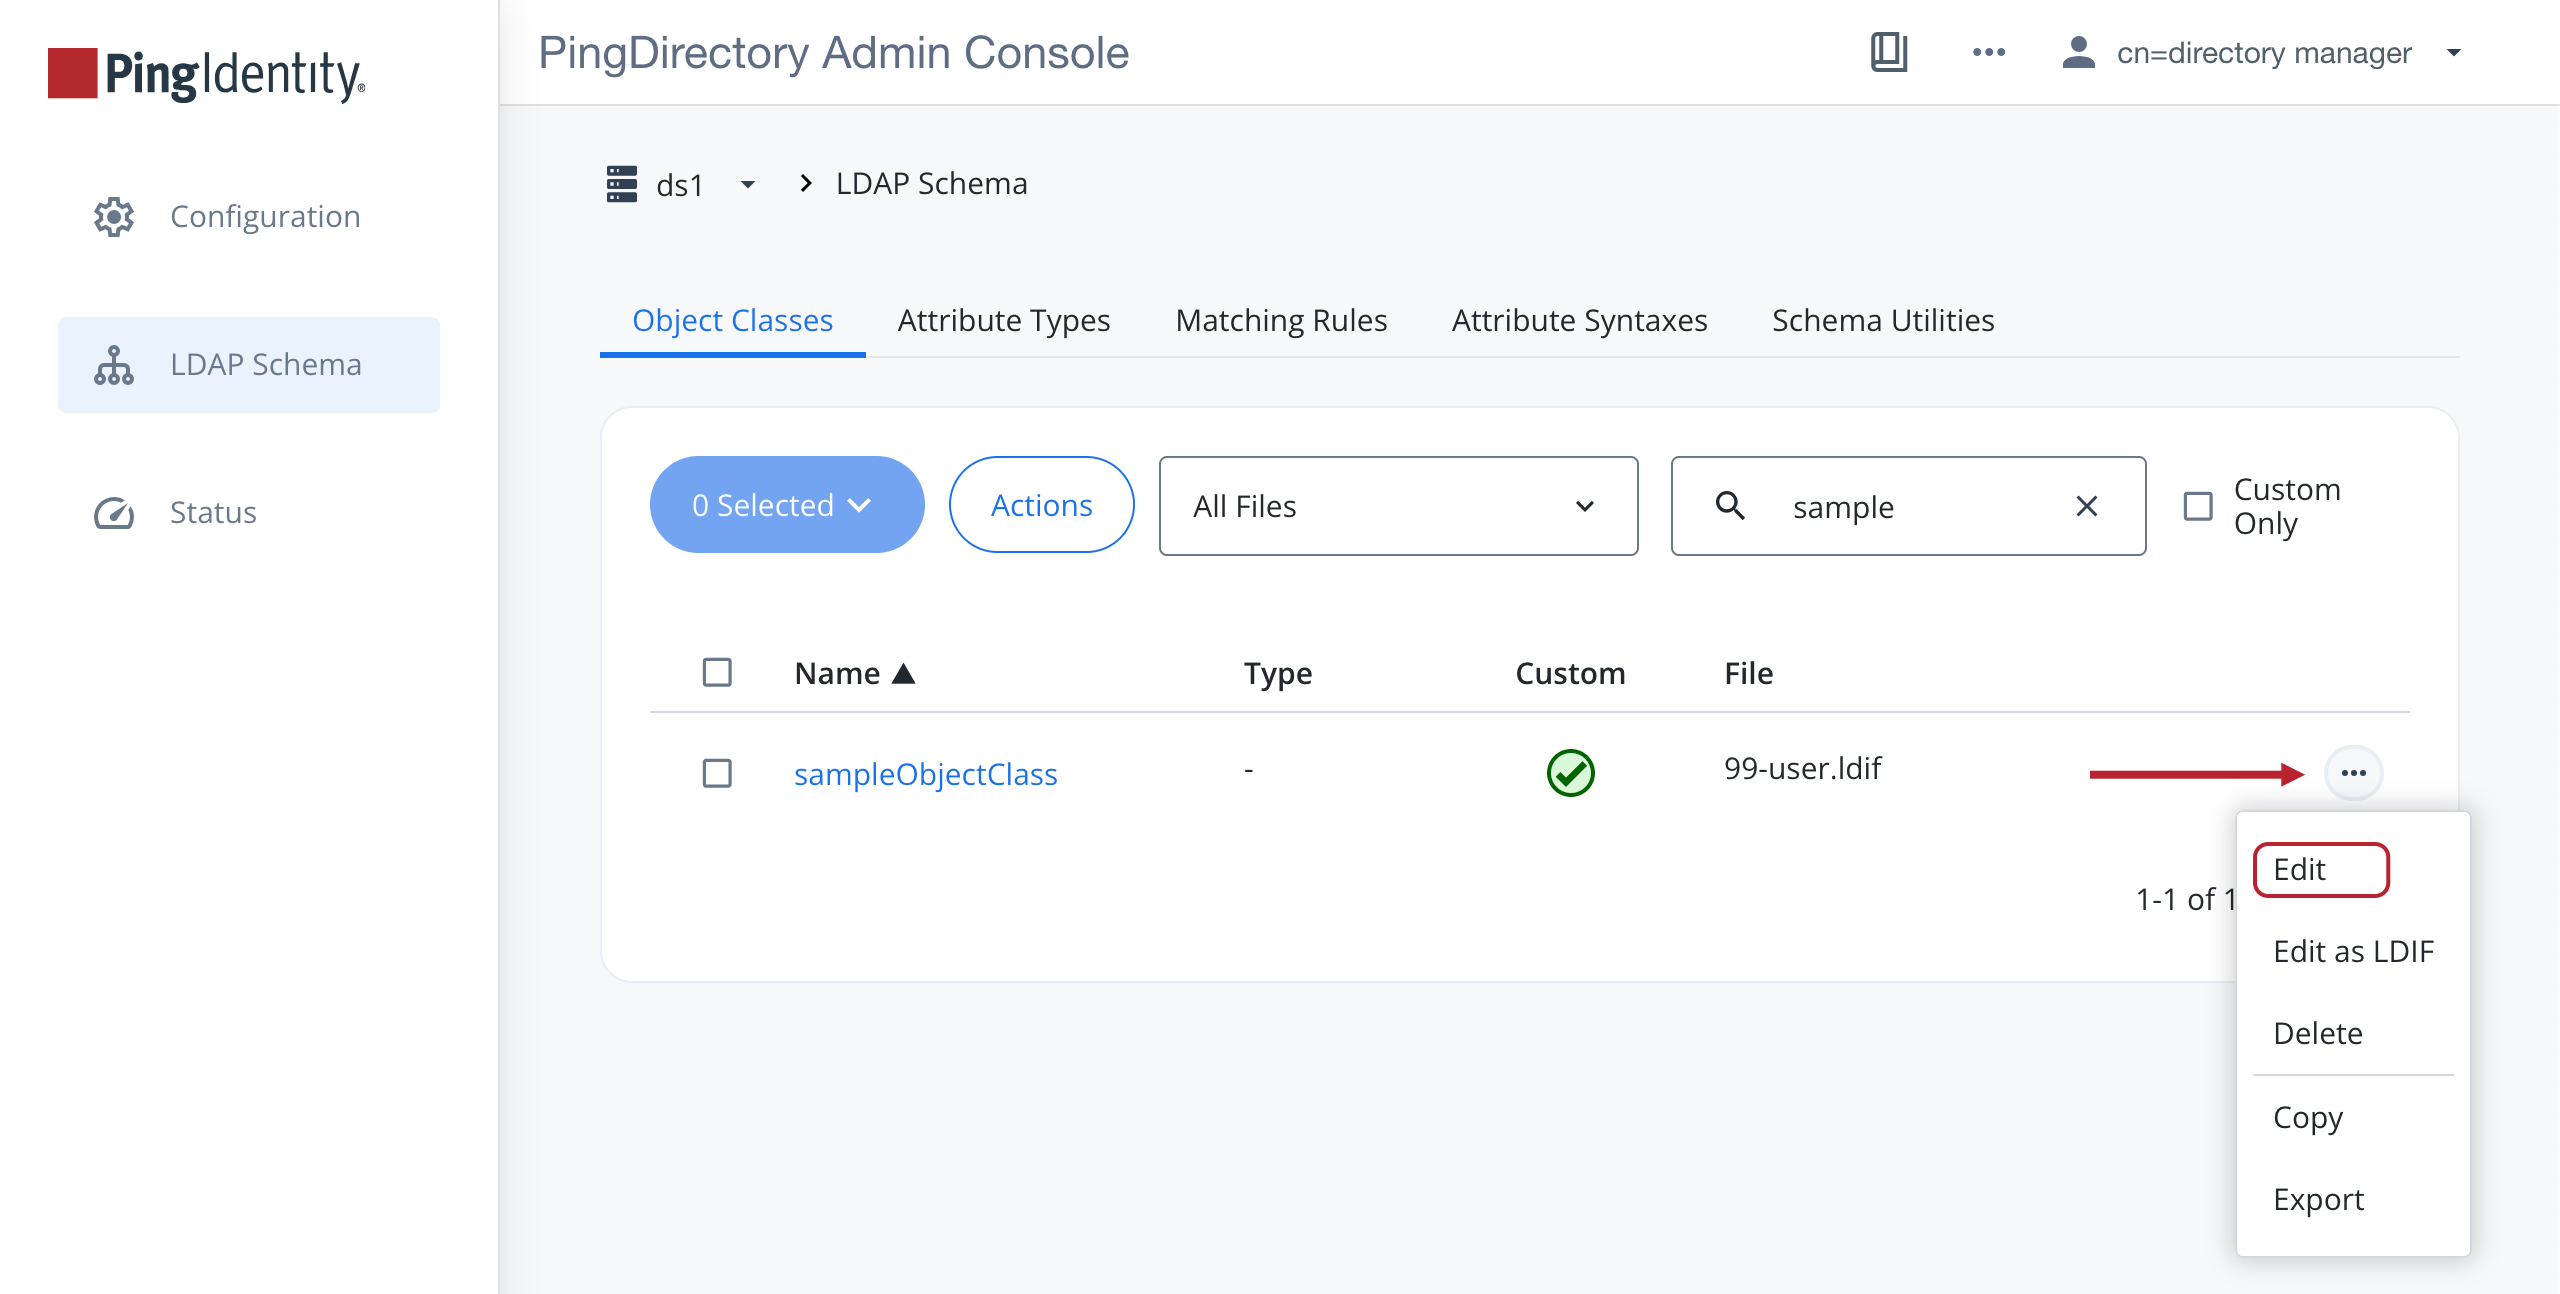
On the Object Classes tab, find the object class that you want to edit. For that row, click the More Options (…) icon and select Edit.
-
Make your changes and click Save. The console displays a success message in the lower-left corner.
Deleting a schema definition
You can only delete schema definitions in the PingDirectory server that are read-write. These are usually marked as Custom in the schema editor. Ensure that the schema element you are deleting isn’t currently in use.
To delete a schema definition:
Steps
-
Sign on to the admin console.
-
In the sidebar, click LDAP Schema.
-
On the Object Classes tab, find the object class that you want to delete. For that row, click the More Options (…) icon and select Delete.
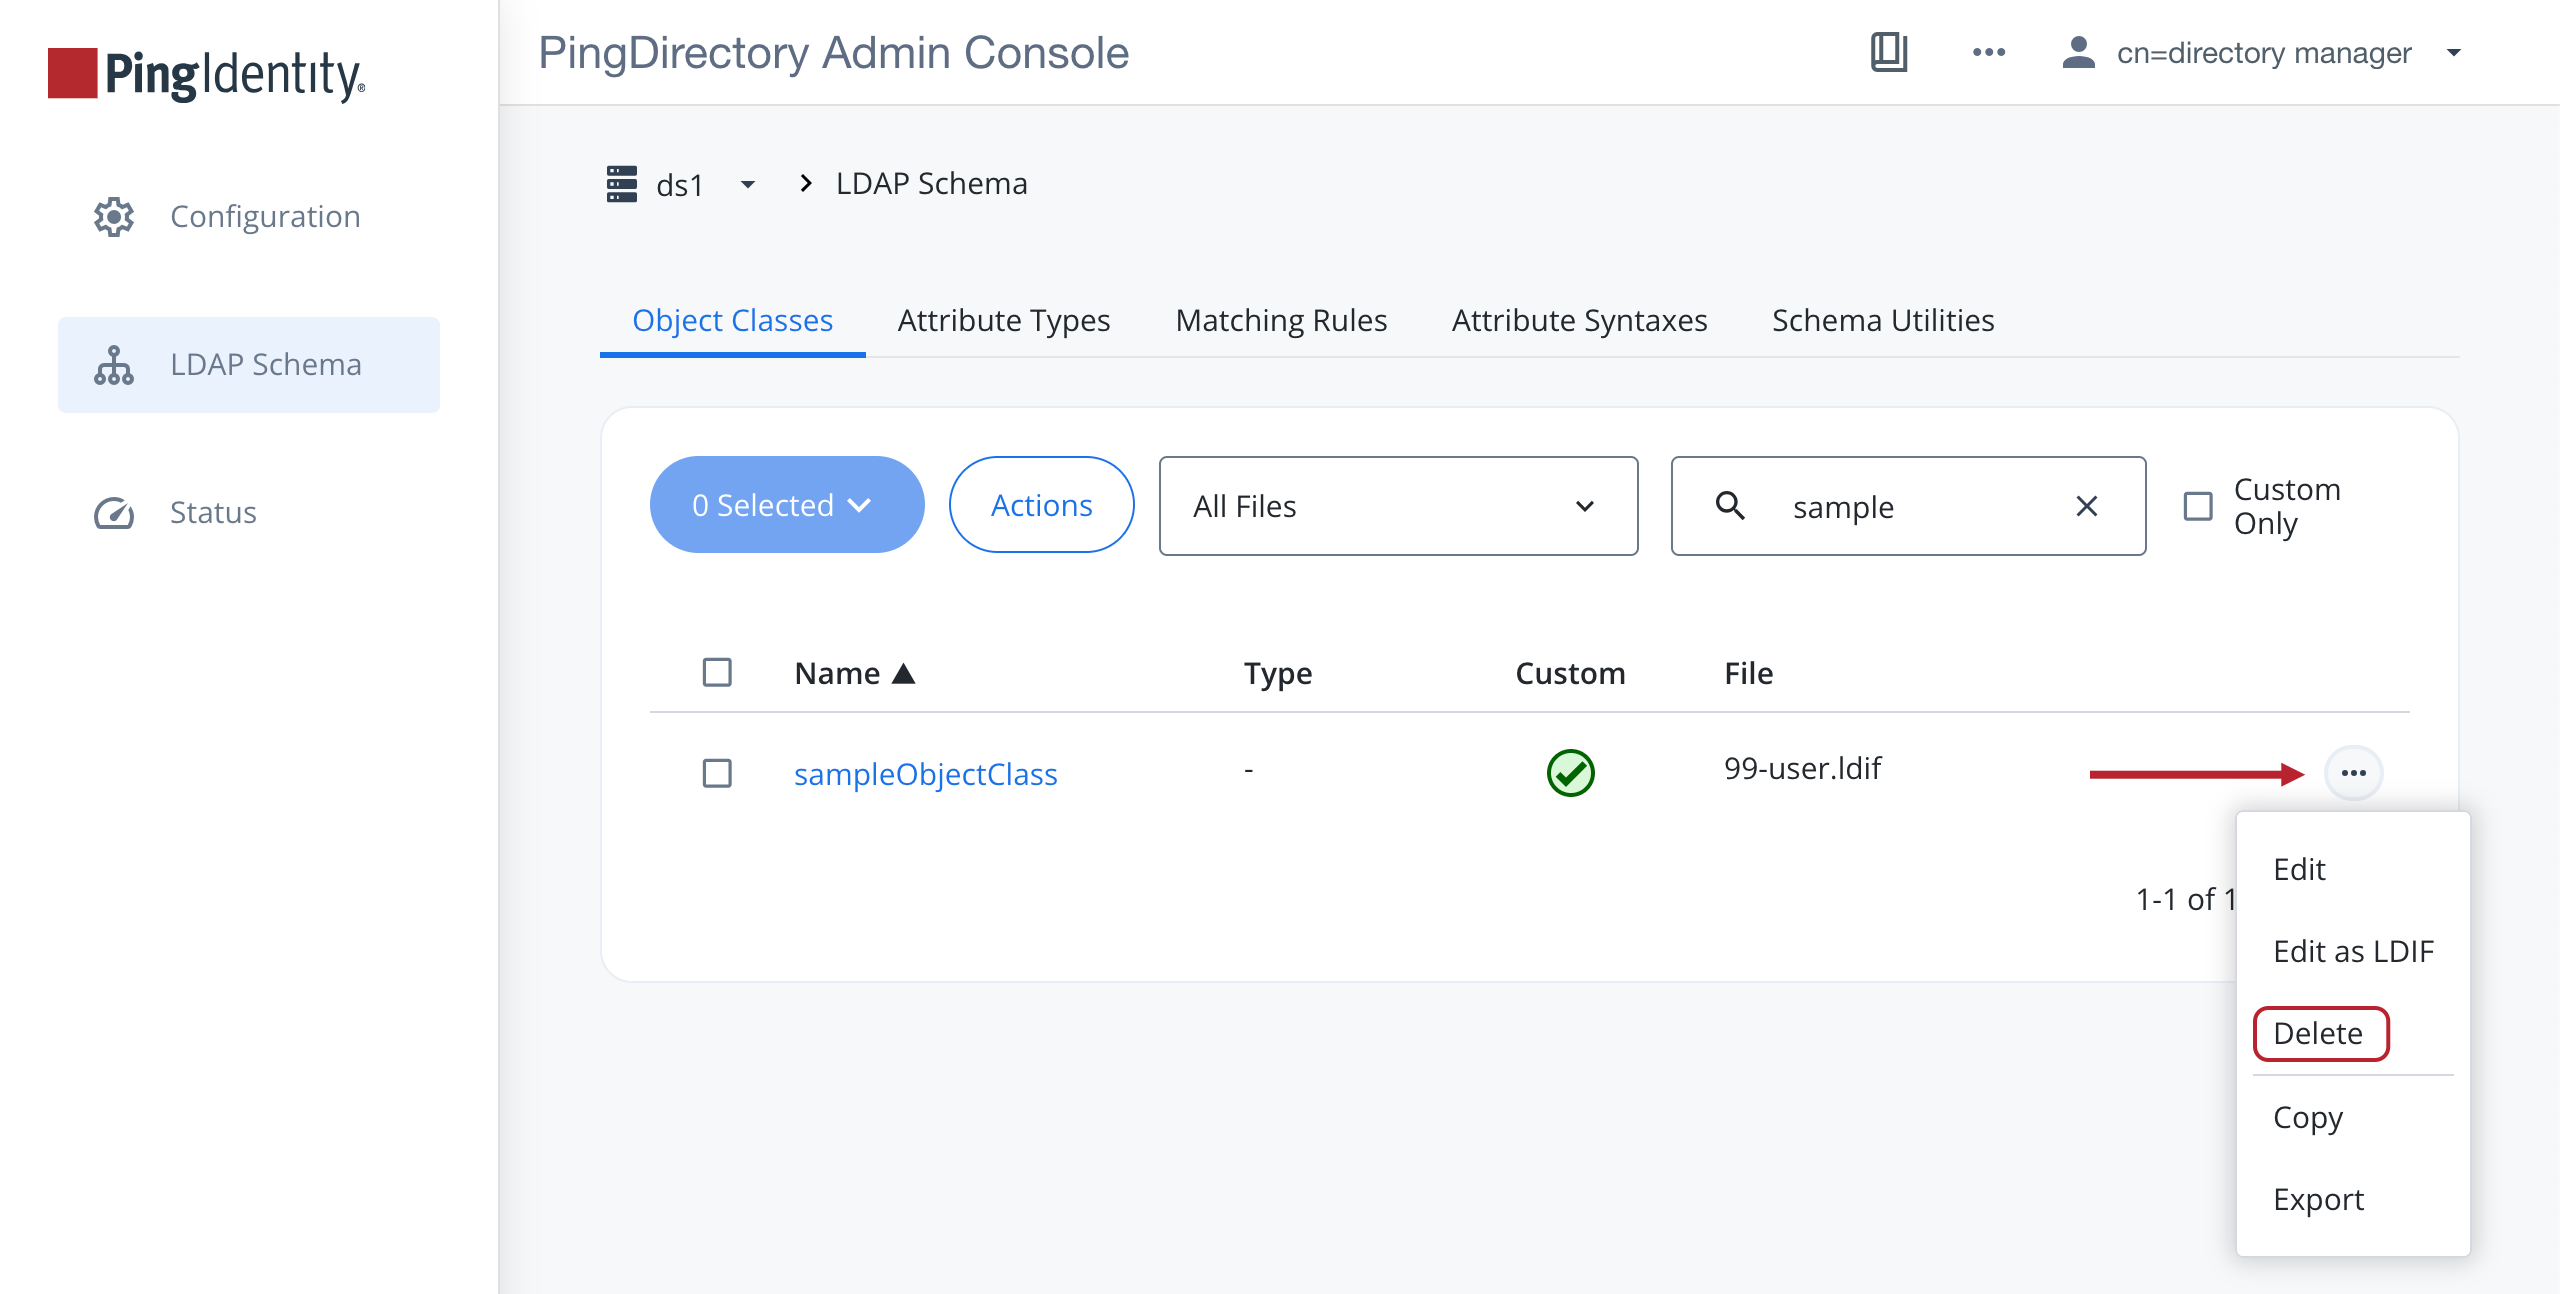
Result:
A Warning dialog box opens.
-
To delete the schema element, click Delete. The console displays a success message in the lower-left corner.
Using the schema editor utilities
The schema editor provides a Schema Utilities tab where you can import new schema elements from a file and check schema compliance.
About this task
If you are importing a schema file, the system automatically checks for compliance before the import. If the definition doesn’t meet schema compliance, the system displays an error message. However, you should check if your file is compliant with your schema before importing it.
To check schema compliance using the schema editor:
Steps
-
Sign on to the admin console.
-
In the sidebar, click LDAP Schema.
-
On the Schema Utilities tab, click Validate Entries.
-
In the Validate Entries modal, add your schema definition using one of two methods:
Choose from:
-
To have the system check an LDIF file, click Load from file and select a file to upload.
You can also drag and drop an LDIF file into the dotted Load from file area.
-
Copy and paste a new schema definition into the field.
-
-
Click Validate.
If there is a problem with your definition, you see an error message.