Installing the PingID integration for Mac login
You can install the PingID integration for Mac login with the UI wizard or with the command-line installation.
|
If for some reason you decide to downgrade to an earlier version of the PingID integration with Mac login, you must completely remove the installed version and only then install the earlier version. |
-
UI
-
CLI
-
CLI reference
Installing PingID integration for Mac login using UI wizard
Install PingID integration for Mac login through the user interface (UI).
Before you begin
|
Adding any multi-factor authentication (MFA) is a procedure that carries the risk of being locked out of the machine.
|
To install the PingID integration, you must have:
-
Administrator privileges on the target Mac machine.
-
A copy of the organization’s
pingid.propertiesfile. For instructions on how to download the relevant PingID properties file (with full or restricted permissions), see Managing the PingID properties file.
About this task
To install the PingID integration for Mac login using the UI wizard:
Steps
-
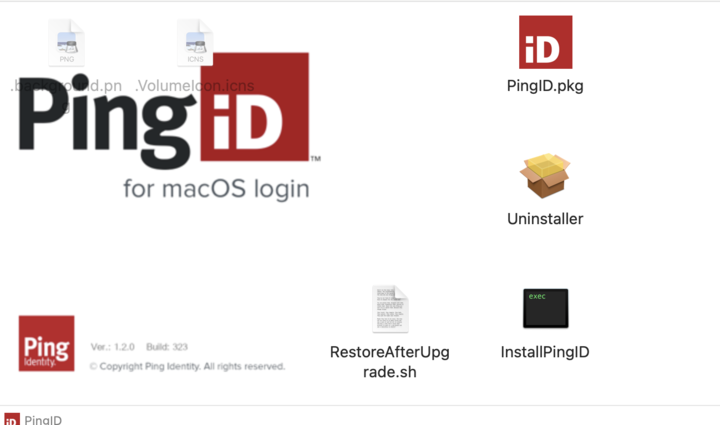
On the PingID Downloads page, go to Integrations and download the PingID package
.pkgfile for Mac login. -
Double-click the
PingID-MacOS-Login<version>.dmgfile to launch the setup wizard.Result:
The installer opens.
-
Double-click the PingID.pkg icon.
-
At the security check window, click Continue.
-
At the installer commencement window, click Continue.
Result:
The Software License Agreement window is displayed.
-
Review the Software License Agreement, click Continue, and when prompted, click Agree.
Result:
The installation proper starts with the Installation Type window.
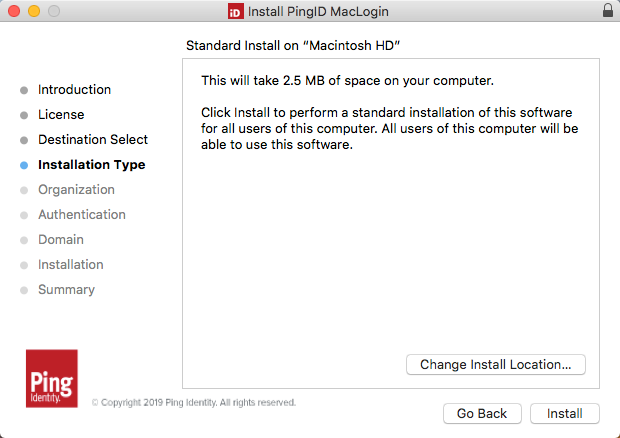
-
Optional: Click Change Install Location.
Result:
The Destination Select window opens.

-
Keep the highlighted option unless there are compelling reasons for a different choice. Click Continue and then click Install.
-
If required, enter your machine user name and password.
Result:
You see the following caution message.
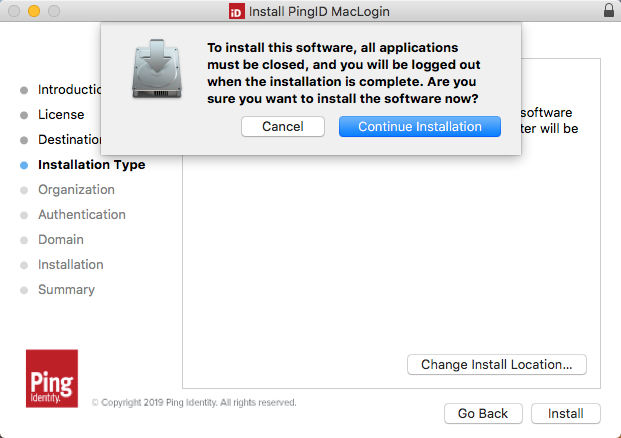
-
Click Continue Installation.
-
In the Organization Information pane, click Browse, and then select the
pingid.propertiesfile that you downloaded from the Admin portal. For more information, see Managing the PingID properties file for Windows and Mac login.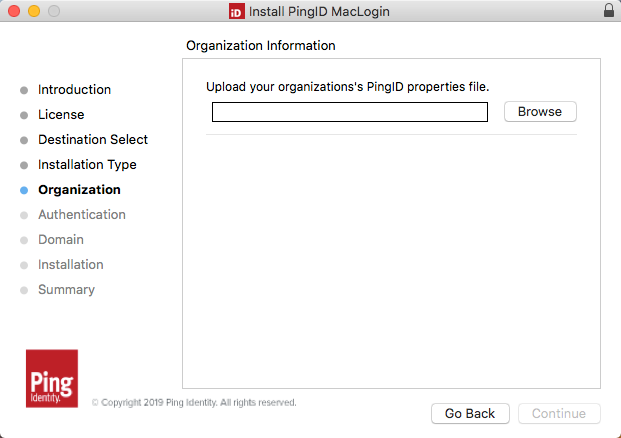
-
Click Continue.
Result:
The Manual Authentication window opens.
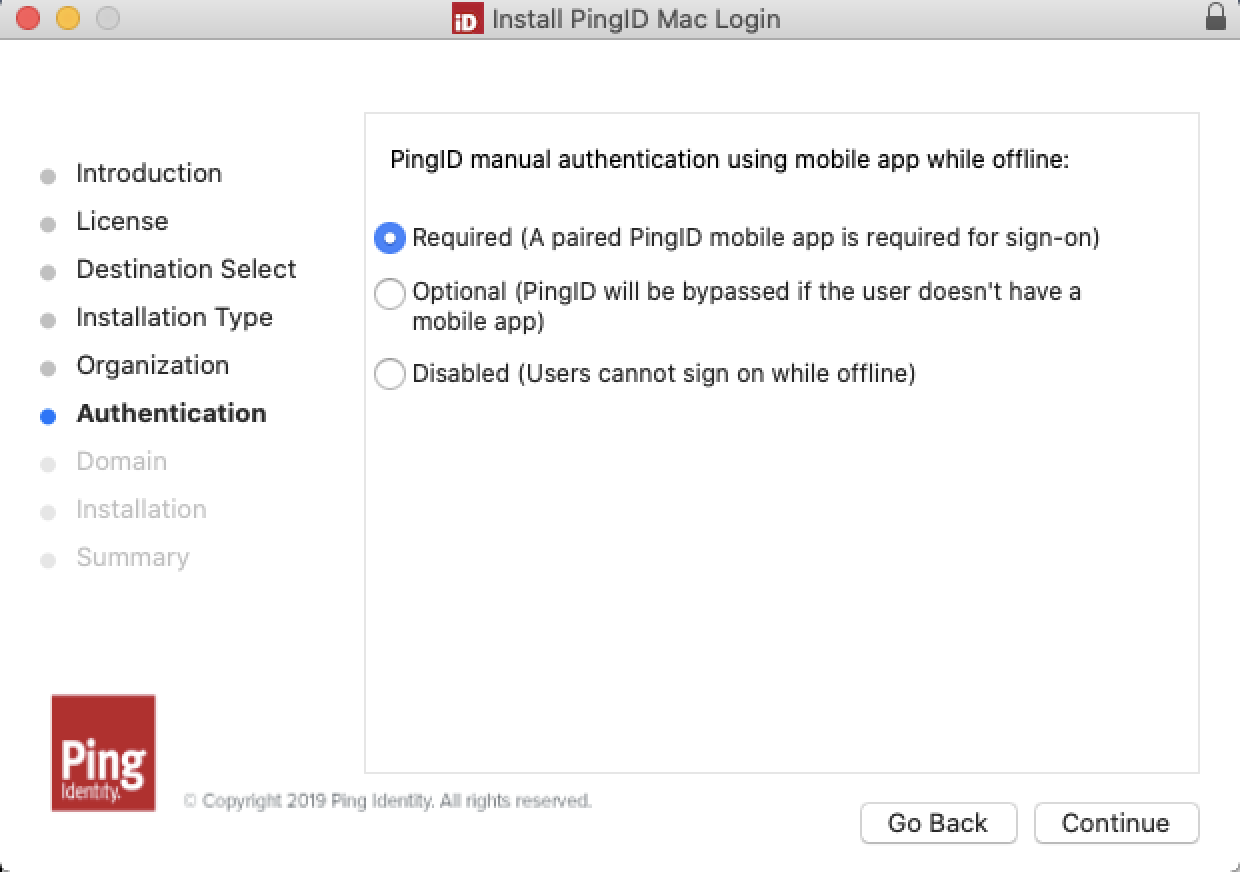
Choose the option to use for situations where the user cannot communicate with the PingID server:
-
Required: User can use the PingID mobile app for offline access. If they do not have a paired mobile device, their access is blocked.
-
Optional: User must use the PingID mobile app for offline access, but if they don’t have a paired mobile device, MFA is bypassed.
-
Disabled: Offline access is not permitted.
-
-
Click Continue.
Result:
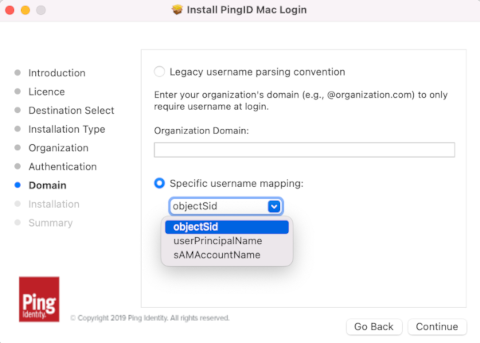
The The Domain / Username Mapping window is displayed.
-
In the Domain / Username Mapping window, select Specific username mapping and choose one of the available Active Directory attributes to use for identifying users, or select the Legacy username parsing convention option.
If you select Legacy username parsing convention, you can optionally provide the organization domain so that users can provide just their user name when logging in, for example,
john.smith, rather than entering user name plus domain name, such asjohn.smith@somewhere.com.The domain format should be:
-
@domainname, such as@somewhere.com -
Maximum of 50 characters
-
The string entered in this field is appended to the username during sign on
By default, domain validation is carried out for the domain that you specify in the Organization Domain field. You can use the Skip domain validation option to specify that PingID should skip domain validation.
Because the username (plus domain name if set here) is sent to PingID for second factor authentication, it must precisely match a username entered through the admin portal. For PingID, user
john.smithis not the same asjohm.smith@somewhere.comeven if the domain is correct.
-
-
Click Continue.
If you changed anything in the previous step, you might be asked to enter your machine username and password.
Result:
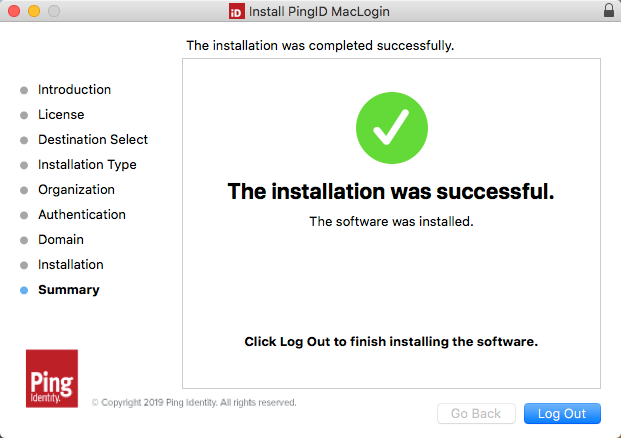
When the installation is complete, you see the following window.
-
Click Log Out.
Result:
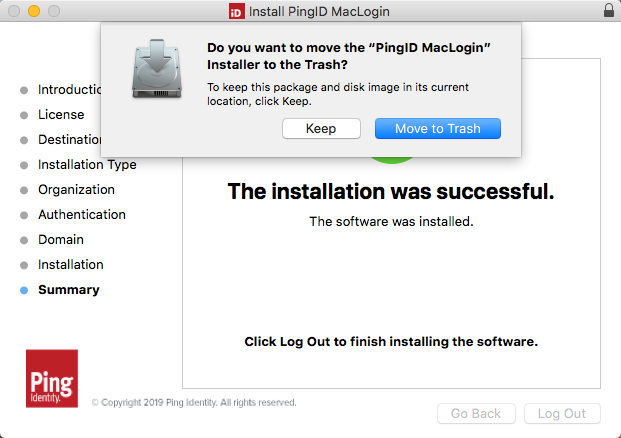
You are asked what to do with the installer package.
-
Decide whether to keep the installer package.
The installer exits and the machine is logged out to apply the changes.
-
Optional: After successful installation, the downloaded
pingid.propertiesfile may be deleted from the Mac. -
To verify the installation, test that a user can sign on to the Mac machine using the PingID integration for Mac login.
Installing PingID integration for Mac login using CLI
Install the PingID integration for Mac login using the command-line interface (CLI).
Before you begin
|
Adding any multi-factor authentication (MFA) is a procedure that carries the risk of being locked out of the machine.
|
To install the PingID integration, you must have:
-
Administrator privileges on the target Mac machine.
-
A copy of the organization’s
pingid.propertiesfile. For instructions on how to download the relevant PingID properties file (with full or restricted permissions), see Managing the PingID properties file.
About this task
Installing the PingID integration from the command line is useful for deploying to multiple machines in batch mode.
To install the PingID Integration for Mac login using the CLI:
Steps
-
On the PingID Downloads page, go to Integrations, and download the PingID package
.pkgfile for Mac login. -
Double-click the PingID-MacOS-Login<version>.dmg file to launch the setup wizard.
Result:
The installer opens.
-
Copy and paste the
PingID.pkgandInstallPingIDfiles to a convenient location. -
Download the PingID properties file to the location in step 3.
-
Open a terminal session and change directory to where you copied the file in step 3.
-
Optional: To see the available CLI help, run the
./InstallPingID --helpcommand. -
Run the installation from a command prompt or create a script containing the required install command.
Choose from:
-
Install using the
pingid.properties file to supply parameter values../InstallPingID --orgSettingsFilePath /Users/admin/Downloads/pingid.properties [optional parameters] -
Install without using the
pingid.propertiesfile. Supply the--orgAlias,--orgKey,--authenticatorAddress,--idpUrl, and--token parametervalues on the command line../InstallPingID --orgAlias <organization alias string> --orgKey <organization key string> --authenticatorAddress <URL of PingID data center> --idpUrl <URL of the server used for PingID API requests> --token <API key identifier> [optional parameters]
-
Mac login command line reference
The following tables provide an overview of the command line commands you can use for the PingID integration for Mac login
== Running the installer from the CLI
The general command line is ./InstallPingID [options] [filepath_opt]
Where:
[filepath_opt] takes the form -p <PingID.pkg file path> or --package <PingID.pkg file path>.
| Parameter<Argument> | Description | ||
|---|---|---|---|
|
The full file path of the PingID properties file. For example, The PingID properties file is referenced from this location during the installation process. You must specify either:
OR all of the following parameters:
|
||
|
The organization’s alias. This value is an entry in the PingID properties file. If the If both the |
||
|
The organization’s base64 key. This value is an entry in the PingID properties file. If the If both the |
||
|
The URL of the PingID data center to which the organization is associated. It is the URL that is listed on the line in the If the If both the |
||
|
The URL of the server used for PingID API requests. Take this value from the If the If both the |
||
|
The identifier of the API key. This value is an entry in the PingID properties file. If the If both the |
||
|
Use the
|
||
|
Use the
|
||
|
The installer attempts to address the PingID authenticator heartbeat to confirm connectivity. If there is no response before installing any of the elements, continue the installation. |
||
|
The installer will prompt with a Log out now? message box. |
||
|
The installer will sign out without asking. |
| Parameter<Argument> | Description | ||||
|---|---|---|---|---|---|
|
Configures the installation to append the value supplied in this parameter to the username at sign-on time.
This parameter has a maximum length of 50 characters, including the leading "@". |
||||
|
By default, domain validation is carried out for the domain that you specify with the |
| Parameter<Argument> | Description |
|---|---|
|
The Possible values for <type> are:
|
|
By default, OAEP padding is used in the encryption for offline authentication. Use |
| Parameter<Argument> | Description |
|---|---|
|
Defines HTTP request timeout value. Possible values are between 1000-30000 ms. |
| Parameter<Argument> | Description |
|---|---|
|
Show a user guide. |
|
Show the Installer version. |
|
If you include the |