Configuring Palo Alto Global Protect for PingID multi-factor authentication
In the following tasks, you will configure Palo Alto Global Protect to work with PingID multi-factor authentication (MFA).
Prerequisites
To set up PingFederate or PingFederate Bridge as a RADIUS server, see Prerequisites: PingFederate RADIUS server.
|
If your end users encounter the Javascript error "Assignment to read-only properties is not allowed in strict mode" when authenticating via PingID, they should upgrade to version 5.2.11 of the GlobalProtect app. |
How it works
The following diagram illustrates a general flow. The actual configuration varies depending on your organizational infrastructure considerations and policies.

Processing Steps
-
When a user opens their Palo Alto Global Protect sign-on window and enters a username and password, their details are sent to the RADIUS server on PingFederate through the VPN RADIUS client.
-
PingFederate authenticates the user’s credentials with the user repository, such as an LDAP server, as first-factor authentication.
-
Upon authentication approval from the user repository, the RADIUS server initiates a second authentication with PingID.
-
The RADIUS server returns a response to Palo Alto Global Protect. If authentication is denied or if an error occurs, the user’s terminal displays an error message.
Setting up a RADIUS profile in the New Generation Firewall
To configure Palo Alto Global Protect to work with PingID multi-factor authentication (MFA), you must set up a RADIUS profile.
Steps
-
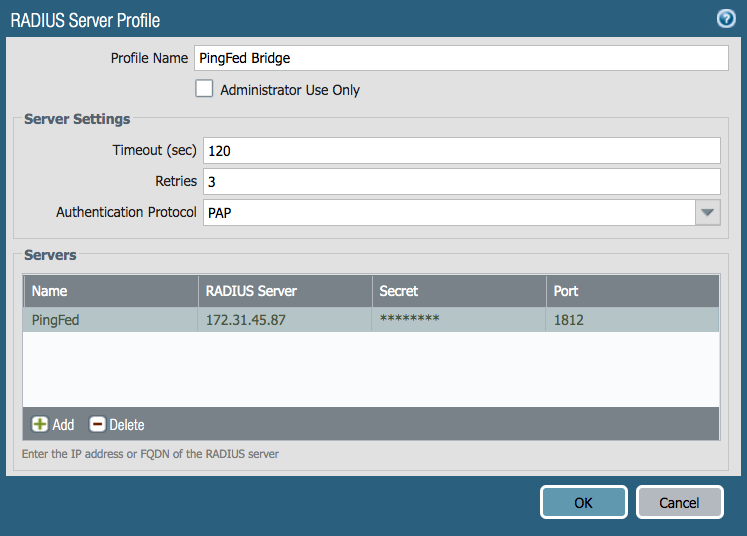
Go to Device → Server Profiles → RADIUS, and click Add.
Result:
The following window is displayed.
-
In the Profile Name field, enter a name for the server.
-
In the Server Settings section, set the Timeout and Retriesfields according to your policy.
-
From the Authentication Protocollist, select PAP.
-
In the Servers section, click Add, and then add the RADIUS server details.
Next steps
For further information about setting the RADIUS profile, see Configure RADIUS Authentication.
Creating an authentication profile
To configure Palo Alto Global Protect to work with PingID multi-factor authentication (MFA), you must create an authentication profile.
Steps
-
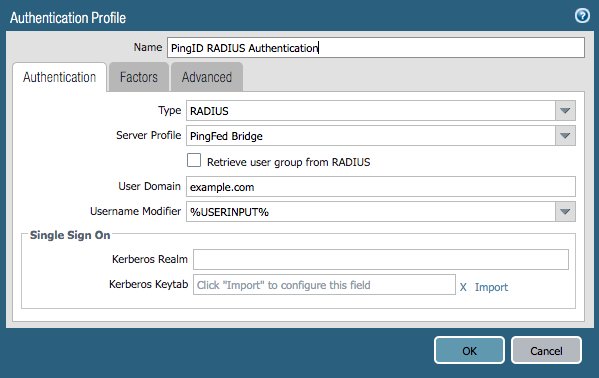
Go to Device → Authentication Profile, and then click Add.
Result:
The Authentication tab of the Authentication Profile window is displayed.
-
In the Name field, enter a name for the profile.
-
From the Type list, select RADIUS.
-
From the Server Profile list, select the RADIUS profile that you previously created.
-
In the User Domain field, enter your own domain name.
-
From the Username Modifier list, leave the default selection of %USERINPUT%.
-
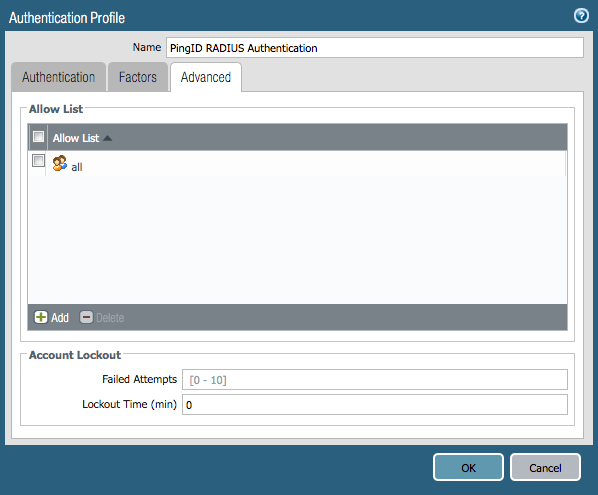
Click Advanced.
Result:
The Advanced tab of the Authentication Profile window is displayed.
-
In the Allow List section, select the group to which this authentication profile will apply. Click OK.
Setting Global Protect Authentication with the new profile
Add the authentication profile to the Global Protect Portal.
Before you begin
If you have not yet created a Global Protect Portal, see Set Up Access to the GlobalProtect Portal.
Steps
-
Go to Network → Global Protect → Portals, and open the portal you want to modify.
-
On the Authentication tab, choose the SSL/TSL Service Profile for the portal.
-
At the bottom left of Client Authentication, click Add.
-
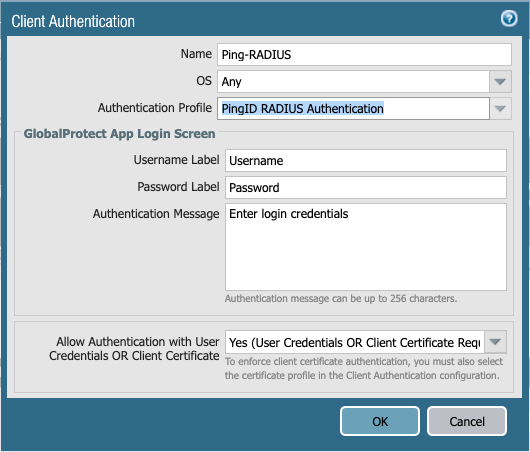
In the Client Authentication window, enter a name in the Name field.
-
From the Authentication Profile list, select the authentication profile that you previously created.
-
Optional: From the Allow Authentication with User Credentials or Client Certificate list, select Yes (User Credentials or Client Certificate Required).
-
Click OK.
-
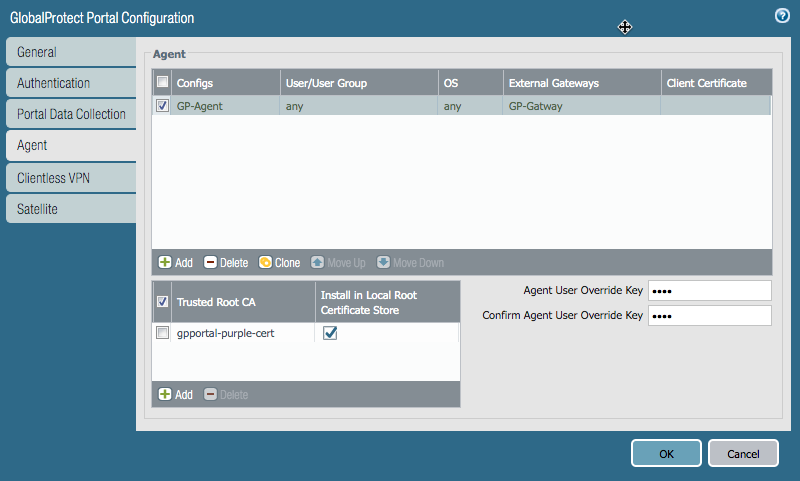
Go to the Agent tab.
-
In the Trusted Root CA section, set the trusted root certificate authority (CA).
-
In the Agent section, click Add.
Result:
The Configs window opens.
-
In the Authentication tab, in the Name field, enter a name.
-
From the Save User Credentials list, select Save Username Only.

-
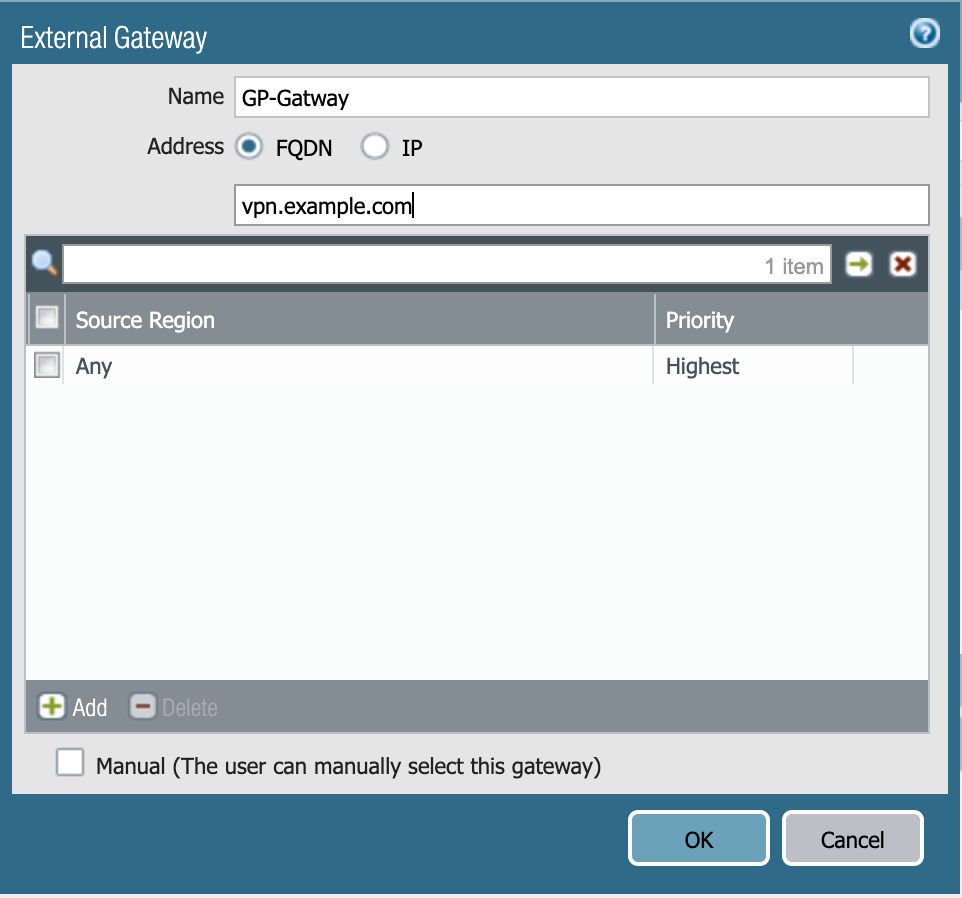
Go to the External tab, and in the External Gateways section, click Add.
-
In the Name field, enter a name for the gateway.
-
In the Address field, enter the fully-qualified domain name (FQDN) or IP for the agent, and select the appropriate check box. Click OK.
-
Go to the App tab and review the App Configurations.
-
Make any necessary changes, and then click OK.
Next steps
Ensure that the Gateway is configured. For more information, see Configure a GlobalProtect Gateway.