Configuring the phone number attribute in PingOne
If you’re using PingOne as your identity provider (IdP) and want to enable backup authentication or pre-populate or restrict registration data, you must first define the phone number attribute in the PingOne directory.
About this task
Learn more in Configuring backup authentication methods and Pre-populating or restricting user registration data.
Steps
-
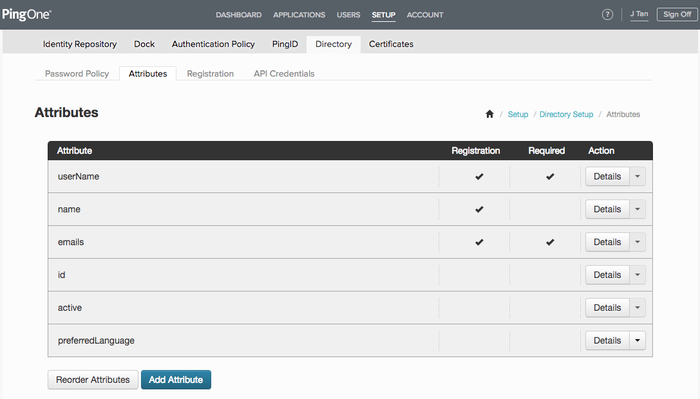
In the PingID admin portal, go to SETUP > Directory > Attributes.
-
If the phoneNumbers attribute isn’t listed, click Add Attribute and then select the phoneNumbers attribute. Click Add.
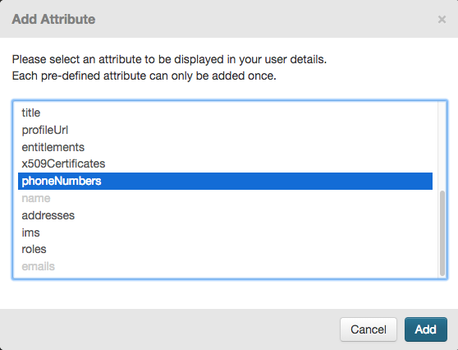
This ensures that the relevant phone number attributes appear as options when configuring user details.
-
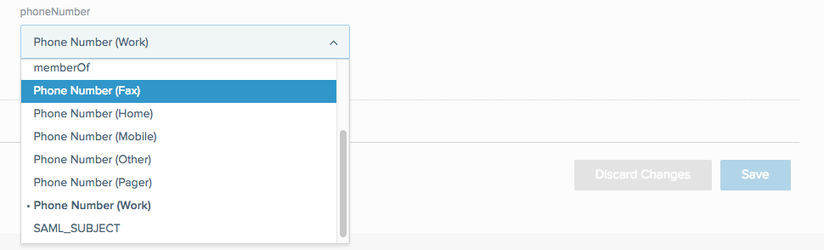
Go to SETUP > Dock > Configuration.
-
In the ATTRIBUTE MAPPING section, from the phoneNumber list, select the phone number attribute you want to use.
-
To add a phone number for a specific user, go to Users > User Directory > Users. For the relevant user entry, click Edit and add the user’s phone number to the relevant phone number field. Click Save.
You must enter phone numbers in Google Library format, which specifies that all phone numbers must include "+" and the international country code.