Configuring Microsoft Intune for PingID
Manage the PingID app using Microsoft Intune.
|
The following steps are for use cases where PingID MFA authenticating devices are managed by Microsoft Intune mobile device management (MDM). In cases where PingFederate is used to apply policies on accessing devices managed by Microsoft Intune, see Intune Integration Kit. |
-
In Microsoft Intune, install an Apple Push Notification service (APNs) certificate for iOS. Learn more in Installing an APNs certificate for iOS in Microsoft Intune.
-
If your organization has iOS devices, add the PingID app for iOS. Learn more in Adding the PingID app for iOS in Microsoft Intune.
-
If your organization has Android devices, add the PingID app for Android. Learn more in Adding the PingID app for Android in Microsoft Intune.
-
Configure PingID configuration policies for Microsoft Intune. Learn more in Setting PingID app configuration policies for Microsoft Intune.
MDM maintenance:
As part of MDM maintenance activities for the PingID app, you can generate new tokens and revoke old tokens. Learn more in the following:
Installing an APNs certificate for iOS in Microsoft Intune
To ensure that PingID app configurations can be pushed to iOS devices, install an Apple Push Notification service (APNs) certificate in Microsoft Intune.
Before you begin
You will need your Apple ID for this procedure.
Steps
-
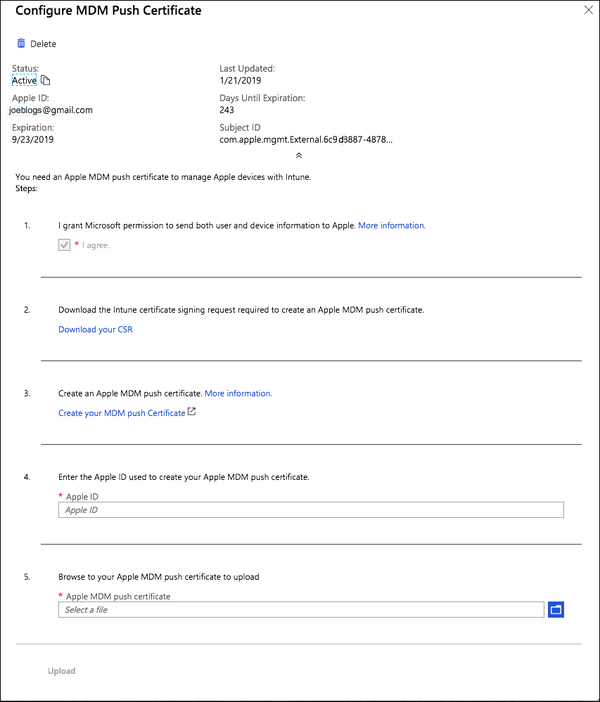
As a Global Administrator in the Microsoft Azure portal, go to Intune → Device Enrollment → Apple Enrollment, and then click Apple MDM Push Certificate.
Result:
The Configure MDM Push Certificate window is displayed.
-
In the Configure MDM Push Certificate window, complete the following fields.
-
In section 1, select the I Agree check box.

-
In section 2, click Download Your CSR.

-
In section 3, click Create Your MDM Push Certificate.

Result:
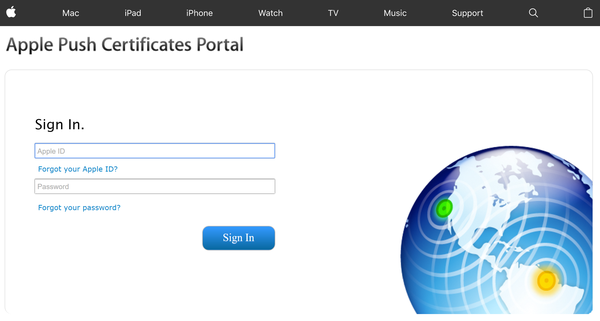
The Apple Push Certificates Portal window opens in your browser.
-
-
Sign on to the Apple Push Certificates Portal.
-
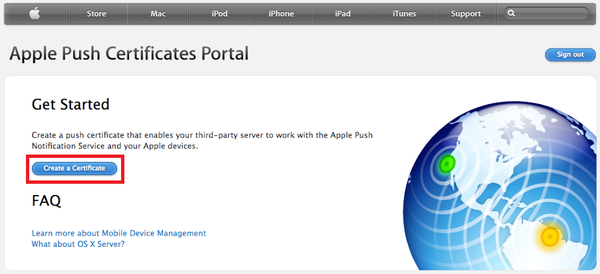
In either the Get Started section or the Certificates for Third-Party Servers section, click Create a Certificate.
If your organization does not yet have any Apple Push certificates, the Get Started section is displayed. Otherwise, the Certificates list is displayed.
-
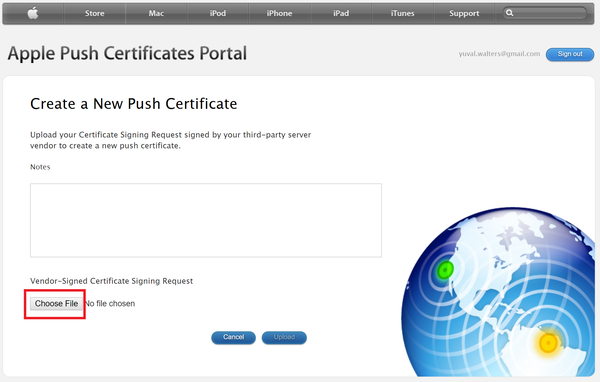
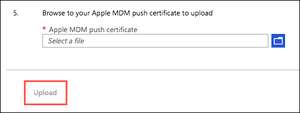
Click Choose File and browse for the certificate signing request (CSR) file you created previously, and then click Upload.
-
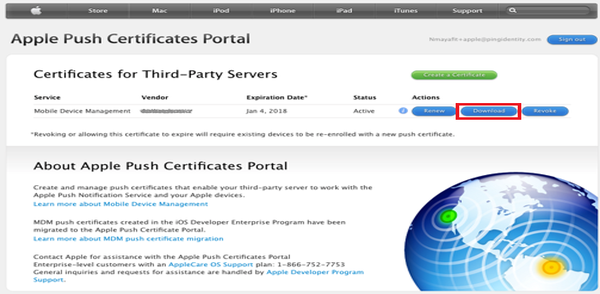
In the row of the new APNs certificate, click Download.
-
Return to the Configure MDM Push Certificate window and complete the following fields.
-
In section 4, enter your Apple ID.

-
In section 5, from the Apple MDM Push Certificate list, select your APNs certificate.
-
Click Upload, and then save your configuration.
-
Next steps
Add the PingID app for iOS. For more information, see Adding the PingID app for iOS in Microsoft Intune.
Configuring Android for Work for Microsoft Intune
To ensure that PingID app configurations can be pushed to Android devices, configure Android for Work for the organization’s mobile device management (MDM).
Before you begin
In the Intune dashboard, configure Android work profile devices. Find more information in the InTune documentation.
About this task
This is an example configuration of Android for Work without G Suite. You can configure Android for Work for MDM with G Suite.
Steps
-
Go to the Microsoft Azure portal at https://portal.azure.com.
-
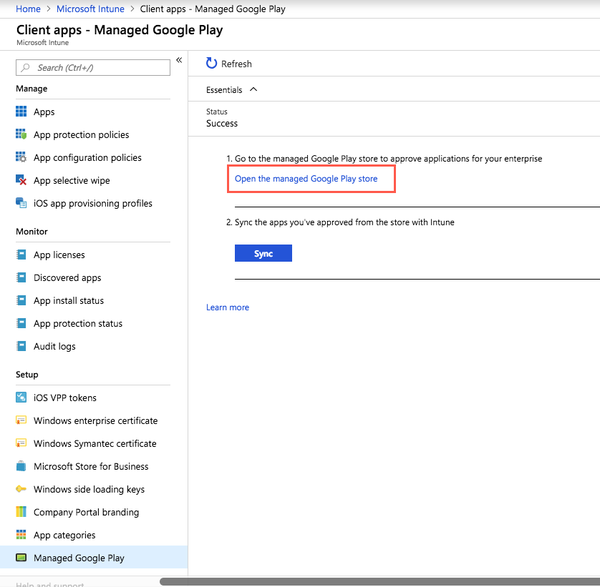
Go to Intune → Home → Client Apps → Managed Google Play.
Result:
The Managed Google Play window opens.
-
Click Open the Managed Google Play Store.
Result:
Google Play opens in a new browser tab or window.
-
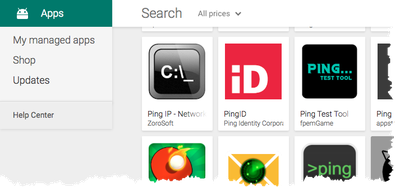
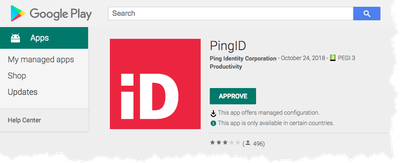
Search for the PingID app and select it.
-
Click Approve.
You might be prompted to sign on as a managed Google Play administrator. Do so.
Result:
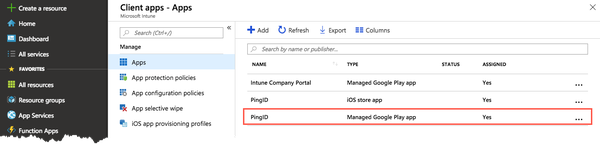
The Client Apps - Apps window is displayed.
-
From the Apps list, click the PingID Google Play entry, and then from the left-hand menu, click Assignments.
Result:
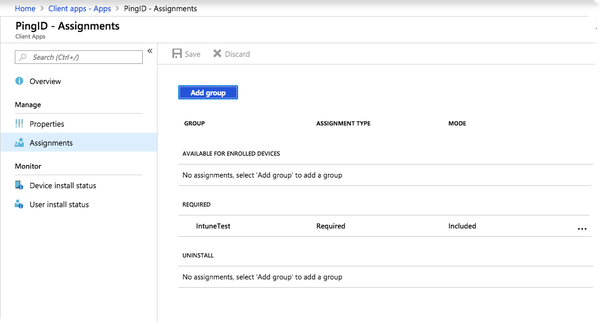
The PingID - Assignments window is displayed.
-
In the PingID - Assignments window, assign the PingID Android app to user groups.
To create, manage and assign apps to groups, see the relevant Intune documentation.
-
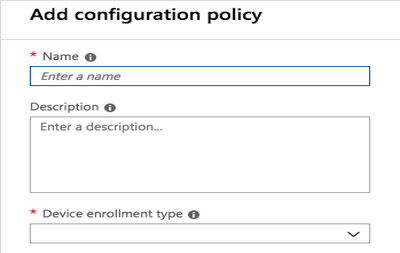
Go to Intune → Client Apps → App Configuration Policies, and then click Add.
Result:
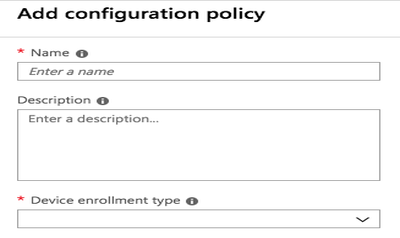
The Add Configuration Policy window is displayed.
-
In the Name field, enter a name for the policy.
-
In the Description field, add a description.
-
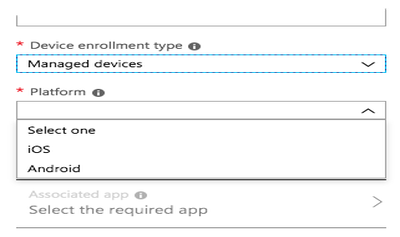
From the Device Enrollment Type list, select Managed Devices.
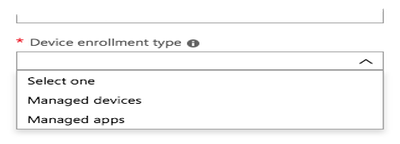
Result:
The Platform list is displayed.
-
From the Platform list, choose Android.
-
At the bottom of the window, click Add.
Result:
The Associated App tab is displayed.
-
On the Associated App tab, click PingID.
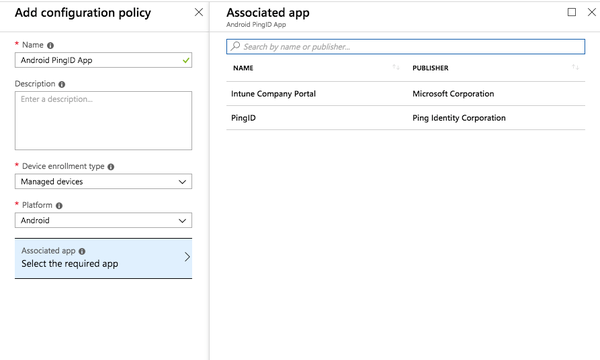
Result:
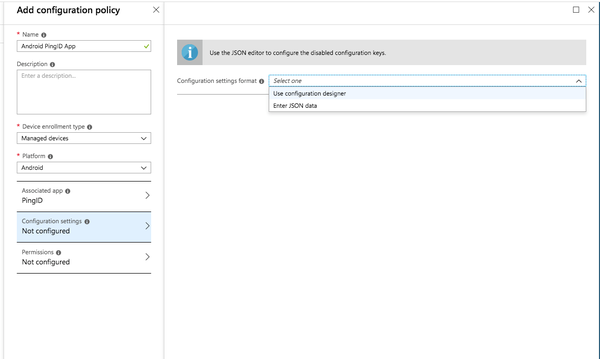
The Configuration Settings tab is displayed.
-
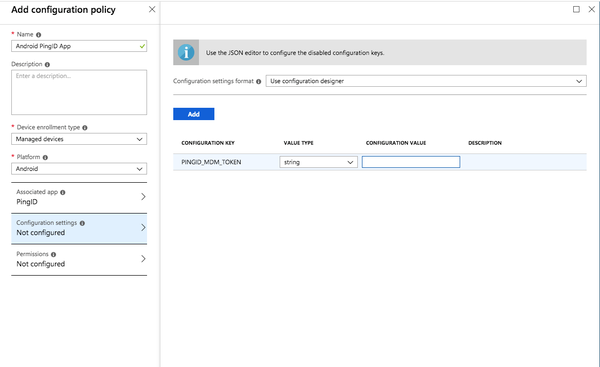
From the Configuration Settings Format list, select Use Configuration Designer.
-
In the Configuration Value field, enter the PingID MDM token, and then click Add.
For more information, see Setting up MDM configuration in PingID for the first time.
Next steps
Adding the PingID app for iOS in Microsoft Intune
Configure PingID as an MDM-managed app for iOS devices in Microsoft Intune.
Steps
-
Go to the Microsoft Azure portal at https://portal.azure.com.
-
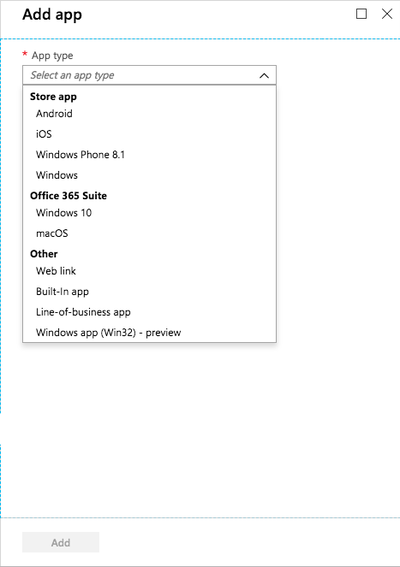
Go to Intune → Client Apps → Apps → +Add → Add App.
-
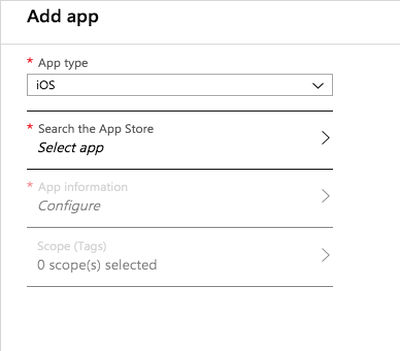
From the App Type list, select iOS.
-
In the Search the App Store section, click Select App.
Result:
The Search the App Store window opens.
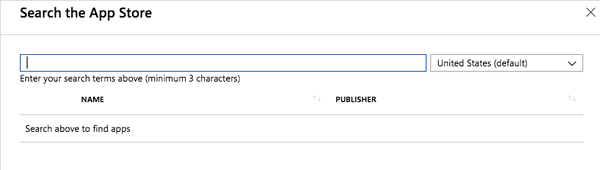
-
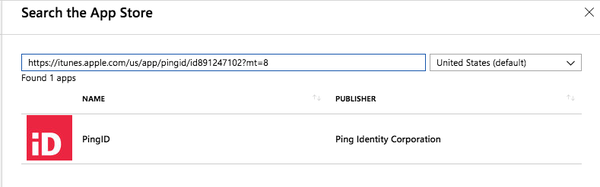
In the search field, enter th e PingID mobile app’s iTunes App Store URL: https://itunes.apple.com/us/app/pingid/id891247102?mt=8.
Result:
The PingID app is displayed.
-
Click the PingID app.
Result:
You are returned to the Add App window with the Configure option enabled.
-
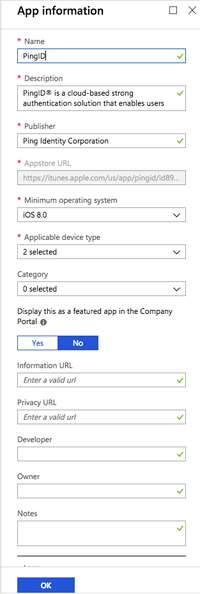
To open the App Information window, click Configure.
-
In the App Information window, make any required changes, and then click OK.
Result:
In the Add App window, the Add button is enabled.
-
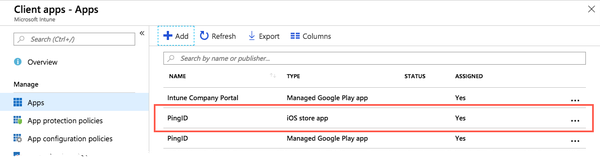
In the Add App window, click Add.
Result:
Your app appears in the list of client apps.
Next steps
Adding the PingID app for Android in Microsoft Intune
To ensure that PingID app configurations can be pushed to Android devices, configure Android for Work for the organization’s mobile device management (MDM).
Before you begin
In the Intune dashboard, configure Android work profile devices. Find more information on the InTune documentation.
About this task
This is an example configuration of Android for Work without G Suite. You can configure Android for Work for MDM with G Suite.
Steps
-
Go to the Microsoft Azure portal at https://portal.azure.com.
-
Go to Intune → Home → Client Apps → Managed Google Play.
-
In the Client Apps - Managed Google Play window, click Open the Managed Google Play Store.
Result:
Google Play opens in a new browser tab or window.
-
Search for the PingID app and select it.
-
Click Approve.
You might be asked to sign on as a managed Google Play administrator.
Result:
The Client Apps - Apps window is displayed.
-
From the Apps list, select the PingID Managed Google Play app, and then from the left-hand menu, click Assignments.
Result:
The PingID - Assignments window is displayed.
-
In the PingID - Assignments window, assign the PingID Android app to user groups.
To create, manage and assign apps to groups, consult the relevant Intune documentation.
Next steps
Setting PingID app configuration policies for Microsoft Intune
Configure the following procedure separately for iOS and Android.
Steps
-
Go to the Microsoft Azure portal at https://portal.azure.com.
-
Go to Intune → Client Apps → App Configuration Policies → +Add.
Result:
The Add Configuration Policy window is displayed.
-
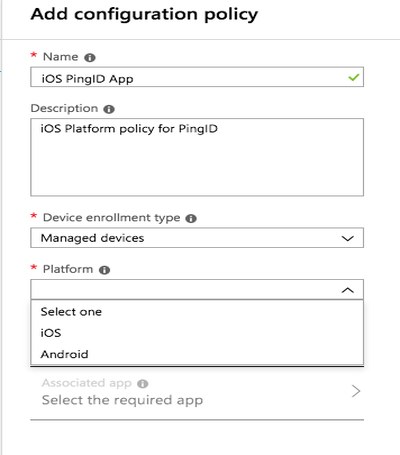
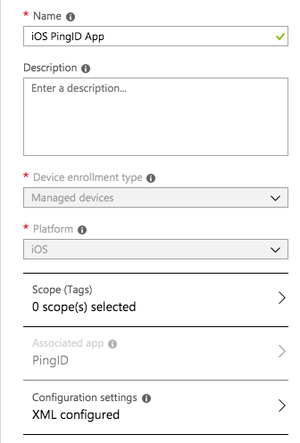
In the Name field, enter a policy name. In the Description field, enter a description.
-
From the Device Enrollment Type list, select Managed Devices.
-
From the Platform list, select the relevant platform.
-
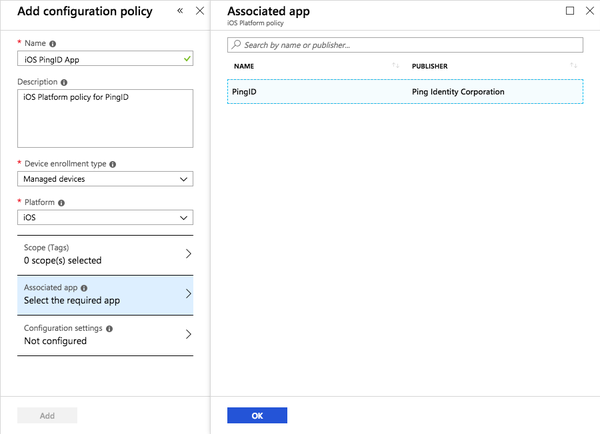
Click the Associated App section, and then in the Associated App pane, select PingID.
Result:
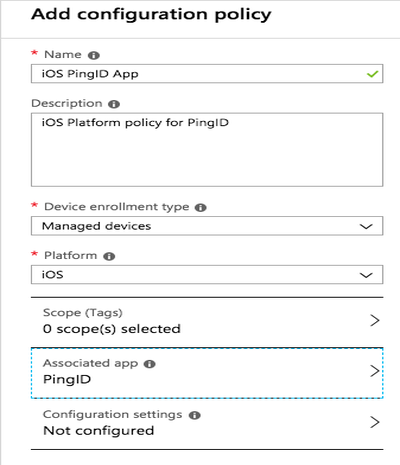
The Associated App section shows PingID.
-
Click the Configuration Settings section, and then follow the steps according to the relevant operating system.
Operating System Steps iOS
-
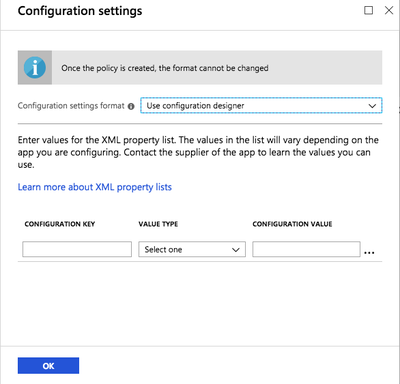
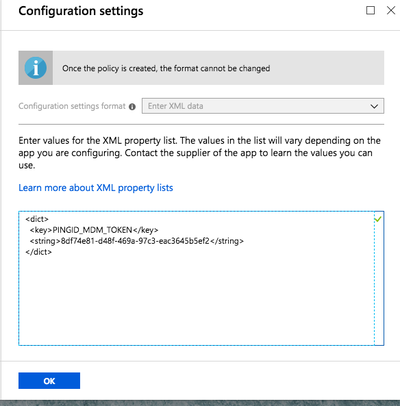
From the Configuration Settings Format list, select Use Configuration Designer.
-
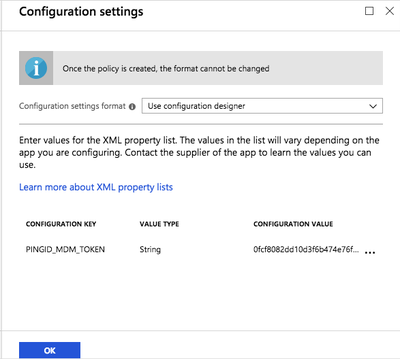
In the Configuration Key field, enter
PING_MDM_TOKEN. -
From the Value Type list, select String.
-
In the Configuration Value field, enter your MDM string generated in the PingID admin portal. For more information, see Setting up MDM configuration in PingID for the first time.
Android
-
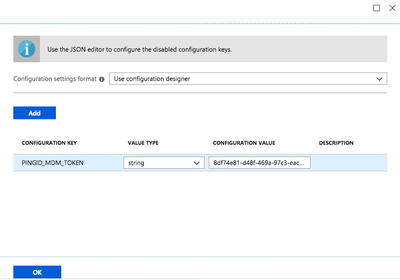
From the Configuration Settings Format list, select Use Configuration Designer.
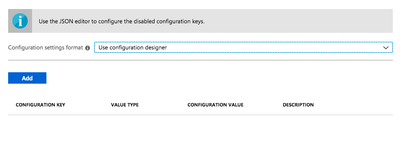
-
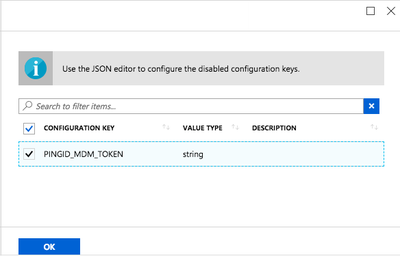
Click Add.
-
To enable the Value Type field, click OK.
-
From the Value Type list, select String.
-
In the Configuration Value field, enter your MDM string generated in the PingID admin portal. For more information, see Setting up MDM configuration in PingID for the first time.
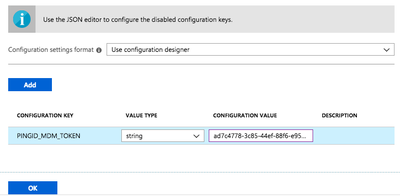
-
-
Click OK.
Result:
You are returned to the Add Configuration Policy window.
Updating a PingID token in Microsoft Intune
Configure the following procedure separately for iOS and Android.
Before you begin
The PingID app is configured for both iOS and Android.
Steps
-
Go to the Microsoft Azure portal at https://portal.azure.com.
-
Go to Intune → Client Apps → App Configuration Policies.
Result:
The Client Apps - App Configuration Policies window is displayed.

-
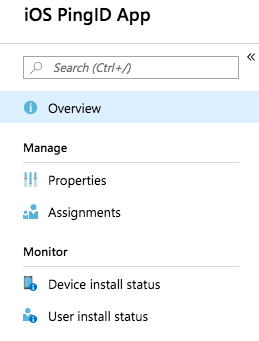
Click the relevant Android PingID App or iOS PingID App entry.
-
Click Properties.
-
Follow the steps according to the relevant operating system.
Operating System Steps iOS
-
Click the Configuration Settings tab.
-
Enter your MDM string between
<string>and</string>. For more information, see Setting up MDM configuration in PingID for the first time.
Android
-
Click the Configuration Settings tab.
-
From the Value Type list, select String. In the Configuration Value field, enter your MDM string. For more information, see Setting up MDM configuration in PingID for the first time.
-
-
Click OK.
Result:
You are returned to the app dashboard window.
-
Click Save.