Configuring Cisco ASA VPN for PingID MFA
Configure Cisco ASA VPN to work with PingID multi-factor authentication (MFA).
Before you begin
Configure the necessary settings in PingOne and PingFederate.
About this task
Configuring Cisco ASA for MFA involves the following steps:
-
Adding an AAA server group
-
Adding a Radius PCV server configuration
-
One or both of the following steps:
-
Configuring a clientless SSL VPN
-
Configuring the network client profile
-
The following video describes the configuration process for your Cisco ASA VPN.
Steps
-
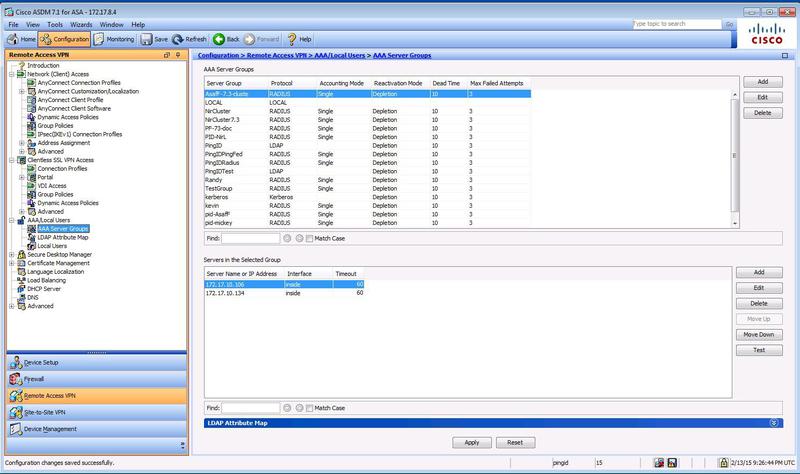
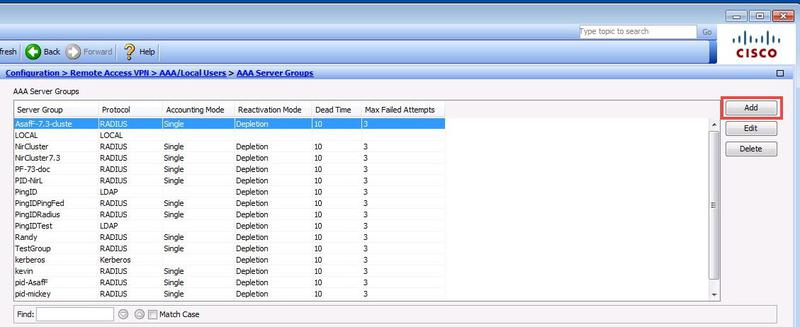
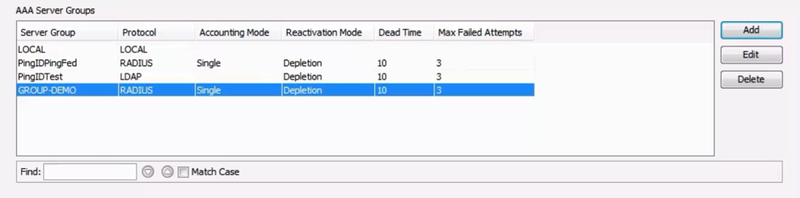
In the Cisco ASDM client, create an AAA Server Group to manage the security required for the RADIUS PCV Server configuration.
-
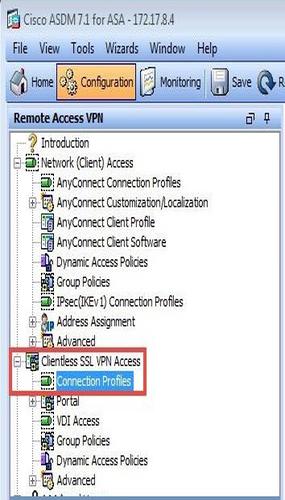
In the Cisco ASDM client, click Configuration, and then click Remote Access VPN.
-
In the Remote Access VPN navigation tree, go to AAA/Local Users → AAA Server Groups.

-
In the AAA Server Groups pane, click Add.
Result:
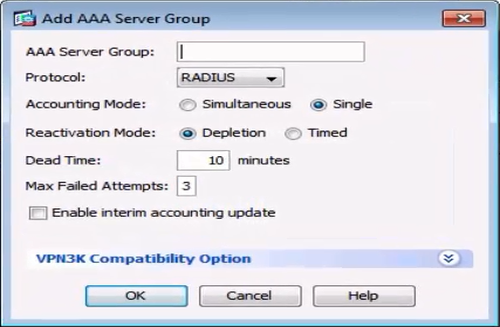
The Add AAA Server Group dialog box opens.
-
Enter values for the following parameters:
-
AAA Server Group: Enter the new server group name.
-
Protocol: Select the
RADIUSprotocol. -
Accept the default values for all other fields, as shown in the AAA Server Group dialog box.
-
-
Click OK.
-
-
Add a new RADIUS PCV server configuration to the server group that you just created.
-
In the AAA Server Groups pane, from the Server Group list, double-click the server group that you created in the previous step.
-
In the Servers in the Selected Group pane, click Add.

Result:
The Add AAA Server dialog box opens.
-
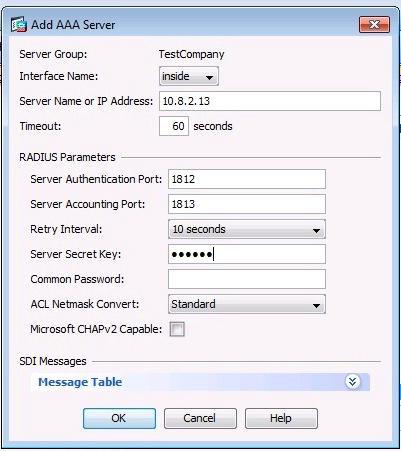
Enter values for the following parameters:
-
Server Name or IP Address: Enter the IP address or server name of the PingFederate server that contains the RADIUS PCV server.
-
Timeout: Change the timeout value to 60 seconds.
This allows sufficient time for MFA to receive the necessary authentication approval.
-
Server Authentication Port: Enter the port number configured in the RADIUS Server PCV. The default value is 1812.
-
Server Accounting Port: Enter the port number configured in the RADIUS Server PCV.
The Server Accounting Port number should be the next consecutive port following the port number configured for the Server Authentication Port. The default Server Authentication Port value is 1813.
-
Server Secret Key: Enter the shared secret configured in the RADIUS Server PCV.
-
-
Click OK.
-
-
Configure a Clientless SSL VPN.
If you do not plan on using a clientless SSL VPN, you can skip to the next section, which provides instructions on configuring the network client profile. This includes the following steps:
-
Configuring the connection profile by configuring the connection profile name, linking the AAA Server group to the Clientless SSL VPN profile, and selecting the related security policy.
-
Configuring the connection alias.
-
Configuring the group URL by defining the URL link that you provide to the user. The user enters the URL to sign on to the system through a browser.
-
In the Remote Access VPN navigation tree, go to Clientless SSL VPN Access → Connection Profiles.
-
In the Connection Profiles section, click Add.
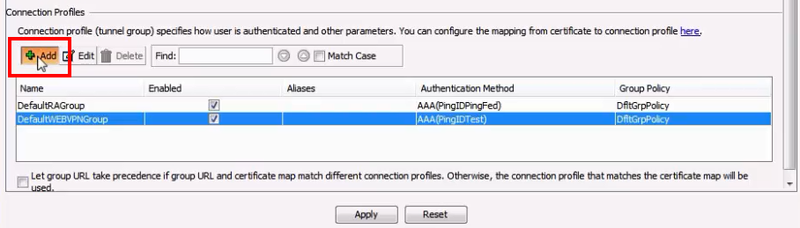
Result:
The Add Clientless SSL VPN Connection Profile dialog box opens.
-
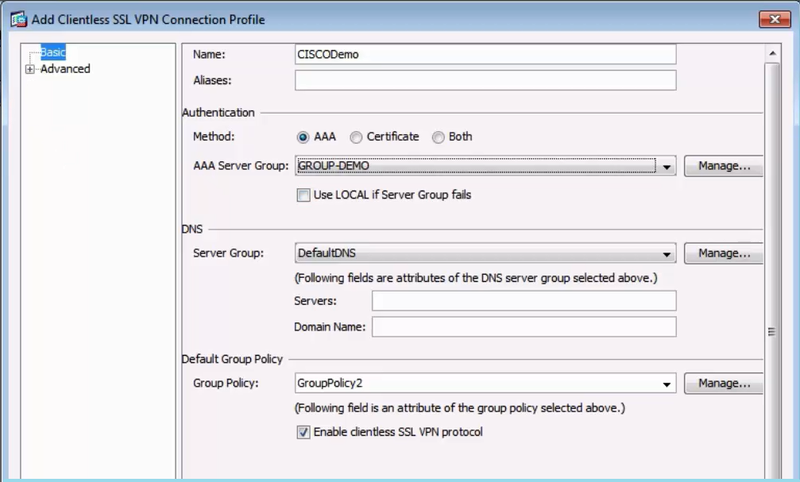
Enter values for the following parameters:
-
Name: Enter the relevant server name.
-
Authentication Method: Select
AAA. -
AAA Server Group: Select the server group that you created in step 1.
-
-
In the left pane, go to Advanced → Clientless SSL VPN. If the following message appears, click Yes.

-
In the Connection Aliases section, click Add.
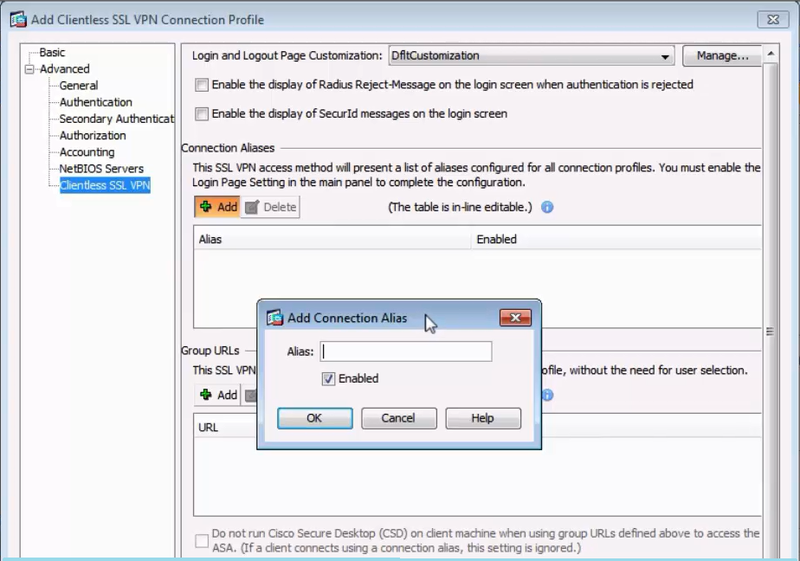
-
In the Add Connection Alias dialog box, enter a name in the Alias field.
-
Select the Enabled check box. Click OK.
-
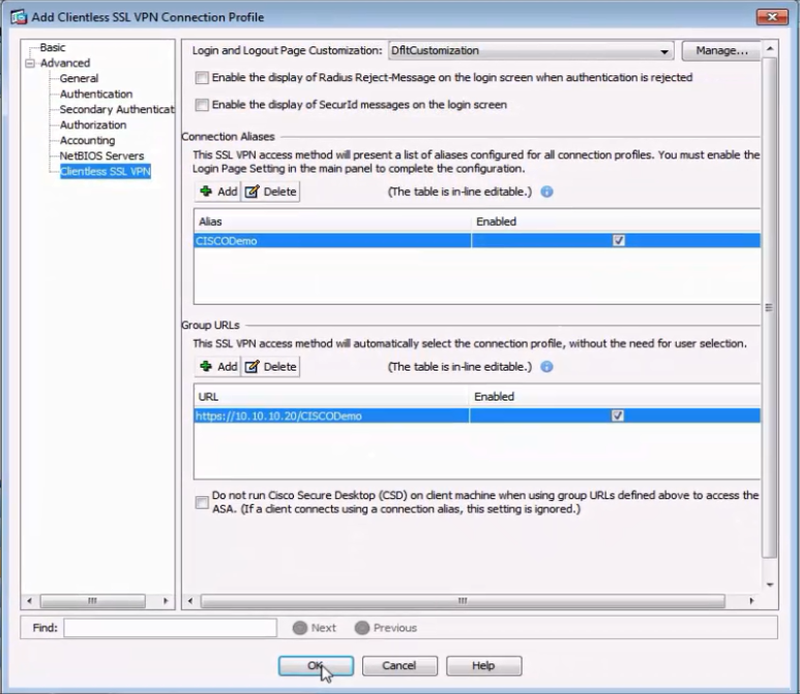
In the Group URLs area, click Add.
-
In the Add Group URL dialog box, enter the server URL in the URL field.
The group URL is the address you provide to the user to sign on to the Cisco VPN, and must have the format
https://<Cisco host name or IP address>/<Alias name>. -
Select the Enabled check box, and then click OK.
Result:
The URL is added to the Group URLs list.
-
Click OK.
-
-
-
Configure the Network Client Profile to provide enough time for MFA to receive authentication approval.
If you carried out the steps in the previous section to configure a clientless SSL VPN, and do not plan on using a network client, you can skip the steps in this section. -
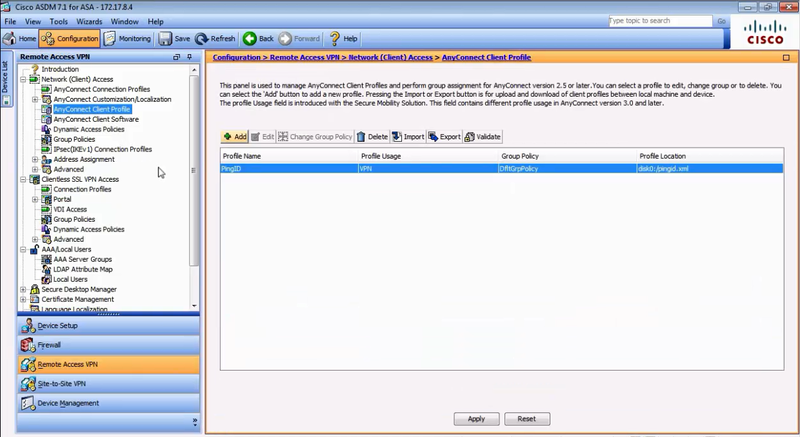
In the Remote Access VPN navigation tree, go to Network (Client) Access → AnyConnect Client Profile.
-
In the AnyConnect Client Profile pane, double-click the existing VPN profile.
-
In the Profile Tree, select Preferences (Part 2).
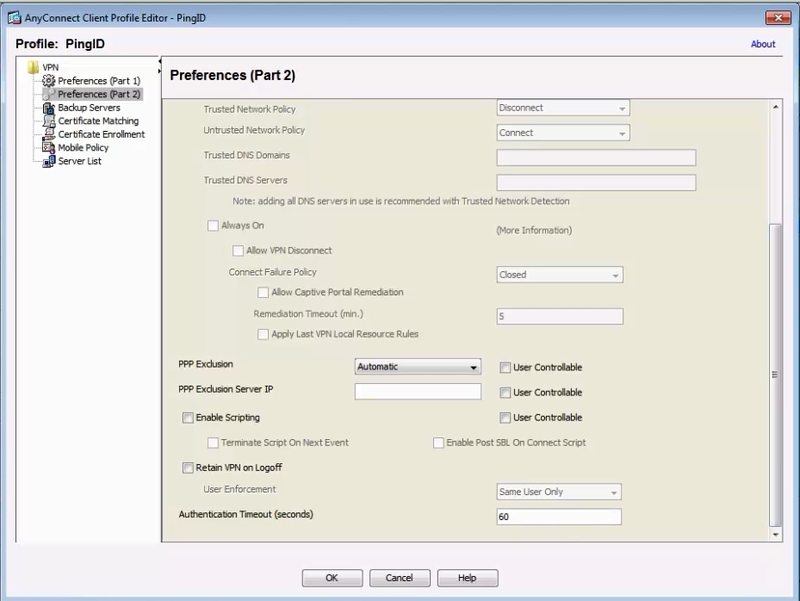
Result:
The Any Connection Profile Editor – PingID dialog box opens.
-
Set the Authentication Timeout (seconds) field to
60. Click OK.This allows sufficient time for MFA to receive the necessary authentication approval when working with IPSec client.
-
In the AnyConnect Client Profile pane, click Apply.
Result:
The changes are applied and your configuration is complete.
-