Configuring a RADIUS server on PingFederate
For your VPN to perform multi-factor authentication (MFA) using the PingID cloud service, you must create and configure a RADIUS server password credential validator (PCV) on PingFederate.
Before you begin
If the following conditions exist in your configuration, configure the relevant additional parameters:
-
RADIUS clients that:
-
Handle first-factor authentication (and therefore does not send passwords to the RADIUS server),
-
and do not support RADIUS challenges
-
do not configure any delegate PCVs, and make sure to configure the following fields:
-
RADIUS Client Password Validation: set this field toenabled. -
Direct OTP validation: For RADIUS clients running 3.0.4 or later, set this field toenabled. -
OTP in Password Separator:For RADIUS clients running 3.0.3 and earlier only, set this field toComma-
RADIUS clients that do not support RADIUS challenges: set the
RADIUS
Client Doesn’t Support Challenge
field toenabled.
-
If a RADIUS client requires additional attributes as part of the Access-Accept response, configure the relevant fields:
-
Multiple Attributes Mapping Rules: Use this option to map attributes from a delegate PCV to any RADIUS attribute. This option supports the mapping of any vendor-specific attribute defined underRADIUS Vendor-specific Attributes. -
User-Specific Groups to RADIUS client: Use this option to add a single group name to any default RADIUS attribute. This option does not support vendor-specific attributes.
Steps
-
Open the PingFederate administrative console.
-
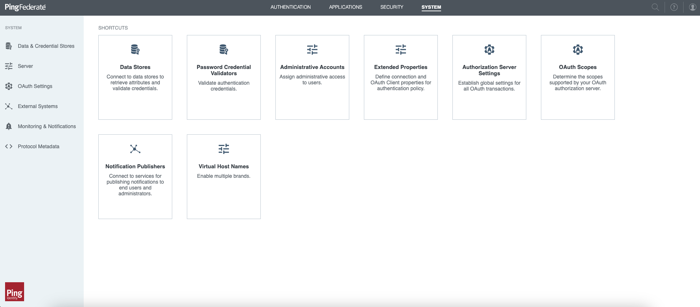
Click System → Password Credential Validators.

Result:
A list of credential validator instances is displayed.

-
In theInstance Name column, click ldapPCV.
Result:
The Create Credential Validator Instance window opens.
-
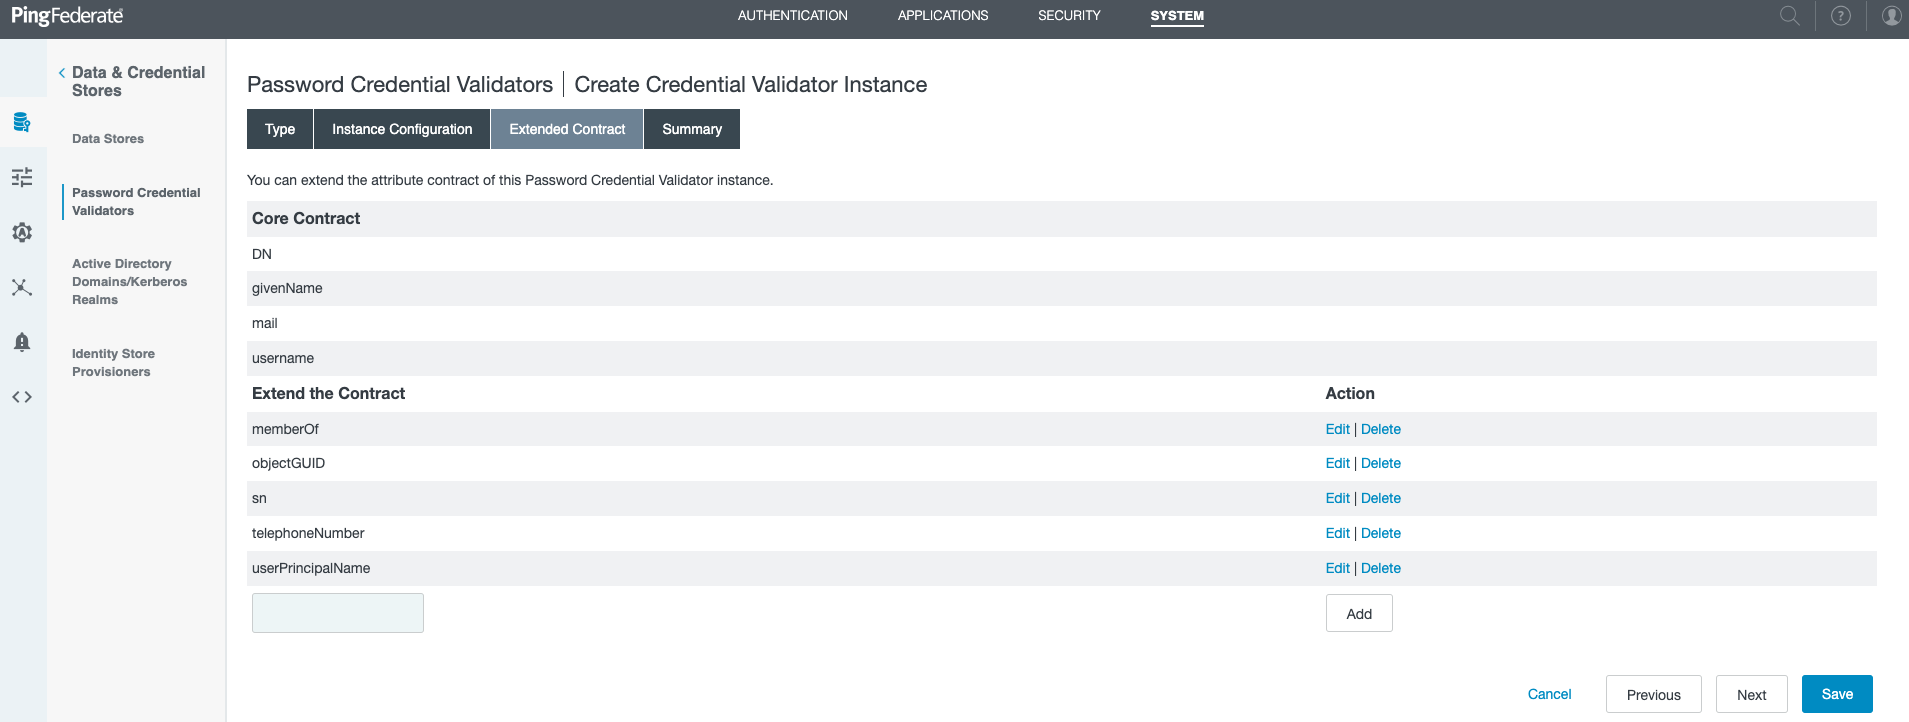
Add the LDAP attributes that you want PingID to map and send to the PingID server.
-
In the Extend the Contract field, enter an LDAP attribute, and then click Add. Repeat this step to add multiple attributes.
Some steps in RADIUS PCV configuration require use of LDAP user groups. To enable use of LDAP user groups, add the memberOf attribute to the LDAP Extended Contract mapping.

-
Click Done, and then click Save.
Result:
The Manage Credential Validator Instances window opens.
-
Repeat this step for each LDAP PCV instance that you want to connect to the RADIUS server as a delegate PCV.
-
-
To create the RADIUS server instance, click Create New Instance.

-
In the Instance Name and Instance ID fields, enter a meaningful instance name and instance ID.
-
From the Type list, select PingID PCV (with integrated RADIUS server).
-
Click Next.

-
To provide the necessary permissions for client to connect to the RADIUS server, create an approved RADIUS client:
-
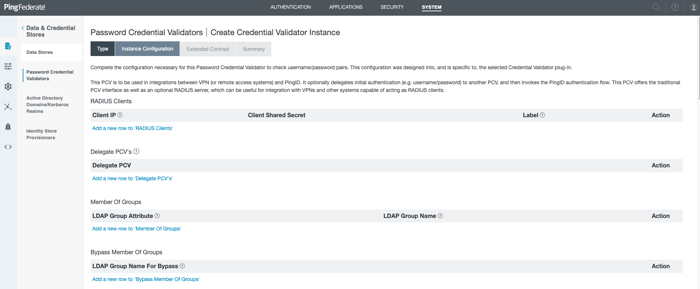
In the RADIUS Clients section, click Add a New Row to RADIUS Clients.
The IP address of the VPN server/remote access system is required here.
-
Enter the RADIUS client’s IP address and its shared secret. Optionally, you can add a label for each client to help distinguish between them when reviewing the list. Click Update.
-
-
Repeat the procedure from step 3 for all additional RADIUS clients that you want to add.
-
To add a Delegate PCV for the initial user authentication:
-
Click Add a New Row to Delegate PCV.
-
From the Delegate PCV list, select the LDAP PCV that you created when you set up PingFederate, and then click Update.
If you do not add a Delegate PCV, the RADIUS server assumes first-factor authentication has been performed by an external service. The RADIUS server will not authenticate against the LDAP directory and only PingID MFA will be used.
-
-
Optional: To define different authentication behavior per LDAP group, see Configuring LDAP group behavior in RADIUS Server.
-
In the If the User Is Not Activated on PingID list, select one of the following options:
Choose from:
-
Register the user: If the user does not have a PingID cloud service account, initiate "on the fly registration" using the Challenge Page on the VPN clientless SSL. This is the default setting.
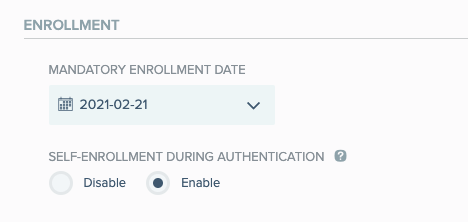
The Mandatory Enrollment Date set in the PingID admin web portal determines when it is mandatory for the user to register. Before this date, “on the fly registration” is optional. To allow users to self-register, click Enable for Self-Enrollment During Authentication.

-
Always fail the login: If the user does not have a PingID cloud service account, access is denied.
-
Fail login unless in grace period: If the user does not have a PingID cloud service account by the mandatory enrollment date, access is denied.
-
Let the user in without PingID: If the user is registered, authenticate with both LDAP and PingID MFA. If the user is not registered with PingID, authenticate with LDAP single-factor authentication only.
-
-
In the RADIUS Server Authentication Port field, enter the port number. The default port is 1812.
The port number must match the port number you define on the VPN client.
-
To define the communication settings between RADIUS server and the PingID cloud service:
-
In the PingOne for Enterprise admin portal, go to Setup → PingID → Client Integration.
-
In the Integrate with PingFederate and Other Clients section, click Download to save a copy of the
pingid.propertiesfile. For more information, see Managing the PingID properties file. -
On the Password Credentials Validators tab, in the PingID Properties field, click Choose File and navigate to the PingID properties file you downloaded earlier. For more information, see Managing the PingID properties file.

-
-
Optional: Configure any additional RADIUS PCV parameters that you want to include. For a list of options, see PingID RADIUS PCV parameters reference guide.
-
Click Next twice, and then click Done.
-
Click Save.
To perform a health-check on the RADIUS PCV server, use the heartbeat on /pf/heartbeat.ping. The PingID RadiusPCV does not expose its own heartbeat endpoint. For more information, see Enabling Heartbeat in PingFederate 7.3 and later.
PingFederate
You can download the PingID for PingFederate properties file for use when integrating PingID with PingFederate.
About this task
The Integrate with PingFederate Bridge properties file provides full permission to perform enrollment, device management, and authentication actions. You can rotate or revoke generated properties files with minimal downtime.
|
For Window login, Mac login, and SSH integrations, you should download the version of the properties file that restricts user permissions to authentication only. For more information, see the relevant tabs on this page. |
The PingID properties file contains sensitive information including the secret encryption key. It should only be handled by administrators and should not be distributed more than is necessary.
|
To ensure minimal downtime when rotating a PingID properties file (key rotation), first generate the PingID properties file and link it to the relevant client, and then revoke the old properties file. |
Steps
-
In the PingOne admin portal, go to Setup → PingID → Client Integration.

Result:
The Integrate with PingFederate and Other Clients section is displayed, listing any PingID properties files that are already defined.
-
To generate a new PingID properties file, click Generate, and then click Save.
You can have a maximum of five active PingID properties files. If you have five active files and want to generate a new one, you must first revoke one of your existing files.
Result:
A new entry is added to the properties file list, showing the new PingID properties file.
-
In the relevant row, click Download, and then save the file to the desired location with a meaningful name.
-
To revoke an old PingID properties file:
-
Download and open the PingID properties file you want to revoke, and ensure the token matches the token listed in the web portal.
-
In the relevant row of the properties file list, click Revoke, and then click Save.
Result:
The selected file is removed from the PingID server and can no longer be used for authentication.
-
Configuring LDAP group behavior in RADIUS Server
About this task
You can use groups for a number of administrative purposes, for example:
-
Defining and restricting who can sign on to PingFederate.
-
Gradually introducing PingID multi-factor authentication (MFA) into your organization.
-
Creating user groups that are exempt from PingID MFA.
Steps
-
Add an LDAP user group.
Option Steps Add an LDAP user group that will require members to authenticate using PingID MFA
-
In the LDAP Group Name section, click Add a new row to ‘Member of Groups’.
-
Enter the CN value of the relevant LDAP group name, and click Update.
Do not enter the full DN. For example, if the full DN is
DN=CN=Android
                                    Users,OU=PingGroups,DC=intheory,DC=com
, enter only the CN value ofAndroid Users.-
Repeat the previous steps for all relevant LDAP groups.
If no groups are defined in the RADIUS Server, group configuration is disregarded during authentication, even if the Check Groups option is enabled.
Add an LDAP group for users that you want to bypass MFA
-
In the LDAP Group Name for Bypass section, click Add a new row to ‘Bypass Member of Groups’.
-
Enter the relevant LDAP group name’s CN, then click Update.
-
Repeat the previous steps for all relevant LDAP groups.
Users included in a Bypass MFA LDAP group will not be prompted to authenticate using PingID, even if they are included in an LDAP group, or the company policy requires MFA.
-
-
Configure the groups by enabling or disabling the following options:
-
Check Groups (cleared by default): If selected, MFA is only performed if the user is a member of one of the groups defined in the Member of Groups section. If cleared, group configuration is ignored during authentication.
-
Check Bypass Groups (cleared by default): If selected, MFA is bypassed if the user is a member of one of the defined groups in the Member of Bypass Groups section. If cleared, Bypass groups are ignored, and the user is required to authenticate.
-
Fail Login if the User is Not Member of the LDAP Group: If selected, users that are not LDAP group members cannot sign on. LDAP group members are always authenticated using PingID MFA. If cleared, only users that are members of a specified group are authenticated using PingID MFA. All other users are validated using LDAP authentication only.
-