Configuring email authentication for PingID
If you have users who use devices that don’t support the PingID mobile application, or you want to provide users with an additional authentication option, you can enable email authentication.
When email authentication is configured, and the user signs on to their account or app, they are sent an email with a 6-digit one-time passcode (OTP) to authenticate with. The OTP is valid for up to 30 minutes.
For information about the user experience, see the PingID End User Guide.
|
To prevent users from registering their device for Email authentication, and allow existing users to continue to authenticate, see Disabling pairing for a specific authentication method. This option is useful if you want to phase out Email authentication, in favor of more secure authentication methods. |
Configuring email authentication
About this task
Steps
-
In the PingOne admin portal, go to Setup → PingID → Configuration.
-
Go to the Alternate Authentication Methods section.

-
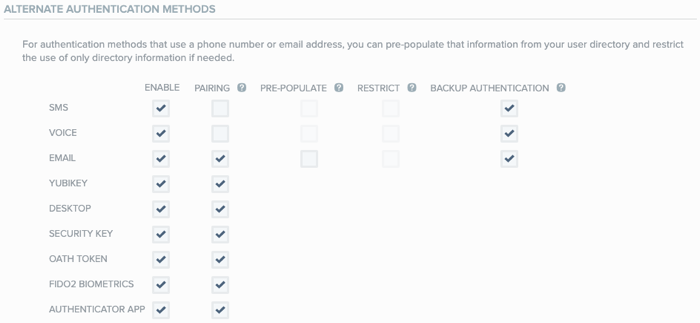
In the Email row, select the Enable check box.
-
Configure email authentication according to the following table.
Check box Description Pre-Populate
To pre-populate the user’s field with the email address stored in your user directory, in the Email row, select the Pre-Populate check box. For more information, see Pre-populating or restricting user registration data.
Restrict
To restrict the user to select only the email address stored in your user directory, in the Email row, select the Restrict check box. For more information, see Pre-populating or restricting user registration data.
Backup Authentication
To enable email as a backup authentication method, in the Email row, select the Backup Authentication check box. For more information, see Configuring backup authentication methods.
You can enable email for backup authentication, even if the Enable check box is not selected in the Email row.
-
Click Save.
If you use email for PingID OTP, for guidance to ensure that your email system will allow delivery of OTP messages, see https://aws.amazon.com/blogs/messaging-and-targeting/amazon-ses-ip-addresses/.
Email customization
Four email customizations are available:
-
Customize the email "From" address to change the default address of
noreply@pingidentity.comtonoreply@yourdomain.com. -
Customize the email "Replyto" address to change the default address of
noreply@pingidentity.comtonoreply@yourdomain.com. -
Customize the email "Subject" line.
To change items 1 to 3 above, sign on to the Ping Identity Support Portal and open a case.
-
Customize the email message body. PingID supplies templates to customize the body of notification mails. To download the templates, see PingID email templates. Download the
.zipfile and extract it. The includedreadme.txtfile contains a directory list of templates.
Editing the template for a new authentication request
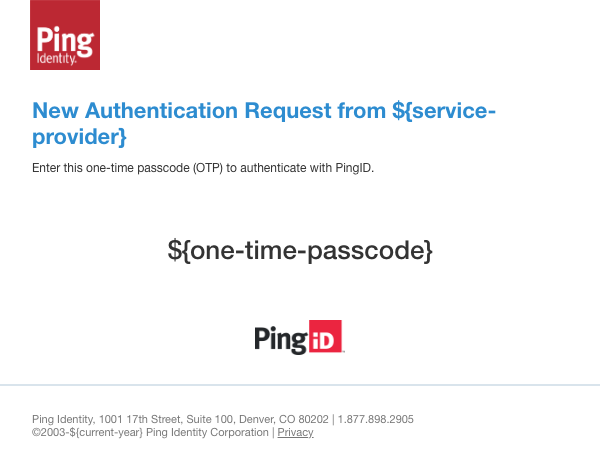
Open the New Email Authentication Request.html file in a text editor. The template is shown in the following image.

This template has two variables, ${one-time-passcode} and ${service-provider}. You can replace any of the HTML content, as long as you retain the ${one-time-passcode} variable. The ${service-provider} and ${current-year} variables are optional.
|
If you include images in any templates, they must be URL references to publicly available assets. Ping Identity does not host the images used in templates. |
After making your changes, contact PingID Customer Support to upload the template.
Editing the template for email pairing
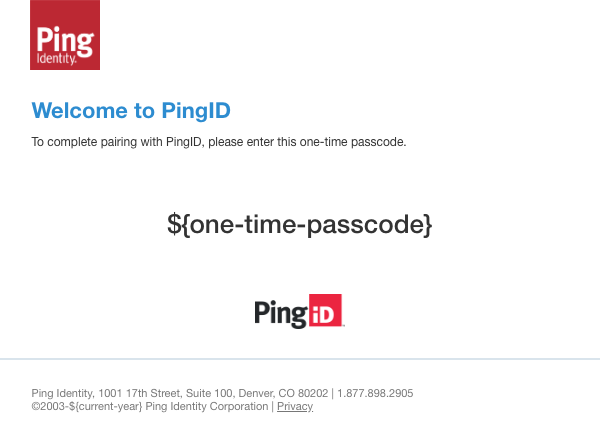
Open the Email Authentication Pairing.html file in a text editor. The template is shown in the following image.

This template has one mandatory variable, ${one-time-passcode}. You can replace any of the HTML content, as long as you retain the ${one-time-passcode} variable. The ${current-year} variable is optional.
|
If you include images in any templates, they must be URL references to publicly available assets. Ping Identity does not host the images used in templates. |
After making your changes, contact PingID Customer Support to upload the template.