Integration for devices using a RADIUS server
You can integrate PingID multi-factor authentication (MFA) into your VPN or remote access system.
About this task
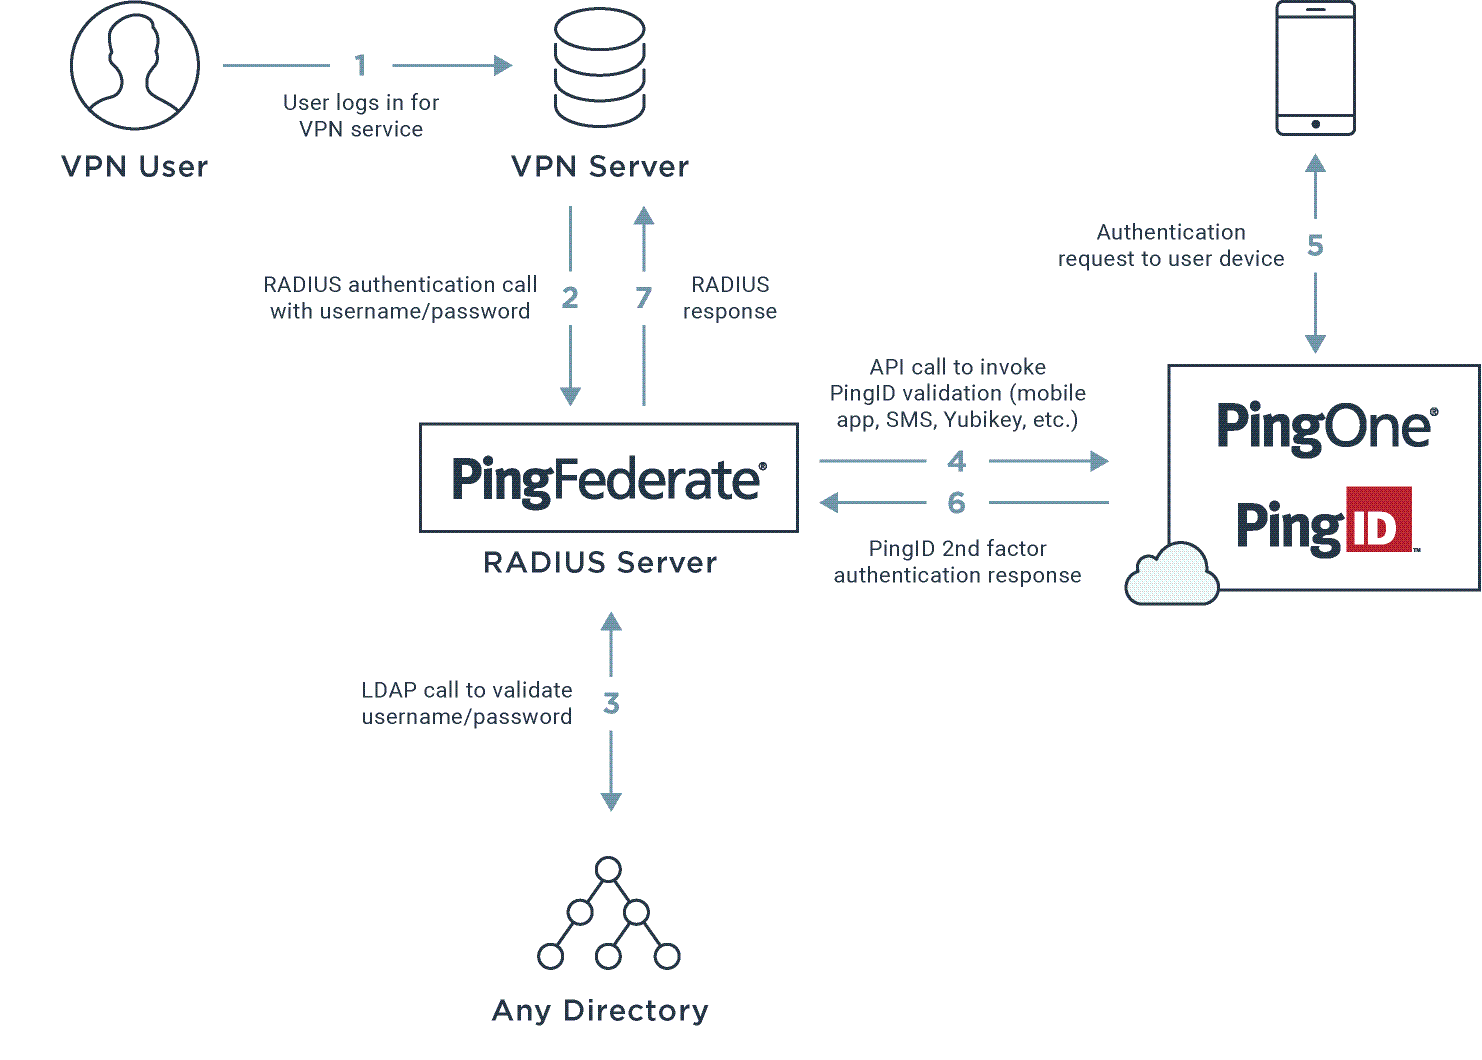
The following diagram shows a general authentication flow. The actual configuration varies depending on your organizational infrastructure considerations and policies.

-
A user opens their IPSec or SSL VPN sign on window and enters a user name and password.
-
The VPN RADIUS client sends their details to the RADIUS Server on PingFederate.
-
PingFederate authenticates the user’s credentials using the LDAP server as first-factor authentication.
-
After LDAP authentication approval, the RADIUS server initiates a second authentication using PingID, and the user receives a push notification to the relevant device, such as the PingID mobile app or a YubiKey.
-
The user approves the push notification or responds by entering a one-time passcode (OTP).
-
The PingID cloud service verifies the response and sends it back to the RADIUS server.
-
The RADIUS server returns a response to the VPN. If authentication is denied or an error occurs, the user receives an error message on their VPN window.
To configure PingID VPN integration, complete the following:
Steps
-
Install the PingID Integration Kit in PingFederate.
For more information, see Installing the PingID Integration Kit for PingFederate.
-
Configure the RADIUS server settings in PingFederate.
For more information, see Configuring a RADIUS server on PingFederate.
-
Configure your VPN client settings.
For more information, see one of the following sections: