Configuring authentication for the PingID mobile app
Users can download the PingID mobile app from the app store to any Android or iOS device.
The PingID app enables users to authenticate with:
-
Swipe authentication. This is authentication method is enabled by default.
-
Biometrics authentication. If enabled, this authentication method allows users to authenticate using their device biometrics, such as fingerprint or Face ID.
-
One-time passcode (OTP). If configured, the PingID mobile app generates an OTP that the user can use in place of swipe or biometrics.
Configuring biometrics authentication for the PingID mobile app
Allow users to authenticate using their fingerprint or Face ID.
Steps
-
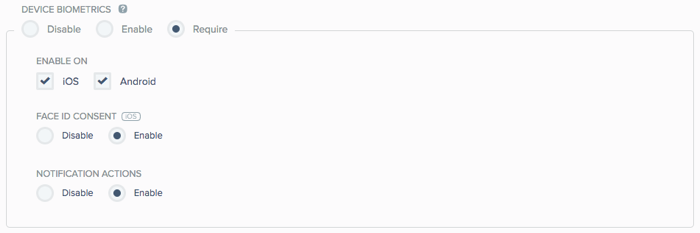
In the PingID admin portal, go to Setup → PingID → Configuration, and in the Mobile App Authentication section, go to the DEVICE BIOMETRICS section.
-
Enable or to require device biometrics:
Choose from:
-
Disable: Disable device biometrics. Users are not able to authenticate using their device biometrics.
-
Enable: Enable users to authenticate with their device biometrics.
-
Require: Force users to authenticate with their device biometrics. Users with devices that do not support biometrics are prompted to authenticate using swipe authentication.
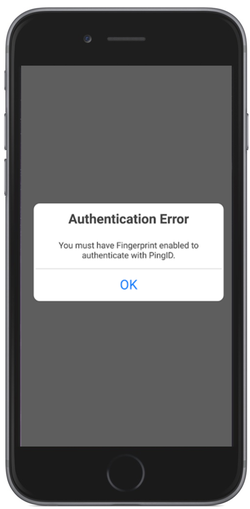
If a user’s mobile device supports biometrics, but they have not configured biometrics authentication on their device, they cannot sign on. The user receives an Authentication Error message on their mobile device and a Canceled message on their web browser.

-
-
In the Enable On section, select the check box for each operating system on which you want to enable biometrics (iOS, Android).
If biometrics authentication is disabled for an operating system, or the device does not support biometrics, the standard swipe method of authentication is used.
-
Optional: By default, iOS device users are only asked to authorize the use of Face ID for PingID authentication when pairing PingID with their device. To prevent users inadvertently authenticating using Face ID if their phone is unlocked, force users to explicitly approve a Face ID consent notification.
This option is available on devices with the PingID mobile app 1.10.0 and later, and Face ID enabled.
-
To enable Face ID consent, in the Device Biometrics section, click either Enable or Require.
-
Click iOS.
-
In the Face ID Consent field, click Enable.
-
-
If you select Require in the Device Biometrics section, in the Notification Actions section, select one of the following options:
Choose from:
-
Disable: Disable notification actions for PingID mobile app. The user is unable to approve or deny PingID mobile app authentication requests from the locked screen:
-
Android: The user cannot swipe down on the notification banner, and the Approve or Deny buttons are not available.
-
iOS: The user cannot see alternative actions when swiping to the left on the notification banner.
-
Enable: Enable notification actions for PingID mobile app. The user can approve or deny PingID mobile app authentication requests from within the notification message on their locked screen. This is the default selection.
-
Android: When the screen is locked, the user might receive a notification to authenticate, depending on the mobile device’s notification configuration. When swiping down on the notification banner, the user can select the Approve or Deny buttons.
-
iOS: The user receives a notification banner and can swipe to the left on the notification banner to see the Approve and Deny buttons.
-
-
To prevent users from bypassing the required biometrics authentication and using the passcode fallback on the mobile app, configure the Device Passcode Fallback field.
If biometrics authentication fails, by default, the user falls back to the device’s passcode to authenticate.
This configuration is only relevant to iOS when the following conditions apply:
-
Device Biometrics is set to Require.
-
iOS is selected.
-
Notification Actions is set to Disable.
Choose from:
-
Disable: When the Disable option is selected, users are prevented from using the passcode fallback and cannot bypass the required biometrics authentication on the application.
-
Only users with biometrics defined on their device, such as fingerprints or face scan, can authenticate successfully.
-
If the authentication is unsuccessful, users can retry up to the maximum number of retries permitted by the OS. This is not configurable.
-
If all retries are unsuccessful, access is denied, and a notification is displayed on both the accessing device browser and the mobile app.
-
Enable: When the Enable option is selected, and biometrics authentication fails, the user can use the device’s passcode to authenticate with PingID. This is the default selection.
-
PingID 1.6.4 and later support device passcode fallback.
-
Mobile device management (MDM) can be used to prevent the user from updating the mobile lock abilities, or adding other users' fingerprints to a mobile device.
-
If there are users who have installed the mobile app before this setting was applied, the settings apply the next time the user is online.
-
-
-
Click Save.
Samsung Galaxy S5 devices have a known bug that can cause fingerprint data to become corrupted, preventing PingID from launching properly. Specifically:
-
The data corruption issue is a device problem (not a bug in PingID) as can be seen from sites such as: https://gs5.gadgethacks.com/how-to/4-ways-fix-your-galaxy-s5-s-dysfunctional-fingerprint-scanner-0158909/
-
If biometrics authentication is configured by the administrator for the organization, S5 device owners may experience a PingID launch problem due to fingerprint data corruption. This may occur even if the S5 devices were not configured for fingerprint support.
The following tables describe the user experience according to the operating system and configuration setting combination.
-
| Biometrics configured on device | State | Disable notification actions | Banner actions on locked screen | Banner actions on unlocked screen | User swipes banner right on locked screen | User presses (taps) banner on unlocked screen |
|---|---|---|---|---|---|---|
Yes |
Enabled |
N/A (There is no option to change this in the UI.) |
|
Swipe the banner down to display the Approve and Deny buttons. When approved, authentication completes. No biometrics are required. |
Unlock with Touch ID or passcode. When approved, the PingID app opens and requests biometrics authentication. |
The PingID app opens and requests biometrics authentication. |
Yes |
Required |
Disabled (Checked) |
|
|
The PingID app opens and requests biometrics authentication. |
The PingID app opens and requests biometrics authentication. |
Yes |
Required |
Enabled (Unchecked) |
|
Swipe the banner down to display the Approve and Deny buttons. When approved, authentication completes. |
The PingID app opens and requests biometrics authentication. |
The PingID app opens and requests biometrics authentication. |
Not configured / Not supported |
Enabled |
N/A |
|
Swipe the banner down to display the Approve and Deny buttons. When approved, authentication completes. |
Unlock with passcode. When approved, the PingID app opens and requests swipe authentication. |
The PingID app opens and requests swipe authentication. |
Not configured / Not supported |
Required |
Disabled (Checked) |
There is no swipe left option. |
|
Unlock with passcode. When approved, the PingID app opens and displays an error. |
The PingID app displays an error. |
Not configured / Not supported |
Required |
Enabled (Unchecked) |
|
Swipe the banner down to display the Approve and Deny buttons. When approved, the PingID app displays an error. |
Unlock with passcode. When approved, the PingID app opens and displays an error. |
The PingID app displays an error. |
| Fingerprint configured on device | State | Disable notification actions | Banner actions on locked screen | Banner actions on unlocked screen | User taps on banner on locked screen |
|---|---|---|---|---|---|
Yes |
Enabled |
N/A |
Show content:
Hide content:
Do not show notifications:
|
The PingID app opens and requests fingerprint authentication. |
|
Yes |
Required |
Disabled (Checked) |
Show content:
Hide content:
Do not show notifications:
|
The PingID app opens and requests fingerprint authentication. |
|
Yes |
Required |
Enabled (Unchecked) |
Show content:
Hide content:
Do not show notifications:
|
The PingID app opens, requesting fingerprint authentication. |
The PingID app opens and requests fingerprint authentication. |
Not configured / Not supported |
Enabled |
N/A |
|
|
The PingID swipe screen is displayed. |
Not configured / Not supported |
Required |
Disabled (Checked) |
Show content:
Hide content:
Do not show notifications:
|
The PingID app displays an error. |
The PingID app displays an error. |
Not configured / Not supported |
Required |
Enabled (Unchecked) |
Show content:
Hide content:
Do not show notifications:
|
The PingID app displays an error. |
The PingID app displays an error. |
Configuring the duration of new authentication requests
Configure the amount of time that an authentication request lasts before timing out.Customize the authentication experience to your user’s needs and reduce the number of users that experience a push notification timeout when attempting to authenticate using the PingID mobile app.
About this task
An authentication request consists of the following two parts, both of which are configurable:
-
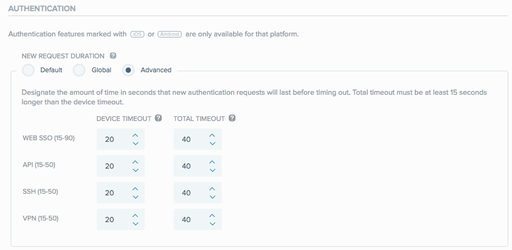
Device Timeout: the maximum time allowed for a new authentication notification request to reach a user’s mobile device before timeout occurs. The default value is 25 seconds.
-
Total Timeout: the total amount of time a new authentication request has to reach a user’s mobile device before timeout occurs. The difference between the device timeout and total timeout indicates the amount of time the user has to respond upon receiving an authentication request before timeout occurs. The default value is 40 seconds.
You can configure timeout values per service, such as Web SSO, Windows login, API, SSH, or VPN, or set global timeout values that are applied to all services. You can increase the timeout values to extend the amount of time a user has to complete authentication on their mobile device before timeout occurs.
This is useful for users with a slow internet connection, for example. You can also use this feature with the direct passcode usage feature to enable users with slow connections to use a one-time password (OTP) to authenticate immediately, rather than responding through a push notification or waiting for the notification to timeout. For more information, see Configuring direct passcode usage.
Changes to the default timeout configuration are applied per organization to all authentication requests, including retry authentication attempts.
|
If push notifications are disabled for a user in the PingID mobile app (Swipe Settings → Disable Swipe), the user is directed to the fallback OTP flow immediately, and no timeout period is applied. |
Steps
-
In the admin console, go to Setup → PingID → Configuration.
-
In the New Request Duration section of the Authentication section, select one of the following options:
Choose from:
-
To apply the default timeout values, click Default.
-
To apply custom timeout values globally to all services, click Global. Use the arrows
 to adjust the values, or enter the values in the Device Timeout and Total Timeout fields.
 -
To define timeout values per service, click Advanced. For each service that you want to customize, use the arrows
to adjust the values, or enter the values in the Device Timeout and Total Timeout fields.
-
|
The range of valid timeout values are shown in parentheses next to each service name. If you do not change a value, PingID uses the default value. For each entry, the value in the Total Timeout field must be at least 15 seconds greater than the value in the Device Timeout field. |
-
Click Save.
Result:
The changes are saved and applied to users upon their next authentication attempt.
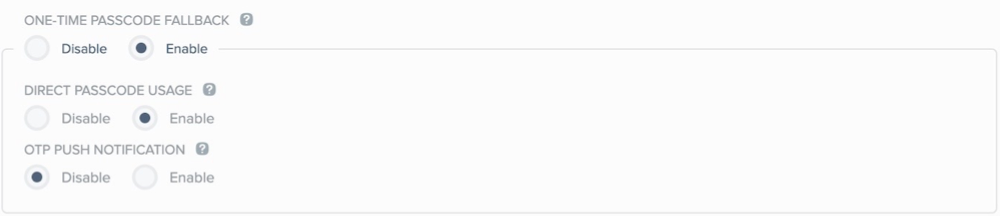
Configuring one-time passcode fallback
The one-time passcode (OTP) fallback setting allows administrators to configure whether users can fall back to an OTP when the mobile app response times out.
About this task
Disabling this setting helps to enforce a security policy that requires authentication by biometrics only. The default setting is Enable.
|
Steps
-
In the PingID admin portal, go to Setup → PingID → Configuration.
-
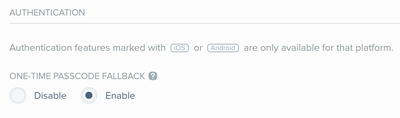
In the One-Time Passcode Fallback section of the Authentication section, select one of the following options:
Choose from:
-
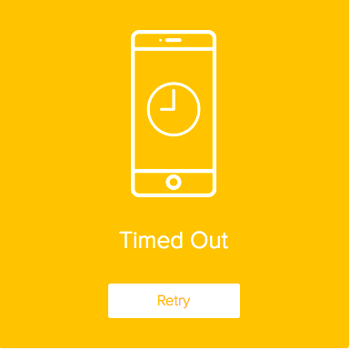
To disable authenticating with an OTP when the mobile app response times out, click Disable. If the request times out or the user’s mobile is offline, the user receives the yellow Timed Out message.
If the user’s mobile is in no push mode, the user will receive the following error message.
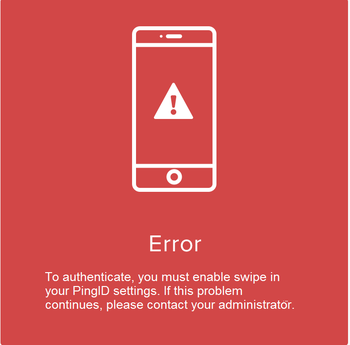
To configure push mode, go to Settings → Swipe Settings → Enable Swipe → Off in the PingID mobile app.
Users with mobile devices that do not support push notifications will not be able to authenticate if the Disable setting is selected.
-
To enable authenticating with an OTP when the mobile app response times out, click Enable. This is the default setting. If the request times out, the user can authenticate using an OTP.
-
-
Click Save.
Configuring direct passcode usage
Direct passcode usage allows users authenticate with a one-time passcode (OTP) immediately, without waiting for a push notification to arrive or to timeout.
About this task
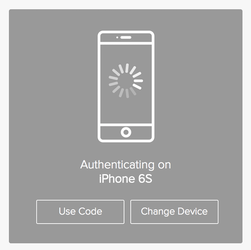
If direct passcode usage is enabled, users awaiting a push notification will see a Use Code button in their web browser, allowing them to bypass the push notification and authenticate directly with an OTP. This is a convenient option for users without a strong network connection.
|
If you are using PingOne DaVinci to orchestrate your PingID flows and want to disable the Direct Passcode Usage feature, you must disable it in the flow settings node in DaVinci, and in the Admin portal. |
Steps
-
In the admin console, go to Setup → PingID → Configuration.
-
In the One-Time Passcode Fallback section of the Authentication section, click Enable.

Result:
The Direct Passcode Usage section displays.
-
In the Direct Passcode Usage section, click Enable.
-
Click Save.
Result
When a user authenticates through the web, they can click Use Code and enter the OTP that appears on the PingID mobile app, rather than waiting for a push notification to arrive or timeout. For more information, see Authenticating using a one-time passcode.
|
If a user clicks Use Code, they can still authenticate using a push notification if it arrives before the user completes authentication using the OTP. |
Configuring the PingID mobile app PIN
As an extra layer of security, you can require users to enter a 4- or 6-digit PIN code to access the PingID mobile app.
About this task
You can require a PIN code to access PingID mobile app for:
-
Devices that don’t already have device biometrics or a device PIN code defined
-
All devices
If this option is enabled:
-
A user is prompted to create a PIN code when they pair the mobile app. The PIN code must include at least 3 or 4 different digits for PIN lengths of 4 and 6 digits, respectively. Digits must not be in ascending or descending sequence, such as 1234 or 4321.
-
A user is prompted to enter the PIN code each time they launch the PingID app.
-
The mobile app is locked after 3 minutes of inactivity, and the user is required to enter the PIN to unlock it.
-
In the event of 3 consecutive incorrect PIN entries, the user is blocked from accessing the app for 2 minutes. This applies to both the PIN entry and the PIN change windows. Lockdown takes effect from the time of the lock, irrespective of whether the desktop app remains open or is closed and relaunched.
-
The mobile app must be online for a user to pair the app. However, a user who is offline can still create a PIN, enter the PIN to access the mobile app, or change their PIN.
-
The mobile app must be online for any change in PIN configuration to take effect, such as enabling or disabling the PIN or changing its length. The user can change their PIN from the PingID mobile app settings.
-
If a user pairs the mobile app to more than one organization, the user must create only one PIN, according to the most restrictive organization requirements. For example:
-
If only one organization has enabled the Mobile Security PIN feature, the user is required to enter their PIN to use the mobile app for authentication to all organizations, including those which do not require the PIN.
-
If one organization requires a 4-Digit PIN and a second organization requires a 6-Digit, the user will be required to enter a 6-digit PIN.
-
-
If the PIN code is already enabled, and the administrator changes the length of the PIN code required, users must first enter the app using the old PIN and then create a new PIN of the new length.
-
It is not possible for the user to reset their PIN. If forgotten, to create a new PIN, the user must unpair their device, and then define their PIN code when pairing their device again.
Steps
-
In the admin portal, go to Setup → PingID → Device & Pairing.
-
In the Pairing Conditions section, under Mobile App Security PIN, select one of the following:
Choose from:
-
Only for users without device PIN/Biometrics: Only users without device PIN or biometrics are required to enter a PIN to use PingID mobile app.
-
All users: All users must enter a PIN code to use PingID mobile app.
-
Disable: Do not require a PIN code to use PingID mobile app.

-
-
Select either 4-Digit or 6-Digit to indicate the PIN length. Click Save.
Result
If an administrator edits the PingID mobile app configuration to require a PIN code, changes are implemented at the user level according to the PingID version and the user flow:
-
Users installing the PingID mobile app for the first time are prompted to create a PIN during the mobile app pairing flow.
-
Users with the PingID mobile app 1.31 or later already paired are prompted to define a PIN code the next time the user opens the PingID mobile app while online.
-
Users with the PingID mobile app earlier than 1.31 already paired must update the PingID mobile app for the changes to take effect. The user is prompted to define a PIN code the next time they launch the new version of the mobile app.
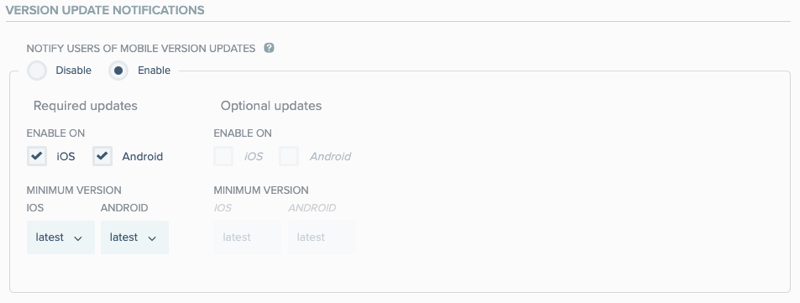
Enabling PingID mobile app update notifications
You can choose to notify users when a new version of PingID mobile app is available. You can make it mandatory, optional, or dependent on the version that they already have installed.
|
After you update the configuration, a seven-day grace period begins before the system notifies users to upgrade. This delay ensures the new version is fully available in the app stores before users receive any notifications. Following the grace period, users receive notification of all version updates through an in-app message the next time they open the application. When an update is required, the system disables lock screen authentication, forcing the user to open the app to perform the update. |
About this task
If you enable updates, you can choose which type of update notifications you require per OS (iOS or Android). Choose from:
-
Required updates: Notify the user when a new version is available. The user must update to the new version to continue using PingID mobile app. The user cannot skip the update and will not be able to authenticate with PingID until they update to the latest version.
-
Optional updates: Notify the user when a new version is available. The notification includes the option to skip the update and install it at a later date.
Steps
-
In the admin portal, go to Setup > PingID > Device & Pairing.
-
To enable notifications when a new version of the mobile app is available, in the Version Update Notifications section, underNotify Users of Mobile Version Updates, select Enable.
Result:
This section provides options to configure update notifications for the PingID mobile app for iOS and Android. For each platform, you can choose whether to require the user to update the app or to inform them of an optional update.
-
For each OS (iOS or Android):
-
Select the relevant checkbox to specify whether updating to the latest version is optional or required.
-
Specify the Minimum Version from which update notifications should be sent.
-
Click Save.
-
Configuring OTP push notifications
You can configure PingID to send a push notification to your users and automatically open PingID mobile app on their device, when requesting a one time passcode.
About this task
When this option is enabled, if a user starts a flow that requires them to enter an OTP, the user no longer has to open their app and search for an OTP. PingID sends a push notification to the user’s device. When the user taps the notification, PingID mobile app opens automatically and generates a new OTP.
Steps
-
In the admin console, go to Setup → PingID → Configuration.
-
In the Mobile App Authentication section, in the OTP Push Notifications field, click Enable.
-
Click Save.
Configuring number matching authentication
Number matching allows the user to authenticate by matching the number displayed on the user’s accessing device with the corresponding number in PingID mobile app.
Configure number matching as an allowed authentication method in PingID policy, and optionally as an authentication action within a policy rule.
Learn more in Policy and rule authentication methods.
Learn more about the user experience in Authenticating using number matching in the PingID User Guide.
|
Displaying details of accessing device
When an authentication request is sent to a mobile device, you can have it include details of the accessing device, such as a map showing its location.
|
This feature determines the location of the accessing device using its IP address and only supports IPv4. As a result, the location shown on the map might be less accurate compared to other location-detection methods. |
About this task
Use the Show Authentication Information setting to disable/enable this option.
Steps
-
In the PingID admin portal, go to Setup → PingID → PingID Settings → Configuration.
-
In the Mobile App Authentication section, set Show Authentication Information to Disabled or Enabled.
Configuring authentication when the device is locked
Configure the Authentication While Device Is Locked setting to enable or disable users using swipe to authenticate with PingID without unlocking their devices. The default setting is Enable.
About this task
|
This configuration is supported on the mobile app 1.7 and later and is only relevant for swipe authentication on devices running Android versions later than Android Q. |
For details about the user experience for authenticating with an Android device, see the PingID End User Guide.
Steps
-
In the admin console, go to Setup → PingID → Configuration.
-
In the Authentication While Device Is Locked section of the Mobile App Authentication section, click one of the following:
Choose from:
-
Disable: Users must unlock their device before authenticating.
-
Enable: Users can authenticate without first unlocking their mobile device.

-
-
Click Save.
Enabling or disabling location collection
The PingID mobile app can collect user location information to provide valuable contextual information for use in current and future risk-based policies and data analytics.
About this task
Location collection is defined per organization and is not enabled by default. Location is only collected when a policy that requires it is configured. If enabled, when installing the PingID mobile app, end users are prompted to allow the PingID mobile app the relevant permissions to collect location information. Users can disable location collection by the PingID app in their mobile device settings.
Location-based policies already defined in your system might deny users access during authentication. We recommend that you enable location collection for all organizations to enable you to apply location-based policy rules and to allow for behavioral analysis in the future.
When changing location collection configuration at the organization level:
-
Changes will apply to the end user’s mobile device the next time the end user authenticates online.
-
If a mobile device is paired with more than one organization, changing location services for one organization level affects all organizations with which the device is paired.
Steps
-
If you are enabling location collection for an organization:
-
Configure a policy that requires location collection. For more information, see PingID policy settings.
-
-
If you are disabling location collection for an organization:
-
When pairing a device with the PingID mobile app, users are not prompted to allow location collection when pairing a new device.
Although location collection remains enabled, if location collection is disabled at the organization level, PingID will not collect location information from the user’s device.
-
If the user has the PingID mobile app installed and has granted permission to location collection, the collection of location information will stop the next time the user authenticates online. The user is not prompted to authorize this change and location is not collected, regardless of whether location collection settings for PingID are allowed or denied.
-
-
If you are re-enabling location collection for an organization:
-
When installing the PingID mobile app on a device and pairing, users are prompted to allow location collection permissions when pairing the device with the organization.
Android users running Android Q and later must select Allow all the time.
-
If the user already has PingID installed and did not grant permission to location collection in the past, their device will prompt them to grant permission the next time they open the PingID app.
A user authenticating through the lock screen is not prompted to allow location permissions, and location collection is not enabled. To approve location permissions, the user must unlock their device and open the PingID app. After the user approves location collection, PingID collects location information.
If a user is paired with a different organization that has not enabled location collection, location information will not be collected.
-
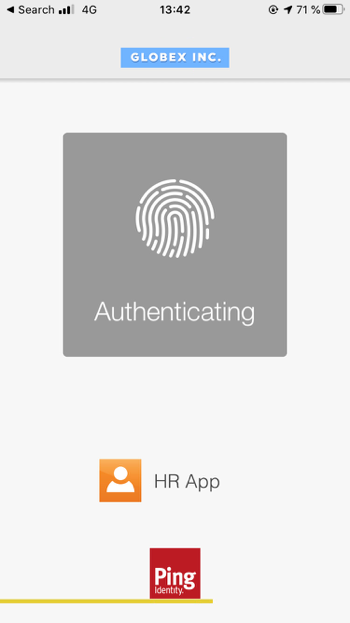
Defining the authenticating app appearance in the PingID mobile app
Configure the PingID mobile app authentication screen to display the name and icon of the app originating the push notification authentication request.
About this task
The following image shows a custom authentication screen in the PingID mobile app.
Steps
-
In the relevant identity provider (IdP), define the name and icon that PingID displays on the authentication screen.
Application IdP Steps PingOne Apps
Define the app name in the Application Name field and the icon in the Graphics field. For more information, see:
PingFederate Apps
Define the app name in the Application Name field and the icon in the Application Icon URL field. For more information, see:
-
Identifying the SP. See the Application Name and Application Icon URL entries.
PingID API Apps
The app name and logo are defined using either:
-
The
appNameandappIconUrlsub-attributes. For more information, see Example PPM request. -
The
sp_logoandsp_nameof the StartAuthentication API. For more information, see the AuthenticateOnline entry.