PingID Administration Guide

Configuring an authentication profile for MFA

Steps

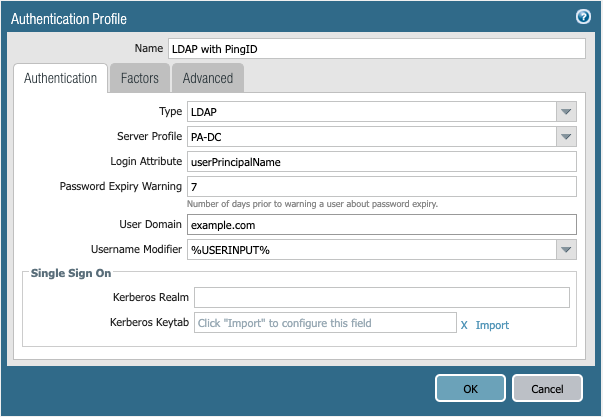
  1. In the Palo Alto NGFW admin portal, go to Device → Authentication Profile, and then click Add.

  2. In the Name field, enter a name for the profile.

  3. From the Type list, select LDAP.

    An screen capture of the Authentication Profile window, on the Authentication tab. In this screen capture, the Name field is populated with the name LDAP with PingID. The Type list shows LDAP as selected
  4. Go to the Factors tab and check Enable Additional Authentication Factors.
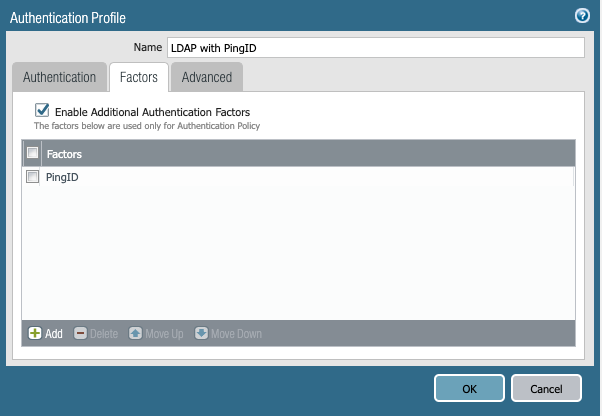
    An image capture of the Authentication Profile window, on the Factors tab. The Enable Additional Authentication Factors check box is selected. There is a list of available factors after the check box to use only for Authentication Policy. At the bottom of the list is the Add plus sign button.
  5. Click Add, and then select PingID.

  6. Go to the Advanced tab, and in the Allow List section, click Add and select the relevant groups or users.

    In this example, we chose all.
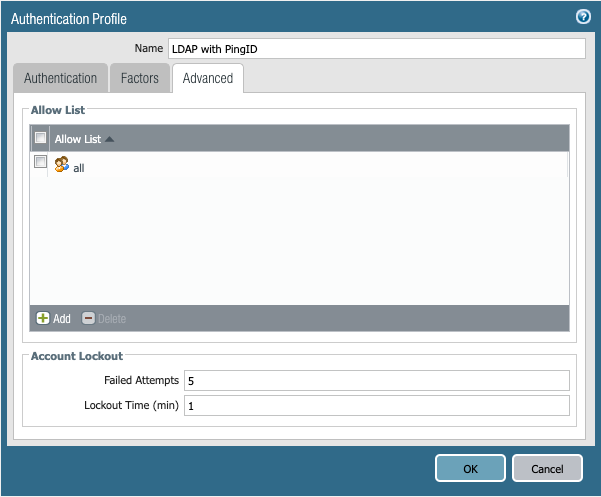
    An image capture of the Authentication Profile window, on the Advanced tab. The Allow List is shown with the option for all.
  7. Optional: Change the Failed Attempts and Lockout Time fields.

  8. Click OK.