Adding a RADIUS Server
To configure Juniper for PingID multi-factor authentication (MFA), you must add a RADIUS server.
Steps
-
Sign on to Juniper with your administrator ID and password.
-
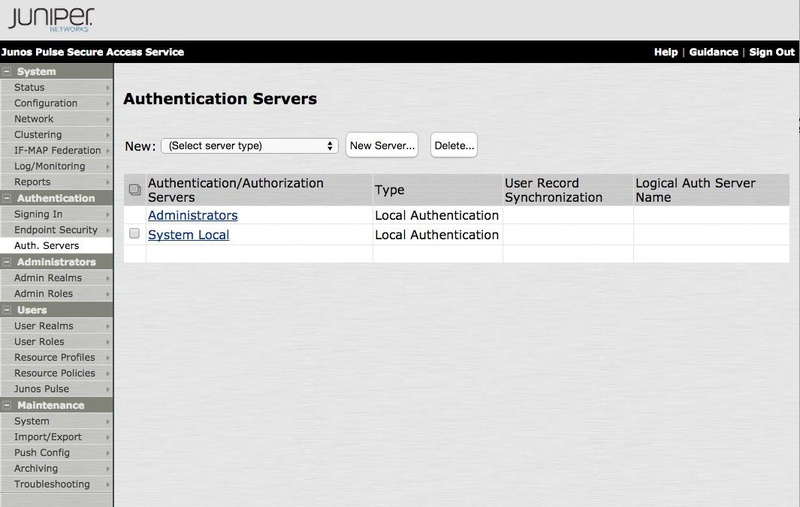
In the left-hand navigation pane, go to Authentication → Auth. Servers.

-
From the New list, select RADIUS Server, and then click New Server.
Result:
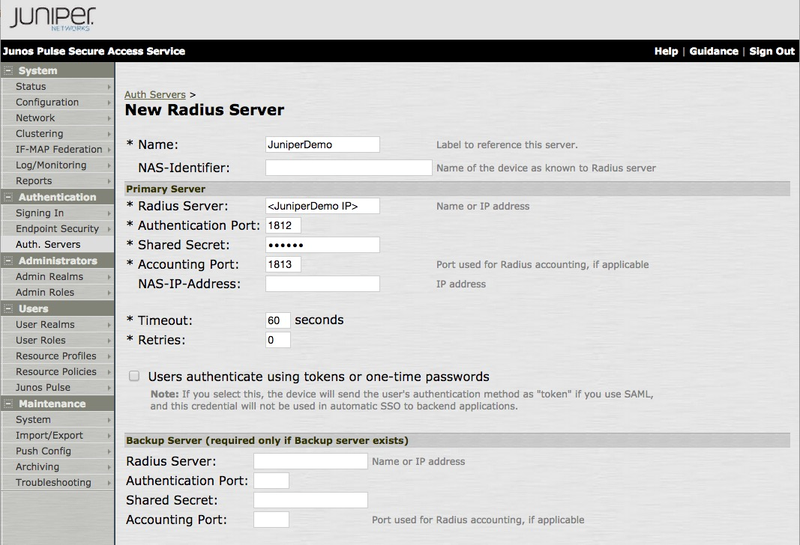
TheNew Radius Server window opens.

-
In the New Radius Server window, enter the following information:
-
In the Name field, enter the RADIUS Server name.
-
In the NAS-Identifier field, enter the name of the device as known to the RADIUS server.
-
In the Radius Server field, enter the DNS name or IP address of the RADIUS server password credential validator (PCV).
-
In the Authentication Port field, enter the port configured in the RADIUS server PCV. The default value is
1812. -
In the Shared Secret field, enter the shared secret configured in the RADIUS server PCV.
-
In the Accounting Port field, enter the port used for RADIUS accounting.
The default value is
1813and should not be changed. -
In the Timeout field, enter
60.The default value is
30.The Timeout field determines the amount of time in seconds before the connection is timed out.
-
-
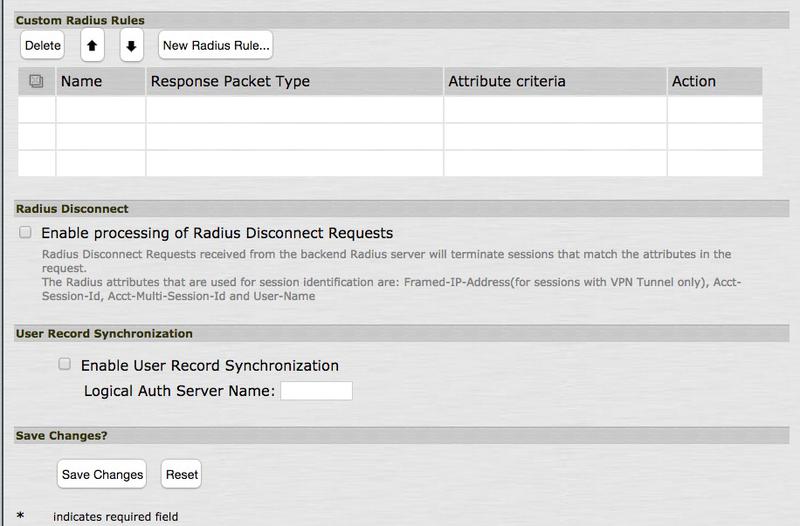
Click Save Changes.
Result:
The Custom Radius Rules section is enabled.

-
Click New Radius Rule.
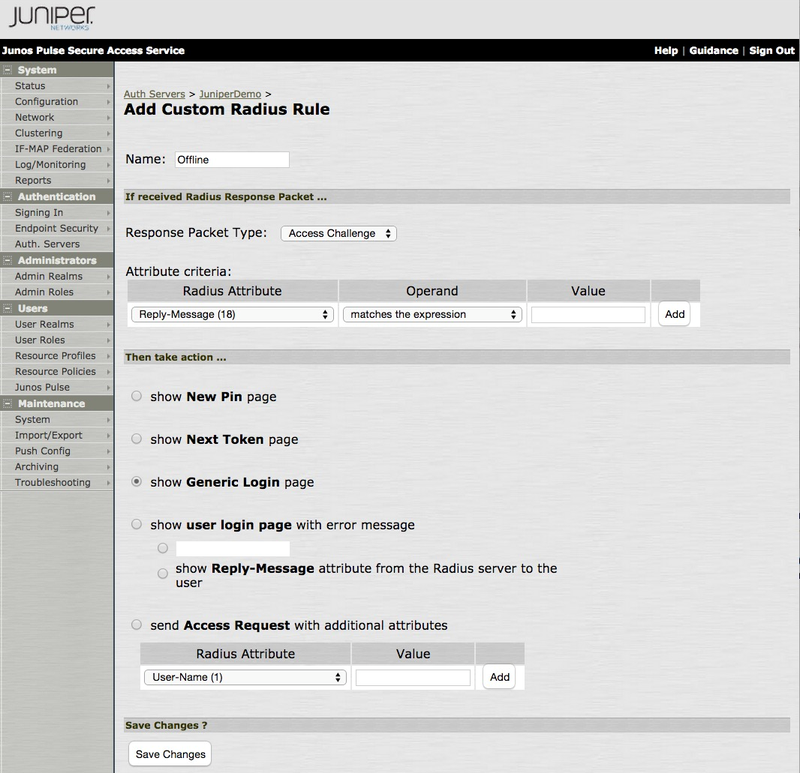
The following window is didplayed:

-
In the Add Custom Radius Rule window, enter the following information:
-
In the Name field, enter
Offline. -
From the Response Packet Type list, select Access Challenge.
This is the default value.
-
Select the Show Generic Login Page check box.
-
-
Click Save Changes.