Configuring a Signing In Policy
To configure Juniper for PingID multi-factor authentication (MFA), you must configure a sign in policy.
Steps
-
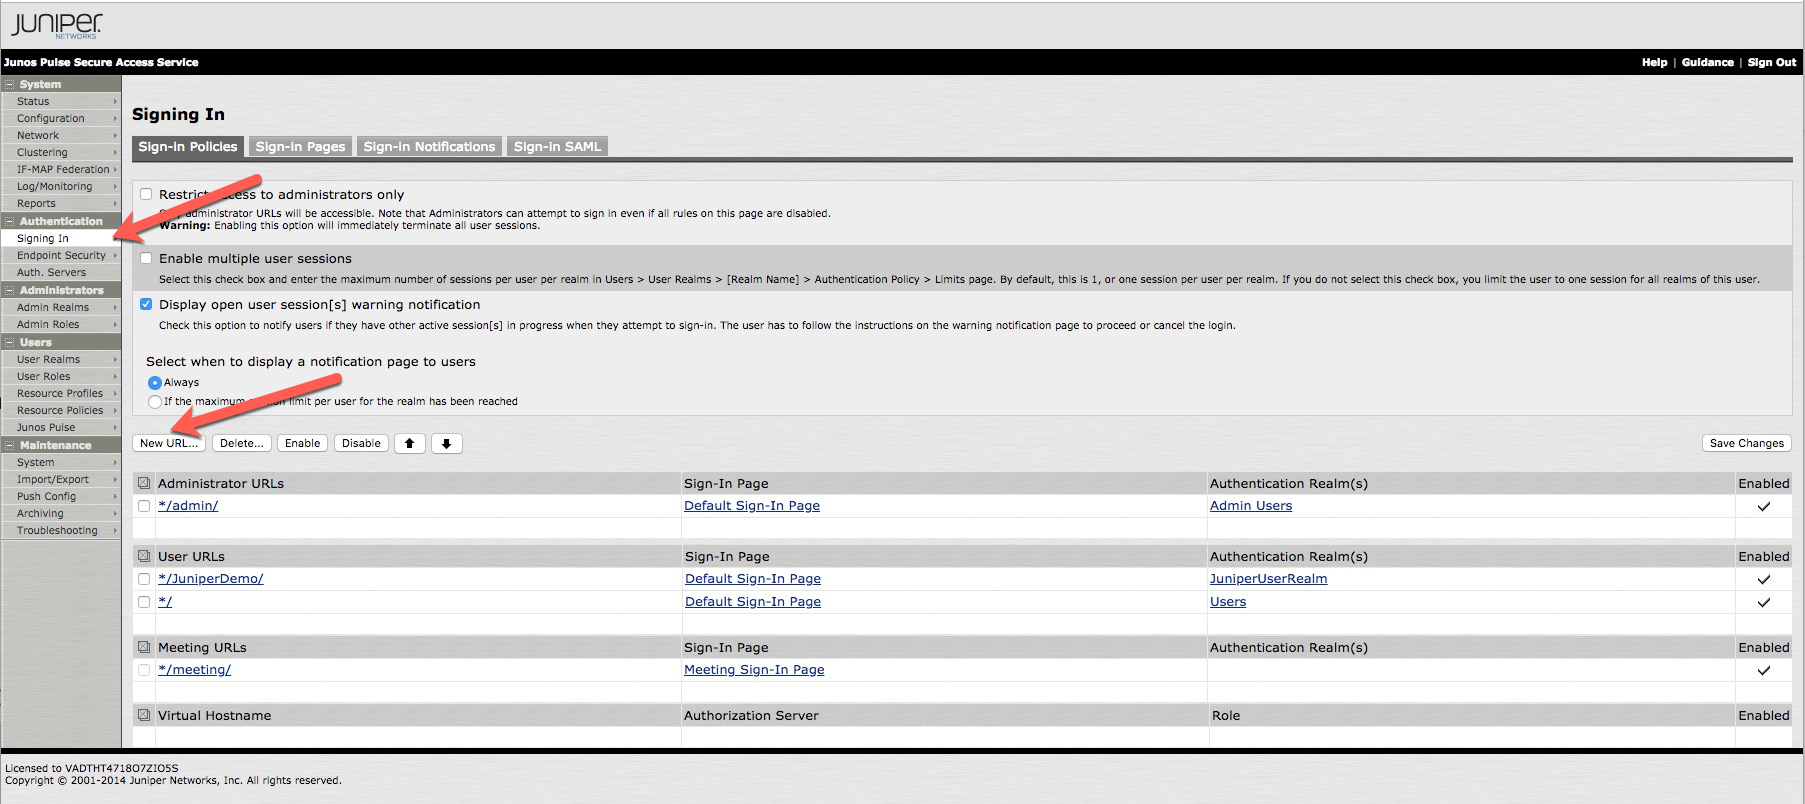
In the left navigation pane, in the Authentication section, click Signing In.

Result:
The Signing In window opens.
-
In the Signing In window, click New URL….
Result:
The next section of the Signing In window opens.

-
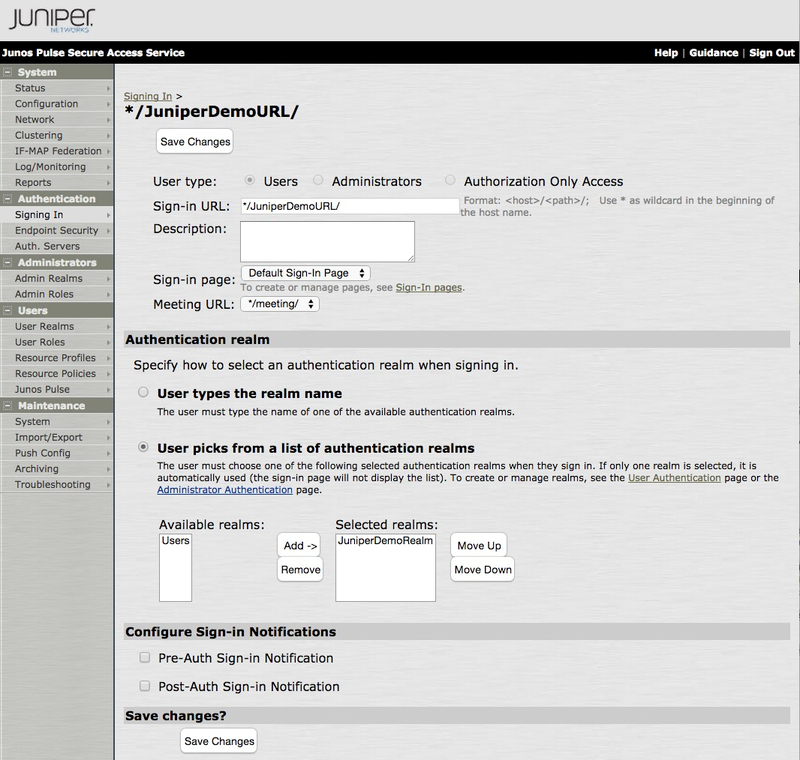
In the User Type section, click Users.
-
In the Sign-in URL field, enter the sign-in URL in the format of
<host>/<path>/.Example:
*/JuniperDemoURL/ -
In the Authentication Realm section, enter the following information:
-
Click User Picks from a List of Authentication Realms.
-
From the Available Realms list, select the realm created in Adding a New Authentication Realm, and then click Add. The realm is added to the Selected Realms list.
Result:
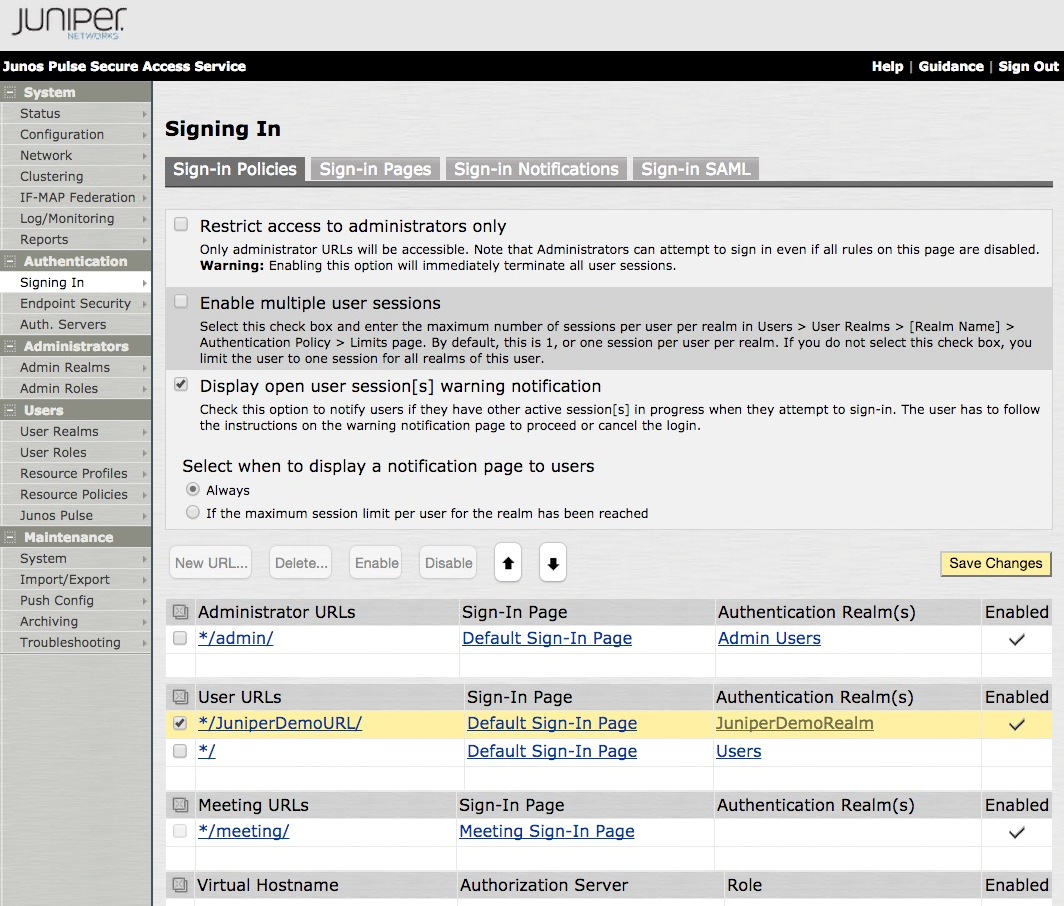
The Signing In window is displayed, and the User URL list contains the new URL.
-
-
Click Save Changes.
-
From User URLs list, select the check box next to the URL you just created.
-
To move the URL to the top of the list, click the Up Arrowicon (
 ).
).
-
Click Save Changes.
Result:
The Juniper VPN is now configured to use the PingFederate RADIUS password credential validator (PCV) server.