Creating the VPN RADIUS server
To configure Check Point VPN for PingID MFA, you must create the VPN RADUS server.
Steps
-
In the Network Objects toolbar, click the Servers and OPSEC tab (
 ).
). -
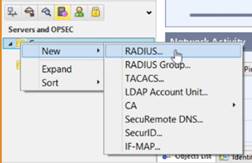
In the Network Objects tree, right-click on Servers and go to New → RADIUS….

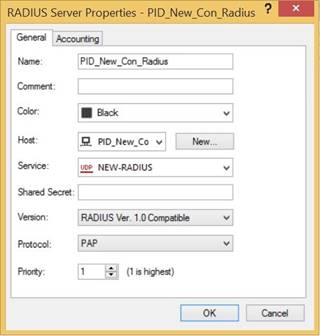
The following window is displayed:

-
On the General tab, enter the following information.
-
In the Name field, enter a RADIUS server name.
-
From the Host list, select the RADIUS host that you created previously.
For more information, see Configuring the RADIUS host.
-
From the Service list, select the RADIUS service that you created previously.
For more information, see Create a UDP Entry.
-
In the Shared Secret field, enter the shared secret.
The shared secret must match the one configured in the RADIUS server PCV.
-
From the Version list, select RADIUS Ver. 1.0 Compatible.
-
From the Protocol list, select PAP.
-
-
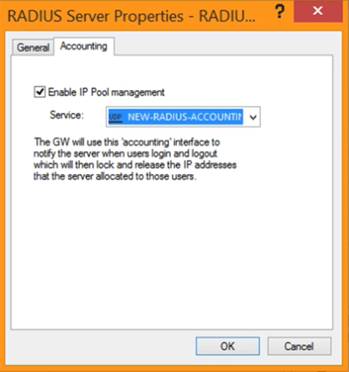
Click the Accounting tab.

-
On the Accounting tab, enter the following information:
-
Select the Enable IP Pool Management check box.
-
From the Service drop-down menu, select the RADIUS accounting service you created earlier.
For more information, see Create a UDP Entry.
-
-
Click OK.