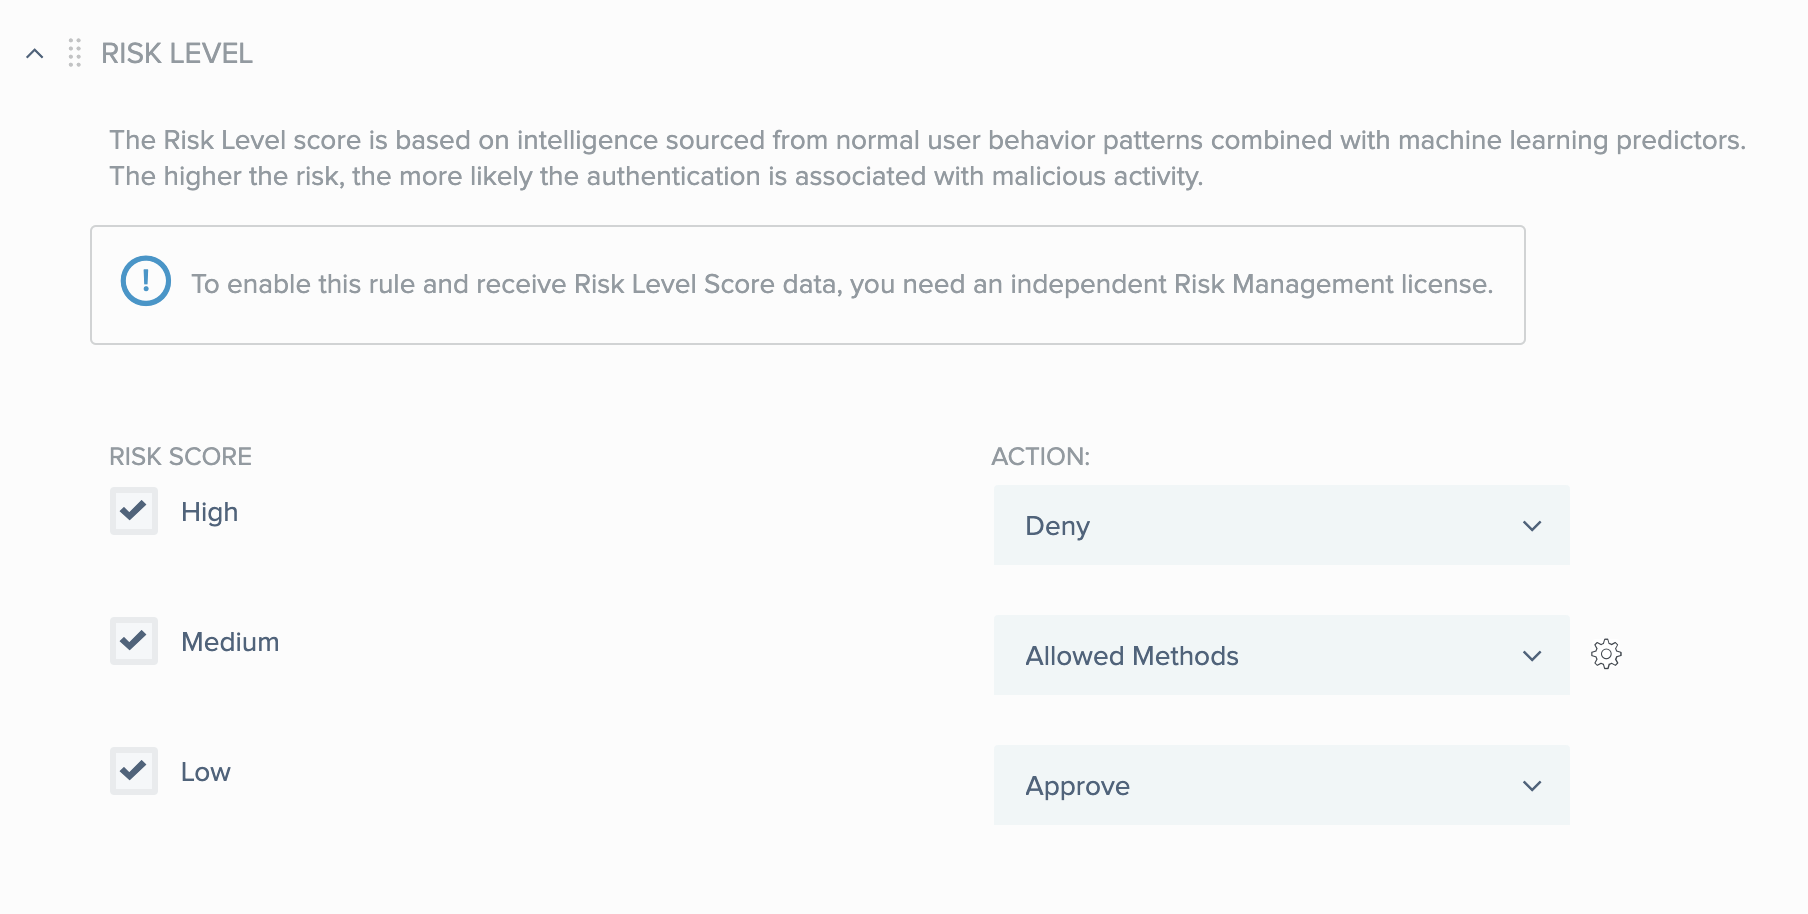
Configuring a risk level rule (web policy)
The PingOne Protect service combines a number of predictors such as user risk behavior, IP reputation, and geovelocity anomaly to calculate a single risk score. If you have a license for PingOne Protect, you can include the risk level that it calculates in your PingID policies. Find more information in Introduction to PingOne Protect.
Before you begin
Before adding a risk level rule, make sure that you have provided a value for the Resource ID field in the definition of the PingID adapter for PingFederate. For more information, see Configuring a PingID Adapter instance. Version 2.11 or higher of the PingID adapter is required for this feature
|
You can also add a rule that uses the risk level provided by a supported third-party risk service. If you are using a third-party service, make sure that you have provided a value for the Risk Level field in the definition of the PingID adapter for PingFederate. |
Steps
-
Create a new policy, or open an existing policy for editing.
-
Click Add Rule.
-
Select Risk Level from the list of rules.
-
For each of the risk levels - high, medium, low - select the check box if you want to specify an MFA action for that level of risk.

-
For each risk level that you selected, use the list of actions to select the MFA action you want to use for that level of risk.
-
Click Save.
-
In the Policy list, click and drag the new policy and place it in the order in which you want it to be considered. Click Save Order.