Adobe Admin Console
The Advanced Identity Cloud Adobe Admin Console application lets you manage users, groups, and user group memberships between Adobe Admin Console and Advanced Identity Cloud. This application requires an Adobe Admin Console administrator account and a properly configured Adobe Admin Console.
Register the application
-
In the Advanced Identity Cloud admin console, go to Applications, and click Browse App Catalog.
-
In the Browse App Catalog modal, select an application, and click Next.
-
Review the Application Integration information, and click Next.
-
In the Application Details window, specify the name, description, application owners, and logo for the application.
-
To make the application an Authoritative source of identity data, select the Authoritative check box. This option is not available for every application.
-
Click Create Application.
Adobe Admin Console requirements
| The steps for configuring Adobe Admin Console should be used as an outline, as the specific options, menus, and features could have changed. |
Before you can configure the Advanced Identity Cloud application, you must create and configure a project in Adobe Admin Console. You need an Adobe Admin Console developer account to complete this procedure:
-
Create or log in to an Adobe Admin Console developer account.
-
From the Adobe Developer Console, click the Projects tab, and then click Create new project.
Show Me

-
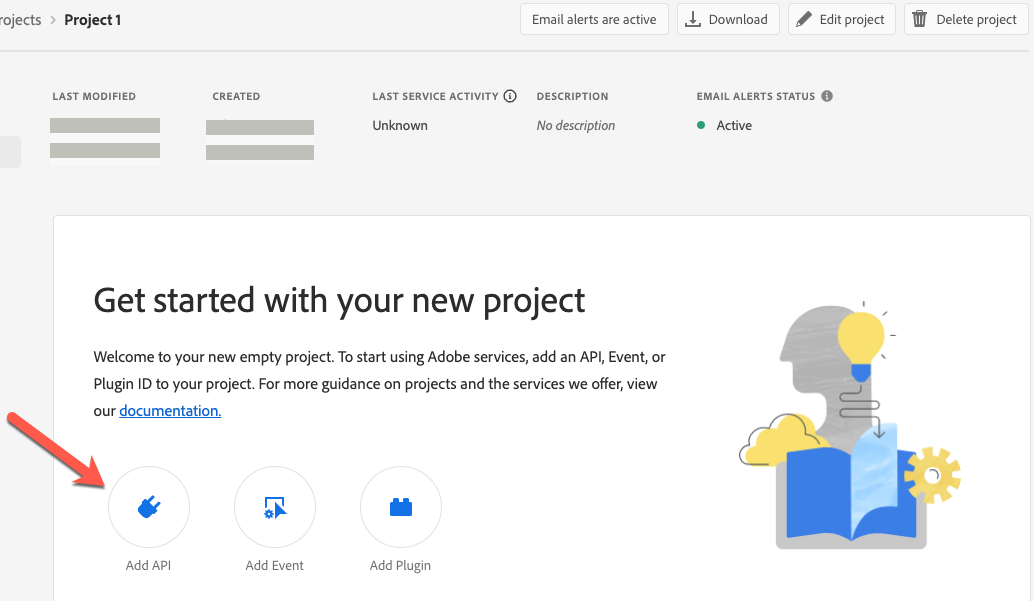
On the Project Name page, click Add API.
Show Me
-
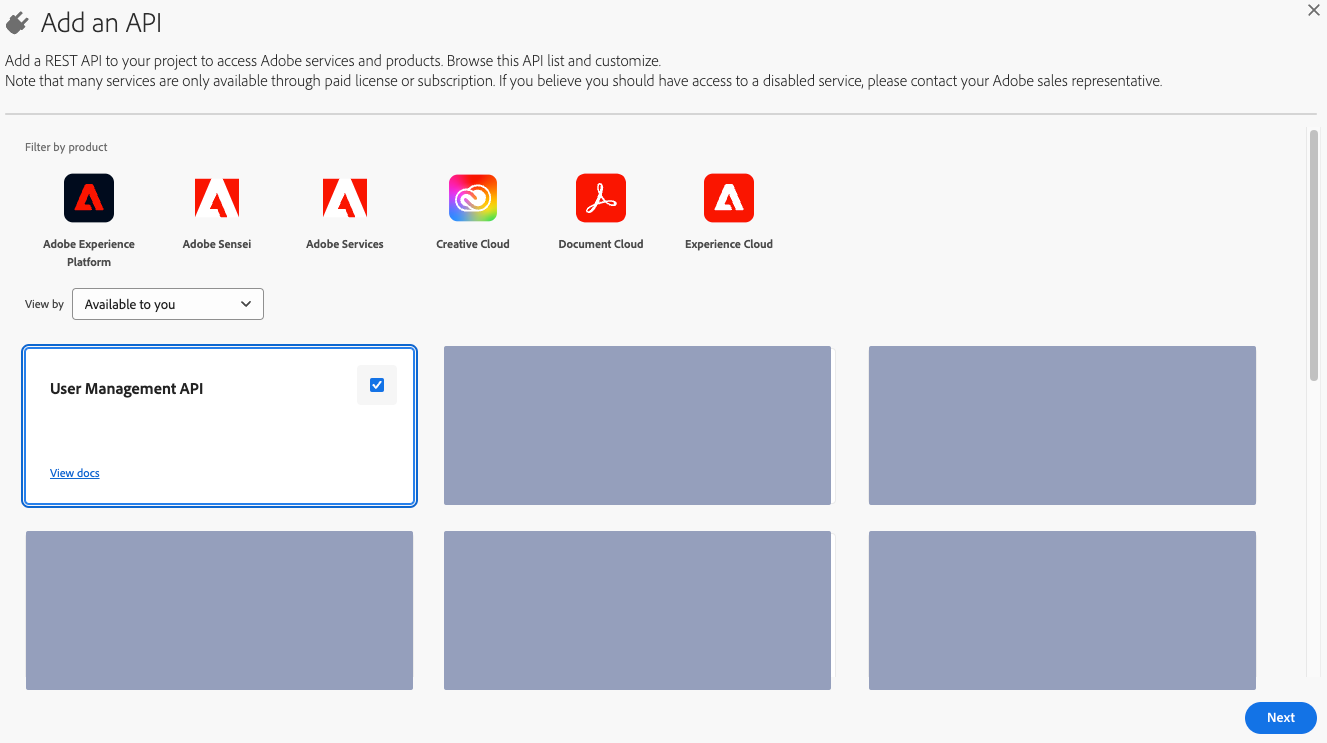
In the Add an API window, select User Management API, and click Next.
Show Me
-
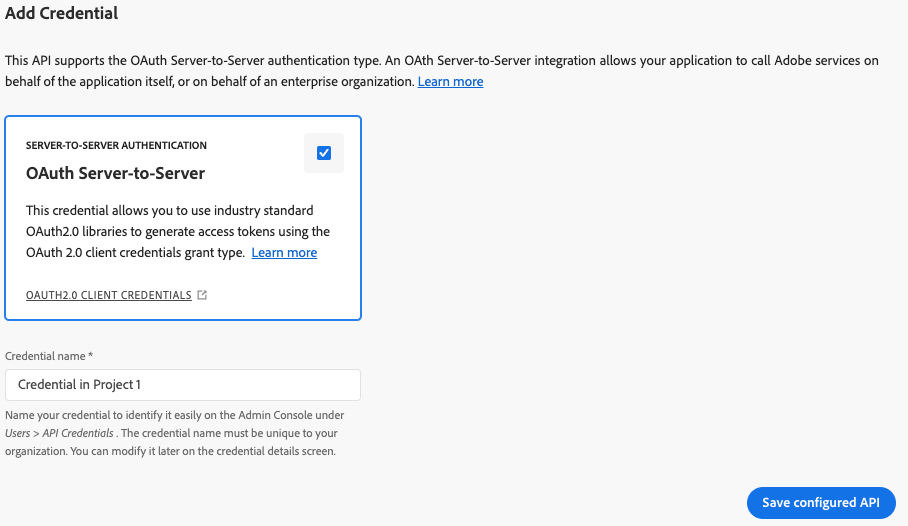
In the Add Credential area, select OAuth Server-to-Server, enter a Credential name, and then click Save configured API.
Show Me
-
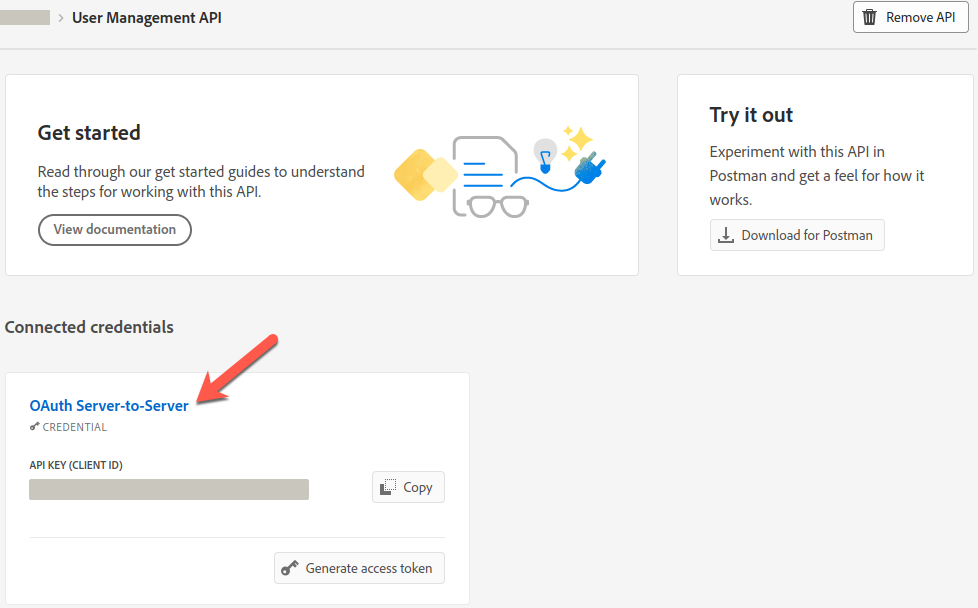
On the Project Name > User Management API page, in the Connected credentials area, click the credential you just added (OAuth Server-to-Server).
Show Me
-
From the Credential detail tab, make note of the following:
-
CLIENT ID
-
CLIENT SECRET
-
SCOPES
-
ORGANIZATION ID
Show Me
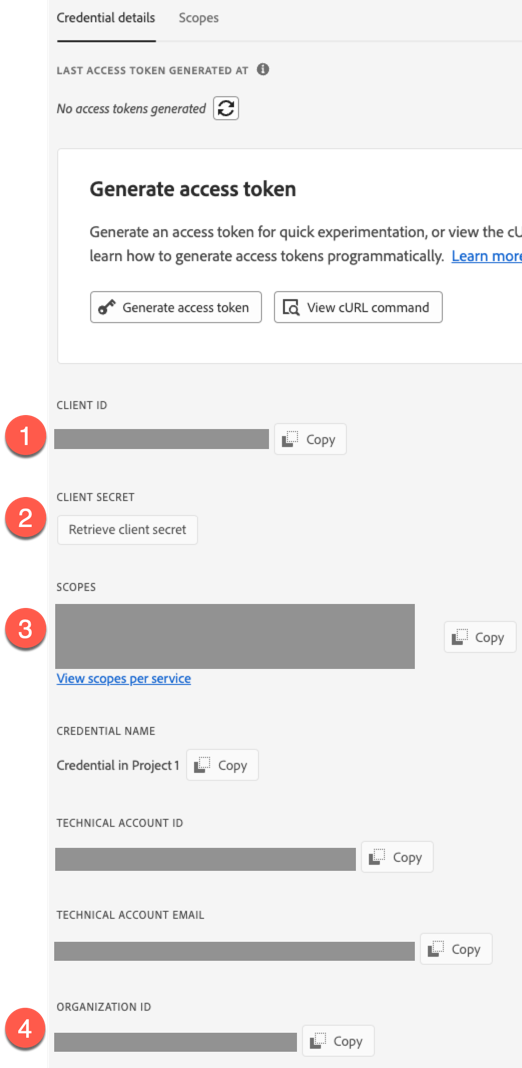
Use these values when you configure provisioning for an Advanced Identity Cloud Adobe Admin Console application.
-
Configure the provisioner
After you register the application, you can configure provisioning.
-
Complete Adobe Admin Console requirements.
-
In the Advanced Identity Cloud admin console, on the Provisioning tab:
-
If setting up provisioning for the first time, click Set up Provisioning.
-
If editing existing settings, in the Connection area, click Settings.
-
-
Configure the following fields:
Field Description Service URI
The service endpoint URI.
Organization ID
Your organization’s unique ID. For example,
12345@AdobeOrg.Refer to Adobe Admin Console requirements for help locating this value.
Token Endpoint
The endpoint to query for a new access token.
Client ID
The client ID for OAuth 2.0 flow.
Refer to Adobe Admin Console requirements for help locating this value.
Client Secret (optional)
The client secret for OAuth 2.0 flow.
Refer to Adobe Admin Console requirements for help locating this value.
-
Optionally, click Show advanced settings to set any of the following options:
Application specific settings Field Description Scope (optional)
The OAuth 2.0 scope(s) to use.
Refer to Adobe Admin Console requirements for help locating this value.
Group Read Rate Limit
Defines throttling for group read operations either per second ("30/sec") or per minute ("100/min").
User Read Rate Limit
Defines throttling for user read operations either per second ("30/sec") or per minute ("100/min").
Write Rate Limit
Defines throttling for write operations (create/update/delete) either per second ("30/sec") or per minute ("100/min").
Maximum Connections
The maximum size of the HTTP connection pool. The default is 10 connections.
Connection Timeout
The timeout for the underlying HTTP connection in seconds. The default is 30 seconds.
Pool configuration Field Description Max idle and active container instances
The maximum number of idle and active container instances. The default value is
10.Max Idle Connector Instances
The maximum number of idle connector instances. The default value is
10.Set Timeout Period
Select to enable a timeout period for the connection. After enabling, configure the following:
-
Timeout period (ms): The timeout period in milliseconds.
Set Minimum Idle Time
Select to set a minimum time (in milliseconds) before an idle object is removed. After enabling, configure the following:
-
Min idle time (ms): The minimum idle time in milliseconds.
Min Idle Instances
The minimum number of idle connector instances.
Result Handler configuration Field Description Enable for connectors with the attribute normalizer interface
Enables the attribute normalizer interface for supported connectors.
Enable local filtering/search features
Enables local filtering and search capabilities.
Enable case insensitive filter
Configures filters to ignore case sensitivity.
Enable configuration of search attributes; disable for local connectors
Enables search attribute configuration. Disable this option for local connectors.
-
In the Operation Timeouts (ms) area, select the operations to enforce timeouts on and enter the duration in milliseconds.
Available operations include Create, Validate, Test, Enable a Script on the Connector, Schema, Delete, Update, Sync, Authenticate, Get, Enable a Script on the Target, and Search.
-
In the Operation Rate Limits area, select the operations to enforce rate limits on.
You can enforce limits on specific operations, including Create, Validate, Test, Script on Connector, Schema, Delete, Update, Sync, Authenticate, Get, Script on Target, and Search.
For each selected operation, configure the following fields:
Field Description Request Limit
Requests allowed over time.
Request Period
Limit resets after this time (ms).
Request Timeout
Time before exception thrown (ms).
-
-
Click Connect.
-
Verify the information in the Details tab.
Configure provisioning and reconciliation resources
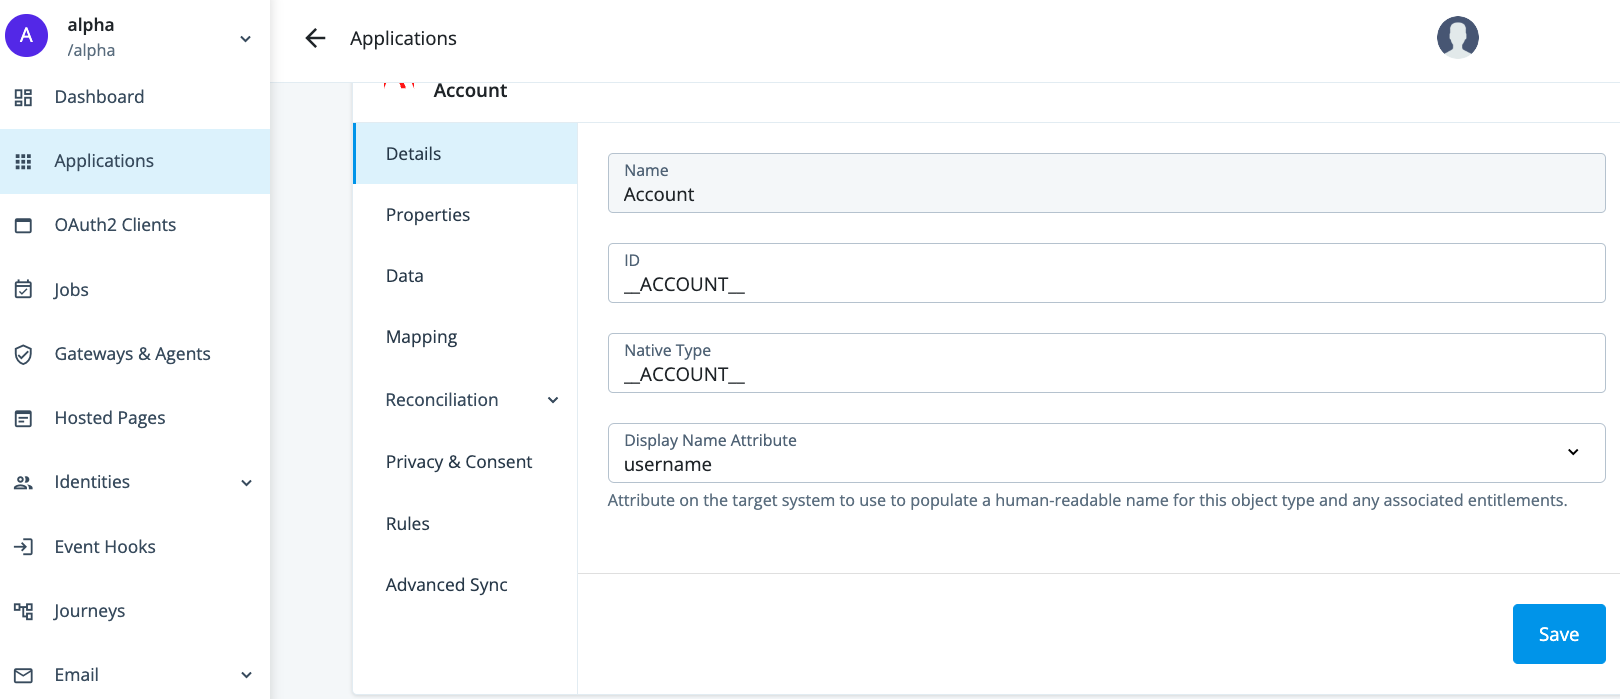
Use the object type list to select a provisioning and reconciliation resource, such as Account.
The selected object type determines the side tabs that display, as each resource has different provisioning and reconciliation requirements.
| Provisioning side tab | Description | Related sections |
|---|---|---|
Details |
View and manage an application, including name, ID, and native type. |
Select the specific application from Provision settings for an application. |
Properties |
View and manage properties for the selected object type. |
|
Data |
View data about the selected object type. |
|
Mapping |
View and manage mappings from the Advanced Identity Cloud admin console properties to external system properties and from external system properties to the Advanced Identity Cloud admin console properties. |
|
Reconciliation |
Preview mappings on target applications between external systems and the Advanced Identity Cloud admin console, and reconcile the data between the two systems. View and manage rules for the users and groups that use your application. View and manage schedules for Full and Incremental reconciliation. |
|
Privacy & Consent |
Manage end-user data sharing and synchronization. |
|
Rules |
View and manage provisioning rules for mappings between Advanced Identity Cloud and a target application. |
|
Advanced Sync |
Create and manage mappings between a managed object type and an application or between applications. |