Historical change report
|
Advanced Identity Cloud add-on capability
Contact your Ping Identity representative if you want to add Advanced Reporting to your PingOne Advanced Identity Cloud subscription. Learn more in Add-on capabilities. |
Advanced Identity Cloud’s advanced reporting capability allows you to generate historical data reports for IDM objects, summarizing the audit trail of changes to these managed identities. For each IDM profile change, Advanced Identity Cloud tracks the modified attribute, its previous and new values, the actor who made the change, timestamp, and transaction ID.
As a report author, you can generate reports on the history of managed identities. For example, you can create reports that list all profile changes for specific users over a period, show which users were deleted, or detail attribute changes for objects like roles, accounts, and applications.
Goals
After completing this use case, you’ll know how to do the following:
-
Create a historical data report template.
-
Run and view a historical data report.
Before you begin
Before you start work on this use case, ensure you have these prerequisites:
-
Make sure you have the advanced reporting capability in your Advanced Identity Cloud tenant.
-
Ensure you have the necessary permissions to create and run reports in Advanced Identity Cloud.
Tasks
Nova Fleming, an end user, needs to track all new account provisions within the organization. She asks the reports administrator to create a report for this purpose.
The reports administrator creates a new report template using the IDM Activity data source.
To make sure the report only shows recent account provisions, the administrator adds
a filter to track profile changes from the start of the year.
Task 1: Create the report template
-
In the Advanced Identity Cloud admin console, go to Reports.
-
On the Reports page, click New Report.
-
In the New Report modal, enter this information:
-
Name: Enter a name for your report.
-
Description: (optional) enter a description for your report.
-
Who Can Run: Select the end users who can run the report.
-
Report Viewer Group: Click to select a group of users who can view the report results. If not selected, all users who can run the report can view the results.

-
-
Click Next.
Task 2: Add the data source
-
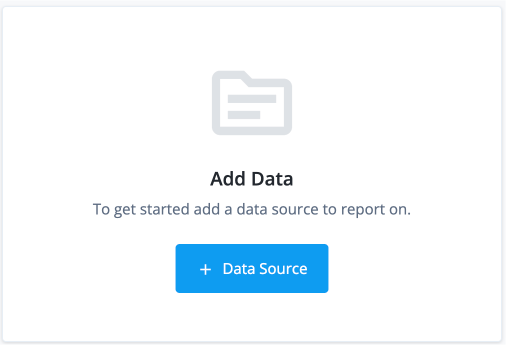
On the Add Data page, click Data Source.
-
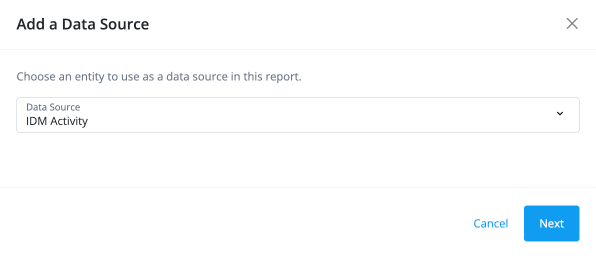
In the Add Data Source modal, select a Data Source and click Next. For example, select IDM Activity.
-
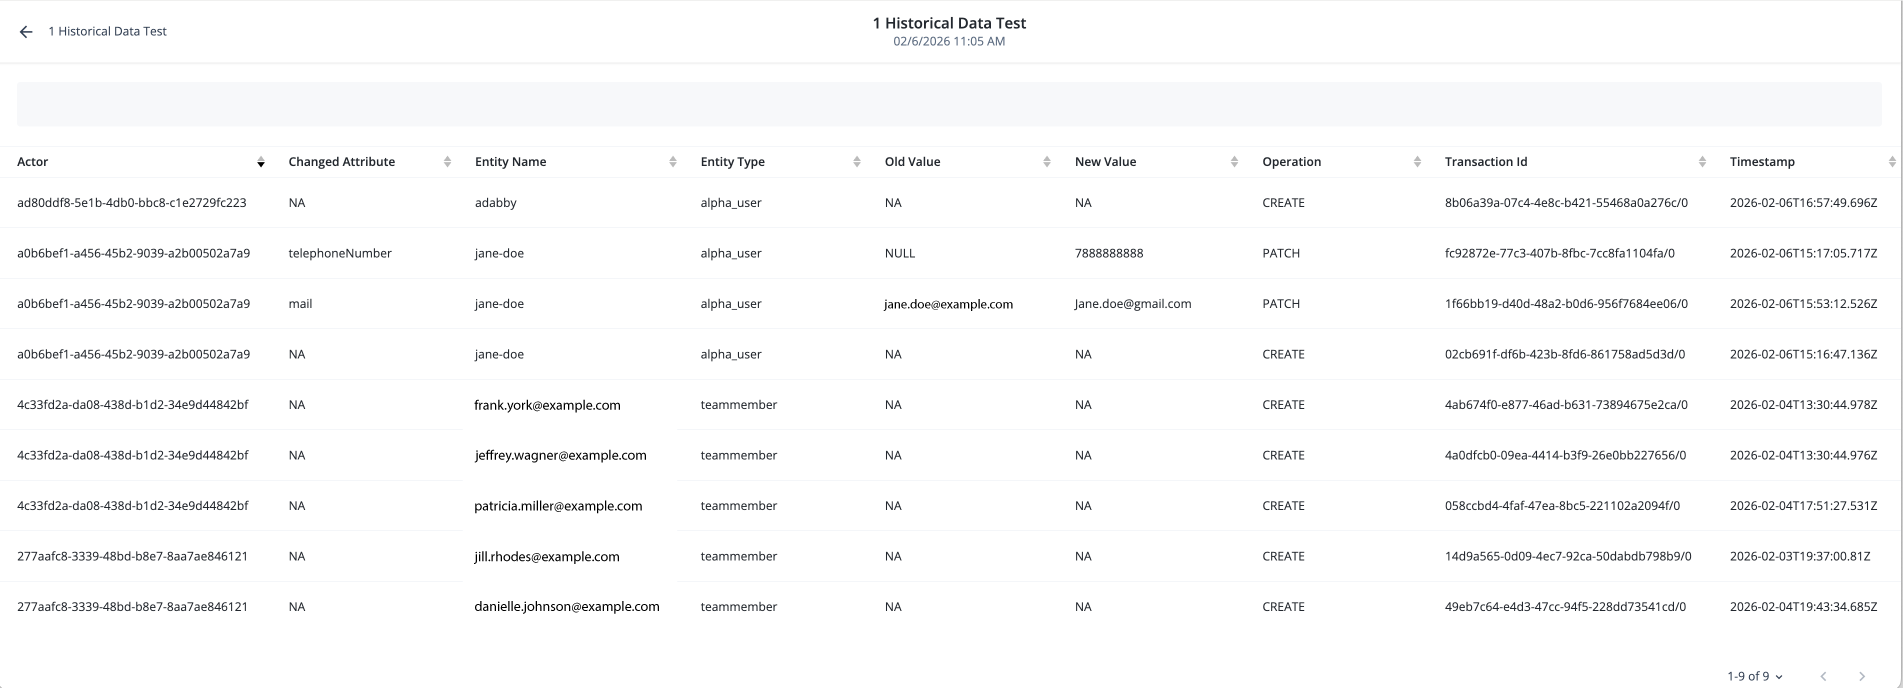
On the draft report page, select the properties in the right column that you want to appear in the report. For example:
-
Actor: The actor who made the change.
-
Changed Attribute: The specific attribute that was modified in the IDM object.
-
Entity Name: The name of the IDM-managed entity that was changed. For end users, this is the
username. For other entities like roles or applications, this is thenameattribute. For custom objects, this is thenameattribute if it exists, or the object ID if a name attribute doesn’t exist. -
Entity Type: The type of the IDM-managed entity that was changed, such as user, role, account, or application.
-
Old Value: The value of the modified attribute before the change was made.
-
New Value: The value of the modified attribute after the change was made.
-
Timestamp: The date and time when the change occurred.
-
Transaction ID: The unique identifier for the transaction that triggered the change, which can be used to correlate related changes across different entities.
You can rearrange the columns by dragging and dropping them in the desired order. 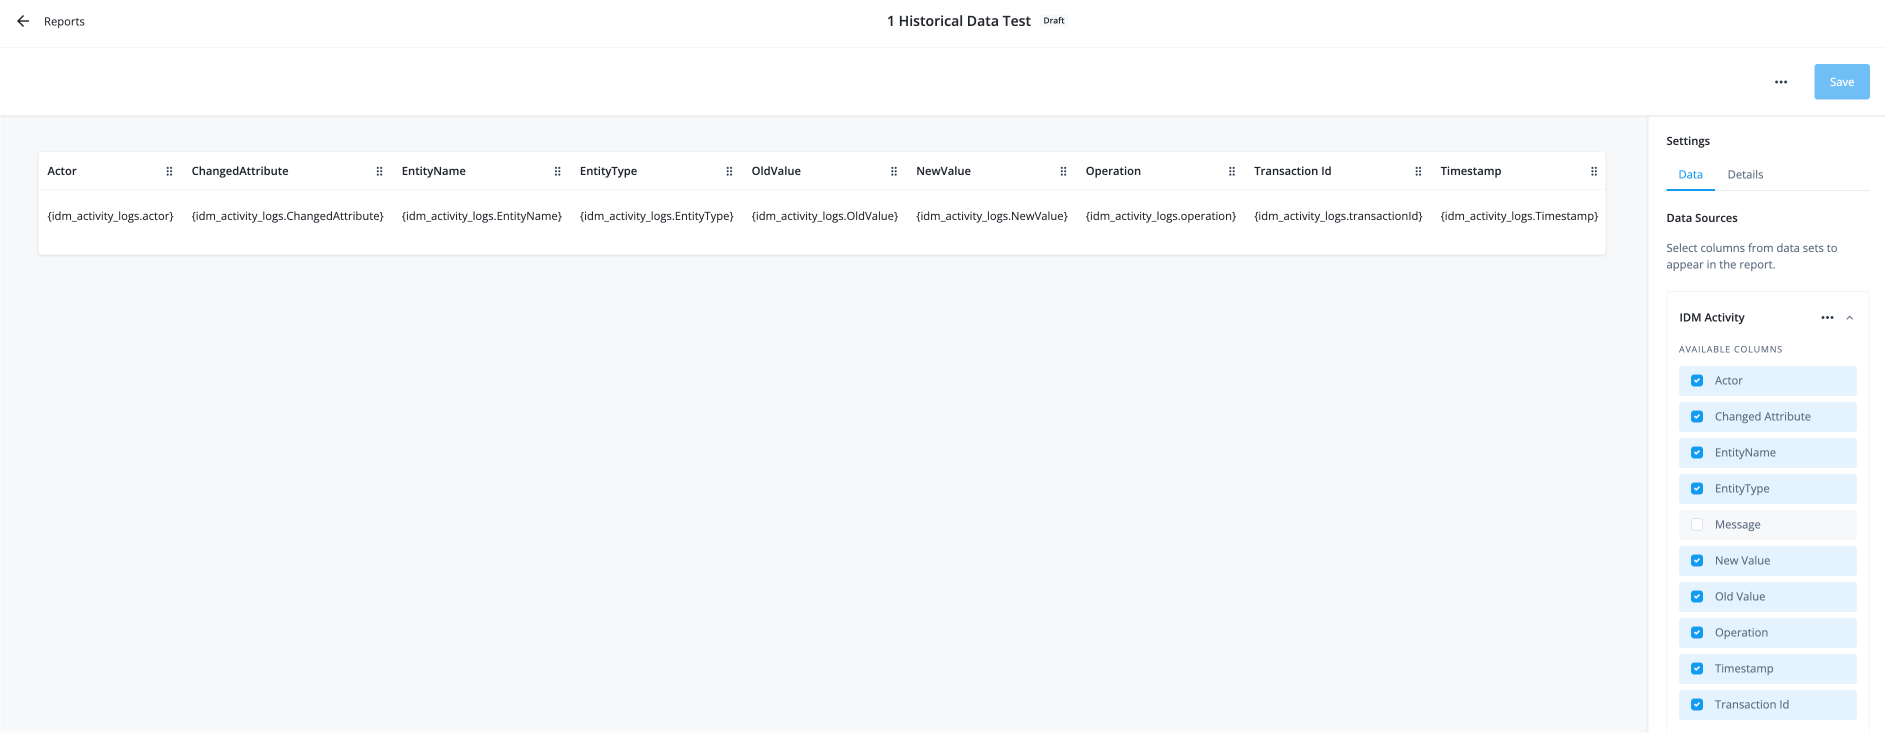
-
-
Limit the report results to a specific time range by adding filters on the timestamp property and excluding automated processes:
-
In the right pane, scroll down to Add Filters and click .
-
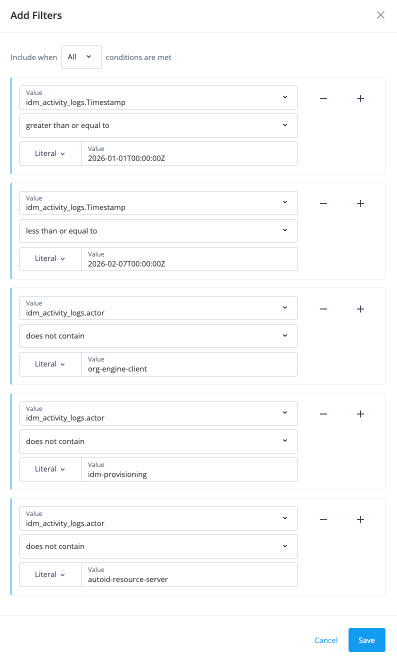
In the Add Filters modal, enter this information:
-
Value: Enter a value for the filter. For example, select idm_activity_logs.Timestamp.
-
Operator: Select an operator for the filter. For example, select greater than or equal to.
-
Literal: Select the Literal option.
-
Value: Enter the literal value. For example, enter 2026-01-01T00:00:00.
-
-
Click , and then click Add Rule.
-
Repeat the previous step to add another filter for the timestamp property to set an end date for the report results. For example, you can set the end date to the current date to show all account provisions from the start of the year.
-
Value: Enter a value for the filter. For example, select idm_activity_logs.Timestamp.
-
Operator: Select an operator for the filter. For example, select less than or equal to.
-
Literal: Select the Literal option.
-
Value: Enter the literal value. For example, enter 2026-02-07T00:00:00.
-
-
Repeat the previous step to add another filter to exclude some automated processes and service accounts. Use the does not contain operator with the
actorproperty to exclude any activity performed by specific actors, such as service accounts or automated processes that you don’t want to include in the report results.-
idm-provisioning:
idm-provisioningis an internal service account used to authenticate and securely provision user accounts within IDM (Identity Management). -
org-engine-client:
org-engine-clientis an OAuth 2.0 or OIDC application registration client. -
autoid-resource-server:
autoid-resource-serveris a resource server in an OAuth 2.0 flow.
-
-
Click Save.
-
-
On the report template, click Save in the top right.