Configure a Microsoft Azure tenant for MS Graph API email client
Use of the MS Graph API email client requires a properly configured Microsoft Azure tenant. The steps for configuring an Azure tenant should be used as an outline, as the specific options, menus, and features may have changed.
-
Navigate to Azure Active Directory | App registrations.
-
Create the Advanced Identity Cloud client application:
-
From the menu bar, click + New Registration.
-
On the Register an application page, enter the application Name, such as
my-email-client. -
For Supported account types, select the applicable option for your organization.
-
Click Register.
-
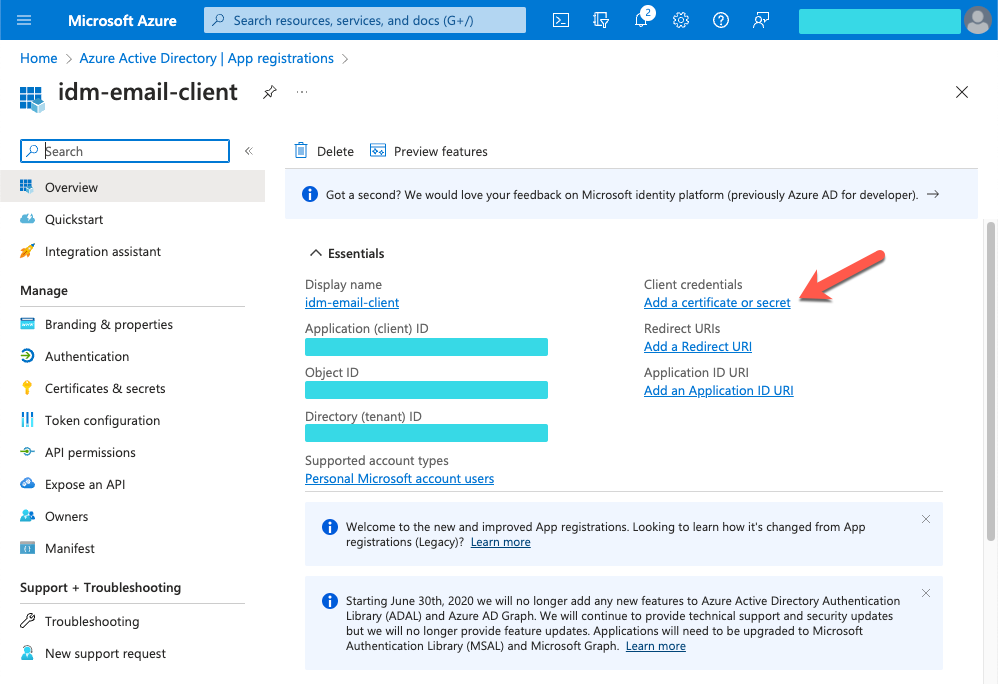
On the my-email-client page, from the main Essentials area, record the Application (client) ID.
This is the value for clientIdin theauthsettings of the email configuration. Learn more inoauth2properties.
-
-
Add a client secret:
-
On the my-email-client page, in the main Essentials area, click Add a certificate or secret.
Show Me
-
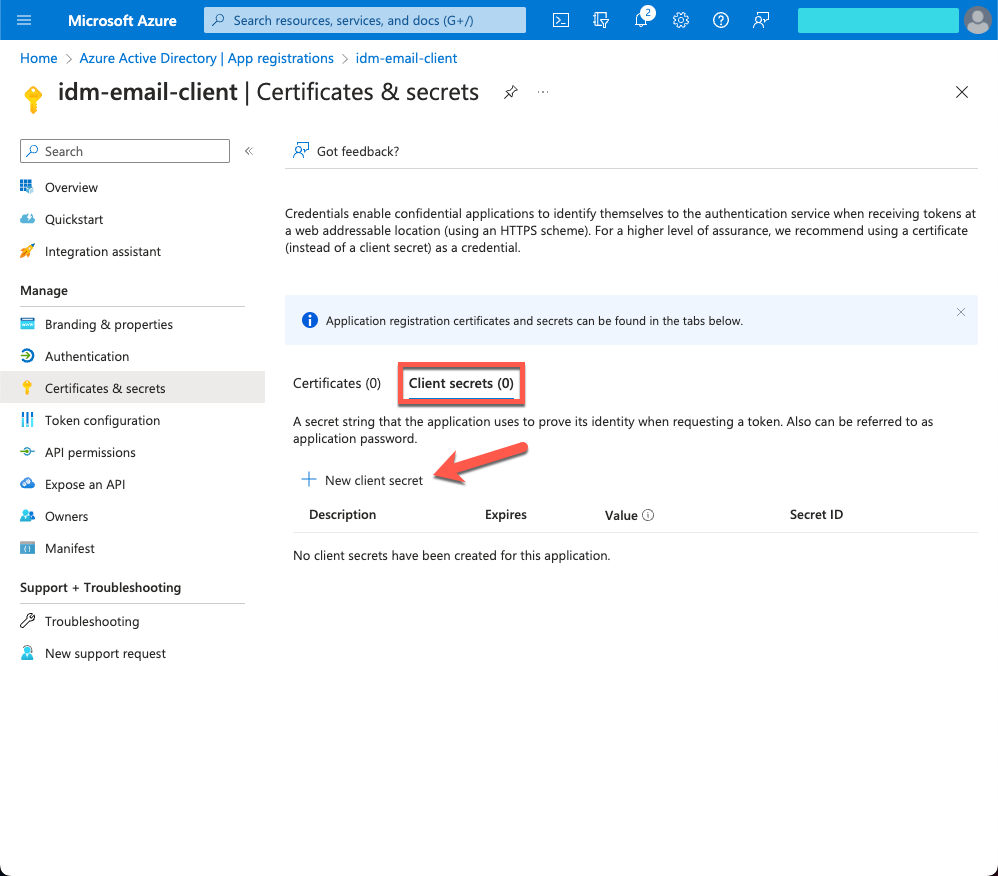
On the Certificates & secrets page, select the Client secrets tab, and click + New client secret.
Show Me
-
In the Add a client secret window, enter the details, and click Add.
-
Copy the Value and Secret ID to a secure place before leaving the Certificates & secrets page.
Use the secret Value for clientSecretin theauthsettings of the email configuration. Learn more inoauth2properties.
-
-
Add API permissions:
-
From the side menu, click API permissions.
-
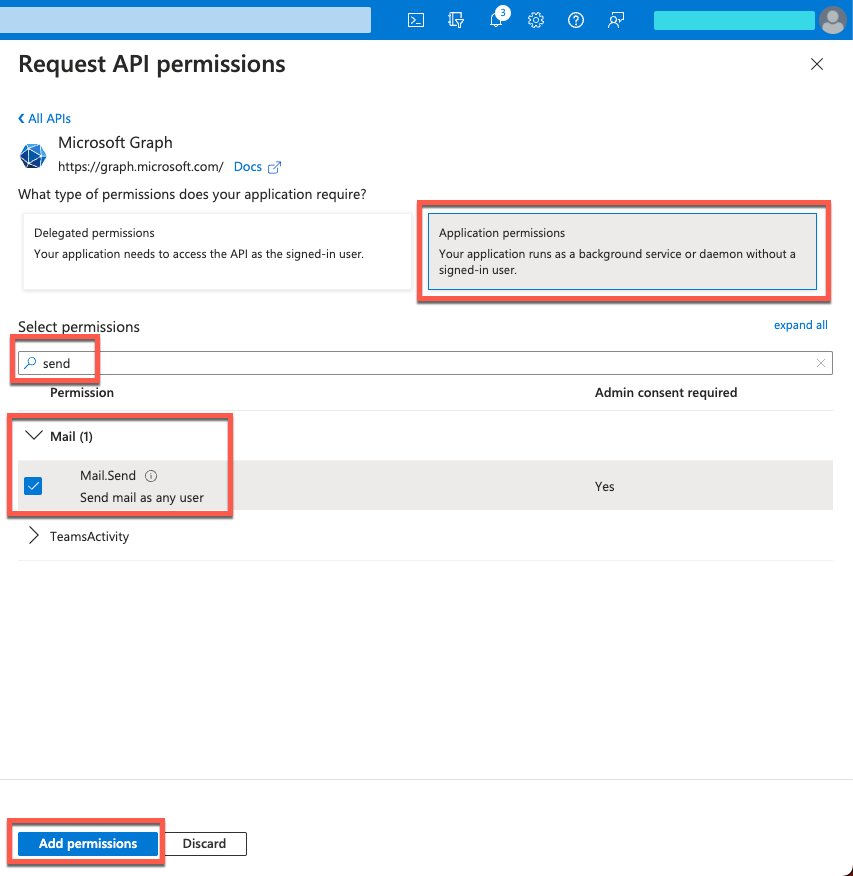
On the API permissions page, click + Add a permission.
-
In the Request API permissions windows, select the Microsoft APIs tab, and click Microsoft Graph.
-
In the What type of permissions… area, click Application permissions.
-
In the Select permissions search bar, type
send. -
Expand the Mail node, and select Mail.Send.
-
Click Add permissions.
Show Me
-