LDAP
The LDAP application template allows you to provision users and groups to an LDAP directory.
Register the application
-
In the Advanced Identity Cloud admin console, go to Applications, and click Browse App Catalog.
-
In the Browse App Catalog modal, select an application, and click Next.
-
Review the Application Integration information, and click Next.
-
In the Application Details window, specify the name, description, application owners, and logo for the application.
-
To make the application an Authoritative source of identity data, select the Authoritative check box. This option is not available for every application.
-
Click Create Application.
Configure the provisioner
-
In the Advanced Identity Cloud admin console, on the Provisioning tab, click Set up Provisioning:
-
If setting up provisioning for the first time:
-
If you have not configured a remote server, click New Connector Server and follow the steps to create a server.
-
If you configured one remote server, it is automatically selected.
-
If you configured multiple remote servers, choose a server.
-
-
When editing existing settings in the Connection area, click Settings.
-
-
Configure the following fields:
Field Description Host Name or IP
The hostname or IP address for the LDAP domain controller.
Port
The port for connecting to the LDAP domain controller.
Use SSL
Enable to use SSL to connect to the LDAP domain controller.
Login Account DN
The distinguished name for the login account.
Password
The password for the login account.
Base DNs for LDAP users and groups
The base context for LDAP users and groups.
-
Click Show advanced settings.
-
To filter users and groups:
-
To only connect a subset of users by applying a query filter based on user attributes, enable Filter users.
-
To apply a filter to users manually:
-
Choose to assign to if All or Any conditions are met.
-
Set the conditions for assigning filters.
-
In the User Object Classes field, enter the names of object classes a user must have for inclusion.
-
-
To use a query to apply a filter to users:
-
Click Advanced Editor.
-
Edit the query code.
-
-
-
To only connect a subset of groups by applying a query filter based on user attributes, enable Filter groups.
-
To apply a filter to groups manually:
-
Choose to assign to if All or Any conditions are met.
-
Set the conditions for assigning filters.
-
-
To filter users and groups:
-
Click Advanced Editor.
-
Edit the query code.
-
-
-
-
To use block-based LDAP controls, enable Use Block-based controls.
-
To use paged results control, enable Use Paged Results control. If Use Block-based controls is enabled, specifies the LDAP Paged Results control is preferred over the VLV control when retrieving entries. The default value is
false. -
To set the change log attribute in the change log entry, set the Change Number Attribute field. The default value is
changeNumber. -
To set the object classes that Advanced Identity Cloud uses as filters when synchronizing, add classes to the Object Classes to synchronize field. The default value is
inetOrgPerson. -
To set the sort attribute to use VLV indexes on the resource, set the Virtual List View (VLV) Sort Attribute field. The default value is
uid. -
To set the name of the attribute that holds the password, set the Password Attribute field. The default value is
userPassword. -
To have the LDAP provisioner read the schema from the server, enable Read Schema. The default value is
true. -
To have Advanced Identity Cloud modify group membership when entries are renamed or deleted, enable Maintain LDAP Group Membership. The default value is
false. -
To specify the group attribute to update with the DN of newly added users, set Group Member Attribute field. The default value is
uniqueMember. -
To specify the name of the attribute that maps to the OpenICF UID attribute, set UID Attribute field. The default value is
entryUUID. -
To use timestamps for liveSync operations instead of the changelog, select Timestamp for Sync Token.
-
To synchronize only the modified properties on a target resource, select Exclude Unmodified.
-
Set any of the following options:
Pool configuration Field Description Max idle and active container instances
The maximum number of idle and active container instances. The default value is
10.Max Idle Connector Instances
The maximum number of idle connector instances. The default value is
10.Set Timeout Period
Select to enable a timeout period for the connection. After enabling, configure the following:
-
Timeout period (ms): The timeout period in milliseconds.
Set Minimum Idle Time
Select to set a minimum time (in milliseconds) before an idle object is removed. After enabling, configure the following:
-
Min idle time (ms): The minimum idle time in milliseconds.
Min Idle Instances
The minimum number of idle connector instances.
Result Handler configuration Field Description Enable for connectors with the attribute normalizer interface
Enables the attribute normalizer interface for supported connectors.
Enable local filtering/search features
Enables local filtering and search capabilities.
Enable case insensitive filter
Configures filters to ignore case sensitivity.
Enable configuration of search attributes; disable for local connectors
Enables search attribute configuration. Disable this option for local connectors.
-
In the Operation Timeouts (ms) area, select the operations to enforce timeouts on and enter the duration in milliseconds.
Available operations include Create, Validate, Test, Enable a Script on the Connector, Schema, Delete, Update, Sync, Authenticate, Get, Enable a Script on the Target, and Search.
-
In the Operation Rate Limits area, select the operations to enforce rate limits on.
You can enforce limits on specific operations, including Create, Validate, Test, Script on Connector, Schema, Delete, Update, Sync, Authenticate, Get, Script on Target, and Search.
For each selected operation, configure the following fields:
Field Description Request Limit
Requests allowed over time.
Request Period
Limit resets after this time (ms).
Request Timeout
Time before exception thrown (ms).
-
-
Click Connect.
-
Verify the information in the Details tab.
Configure provisioning and reconciliation resources
Use the object type list to select a provisioning and reconciliation resource, such as Account.
The selected object type determines the side tabs that display, as each resource has different provisioning and reconciliation requirements.
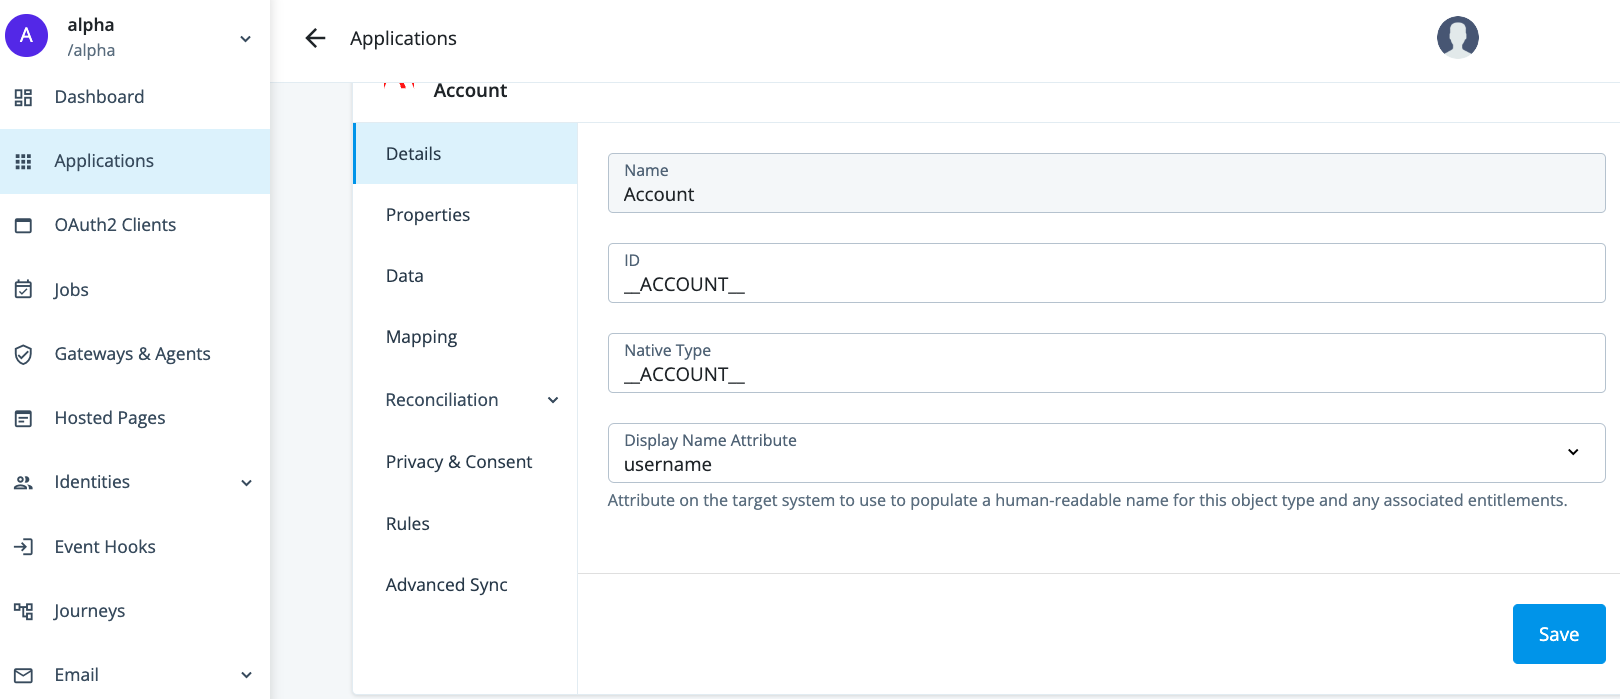
| Provisioning side tab | Description | Related sections |
|---|---|---|
Details |
View and manage an application, including name, ID, and native type. |
Select the specific application from Provision settings for an application. |
Properties |
View and manage properties for the selected object type. |
|
Data |
View data about the selected object type. |
|
Mapping |
View and manage mappings from the Advanced Identity Cloud admin console properties to external system properties and from external system properties to the Advanced Identity Cloud admin console properties. |
|
Reconciliation |
Preview mappings on target applications between external systems and the Advanced Identity Cloud admin console, and reconcile the data between the two systems. View and manage rules for the users and groups that use your application. View and manage schedules for Full and Incremental reconciliation. |
|
Privacy & Consent |
Manage end-user data sharing and synchronization. |
|
Rules |
View and manage provisioning rules for mappings between Advanced Identity Cloud and a target application. |
|
Advanced Sync |
Create and manage mappings between a managed object type and an application or between applications. |