Manage scopes
Identity Governance allows you to centrally manage end-user access to resources across your company using scopes. Administrators can create and manage filtering rules to ensure users have access to only the resource required.
View scopes
-
In the Advanced Identity Cloud admin console, click Governance > Scopes. The page appears with a list of scopes. If no scopes are present, the page displays a New Scopes button.
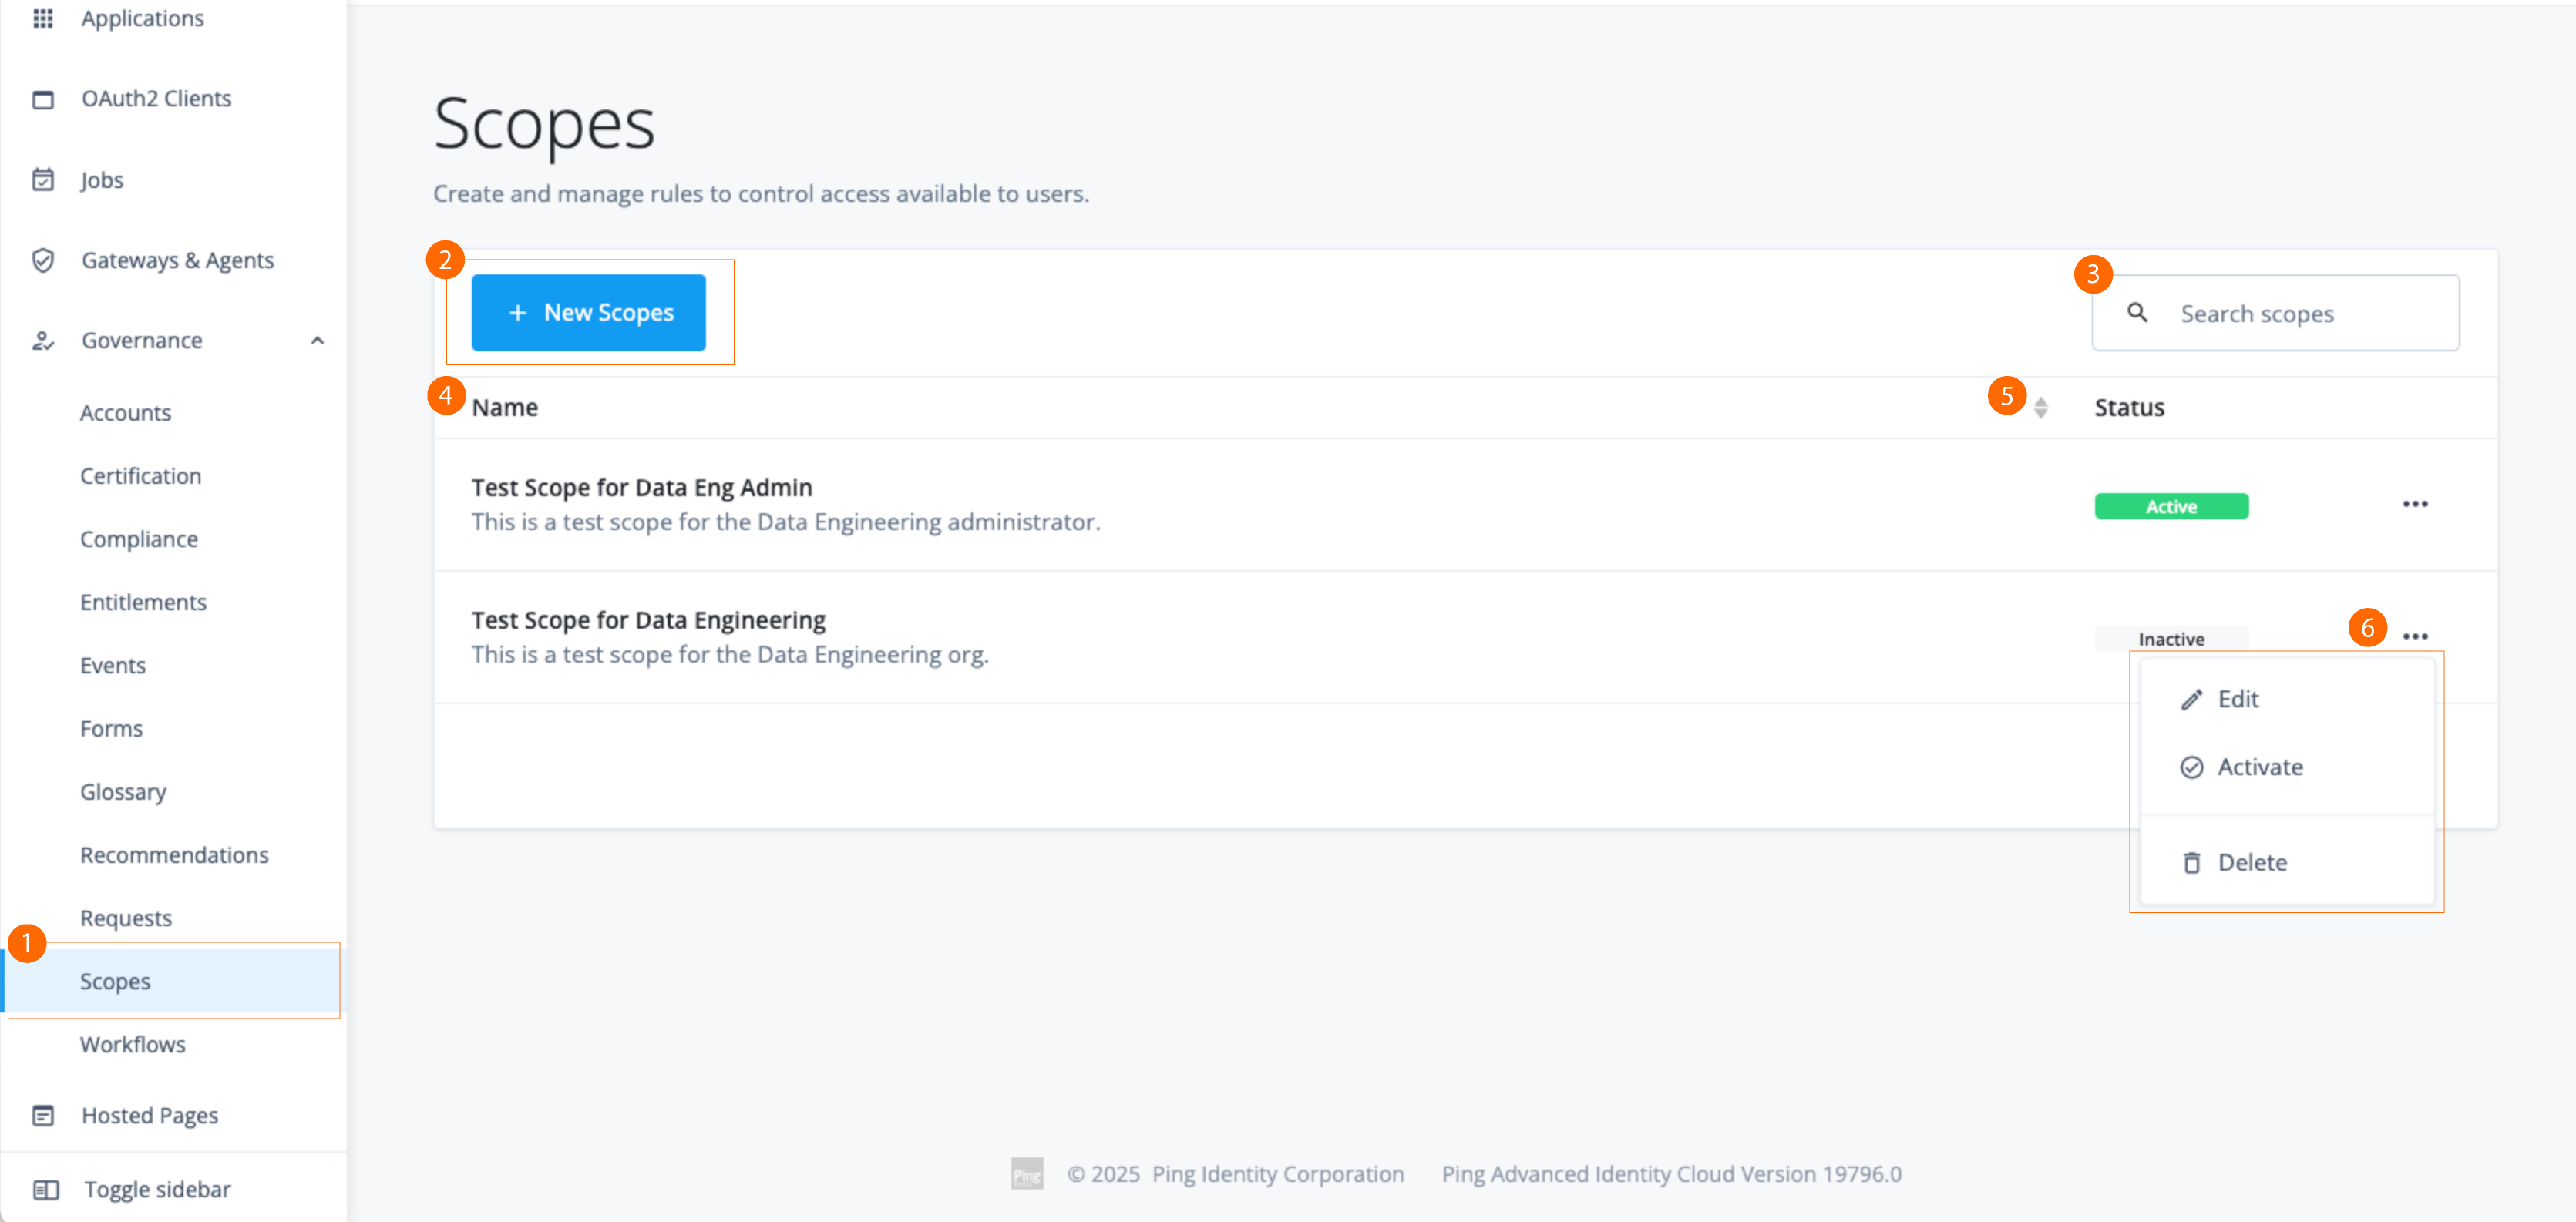
-
1 Click the New Policy button to add a new policy.
-
2 Search scopes: Search by scope name, status, or description (case-insensitive).
-
3 Name: Name of the policy. This is a required field.
-
4 Status: Current status of the scope, either
InactiveandActive. You can sort the list in ascending or descending order by clicking the up or down triangles. -
5 Ellipsis (): Click to edit, deactivate (if active) or activate (if inactive), or delete the scope.
-
Add scopes
-
In the Advanced Identity Cloud admin console, click Governance > Scopes.
-
Click the New Scopes.
-
On the New Scope Details page, enter the scope details, and then click Next:
Field Description Name
Enter a name for your scope. Follow any naming convention established by your company.
Description (optional)
Enter a general description for the new scope.
-
On the New Scope Applies to page, do the following:
-
Use the filter to define which users should have this scope. Select or enter the properties, and then click to add the filter.
Field Description Select users if
AnyorAllconditions are met.Select either Any or All.
Select a property
Select any custom or out-of-the-box user attribute.
Operator
Values include:
-
contains
-
does not contain
-
is
-
is not
-
starts with
-
ends with
Attribute Value
Enter an attribute.
-
-
Click Next to continue.
-
-
On the New Scope Access page, select the applications, entitlements, roles, or user resources that end users can access:
Field Description Applications
Select the checkbox to allow access to applications, and then select one of the following:
-
All Applications
-
Applications matching a filter. The page displays a filter to match the applications.
Select the permissions to grant:
-
View Applications
-
Create Applications
Entitlements
Select the checkbox to allow access to entitlements, and then select one of the following:
-
All Entitlements
-
Entitlements matching a filter. The page displays a filter to match the entitlements.
Select the permissions to grant:
-
View Entitlements
-
Modify Entitlements
-
View Grants
Roles
Select the checkbox to allow access to roles, and then select one of the following:
-
All Roles
-
Roles matching a filter. The page displays a filter to match the roles.
Select the permissions to grant:
-
View Roles
-
Create Roles
-
Modify Role
-
Publish Roles
-
Delete Role
Users
Select the checkbox to allow access to users, and then use the filter to define which users can be accessed:
-
Select whether Any or All conditions are met.
-
Select a property and operator, enter an attribute value, and then click to add the filter.
Select the permissions to grant:
-
View Users
-
Create Users
-
Modify User
-
Delete User
-
View Grants
-
Click Save. The Scopes page displays the new scope.
-
Edit scopes
-
In the Advanced Identity Cloud admin console, click Governance > Scopes.
-
On the Scopes page, click the ellipsis () for a policy, and then click Edit to change any aspect of a scope.
-
Click Save to keep your changes.
-
Click Deactivate to disable the scope, or click Activate to enable the scope for use.
-
Click Remove to remove the rule from the policy.
-