Manage self-service promotions using the admin console
You can find background information on self-service promotions in PingOne Advanced Identity Cloud in Introduction to self-service promotions.
Lower and upper environments
Before you run a promotion using the admin console, you must know which tenant environment is the lower environment and which is the upper environment. Learn more in Lower and upper environments.
The admin console uses a push model to promote configuration, so you must run a promotion from the admin console in the lower environment. However, you must also have a tenant administrator account in the upper environment because the admin console in the lower environment needs to authenticate to the upper environment.
When a promotion is complete, you can view a report in the lower environment. The report for the most recent promotion includes an option to roll back the promotion. You can also view reports in the upper environment.
Promotions functionality in the lower environment
In the lower environment, the admin console lets you:
-
View changes awaiting promotion to the upper environment
-
Run a dry-run promotion of changes to the upper environment
-
Run a promotion of changes to the upper environment
-
Roll back a promotion from the upper environment
-
View a history of promotions and rollbacks related to the upper environment
This lower environment functionality exists in your development and staging environments only. It doesn’t exist in your production environment because that environment doesn’t send promotions to another environment.
View changes awaiting promotion to the upper environment
-
In the Advanced Identity Cloud admin console of the lower environment, open the TENANT menu (upper right).
-
Click Promote configuration to open the Promotion tab in the Tenant Settings page.
-
The Promotion tab shows the following information:
-
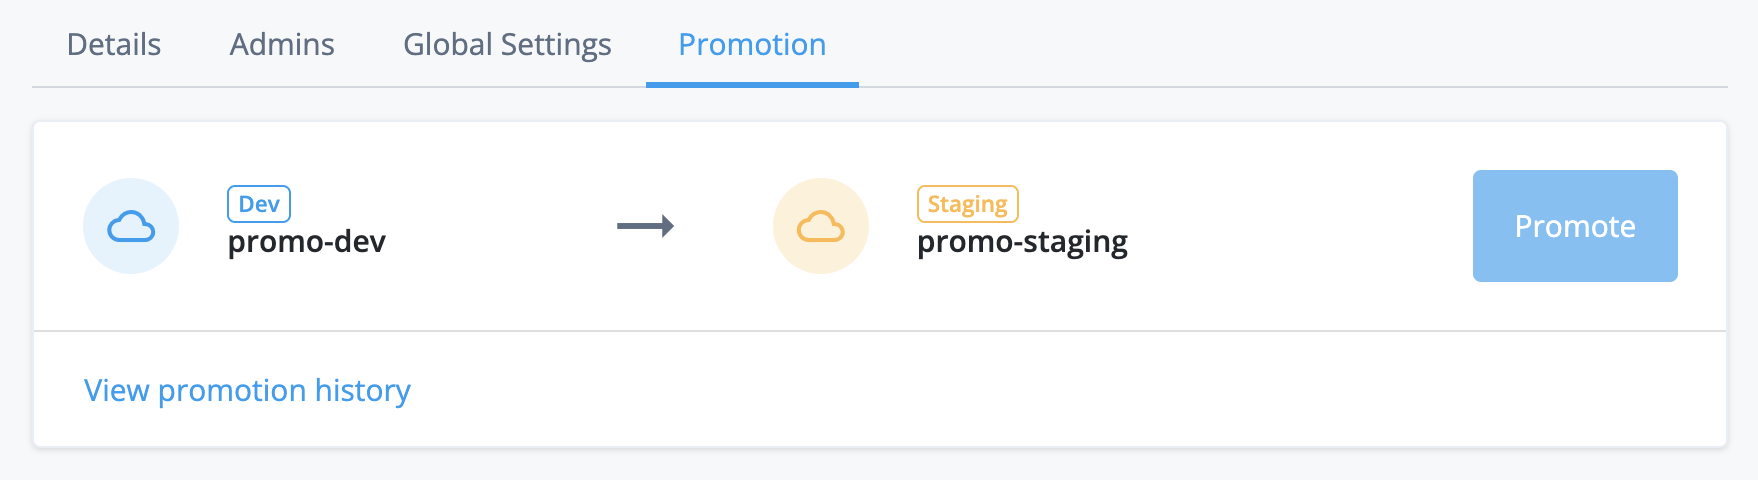
A summary of the promotion status for the environment:
-
Your development environment shows information about promoting from your development environment to your staging environment:
If you have a UAT[1] environment, your development environment promotes to your UAT environment instead. The revised promotion order is development → UAT → staging. If you have a second UAT environment, the revised promotion order is development → UAT → UAT2 → staging.
Learn more in Additional UAT environments.
-
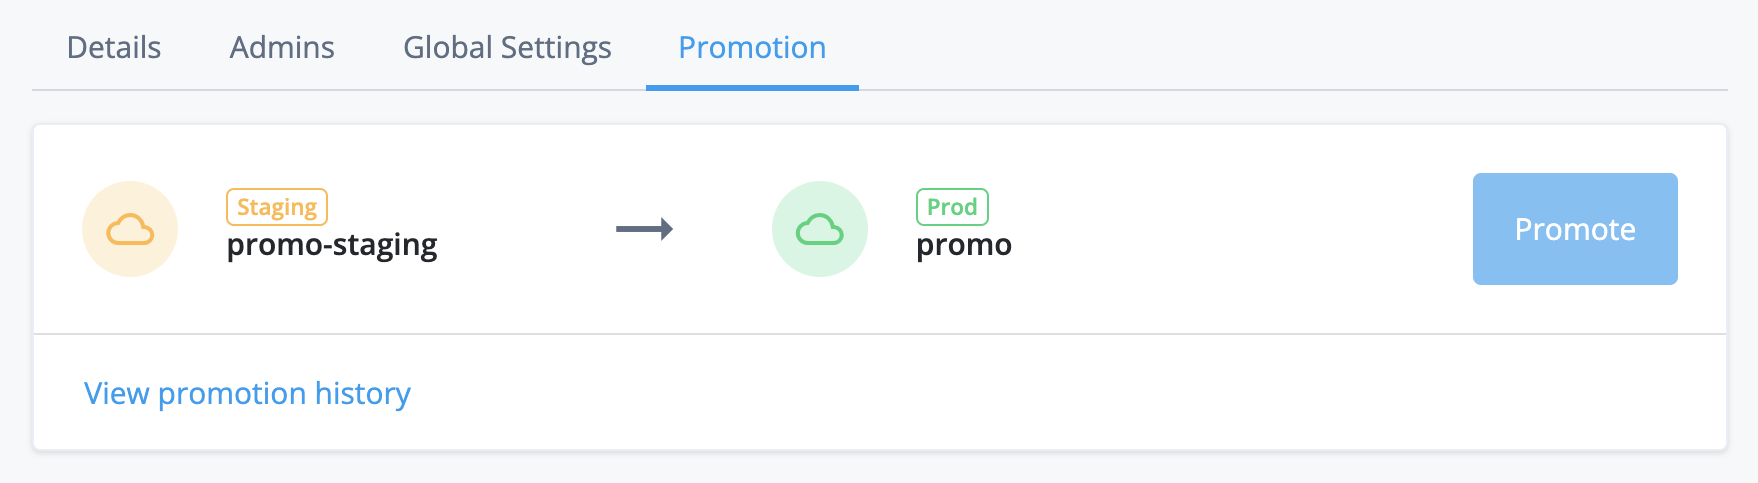
Your staging environment shows information about promoting from your staging environment to your production environment:
-
-
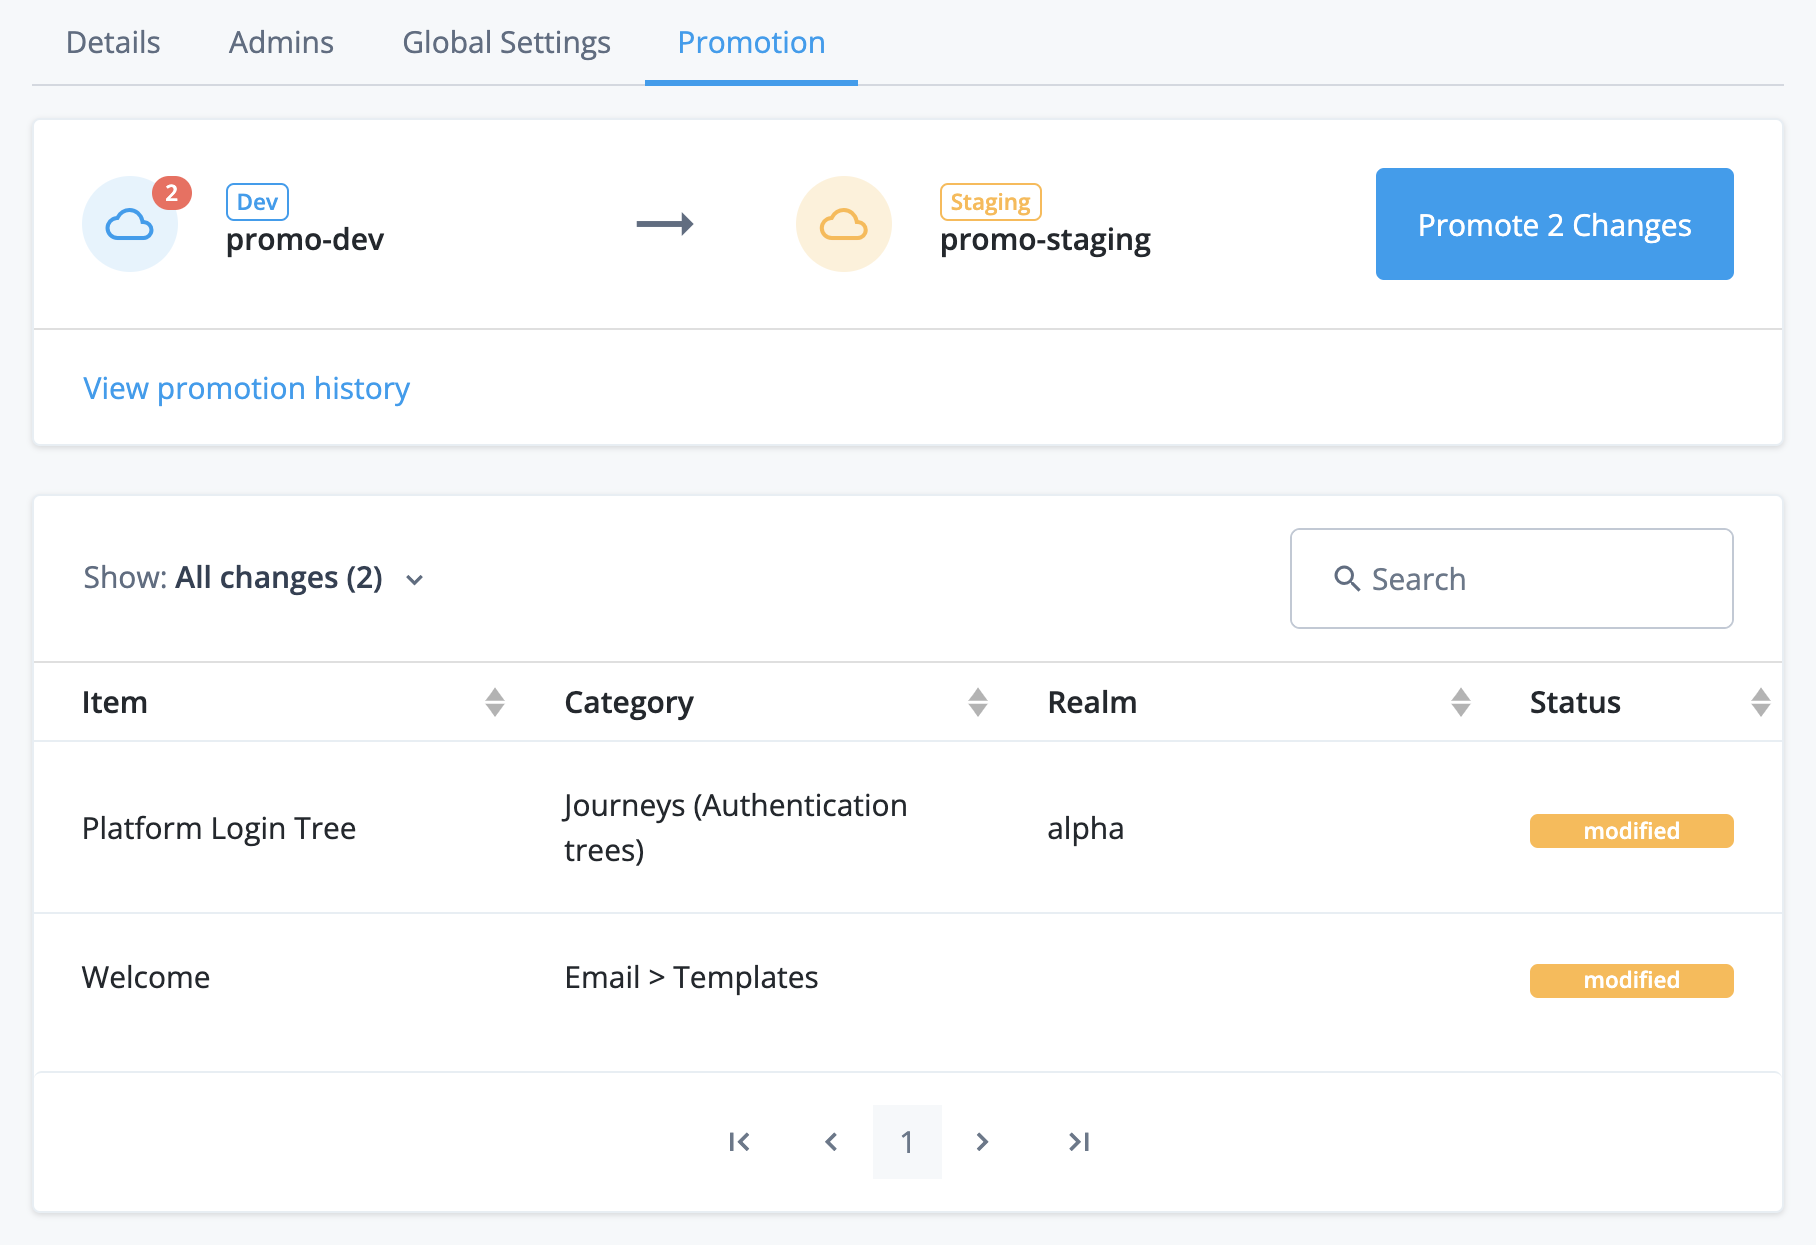
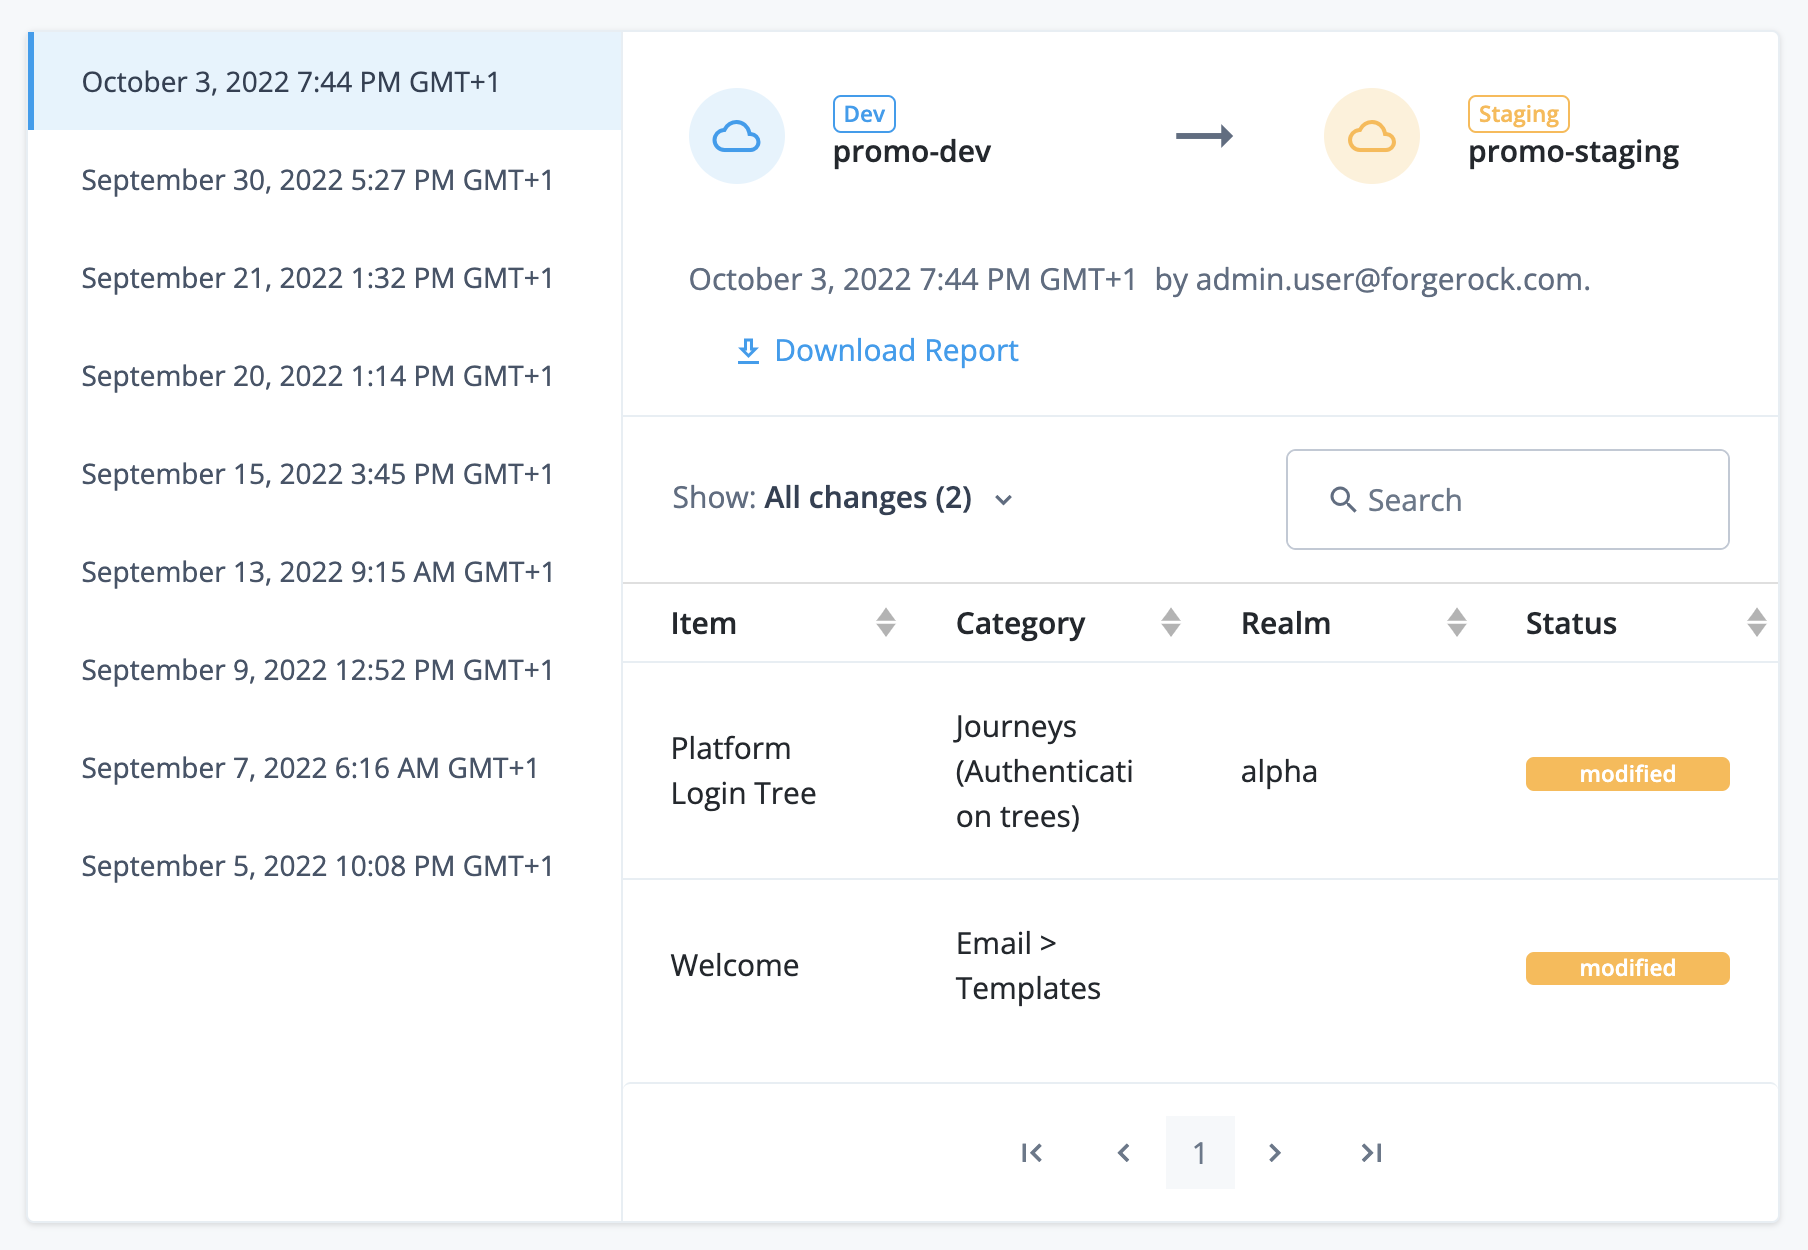
A summary of any changes to static configuration made by you or other tenant administrators.
For example, in the screenshot below, the admin console indicates that two configuration changes have been made, one to a journey and one to an email template:
-
Sign in to the upper environment
When you run a promotion, run a rollback, or view promotion history, the admin console in the lower environment shows a sign-in page for the upper environment. This lets the admin console in the lower environment authenticate to the upper environment using your upper environment tenant administrator account.
In your development environment, the sign-in page title is Sign in to Staging:

In your staging environment, the sign-in page title is Sign in to Production:

| If you have one or more UAT[1] environments, your development environment shows a sign-in page to your UAT environment instead. Learn more in Additional UAT environments. |
To sign in:
-
Check your browser settings:
-
Ensure your browser has third-party cookies enabled for your tenant domain:
-
For Chrome, follow the instructions under the "Change your cookie settings" section in this support article: https://support.google.com/chrome/answer/95647.
-
For other supported browsers, consult the browser’s documentation.
-
-
Ensure your browser is not in incognito mode.
If your browser doesn’t have third-party cookies enabled or is in incognito mode, authentication to the upper environment fails without an error message and redisplays the sign-in page. -
-
Click Sign in to Staging (from your development environment) or Sign in to Production (from your staging environment) to open a pop-up browser window showing the sign-in page for the upper environment:
-
Enter the credentials of your tenant administrator account for the upper environment.
-
Click Next.
-
Complete the authentication journey to the upper environment:
-
If 2-step verification is already enabled for your tenant administrator account, follow the UI prompts to provide your second authentication factor.
-
If 2-step verification isn’t yet enabled for your tenant administrator account:
-
Click Set up.
-
Follow the UI prompts to set up a second authentication factor for your tenant administrator account.
-
Follow the UI prompts to provide your second authentication factor.
-
-
-
After you have successfully authenticated, the pop-up browser window closes automatically.
-
Promote changes to the upper environment
|
The deployment of the release upgrade to your production environment is triggered by the first promotion to that environment during the 7-day deferral period. This means that you must pause promotions to your production environment until you have validated the new release in your lower environments. |
-
In the Advanced Identity Cloud admin console of the lower environment, open the TENANT menu (upper right)
-
Click Promote configuration.
-
Review the static configuration changes that are awaiting promotion. Learn more in View changes awaiting promotion to the upper environment.
If there are any scripts awaiting promotion, ensure that they do not emit any personally identifiable information (PII) of your end users into Advanced Identity Cloud logs.
Ping Identity recommends that you establish a review and testing process for all scripts to prevent PII leaking out of your Advanced Identity Cloud tenant environments.
-
Choose one of the following promotion options:
-
Click Dry Run to perform a dry-run promotion of the changes to the upper environment. This lets you identify potential problems with missing ESVs or encrypted secrets without promoting any changes to the upper environment.
-
Click Promote n Changes to run a normal promotion.
-
-
If the admin console shows a sign-in page for the upper environment, follow the steps in Sign in to the upper environment.
-
Follow the instructions in the appropriate tab:
-
Normal promotion
-
Dry-run promotion
In the Lock Tenants? modal, click Lock and Continue to lock the lower and upper environments.
Show lock tenants modal
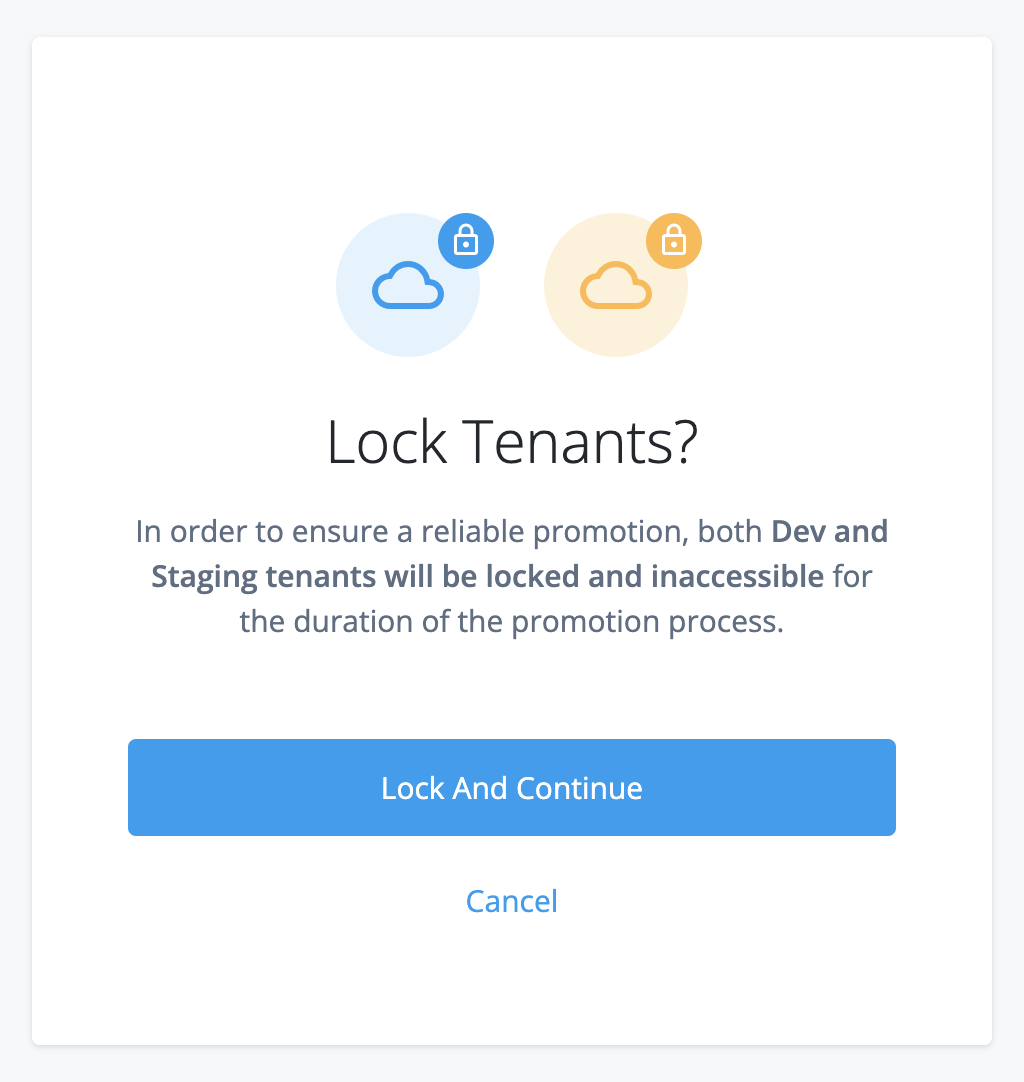
Allow 1–2 minutes for the locking process to complete. When the environments are locked, the admin console has restricted functionality.
In the Lock Tenants? modal, click Lock and Start Dry Run to lock the lower and upper environments.
Allow 1–2 minutes for the locking process to complete. When the environments are locked, the admin console has restricted functionality.
Locking an environment prevents configuration changes that could disrupt a promotion, a dry-run promotion, or a rollback; however, all authentication flows continue to work as normal.
-
-
Follow the instructions in the appropriate tab:
-
Normal promotion
-
Dry-run promotion
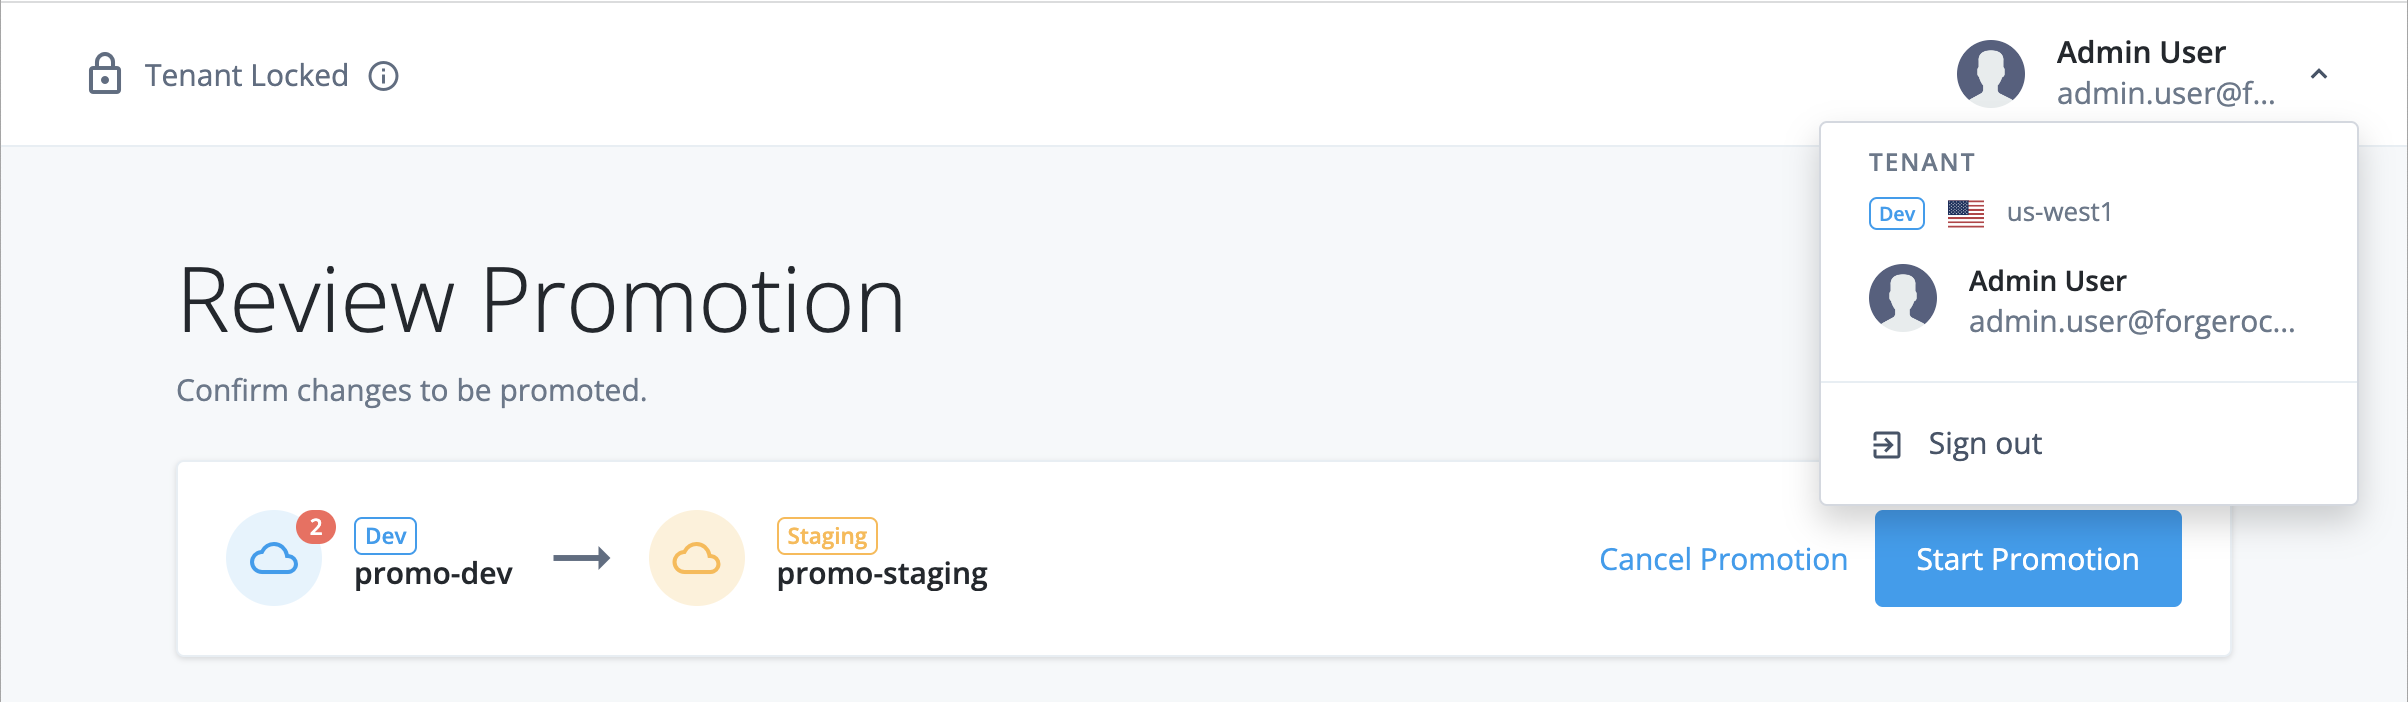
In the Review Promotion page, check the static configuration changes that are awaiting promotion:
-
If you want to cancel the promotion, click Cancel Promotion.
This unlocks the lower and upper environments. Allow 1 - 2 minutes for the unlocking process to complete.
-
If you want to proceed with the promotion:
-
Click Start Promotion
-
In the Start Promotion? modal:
-
If your static configuration contains directly embedded encrypted secrets that aren’t yet stored in ESVs, select Ignore Encrypted Secrets to bypass the integrity check for encrypted secrets.
-
Click Start Promotion again.
-
This promotes the static configuration changes from the lower environment to the upper environment. At the end of the promotion process, Advanced Identity Cloud services are restarted in the upper environment, and both environments are automatically unlocked. Allow 10 - 45 minutes for these combined processes to complete.
If the admin console shows an error message during the promotion process, refer to the following:
-
In the Review Dry Run page, check the static configuration changes that are awaiting promotion:
-
If you want to cancel the dry-run promotion, click Cancel Dry Run.
This unlocks the lower and upper environments. Allow 1 - 2 minutes for the unlocking process to complete.
-
If you want to proceed with the promotion:
-
Click Start Dry Run
-
In the Start Dry Run? modal:
-
If your static configuration contains directly embedded encrypted secrets that you have yet to store in ESVs, check Ignore Encrypted Secrets to bypass the integrity check for encrypted secrets.
-
Click Start Dry Run again.
-
At the end of the promotion process, Advanced Identity Cloud services are restarted in the upper environment, and both environments are automatically unlocked.
If the admin console shows an error message during the promotion process, refer to the following:
-
-
-
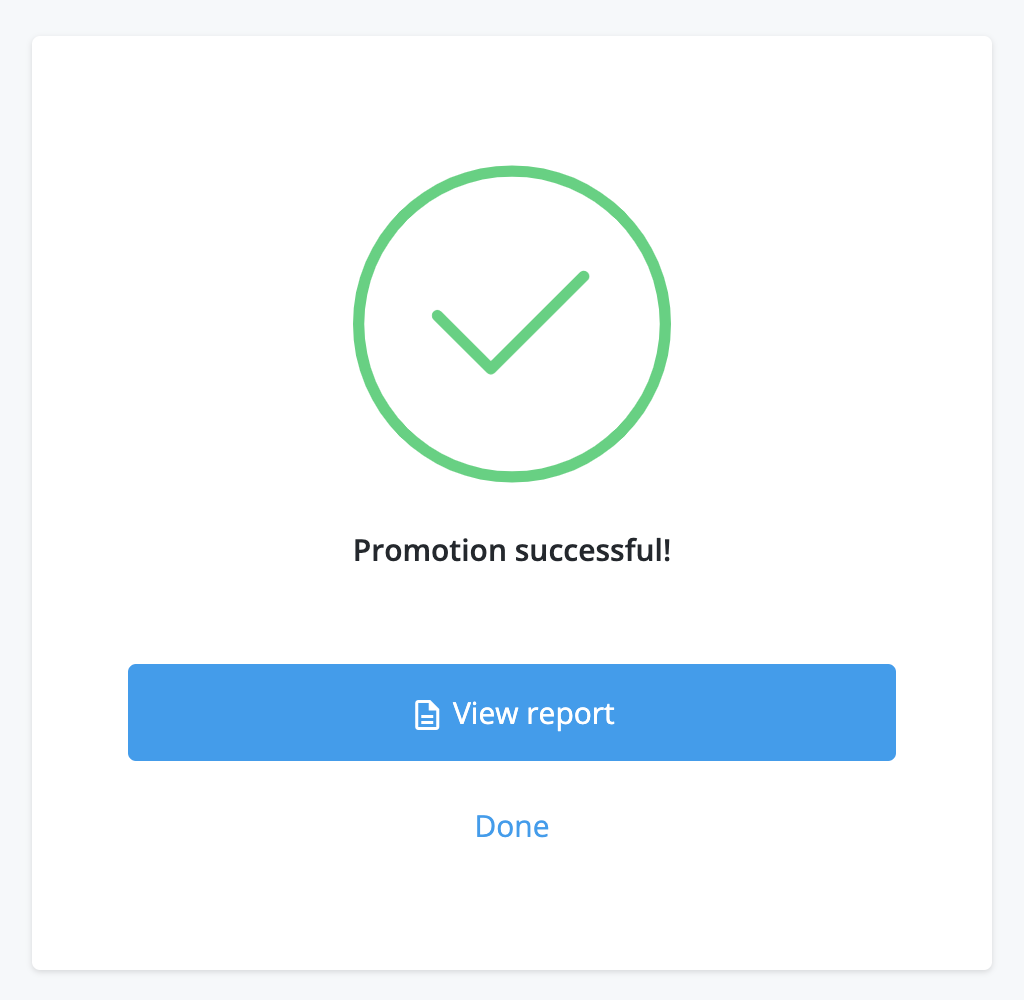
When the promotion completes, the UI displays a success modal:
-
Click View report to view the promotion immediately in the promotion history.
-
Click Done to return to the Promotion tab.
Show promotion success modal
-
View history of promotion and rollback activity related to the upper environment
You can view a history of promotion and rollback activities. This includes promotions and dry-run promotions from the lower environment to the upper environment and rollbacks initiated from the lower environment to revert a promotion in the upper environment.
-
In the Advanced Identity Cloud admin console of the lower environment, open the TENANT menu (upper right)
-
Click Promote configuration.
-
Click Promotion history.
-
If the admin console shows a sign-in page for the upper environment, follow the steps in Sign in to the upper environment.
-
In the Promotion History page, click a date in the vertical menu to review a promotion, dry-run promotion, or rollback report.
-
A promotion report shows changes moving from the lower environment to the upper environment. For the latest promotion, the report also displays a Rollback button:
Show promotion report
-
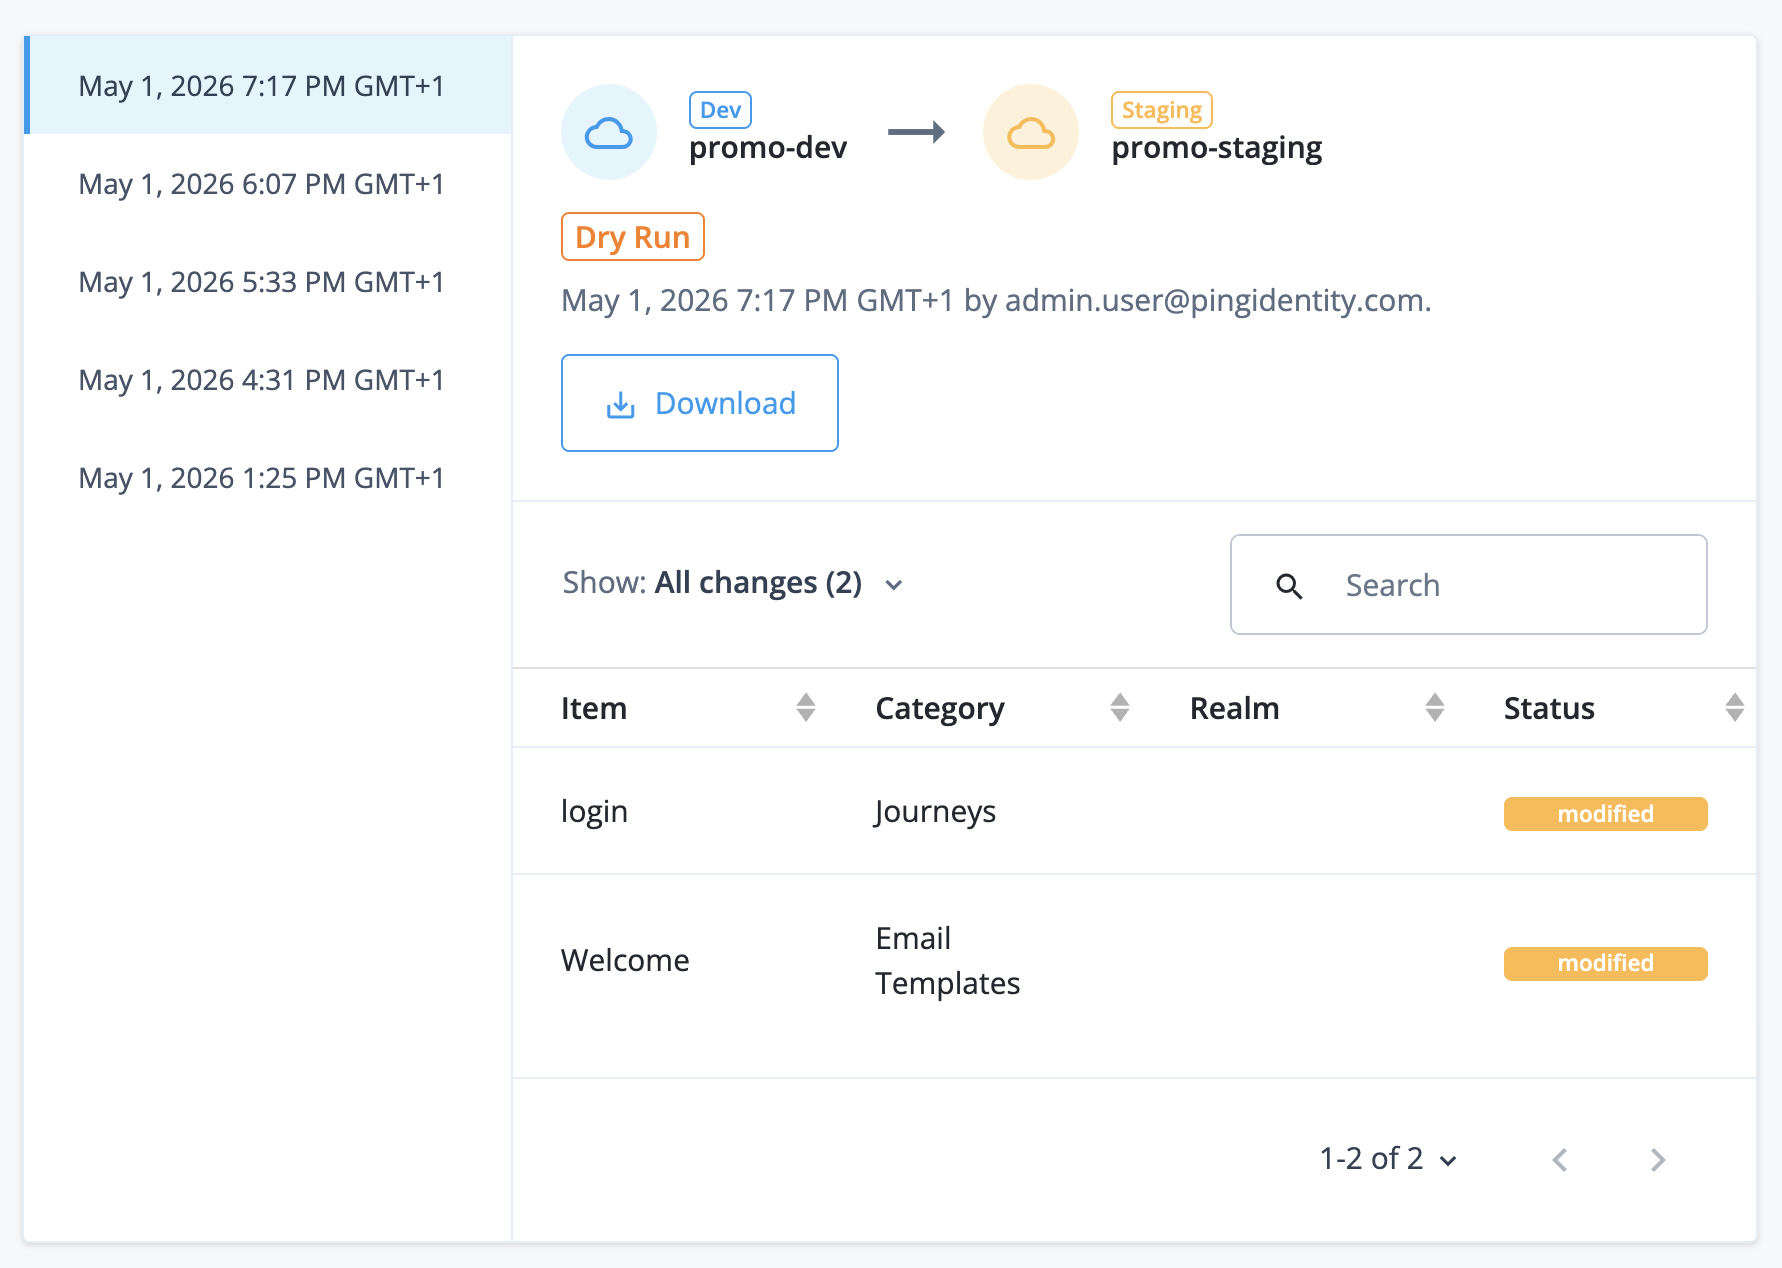
A dry-run promotion report shows changes moving from the lower environment to the upper environment. It displays a Dry Run badge below the environment information:
Show dry-run promotion report
-
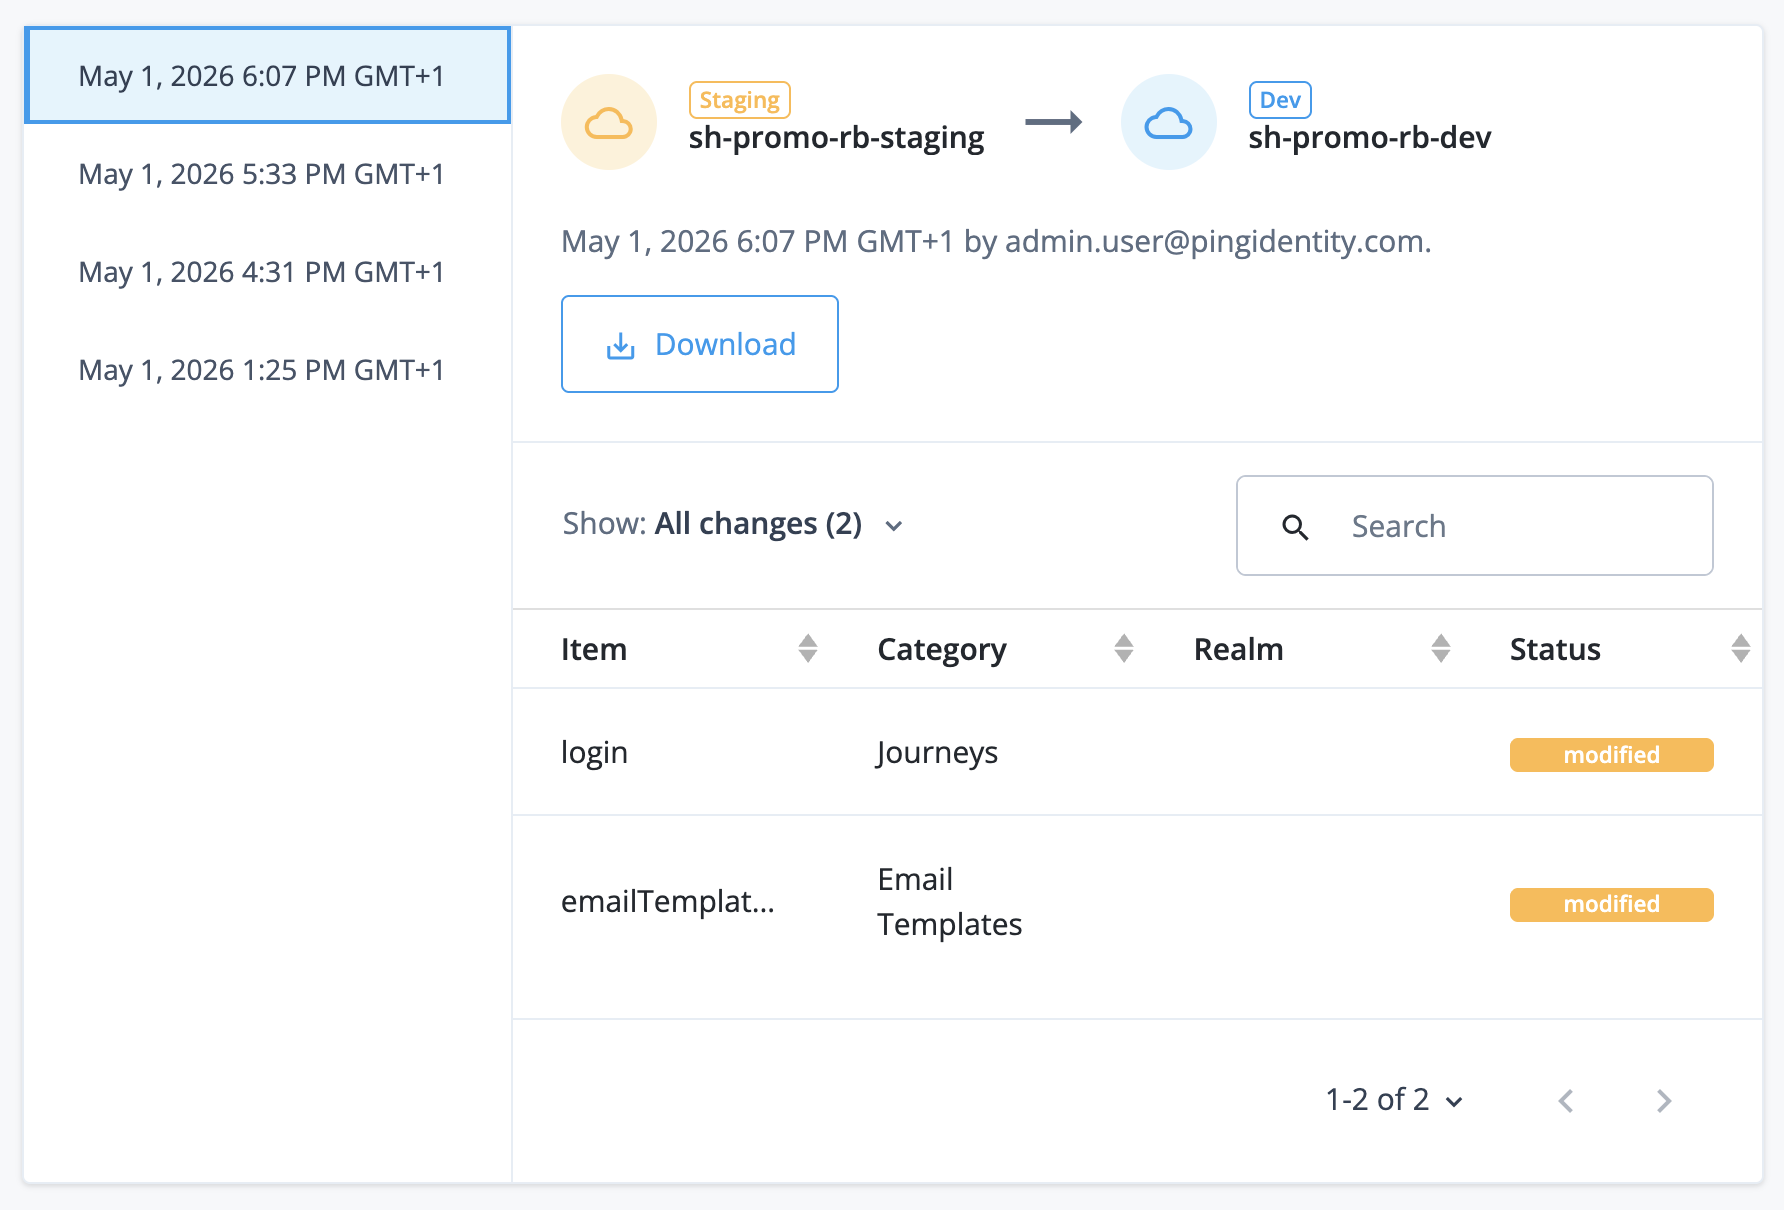
A rollback report shows changes moving from the upper environment back to the lower environment:
Show rollback report
-
Roll back a promotion from the upper environment
|
If you intend to run a rollback on your production environment, check with your team if the promotion you’re rolling back triggered a release upgrade. Learn why the release might have triggered a release upgrade in Release deferral.
|
-
In the Advanced Identity Cloud admin console of the lower environment, open the TENANT menu (upper right).
-
Click Promote configuration.
-
Click Promotion history.
-
If the admin console shows a sign-in page for the upper environment, follow the steps in Sign in to the upper environment.
-
In the Promotion History page, click the dates in the vertical menu to find the most recent promotion report.
-
Click Rollback for that promotion.
-
In the Lock Tenants? modal, click Lock and Continue to lock the lower and upper environments.
Allow 1–2 minutes for the locking process to complete. When the environments are locked, the admin console has restricted functionality.
Locking an environment prevents configuration changes that could disrupt a promotion, a dry-run promotion, or a rollback; however, all authentication flows continue to work as normal.
-
In the Review Rollback page, check the static configuration changes that are awaiting reversion.
-
If you want to cancel the rollback, click Cancel Rollback.
This unlocks the lower and upper environments. Allow 1 - 2 minutes for the unlocking process to complete.
-
If you want to proceed with the rollback:
-
Click Start Rollback
-
In the Start Rollback? modal, click Start Rollback again.
This rolls back the static configuration changes from the upper environment. At the end of the rollback process, Advanced Identity Cloud services are restarted in the upper environment, and both environments are automatically unlocked. Allow 10 - 45 minutes for these combined processes to complete.
If the admin console shows a Tenant locked error message during the rollback process, refer to Resolve tenant locked errors.
-
-
-
When the rollback completes, the UI displays a success modal:
-
Click View report to view the rollback immediately in the promotion history.
-
Click Done to return to the Promotion tab.
-
Promotions functionality in the upper environment
In the upper environment, the admin console lets you view a history of promotions received from the lower environment.
This upper environment functionality exists in your staging and production environments only. It doesn’t exist in your development environment because that environment doesn’t receive promotions from another environment.
View history of promotion and rollback activity related to the lower environment
-
In the Advanced Identity Cloud admin console of the upper environment, open the TENANT menu (upper right)
-
Click Tenant settings.
-
Click the Details tab.
-
Click View updates.
-
In the Tenant Updates page, click a promotion date in the left menu to review a report.
Learn more in the screenshot in View history of promotion and rollback activity related to the upper environment.
Restricted functionality
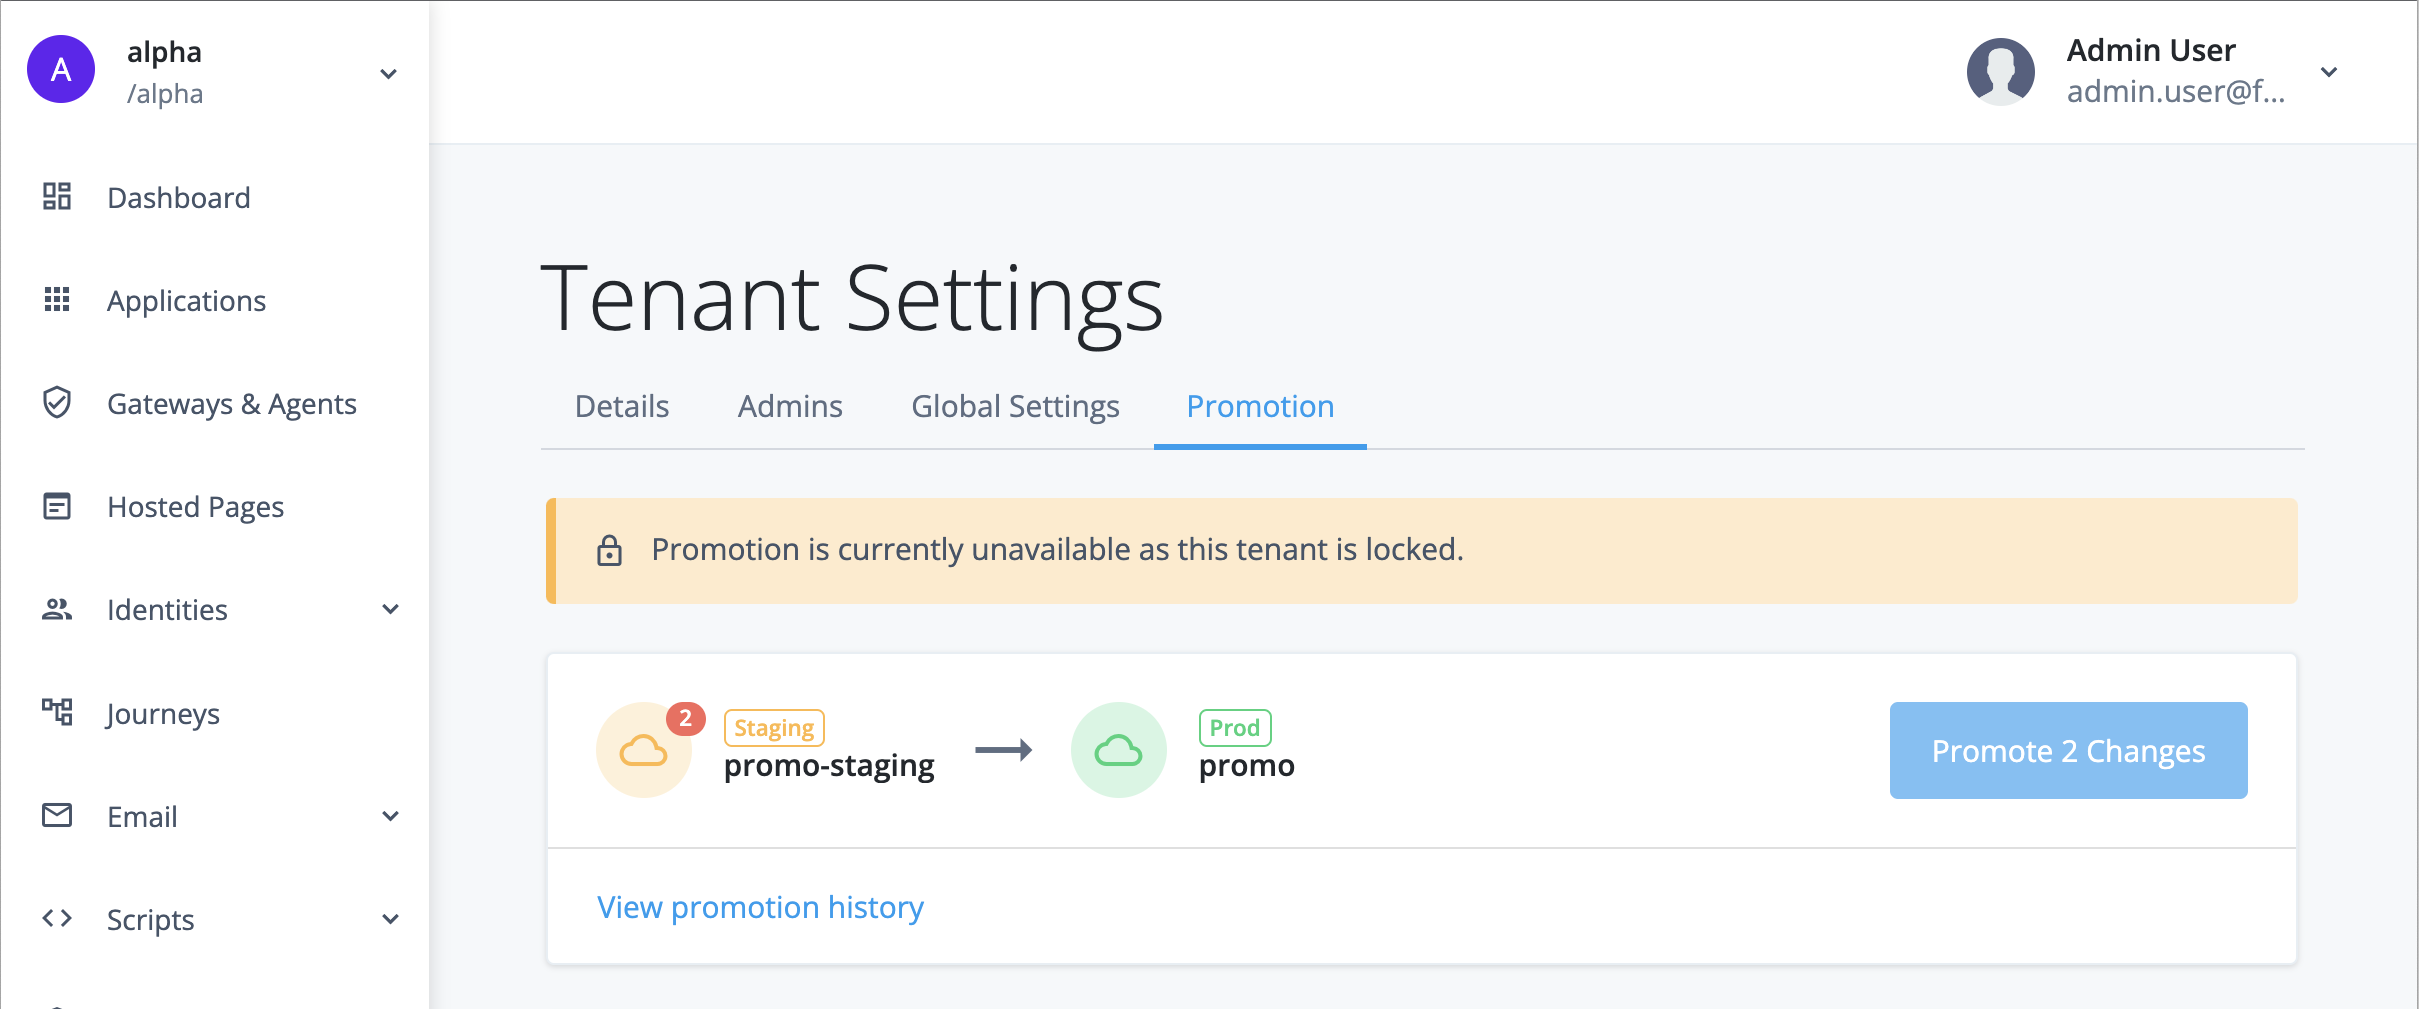
When you run a promotion and lock the upper and lower environments, the admin console restricts some functionality under Tenant Settings > Promotion until the environments are unlocked.
Restricted functionality in the lower environment
In the lower environment, the admin console has the following restricted functionality:
-
The left menu is hidden.
-
The page header shows Tenant Locked on the left.
-
The page header shows a restricted drop-down list on the right.
If you sign off and immediately sign back on, you are redirected back to Tenant Settings > Promotion.
Other tenant administrators who are signed on and working in other parts of the admin console do not have this restricted functionality. They are not redirected to Tenant Settings > Promotion unless they sign off and immediately sign back on while the upper and lower environments are locked.
Troubleshooting
Resolve failed integrity check for missing ESVs
When you run a promotion, the admin console shows an error message if you have missing ESVs:
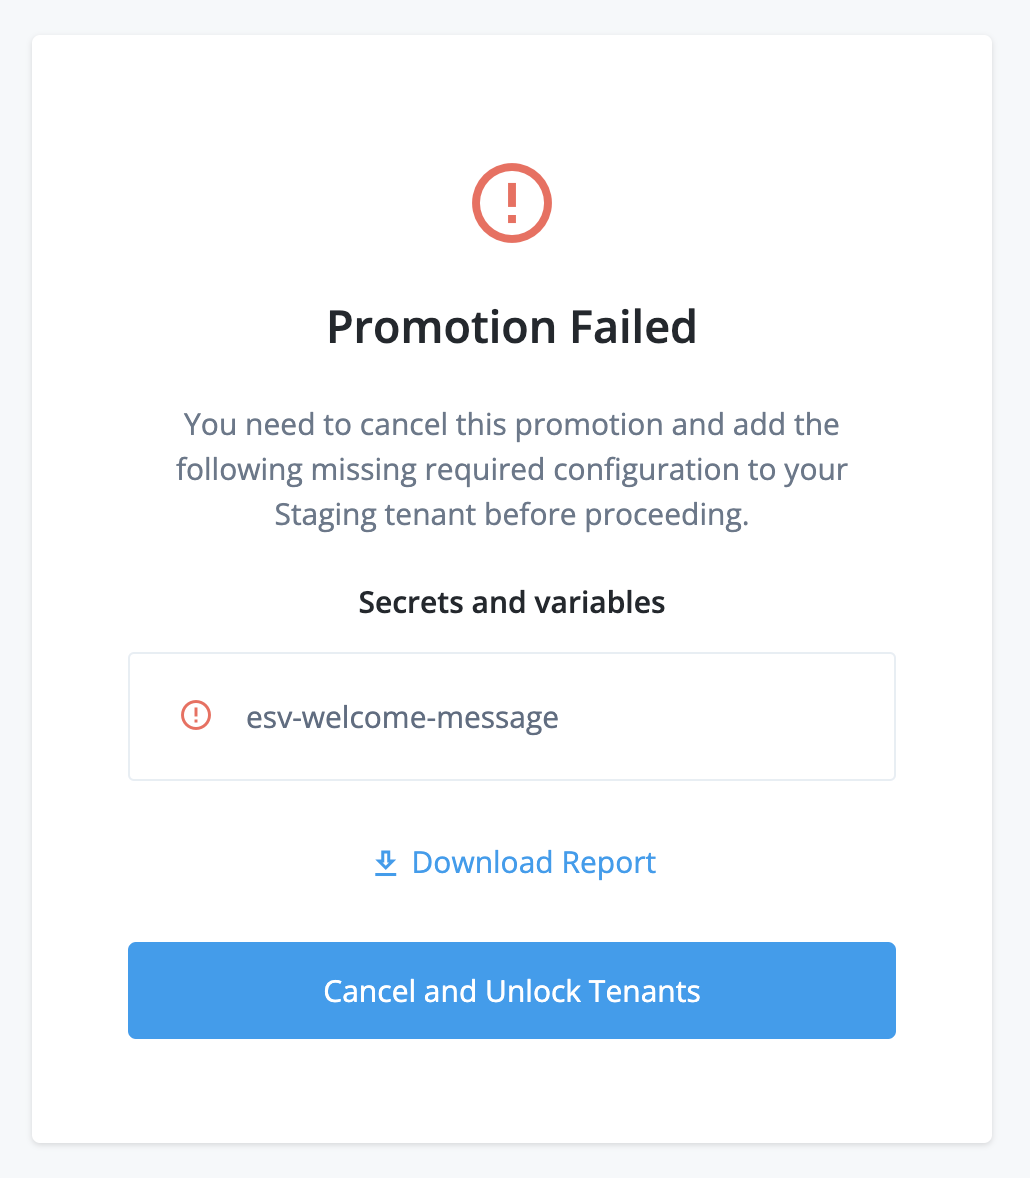
This happens when the upper environment failed an integrity check for missing ESVs.
To resolve this:
-
Click Download Report to download a CSV report of the affected configuration.
-
Click Cancel and Unlock Tenants. This unlocks the lower and upper environments. Allow 1 - 2 minutes for the unlocking process to complete.
-
For each ESV in the report, create an equivalent ESV in the upper environment.
-
Start the promotion steps again.
Resolve failed integrity check for encrypted secrets
When you run a promotion, the admin console shows an error message if you have encrypted secrets in your configuration:
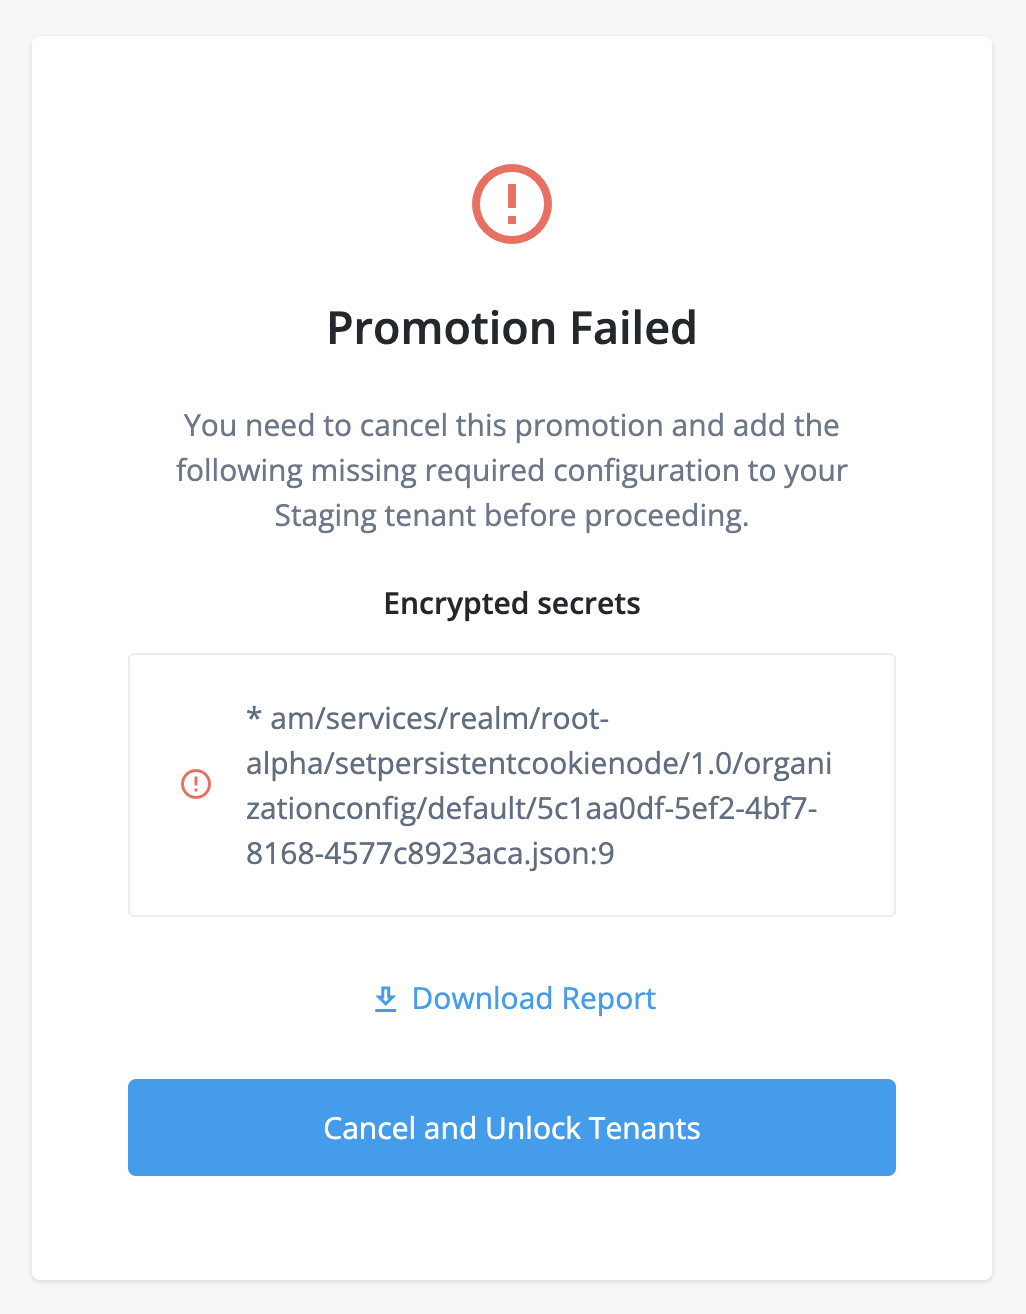
This happens when your lower environment configuration failed an integrity check for encrypted secrets.
To resolve this:
-
Click Download Report to download a CSV summary of the affected configuration.
-
Click Cancel and Unlock Tenants. This unlocks the lower and upper environments. Allow 1 – 2 minutes for the unlocking process to complete.
-
For each encrypted secret in the report:
-
Create an ESV secret containing the encrypted secret in each of the development, staging, and production environments.
-
Update your configuration to reference the new ESV secret.
-
-
Start the promotion steps again.
Resolve tenant locked errors
When you attempt to run a promotion or roll back a promotion, the admin console may show an error message that your tenant is locked:
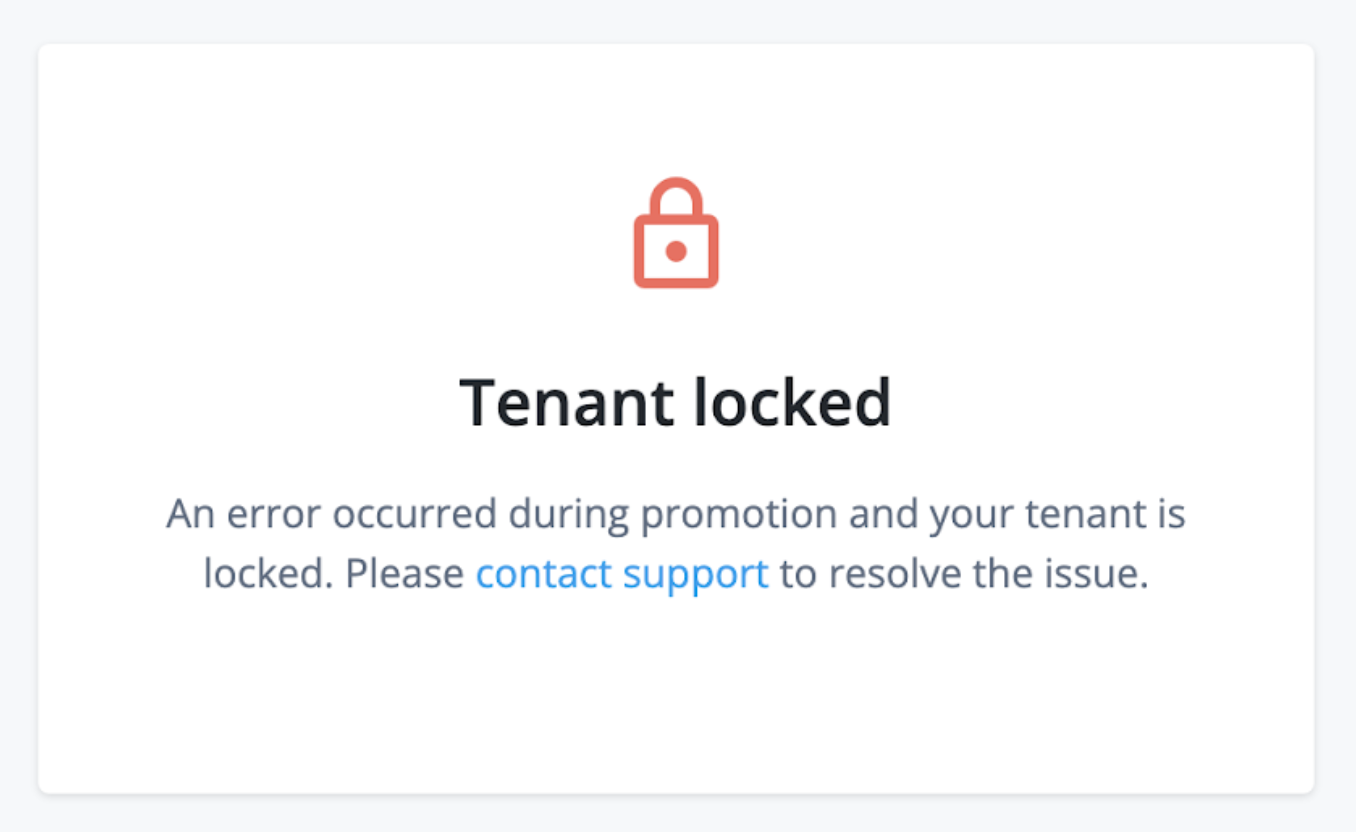
This happens when a previous promotion or rollback failed and left the environments in an error state that can’t be automatically resolved.
To resolve environment errors that are preventing a promotion or a rollback, open a support case:
-
Click Create a case.
-
Follow the steps in the case submission wizard by selecting your account and contract and answering questions about your tenant environments.
-
On the Please answer the following questions to help us understand the issue you’re facing page, enter the following details, and then click Next:
Field Value What product family is experiencing the issue?
Select PingOne Advanced Identity Cloud
What specific product is experiencing the issue?
Select Tenant Settings
What version of the product are you using?
Select NA
Which component is affected?
Select Self-Service Promotion
What Hostname(s) or Tenant ID(s) does this apply to?
Enter a comma-separated list of FQDNs for the relevant tenant environments.
-
On the Tell us about the issue page, enter the following details, and then click Next:
Field Value Provide a descriptive title for your issue
Enter one of the following:
-
Resolve environment errors preventing a self-service promotion -
Resolve environment errors preventing a self-service rollback
Describe the issue below
Enter the following details:
-
The error type, either:
-
An error has occurred during a self-service promotion to the development/staging/production environment -
An error has occurred during a self-service rollback from the staging/production environment
-
-
The error code and message (API users only).
-
-
Click Submit.
Revert configuration in your development environment
To revert configuration in your development environment, open a support case:
-
Click Create a case.
-
Follow the steps in the case submission wizard by selecting your account and contract and answering questions about your tenant environments.
-
On the Please answer the following questions to help us understand the issue you’re facing page, enter the following details, and then click Next:
Field Value What product family is experiencing the issue?
Select PingOne Advanced Identity Cloud
What specific product is experiencing the issue?
Select Configuration
What version of the product are you using?
Select NA
What Hostname(s) or Tenant ID(s) does this apply to?
Enter a comma-separated list of FQDNs for the relevant tenant environments.
-
On the Tell us about the issue page, enter the following details, and then click Next:
Field Value Provide a descriptive title for your issue
Enter
Select Restore from backupDescribe the issue below
Enter the following details:
-
The FQDN of the upper environment from the promotion you need to revert.
-
The date when you last had stable configuration, using the format YYYY-MM-DD.
-
-
Click Submit.