Prepare applications for entitlements
Before your end users can work entitlements, tenant or governance administrators must prepare the applications for entitlements.
Key tasks are:
|
For more details on provisioning applications, learn more in Provision an application. |
Load entitlements into Advanced Identity Cloud
When you onboard a target application into Advanced Identity Cloud, it also pulls in the application’s
entitlements. Each application’s account schema includes one or more attributes that define
the account’s privileges, which the target system assigns to accounts.
These attributes depend on other objects in the application, known as non-account objects.
Non-account objects represent entities linked to the user entity in the target system.
Examples of non-account objects are roles, groups, departments, permissions, and licenses.
For example, in a Salesforce application, the group object property is mapped
to the GroupIds field in the Advanced Identity Cloud user identity, which serve as the source
for the account’s allowed entitlements.
The system later brings in any entitlement changes through reconciliation, the process of comparing and synchronizing identity data between the Identity Governance system and external target systems.
|
You must run entitlement reconciliations at regular intervals depending upon how frequently new entitlements are added to or deleted from the target application. |
Validate the entitlement configuration
Before your end users can work with entitlements, Advanced Identity Cloud tenant or governance administrators must prepare applications for them. When you connect a target application, several object types are added to the application in Advanced Identity Cloud.
To use any of these as entitlements, you must configure them
on the account object type and run a reconciliation. This process brings in the entitlements
into Advanced Identity Cloud and makes them available for use. Make sure to:
-
Verify that the account attribute has been correctly tagged as an entitlement based on your requirements.
-
Verify that the account attribute is associated with the correct non-account object.
To validate the entitlement configuration and verify the account attribute:
-
In the Advanced Identity Cloud admin console, go to Applications > Browse App Catalog.
-
Select an application and click the Provisioning tab.
-
On the Details page, verify that the Native Type is
_ACCOUNT_. -
Click the Properties tab to view the account attributes.
-
Select the account attribute containing the entitlements to be assigned to the account.
For most applications in the application catalog, the star icon identifies the attribute.
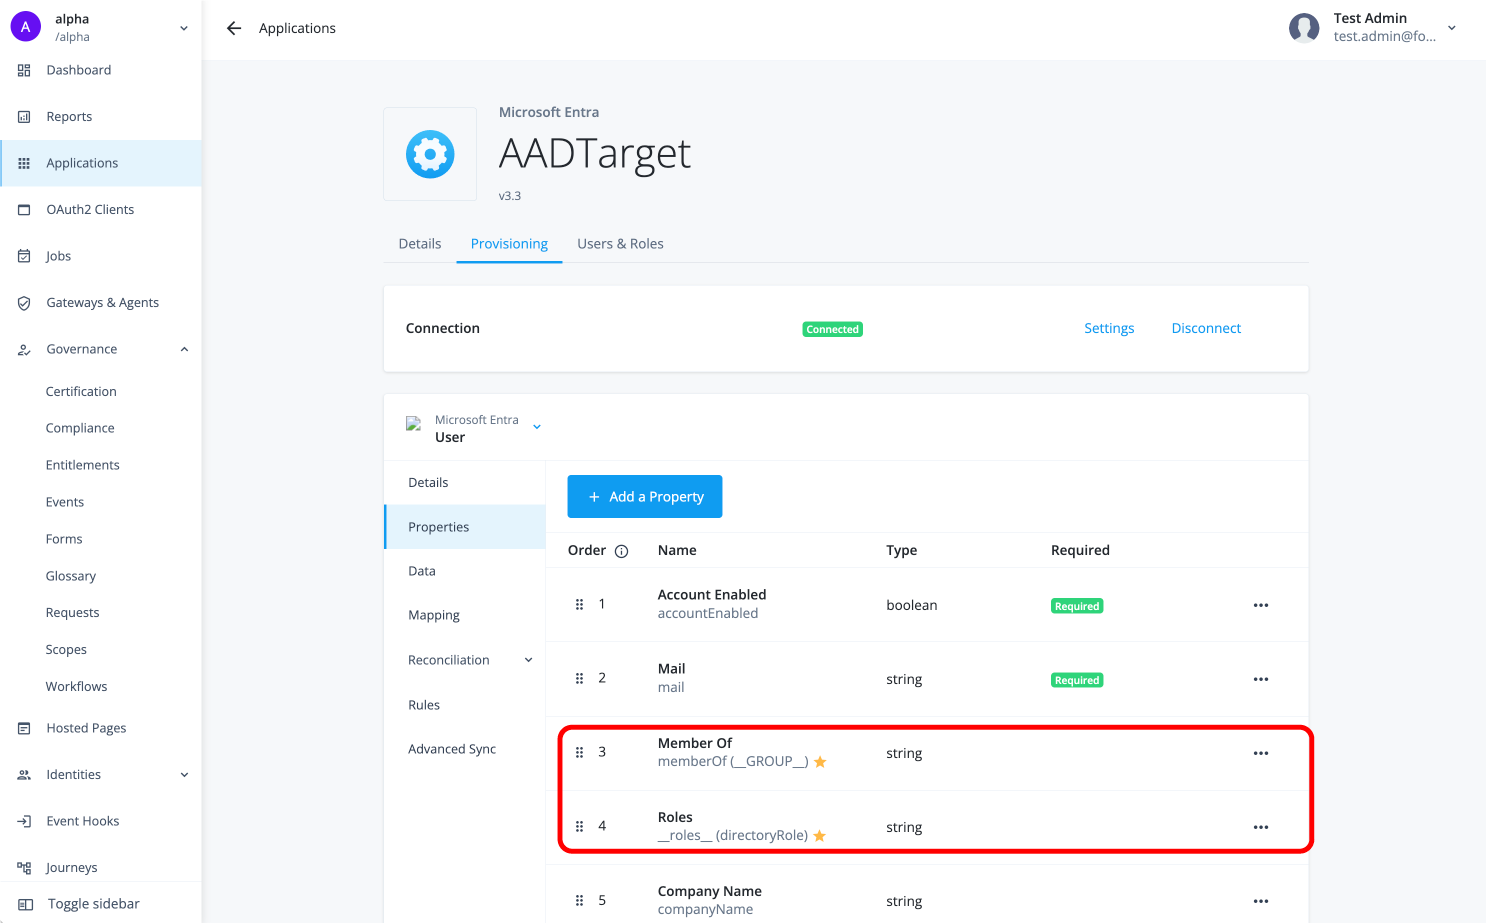
-
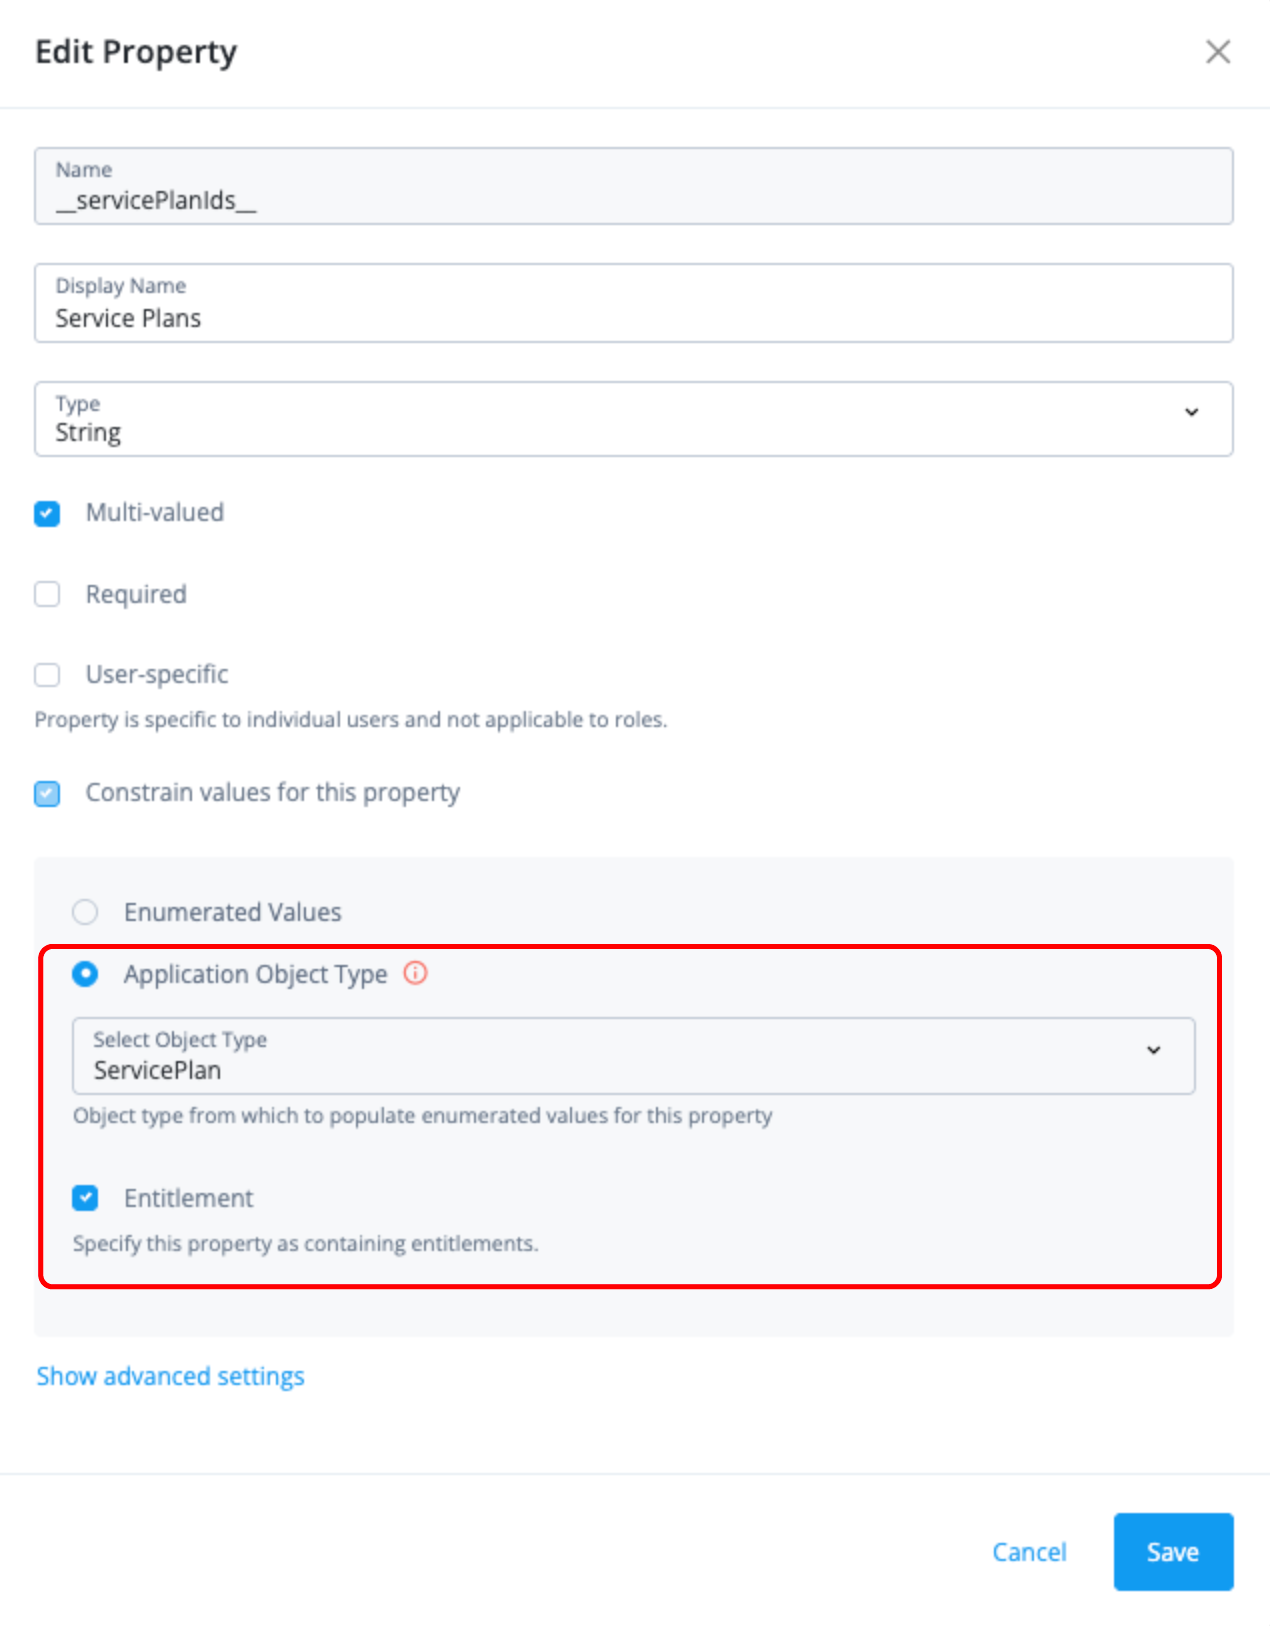
Click ellipsis () > Edit to view or edit the property.
-
Verify that the application object type attribute has the correct non-account object specified and that the Entitlement box is checked.
There are some applications that require you to manually set the non-account object including:
-
Scripted REST
-
Scripted Groovy
-
Scripted Table
-
PowerShell
-
Multi-file CSV
-
SCIM
Learn more in Manually set non-account objects for an account object.
-
-
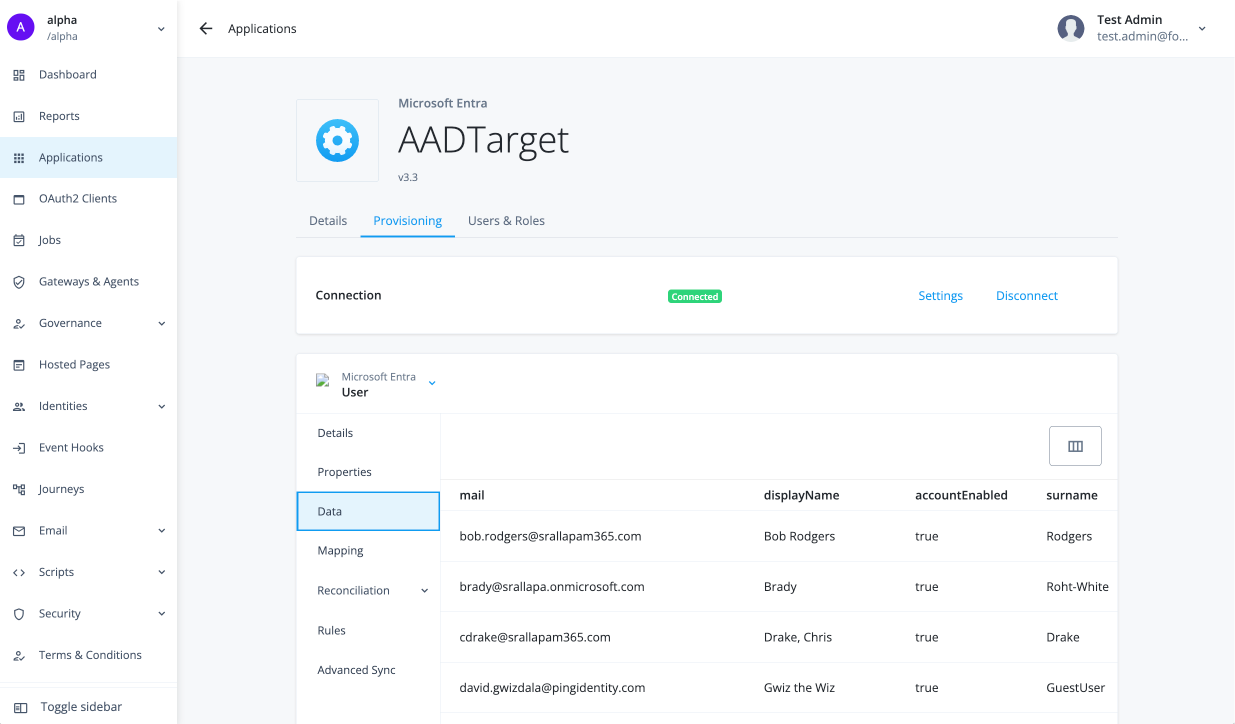
Click Data to preview the information, providing a real-time view of the target system data. You can scroll right to view the whole dataset.
Configure user-friendly display names
When you onboard entitlements into Advanced Identity Cloud, they can have highly cryptic or technical names that make its purpose difficult to ascertain. To ensure user-friendly names appear when displaying accounts or entitlements, configure the application object types accordingly.
-
In the Advanced Identity Cloud admin console, go to Applications > Browse App Catalog.
-
Select an application and click the Provisioning tab.
-
On the Details page, make sure you are viewing the
Userobject type. -
In the Display Name Attribute field, select a single-valued string attribute from the target application.
-
Click Save.
-
Repeat steps 1–5 for the other object types.
The following video shows an example:
Configure the entitlement glossary
Administrators can enhance entitlements by adding meaningful business context, helping users understand their purpose and supporting Identity Governance in decision-making. This context is managed through the entitlement glossary, where administrators can add custom attributes in addition to the default ones.
Learn more in Managing the governance glossary.
Load entitlements on-demand
Before running a reconciliation, make sure you have configured it to your requirements.
-
In the Advanced Identity Cloud admin console, go to Applications > Browse App Catalog.
-
Select an application and click the Provisioning tab.
-
On the Details page, make sure you are viewing the
Userobject type. -
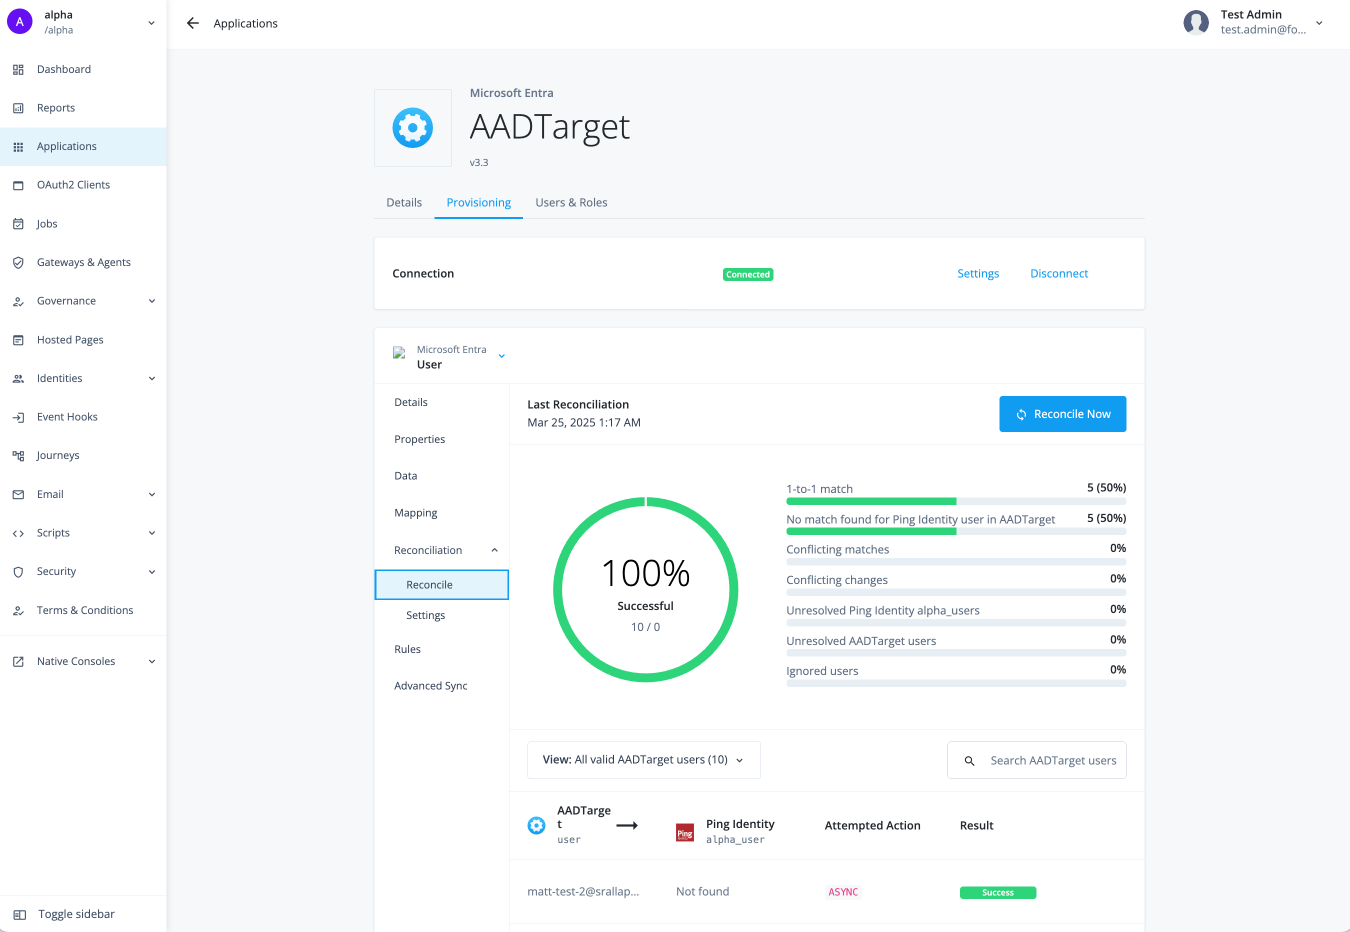
Click Reconciliation > Reconcile.
-
Click Reconcile Now if you want to onboard the entitlements immediately.
The page displays the results of your reconciliation. You can see the successful and unsuccessful matches.