Manage entitlements
After you load entitlements into Advanced Identity Cloud, you can manage them from the entitlements page. You can view entitlement details, add business-friendly context, and manage user access.
View entitlements
To view the entitlements catalog, go to Governance > Entitlements.

The entitlements page displays the following information:
-
Entitlement: Displays the unique identifier of the entitlement.
-
Display Name: Displays the user-friendly name of the entitlement.
-
Object Type: Displays the object type associated with the entitlement.
-
Account Attribute: Displays the account attribute associated with the entitlement.
-
Owner: Displays the end user who manages the entitlement.
-
Ellipsis : Click to edit the entitlement.
View entitlement details
Click any entitlement from the entitlements catalog to view its details.
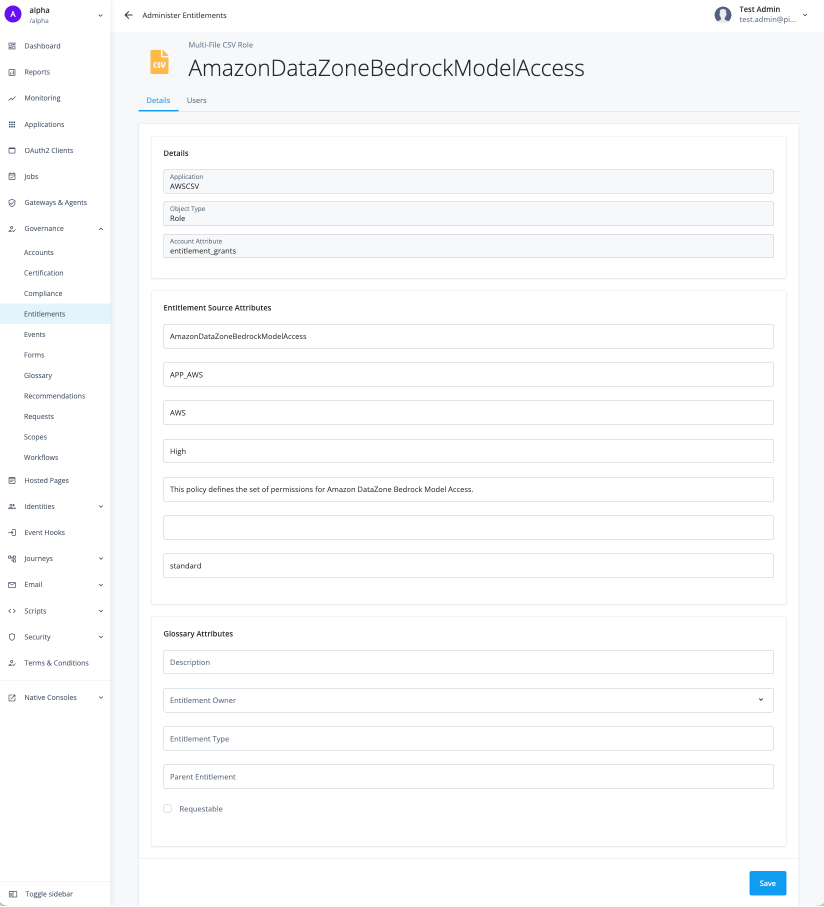
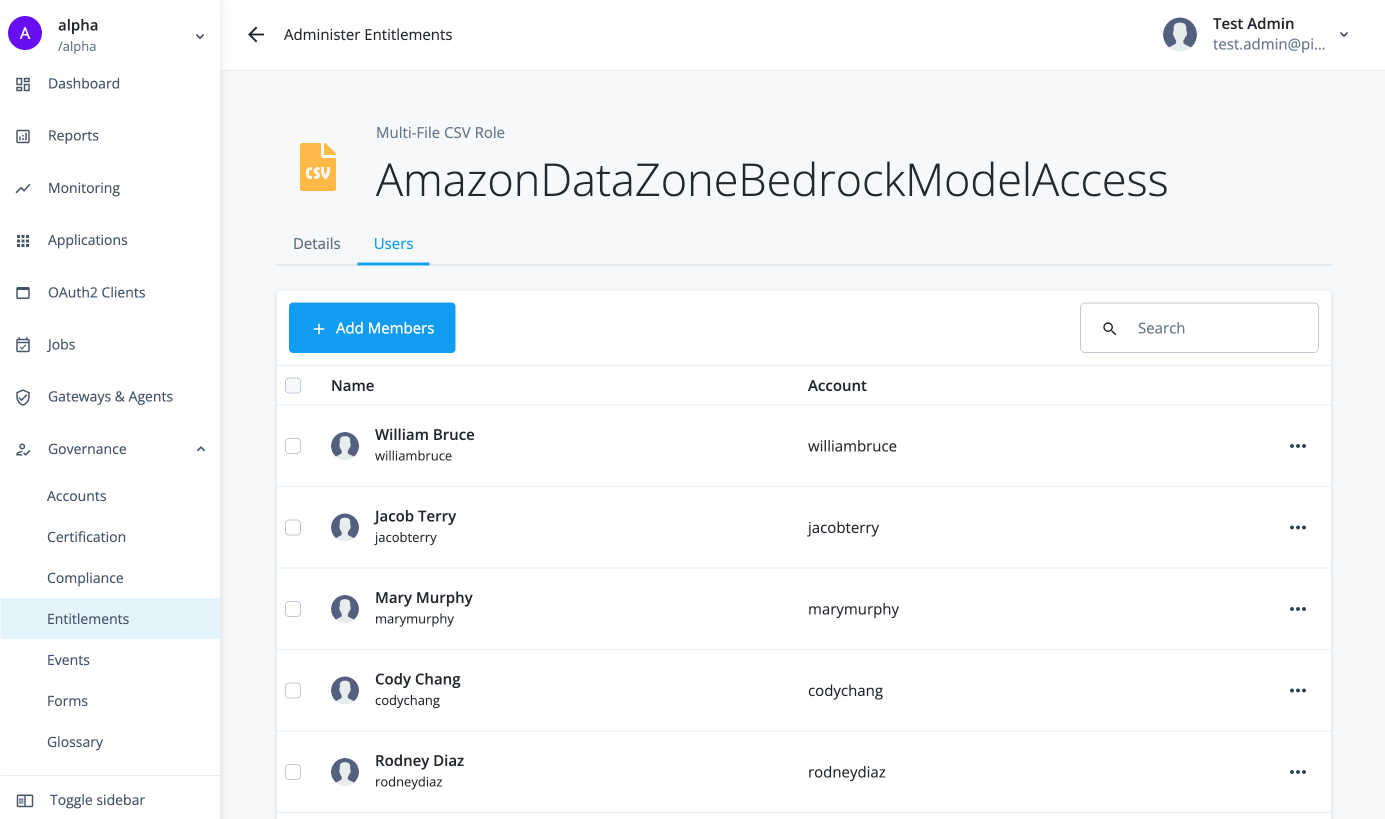
There are two tabs that appear on the entitlement details page: Details and Users.
The Details tab contains three sections:
-
Details: Shows the application name, object type, and account attribute.
-
Entitlement source attributes: Shows the entitlement data in the target application.
-
Glossary attributes: Shows the business metadata that the entitlement has if any.
The Users tab displays a list of end users who have the entitlement. You can add, remove, or revoke the entitlement for specific users from this tab.
Add or modify the glossary attributes
Glossary attributes provide business-friendly metadata about an entitlement, such as its description, owner, type, and parent entitlement. You can add or modify the glossary attributes for an entitlement from entitlement details page.
-
In the Advanced Identity Cloud admin console, go to Governance > Entitlements.
-
Select an entitlement from the entitlements catalog.
-
On the entitlement details page, click the Details tab.
-
In the Glossary attributes section, enter or select the following information:
-
Description: Enter a description for the glossary attribute.
-
Entitlement Owner: Select the end user who manages the entitlement.
-
Entitlement Type: Enter the entitlement type.
-
Parent Entitlement: Enter the parent entitlement, if any.
-
Requestable: Select this checkbox to make the entitlement requestable.
Requestableindicates that end users can request the entitlement during access requests.
-
-
Click Save.
Add members to an entitlement
-
In the Advanced Identity Cloud admin console, go to Governance > Entitlements.
-
Select an entitlement from the entitlements catalog.
-
Click the Users tab.
-
Click Add Members.
-
In the Add Members modal, search for and select end users to whom you want to assign the entitlement.
-
Click Save. Saving this action generates a request that the entitlement owner must approve before the entitlement owner assigns the entitlement to the selected end users. Learn more about tracking a request in Access requests.
Remove members from an entitlement
-
In the Advanced Identity Cloud admin console, go to Governance > Entitlements.
-
Select an entitlement from the entitlements catalog.
-
Click the Users tab.
-
Select the end users you want to remove as a member.
-
Click Remove.
-
In the Confirm Removal modal, click Remove. Removing members generates a request that the entitlement owner must approve before the entitlement is removed from the selected end users.