Configure role lifecycle management
Role lifecycle management (role LCM) lets authorized end users create, update, delete, and view role information. It also enforces policies by requiring approval workflows before the system applies any role changes. This prevents users from granting excessive permissions without oversight and ensures access remains aligned with organizational policies.
As a tenant administrator or governance administrator, you must configure and enable role lifecycle management (role LCM) before delegated end users can manage roles.
|
Personas
Role LCM involves the following personas:
| Persona | Description |
|---|---|
Administrator |
A tenant administrator or an internal administrator, such as a configured OAuth 2.0 client. |
Role owner |
A user listed as the owner of a role in Advanced Identity Cloud. |
End user |
An end user that’s an application owner or an entitlement owner. They might also receive permissions directly from Identity Governance scopes or have no additional role-related permissions. |
Activate role LCM
Administrators must enable role LCM to activate the feature in the hosted account pages.
-
In the Advanced Identity Cloud admin console, go to Governance > Requests, and click the Settings tab.
-
In the Governance LCM section, click Ellipsis (), and then click Settings.
-
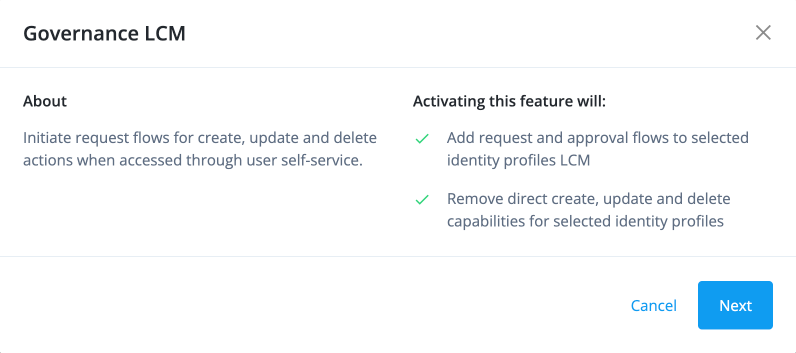
In the Governance LCM modal, read the note stating that this feature adds request and approval flows for selected identity profiles and removes direct create, update, and delete capabilities, and then click Next.
-
In the Governance LCM modal, click Role LCM, and then click Activate.
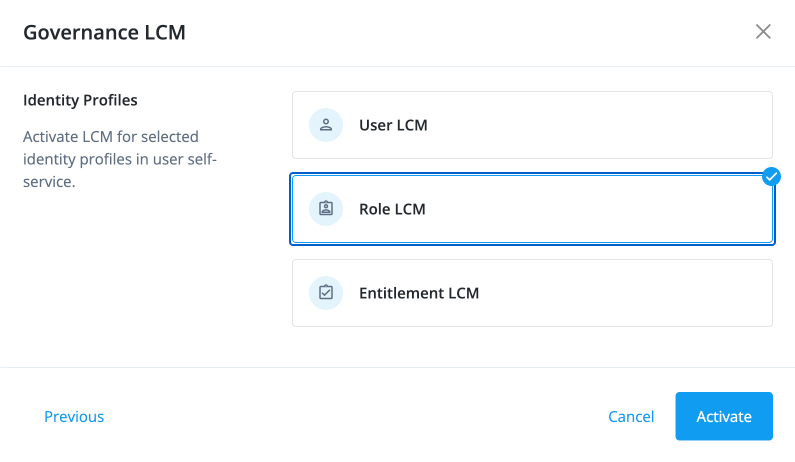
The role LCM feature is now enabled.
Create a scope to define which roles a delegated end user can manage
Create one or more scopes to define who can manage roles and what data they can access. Scopes let you control visibility and permissions for roles, role members, and assigned entitlements so you can delegate role management to the right administrators.
|
To use role LCM, a delegated end user must both match a role-management scope and be assigned an internal role that grants access to the Roles object. |
Role scope permissions
Scopes control what roles a user can see and manage. They define boundaries for role lifecycle operations based on role attributes, such as which applications or entitlements the role includes. When you assign a scope to a user, that scope determines whether they can view, create, modify, or delete specific roles.
By default, administrators, role owners, and end users have the following scope permissions:
| Action | Admin | Role owner | End user |
|---|---|---|---|
View role |
Yes |
Yes |
If scoped |
Create role |
Yes |
If scoped |
If scoped |
Modify role |
Yes |
If scoped |
If scoped |
Delete role |
Yes |
If scoped |
If scoped |
Sarah owns the Marketing role. As an end user, she also has a scope that lets her manage roles that match a filter for CRM entitlements.
Together, these permissions let Sarah:
-
View and edit the Marketing role through role ownership.
-
View and edit any role that matches the CRM-entitlement filter through her end-user scope.
-
Create roles that match the CRM-entitlement filter through her end-user scope.
-
Delete roles that match the CRM-entitlement filter through her end-user scope.
Because Sarah is the Marketing role owner and also has a scope that applies to roles matching the CRM-entitlement filter, she can still edit the Marketing role after it includes CRM entitlements.
Create a scope for role LCM
-
Sign on to the Advanced Identity Cloud admin console as a tenant administrator.
-
Go to Governance > Scopes, and click New Scopes.
-
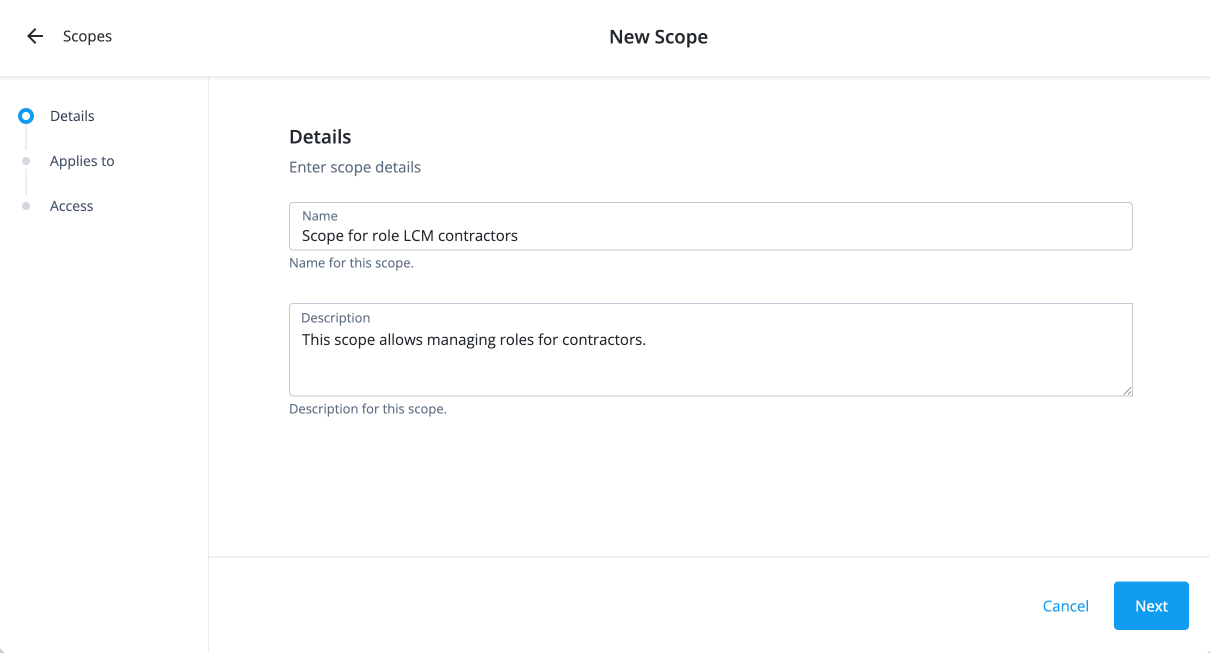
On the New Scope page, enter the following on the Details page:
-
Name: Enter a descriptive name for the scope. The name should be descriptive enough to easily identify the purpose of the scope. For example, enter Scope for role LCM for contractors if you want to assign an employee to manage roles for contractors.
-
Description: Enter a description for the scope. For example, enter
This internal scope allows managing roles for contractors. -
Click Next.
-
-
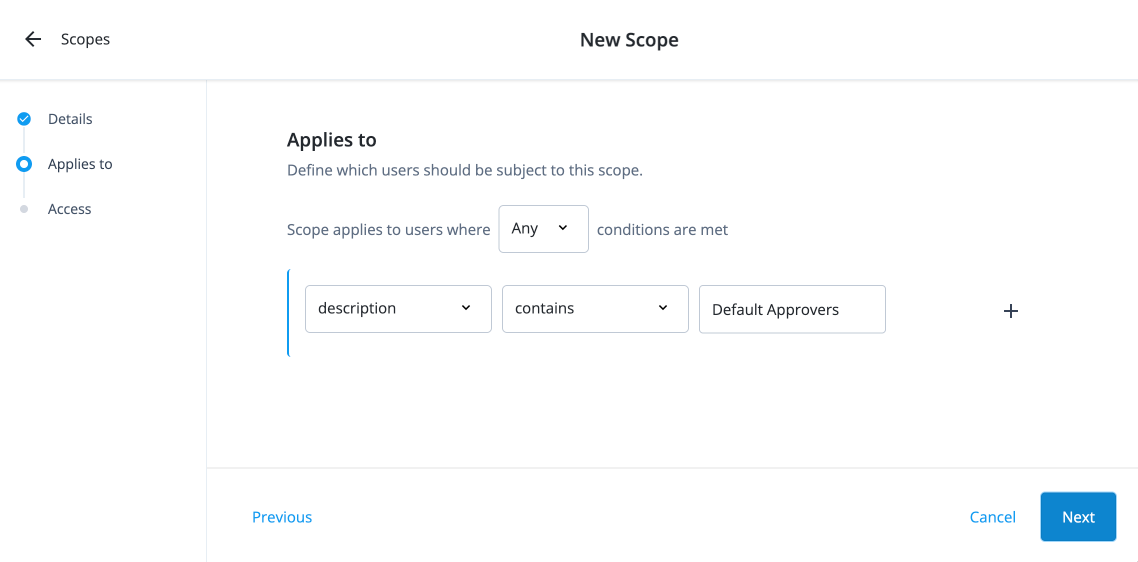
On the Applies to page, define which users should be subject to this scope.
-
Select if the All or Any condition must be met.
-
Select a property for this scoping rule. For example, select description.
-
Select an operator for the scoping rule. For example, select contains.
-
Enter a condition. For example, enter Default Approvers.
-
If you want to add another rule, click and repeat the steps.
-
Click Next.
-
-
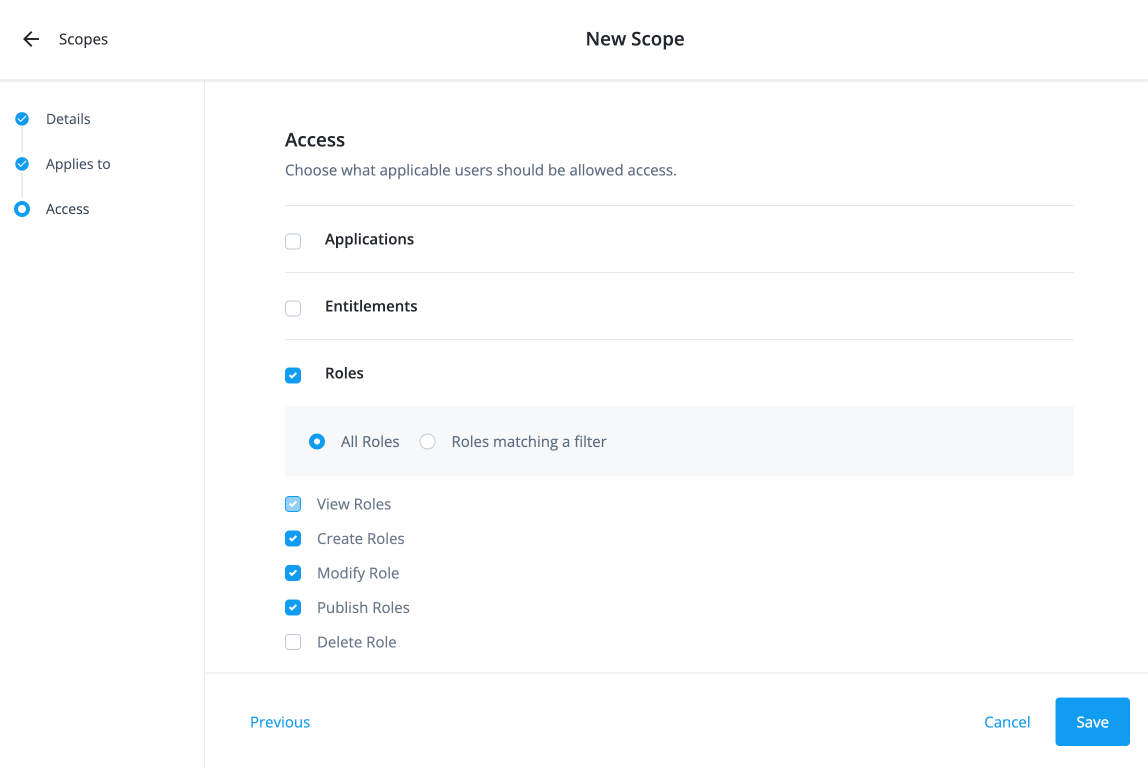
On the Access page, click Roles.
-
Select the All Roles or Roles matching a filter if this scope applies to all configured roles, or select Roles matching a filter to define the conditions under which this scope applies.
-
If you selected Roles matching a filter, select if All or Any conditions must be met.
-
Select a property for this scoping rule.
-
Select an operator for the scoping rule.
-
Enter a condition.
-
If you want to add another rule, click and repeat the steps.
-
-
Select the permissions available to the scope:
-
Create Roles: Permission to create a new role.
-
Modify Role: Permission to modify a role.
-
Publish Roles: Permission to publish a role.
-
Delete Role: Permission to delete a role.
-
-
Click Save.
-
Create an internal role that grants the delegated end user capability
Administrators must create an internal role, so that authorized end users can view the Roles object.
-
Sign on to the Advanced Identity Cloud admin console as a tenant administrator.
-
Go to Identities > Manage.
-
Click Internal Roles > New Internal Role.
-
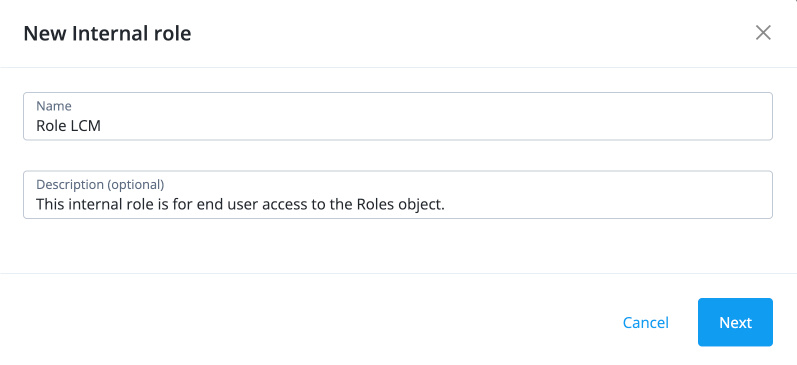
In the New Internal Role modal, enter the following and click Next.
-
Name: Enter a name for the internal role, such as Role LCM.
-
Description: Enter a description for the internal role.
-
-
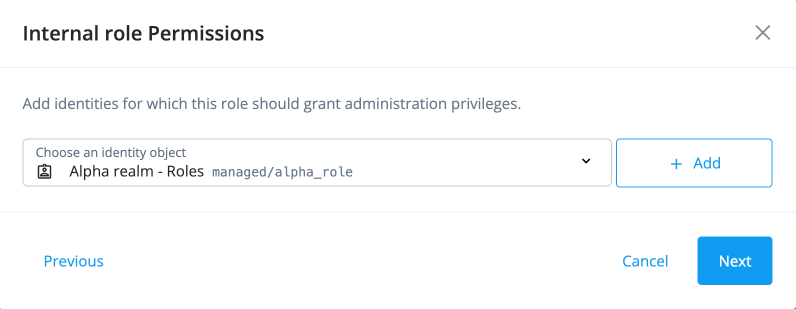
In the Internal role Permissions modal, select Alpha realm - Roles, and click Add.
-
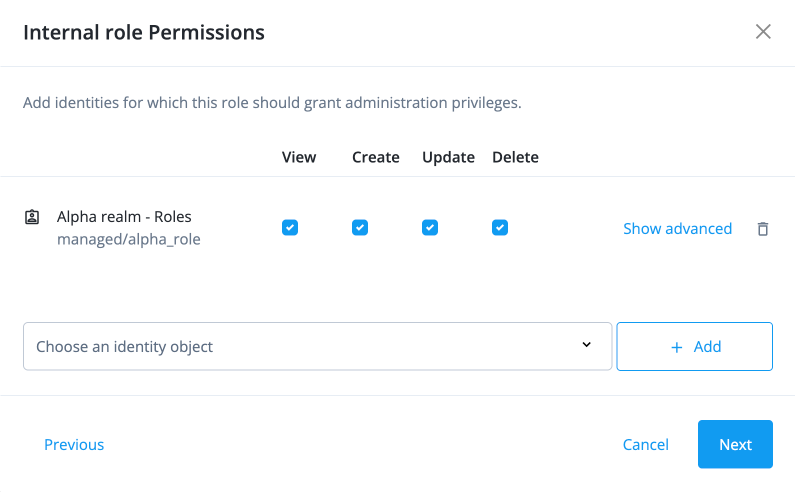
Select the internal role permissions you want available with the role:
-
View: Allows viewing role information.
-
Create: Allows creating new roles.
-
Update: Allows updating existing roles.
-
Delete: Allows deleting roles.
-
-
Click Show advanced. Click set all attributes and select Read/Write for the attribute permissions.
-
Name
-
Description
-
Members
-
assignments
-
applications
-
condition
-
temporalConstraints
Click Administer only a subset of Alpha realm - Roles by applying a filter to access a subset of roles based on specific criteria.
-
-
Click Next.
-
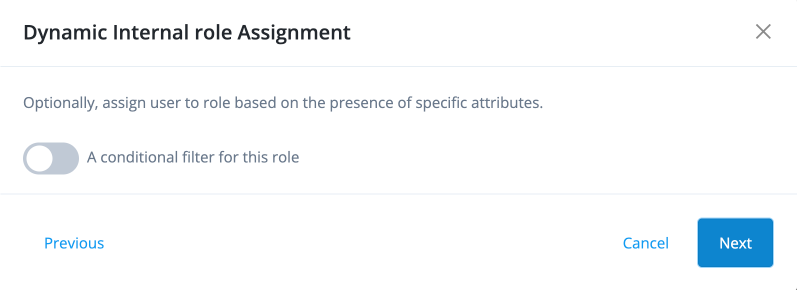
In the Dynamic Internal role Assignment modal, click A conditional filter for this role if you want to set a conditional role assignment. Otherwise, click Next.
-
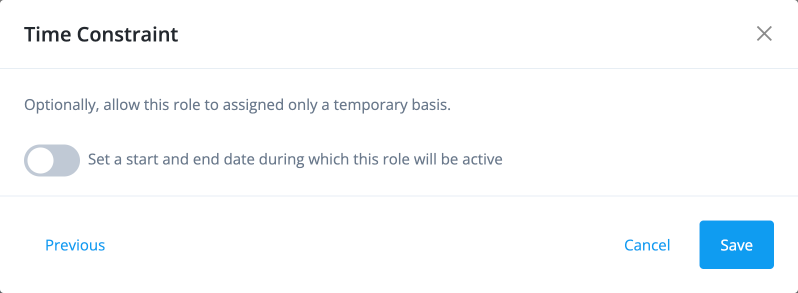
In the Time Constraint modal, click Set a start and end date during which this role will be active if you want to assign the role on a temporary basis. Otherwise, click Save to finish creating the internal role.
Assign end users to the internal role
Associate the scope to the assigned end users to limit their authority to the intended roles.
-
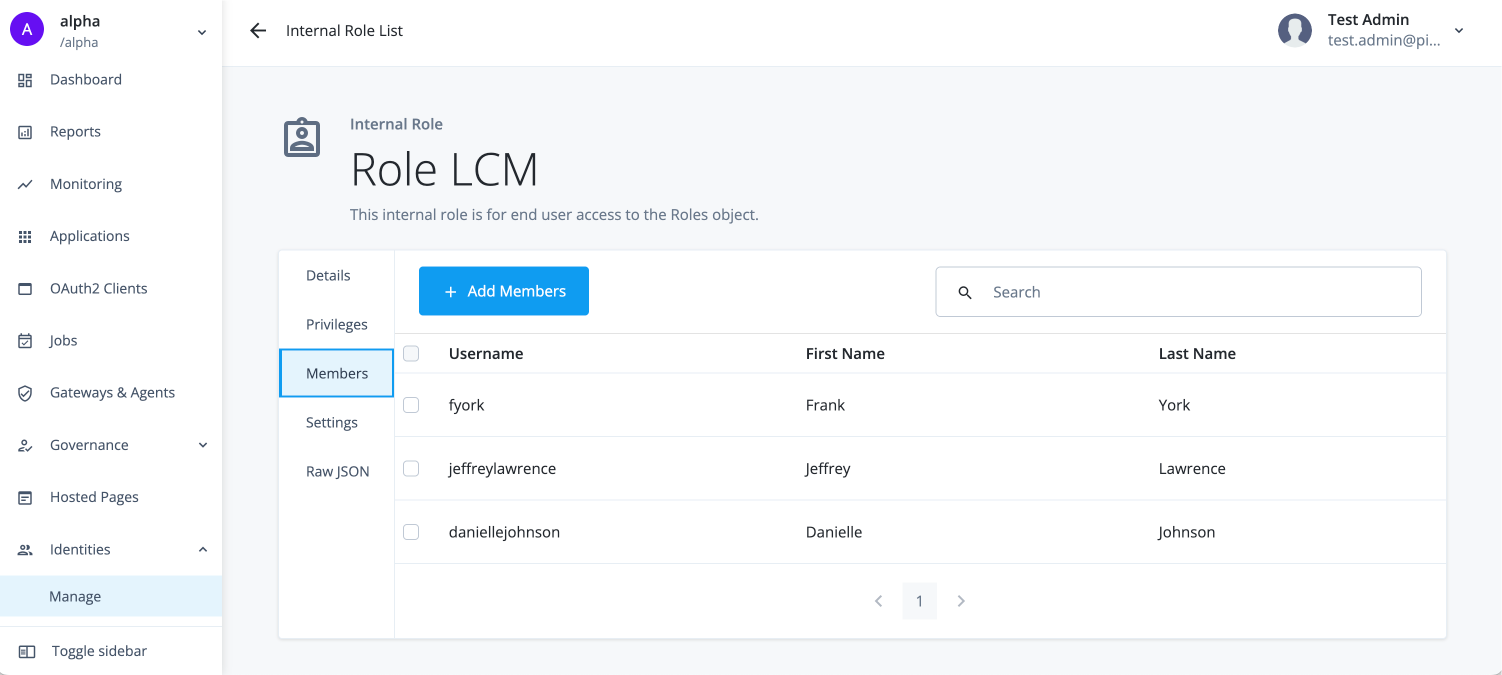
On the Role LCM page, click Add Members.
-
In the Add Members modal, select the users to which the internal role applies, and then click Save.
Test role LCM
After you enable role LCM, test the feature to ensure it’s working as expected before delegating role management to end users.
-
Sign on as a test user that’s a role LCM administrator.
-
Go to Administer > Roles.
-
Click New Role.
-
In the New role modal, fill out the form for the new role, and then click Save.
-
Click View request to see the details of the change request you just submitted, and ensure the workflow is correct.
-
Sign on to the Advanced Identity Cloud admin console as a tenant administrator.
-
Go to Governance > Requests.
-
Click the change request you just submitted, and ensure the request details are correct.
-
Approve or reject the request, and ensure the request status updates accordingly.