Use a remote proxy to access data objects
The remote proxy allows you to connect to another Advanced Identity Cloud tenant or PingIDM instance to access data objects as if they are local resources. Through the /openidm/external/idm/<receiving-tenant-name> endpoint, you can:
-
Query and manage users from a receiving tenant
-
Create sync mappings between tenants
-
Run scripts that interact with remote data
-
Perform reconciliation to sync data across environments
Common use cases
-
Environment promotion: Sync data from sandbox → staging → production.
-
Geographic distribution: Keep geographically distributed data centers in sync.
-
Migration: Sync data between self-managed PingIDM and Advanced Identity Cloud tenants.
-
Multi-tenant management: Manage multiple Advanced Identity Cloud tenants from a single control plane.
| The proxy doesn’t support liveSync or implicit sync from remote Advanced Identity Cloud resources. You’re limited to using reconciliation when pulling data from a remote system. |
High-level setup
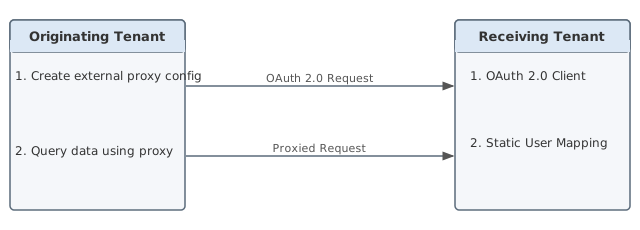
Setting up a remote proxy involves configuring both an originating tenant (where you configure the proxy) and a receiving tenant (where the proxy points).
| Originating is the local tenant where you configure the proxy. Receiving is the remote tenant where the proxy points. |
Originating tenant:
-
Create an external proxy configuration pointing to the receiving tenant.
-
Configure OAuth 2.0 client credentials for authentication.
Receiving tenant:
-
Create an OAuth 2.0 client with the
client_credentialsgrant type. -
Configure a static user mapping to grant the OAuth 2.0 client admin permissions.
-
Ensure the OAuth 2.0 client has the
fr:idm:*scope.
Setup overview:
Prerequisites
For the originating tenant, you need:
-
Tenant FQDN
-
For example:
https://<originating-tenant-env-fqdn>
-
-
Service account ID and private key for authentication
-
OAuth 2.0 client ID from the receiving tenant (for example,
idmprovisioning) -
OAuth 2.0 client secret from the receiving tenant
-
Realm name on the receiving tenant (for example,
alphaorbravo)
For the receiving tenant, you need:
-
Tenant FQDN
-
For example:
https://<receiving-tenant-env-fqdn>
-
-
Service account ID and private key for authentication
-
Realm name (for example,
alphaorbravo) -
OAuth 2.0 client ID (for example,
idmprovisioning) -
OAuth 2.0 client secret
SSL/TLS certificates
To connect to a receiving instance over SSL or TLS, you must import the receiving instance’s server certificate into your originating instance’s truststore. This is only necessary if a CA that isn’t already in the truststore signed the certificate. Learn more in Self-managed certificates.