Customize the visibility and arrangement of navigation menu items
For each navigation profile (and each fallback configuration in a hosted pages theme), you can configure the visibility and arrangement of its menu items to suit the end-user experience. For a high-level overview of configuring menu item visibility, refer to Configure the navigation menu.
Change the visibility of a menu item
Change the visibility of menu items to streamline the end-user experience.
-
Navigate to the navigation profile or fallback configuration that you want to modify:
-
Fallback configuration
-
In the Advanced Identity Cloud admin console, go to User Experience > Hosted Pages, then select a theme.
-
Select Account Pages.
-
In the panel on the right-hand side, click Layout, then scroll to the Navigation section.
-
-
Modify the visibility of menu items:
-
To hide a menu item:
-
Find the menu item you want to hide, and click its Ellipsis icon () to open its actions menu.
-
Click Delete. This removes the menu item from the navigation menu, although it remains available for re-adding later.
-
Click Save.
-
-
To show a previously hidden menu item:
-
-
Fallback configuration
Click the Add icon ().
-
-
From the list of available menu items, select the menu item you want to show, then click Next.
-
Configure the menu item:
-
(Optional) Change the Label.
-
(Optional) Change the Icon Code. For a list of available icon codes, refer to Material Icons.
-
(Optional) If the menu item has submenu items, select which submenu items to include using the checkboxes under Dropdown Items. By default, all submenu items are selected.
-
-
Click Add.
-
(Optional) Click the menu item’s Drag indicator icon () and drag the menu item to the desired position in the menu.
-
Click Save.
-
-
Change menu item order and grouping
Change the order and grouping of menu items in the navigation menu to suit your company’s needs.
-
Navigate to the navigation profile or fallback configuration that you want to modify:
-
Fallback configuration
-
In the Advanced Identity Cloud admin console, go to User Experience > Hosted Pages, then select a theme.
-
Select Account Pages.
-
In the panel on the right-hand side, click Layout, then scroll to the Navigation section.
-
-
Modify the order and grouping of menu items:
-
To reorder menu items:
-
Click a menu item’s Drag indicator icon () and drag it to the desired position in the menu.
-
Repeat for any other menu items you want to reorder.
-
-
To group menu items:
-
(Optional) Add additional divider menu items to the menu:
-
-
Fallback configuration
Click the Add icon ().
-
-
From the list of available menu items, select Divider, then click Next.
-
Repeat as necessary to add multiple divider menu items.
-
-
(Optional) Remove existing divider menu items that you don’t need:
-
Find the divider menu item you want to remove, and click its Ellipsis icon () to open its actions menu.
-
Click Delete.
-
-
Click the Drag indicator icon () of a Divider menu item and drag it to the desired position in the menu to create a visual separation between groups of menu items. Repeat for any other Divider menu items you want to reposition.
-
Click Save.
-
-
Change menu item label and icon
Change the label or icon for your menu items to better align with your company’s branding.
-
Navigate to the navigation profile or fallback configuration that you want to modify:
-
Fallback configuration
-
In the Advanced Identity Cloud admin console, go to User Experience > Hosted Pages, then select a theme.
-
Select Account Pages.
-
In the panel on the right-hand side, click Layout, then scroll to the Navigation section.
-
-
Find the menu item you want to change, and click its Ellipsis icon () to open its actions menu.
-
Configure the menu item:
-
(Optional) Change the Label.
-
(Optional) Change the Icon Code. For a list of available icon codes, refer to Material Icons.
-
(Optional) If the menu item has submenu items, select which submenu items to include using the checkboxes under Dropdown Items. By default, all submenu items are selected.
-
-
Click Save.
Add custom menu items
Add a custom menu item to link to other Ping Identity resources such as the PingOne Dock, PingOne self service, or a specific journey or flow. You can also link to resources in your company that end users may need to access.
-
Navigate to the navigation profile or fallback configuration that you want to modify:
-
Fallback configuration
-
In the Advanced Identity Cloud admin console, go to User Experience > Hosted Pages, then select a theme.
-
Select Account Pages.
-
In the panel on the right-hand side, click Layout, then scroll to the Navigation section.
-
Click the Add icon ().
-
-
From the list of available menu items, select Custom Link, then click Next.
-
Configure the menu item:
-
Enter a menu Label. For example,
Privacy Policy. -
(Optional) Add translations for the label text:
-
Click the Translate icon () to the right of the Label text field, to open the Translations modal.
-
Enter a locale code in the Locale field and translated text in the Label field to create a translation. For example, to support German, enter
defor the locale andDatenschutzrichtliniefor the label. -
For each additional language you want to support, click the Add icon () to add an additional row, then enter locale and label values as described in the previous step.
-
To remove a translation, click the Remove icon () next to the row you want to remove.
-
Click Apply to save your translations and close the modal.
-
-
(Optional) Change the Icon Code. For a list of available icon codes, refer to Material Icons. Otherwise, the default Link icon () is used.
-
Enter an absolute URL for the custom menu item. The URL opens in a new browser tab when the end user clicks the menu item.
-
Click Add.
-
-
(Optional) Click the menu item’s Drag indicator icon () and drag the menu item to the desired position in the menu.
-
Click Save.
Add custom submenus
Add a custom submenu to group related menu items together under a single parent menu item.
-
Navigate to the navigation profile or fallback configuration that you want to modify:
-
Fallback configuration
-
In the Advanced Identity Cloud admin console, go to User Experience > Hosted Pages, then select a theme.
-
Select Account Pages.
-
In the panel on the right-hand side, click Layout, then scroll to the Navigation section.
-
Click the Add icon ().
-
-
From the list of available menu items, select Sub-menu, then click Next.
-
Configure the submenu:
-
Enter a submenu Label. For example,
Company Policies. -
(Optional) Add translations for the label text:
-
Click the Translate icon () to the right of the Label text field, to open the Translations modal.
-
Enter a locale code in the Locale field and translated text in the Label field to create a translation. For example, to support German, enter
defor the locale andUnternehmensrichtlinienfor the label. -
For each additional language you want to support, click the Add icon () to add an additional row, then enter locale and label values as described in the previous step.
-
To remove a translation, click the Remove icon () next to the row you want to remove.
-
Click Apply to save your translations and close the modal.
-
-
(Optional) Change the Icon Code. For a list of available icon codes, refer to Material Icons. Otherwise, the default Folder icon () is used.
-
Modify the submenu items using the following guidance:
-
The items are displayed in two groups: assigned and available.
-
Assigned items are those that have been added to the submenu and are displayed in a group above the available items. Initially, there are no assigned items.
-
Available items are those that can be added to the submenu and are displayed in a group below the assigned items. Available items each have an Add icon ().
-
-
Click the Add icon () next to an available item to assign it to the submenu:
-
Custom links and dividers are always available and you can add as many as you need.
-
Other menu items are only available if you delete them from the main menu first.
-
Custom links also require you to enter a Label and a URL.
-
-
Click the Drag indicator icon () next to an assigned item to drag it to the desired position in the submenu.
-
Click the Delete icon () next to an assigned item to remove it from the submenu.
-
-
Click Add.
-
-
(Optional) Click the menu item’s Drag indicator icon () and drag the menu item to the desired position in the menu.
-
Click Save.
Enable delegated administrator menu items
By default, the menu items related to delegated administrator privileges (for example, Alpha realm - User) aren’t visible to end users.
These menu items become visible only when an end user is assigned to an internal role that has at least the view privilege for the corresponding identity type.
The following steps describe how to create an internal role with the necessary privileges to manage an identity type and assign it to an end user.
-
In the Advanced Identity Cloud admin console, go to Identities > Manage.
-
Click Internal Roles.
-
Click New Internal Role.
-
In the New Internal Role modal:
-
Enter a name for the internal role. For example,
Delegated Administrator. -
(Optional) Enter a description for the internal role.
-
Click Next.
-
-
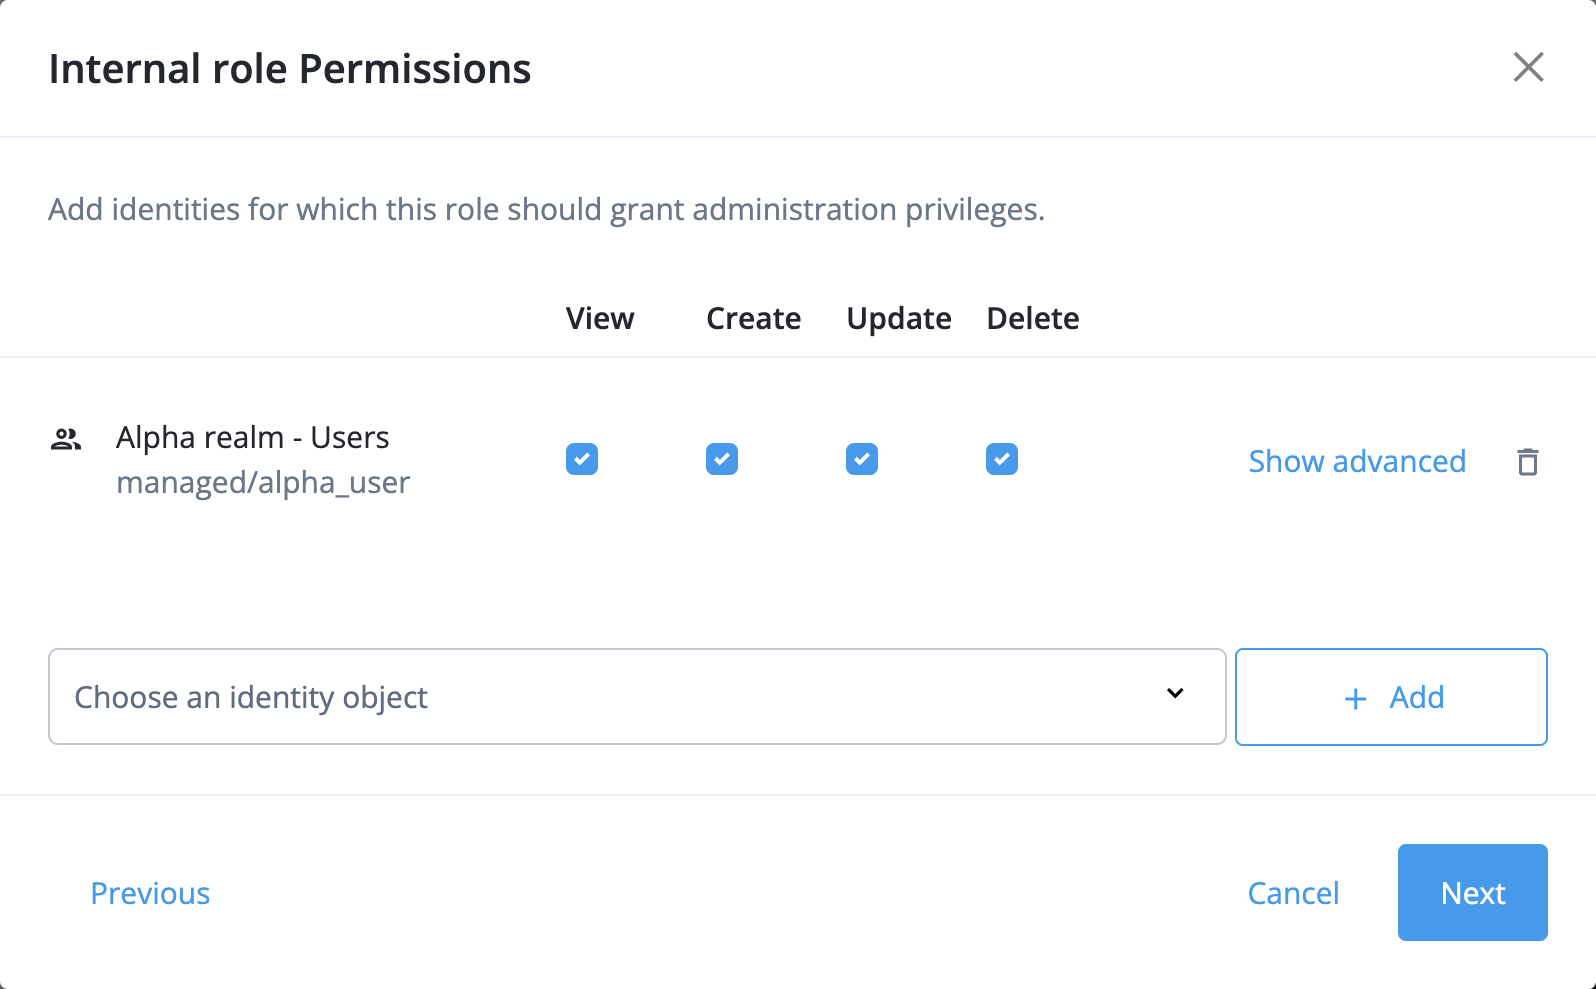
In the Internal role Permissions modal:
-
In the Choose an identity object list, select an identity type. For example, Alpha realm - Users.
-
Click Add.
-
Select at least the View privilege and any additional privileges for the identity type using the Create, Update, and Delete options.
-
(Optional) Repeat the previous three steps to add additional identity types and their corresponding privileges as necessary.
-
Click Next.
-
-
In the Dynamic Internal role Assignment modal, click Next.
-
In the Time Constraint modal, click Save to create the internal role.
-
In the Internal Role page, click the Members tab, then click Add Members.
-
In the Add Members modal, select a user identity from the Members list that you want to assign the internal role to, then click Save.
The end user can now see the corresponding delegated administrator menu items in the hosted account pages navigation menu when they sign on.
|
For more complex delegated administration use cases, learn more in: |