Connecting to PingOne Protect
Establish a connection between PingOne Authorize and PingOne Protect to use risk signals in authorization policies and provide risk evaluation feedback.
PingOne Protect monitors end-user requests and generates a risk score of low, medium, or high, based on user behavior and device context. Connector services enable you to include these risk assessments in dynamic authorization policies. For example, if a risk score is medium, the authorization policy might direct the user to complete step-up authentication with additional multi-factor authentication (MFA) methods. When the risk score is high, the policy might deny access to the resource.
PingOne Protect provides the capability to evaluate risk for an event, and provide feedback that improves risk models. Add a separate PingOne Protect Connector service in PingOne Authorize for each capability.
Configure the following Connector settings, then configure general settings to finish the service connection.
Before you begin
-
Make sure PingOne Protect is in your PingOne environment. Learn more in Getting up and running with PingOne Protect.
-
If you’re using an external user directory, create attributes that store values for service input settings, such as the ID and IP address of the user whose risk is being evaluated.
Steps
-
Add a service and select Connector as the Service Type.
-
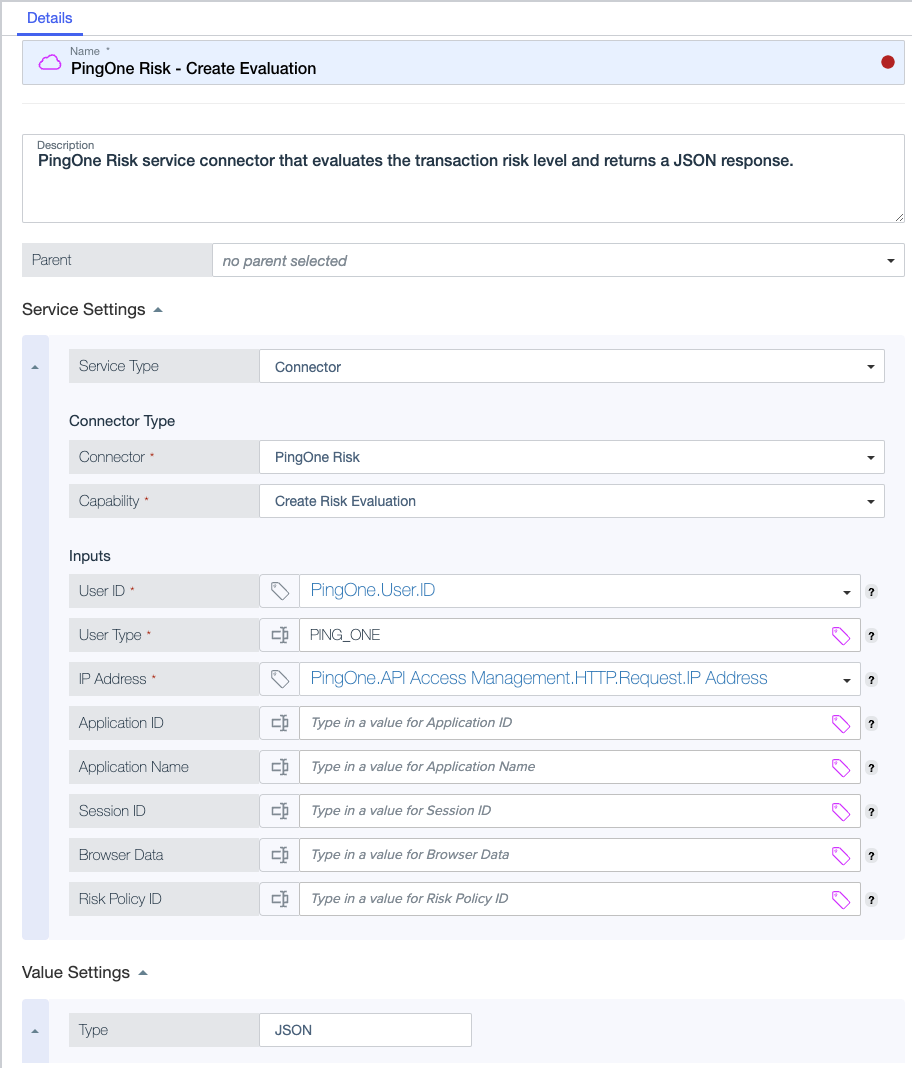
For the Connector type, select PingOne Risk.
-
For Capability, select one of the following:
Choose from:
-
Create Risk Evaluation: Evaluate risk for a specific transaction based on predictors and risk models.
-
Update Risk Evaluation: Provide feedback to PingOne Protect to improve the accuracy of the machine learning models. Perform this update after every risk evaluation.
Changing the Connector type or Capability clears service settings. If you want to keep service settings, make sure you save the Connector before you change the type or capability.
-
-
Complete Inputs to define the API call to the PingOne Protect service.
For each input, enter a constant or click
 to select an attribute. Constants are strings, but you can also enter numbers, enums, JSON objects, and attribute references. You can leave optional constants blank. If you switch to attribute selection, you must select an attribute, even if the input is optional.
Learn more about the fields passed in the service request in Risk Evaluations in the PingOne Protect API Reference documentation.
Inputs Description User ID
ID of the user whose risk is being evaluated.
If this is a PingOne user, make sure the ID belongs to a user in the current PingOne environment.
User Type
For PingOne users, enter
PING_ONE. For users in an external directory, enterEXTERNAL. These are the only valid values for this input.IP Address
The IP address of the user whose risk is being evaluated.
Application ID
(Optional) ID for the application or resource the user wants to access.
Application Name
(Optional) Name of the application or resource the user wants to access.
Session ID
(Optional) Unique session ID for the transaction event.
Browser Data
(Optional) An object that specifies browser fingerprint attributes. You can also use FingerprintJS to retrieve browser data.
Risk Policy ID
(Optional) The risk policy set used for the risk evaluation. If this is blank, the risk evaluation uses the default risk policy set for the current environment.
Completion Status
This input is for the Update Risk Evaluation capability.
Status of the risk evaluation you’re updating. Enter
SUCCESSorFAILED. These are the only valid values for this input.Risk Evaluation ID
This input is for the Update Risk Evaluation capability.
The ID of the risk evaluation you’re updating. You can generate an attribute for the ID from the service response.
Tooltips provide additional guidance for inputs. If you’re having problems with invalid requests to PingOne Protect, make sure the service inputs are correct.
The following image shows an example PingOne Risk Connector service.

-
Finish general settings for the service.
Result
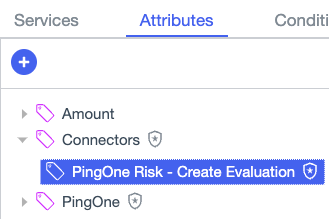
When you save the Connector service, PingOne Authorize automatically generates an attribute that resolves against the service. This attribute has the same name as the Connector service. Connector attributes are listed directly under Connectors on the Attributes tab in the Trust Framework.

You can generate child attributes from this attribute to extract service response values, such as the risk level, for use in authorization policies. When you update a Connector service, PingOne Authorize updates the generated Connector attribute associated with the service.