Adding an application role
Add application roles to group application permissions by function, then control access to application resources by assigning roles to users.
Before you begin
-
Add the application permissions that you want to grant to your roles.
-
Add the users that you want to assign to roles.
About this task
Roles determine which permissions a user has. A user can perform an action on an application resource if they have a role with the associated permission.
|
You can add up to 128 application roles in each PingOne environment. |
Steps
-
Go to Authorization > Application Roles.
-
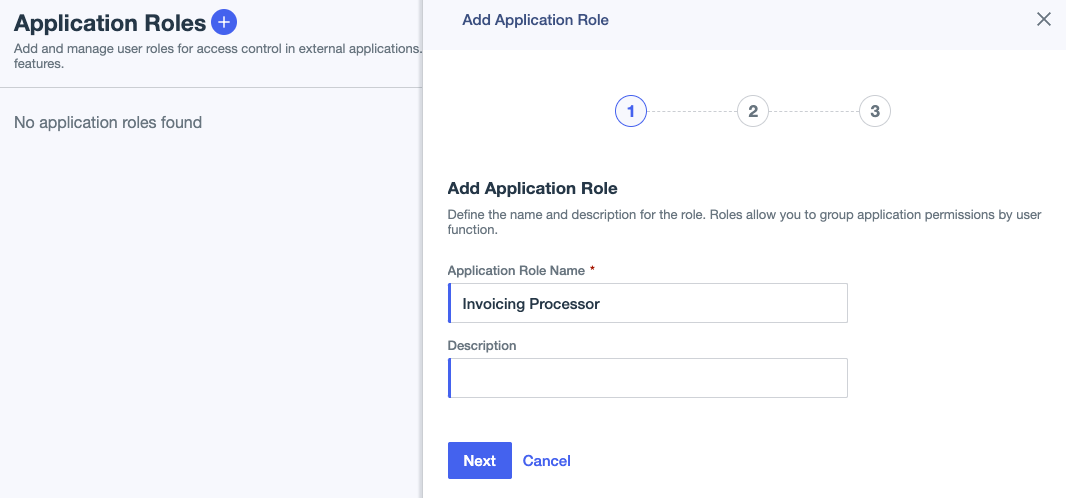
Click the icon next to Application Roles.
-
Enter a unique Application Role Name and an optional Description. Click Next.
The name can include Unicode letters, marks, numbers, spaces, forward slashes, dots, apostrophes, underscores, and hyphens, with a maximum length of 20 characters.
Example:
For example, you could add an
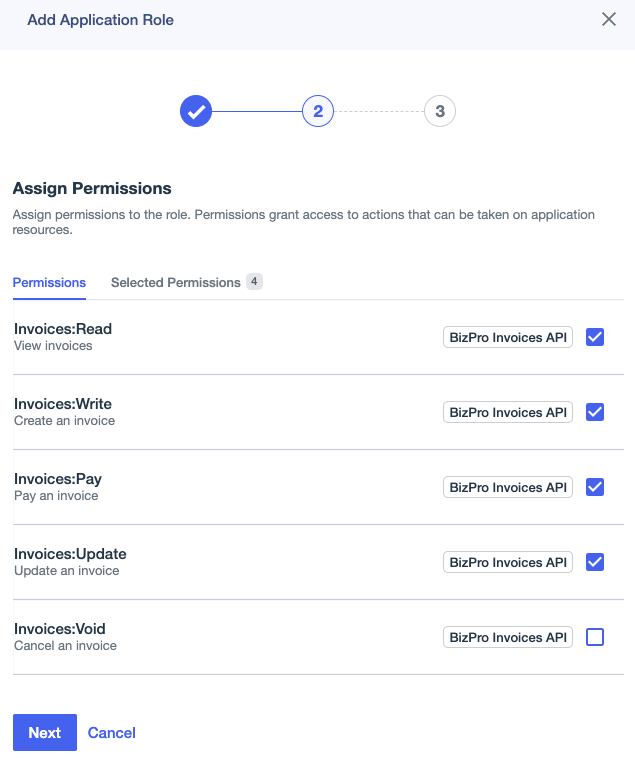
Invoicing Processorrole for the BizPro invoicing application to give Invoicing Processors permissions to read, write, pay, and update invoices.
-
Select the permissions that you want to assign to the role.
Permission names list the application resource and action separated by a colon. For reference, the PingOne resource associated with the application resource is displayed next to the checkbox.

-
Click Next.
-
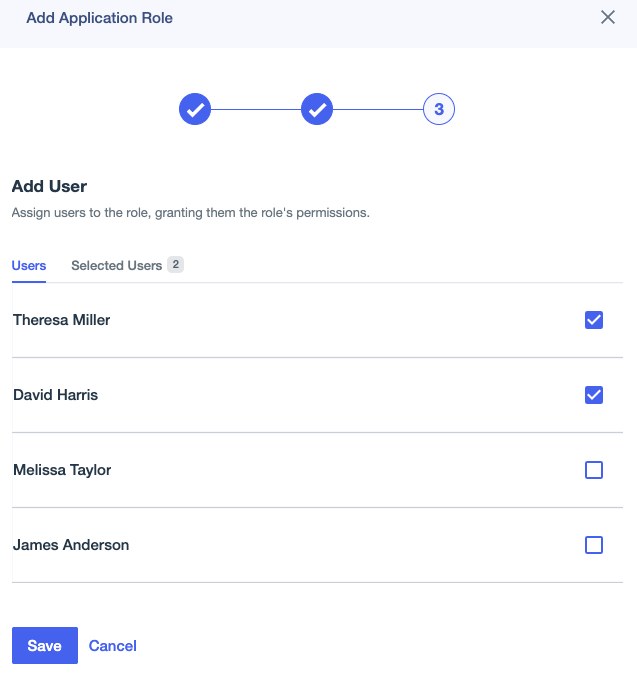
Select the users that you want to assign to the role.
Result:
Selected users will have the permissions that are assigned to the role.

-
Click Save.
Next steps
Add additional roles and assign users to grant them the permissions assigned to the roles.
For example, in the BizPro invoicing application, Billing Supervisors might need permissions to read and void invoices. Add a Billing Supervisor role and assign the Invoices:Read and Invoices:Void permissions to it.