Setting up SSO to PingAccess
To set up single sign-on (SSO) access from the PingOne admin console to PingAccess, configure PingOne and PingAccess, and then test the sign-on experience.
Before you begin
Ensure that you have:
-
A licensed version of PingAccess
-
A PingOne account
Configuring PingOne for SSO in PingAccess
About this task
To configure PingOne for SSO in PingAccess:
Steps
-
In the PingOne admin console, add a new attribute for PingAccess administrator roles:
-
Go to Directory > User Attributes and click .
-
In the Add Attribute panel, select Declared and click Next.
Declared attributes maintain the values of the claims that authorize access to other products.
-
Enter the following information:
-
Name:
PingAccess-Role(this value is case sensitive) -
Display Name:
PingAccess Role -
Description (optional): Enter a brief description of this attribute that distinguishes it from others.
-
-
Click Save.
-
-
Create a new connection:
-
Go to Applications > Applications and click .
-
In the Add Application panel, enter the following information:
-
Application Name: A name that helps you recognize this connection, such as
The PingOne Admin Console SSO PingAccess. -
Description (optional): A brief description of this application that distinguishes it from others.
-
-
For Application Type, select OIDC Web App and click Save.
-
In the application details panel, on the Configuration tab, click the Pencil icon.
-
Locate the Redirect URIs field and enter the appropriate URL.
Example:
For example,
https://<FQDNofPAServer>:9000/pa/oidc/cb, where <FQDNofServer> is the machine name or fully qualified domain name of your PingAccess server, such ashttps://localhost:9000/pa/oidc/cb. -
Click Save.
-
On the Resources tab, click the Pencil icon.
-
In the Scopes list, locate the profile scope and select the checkbox to add it to the Selected Scopes section.
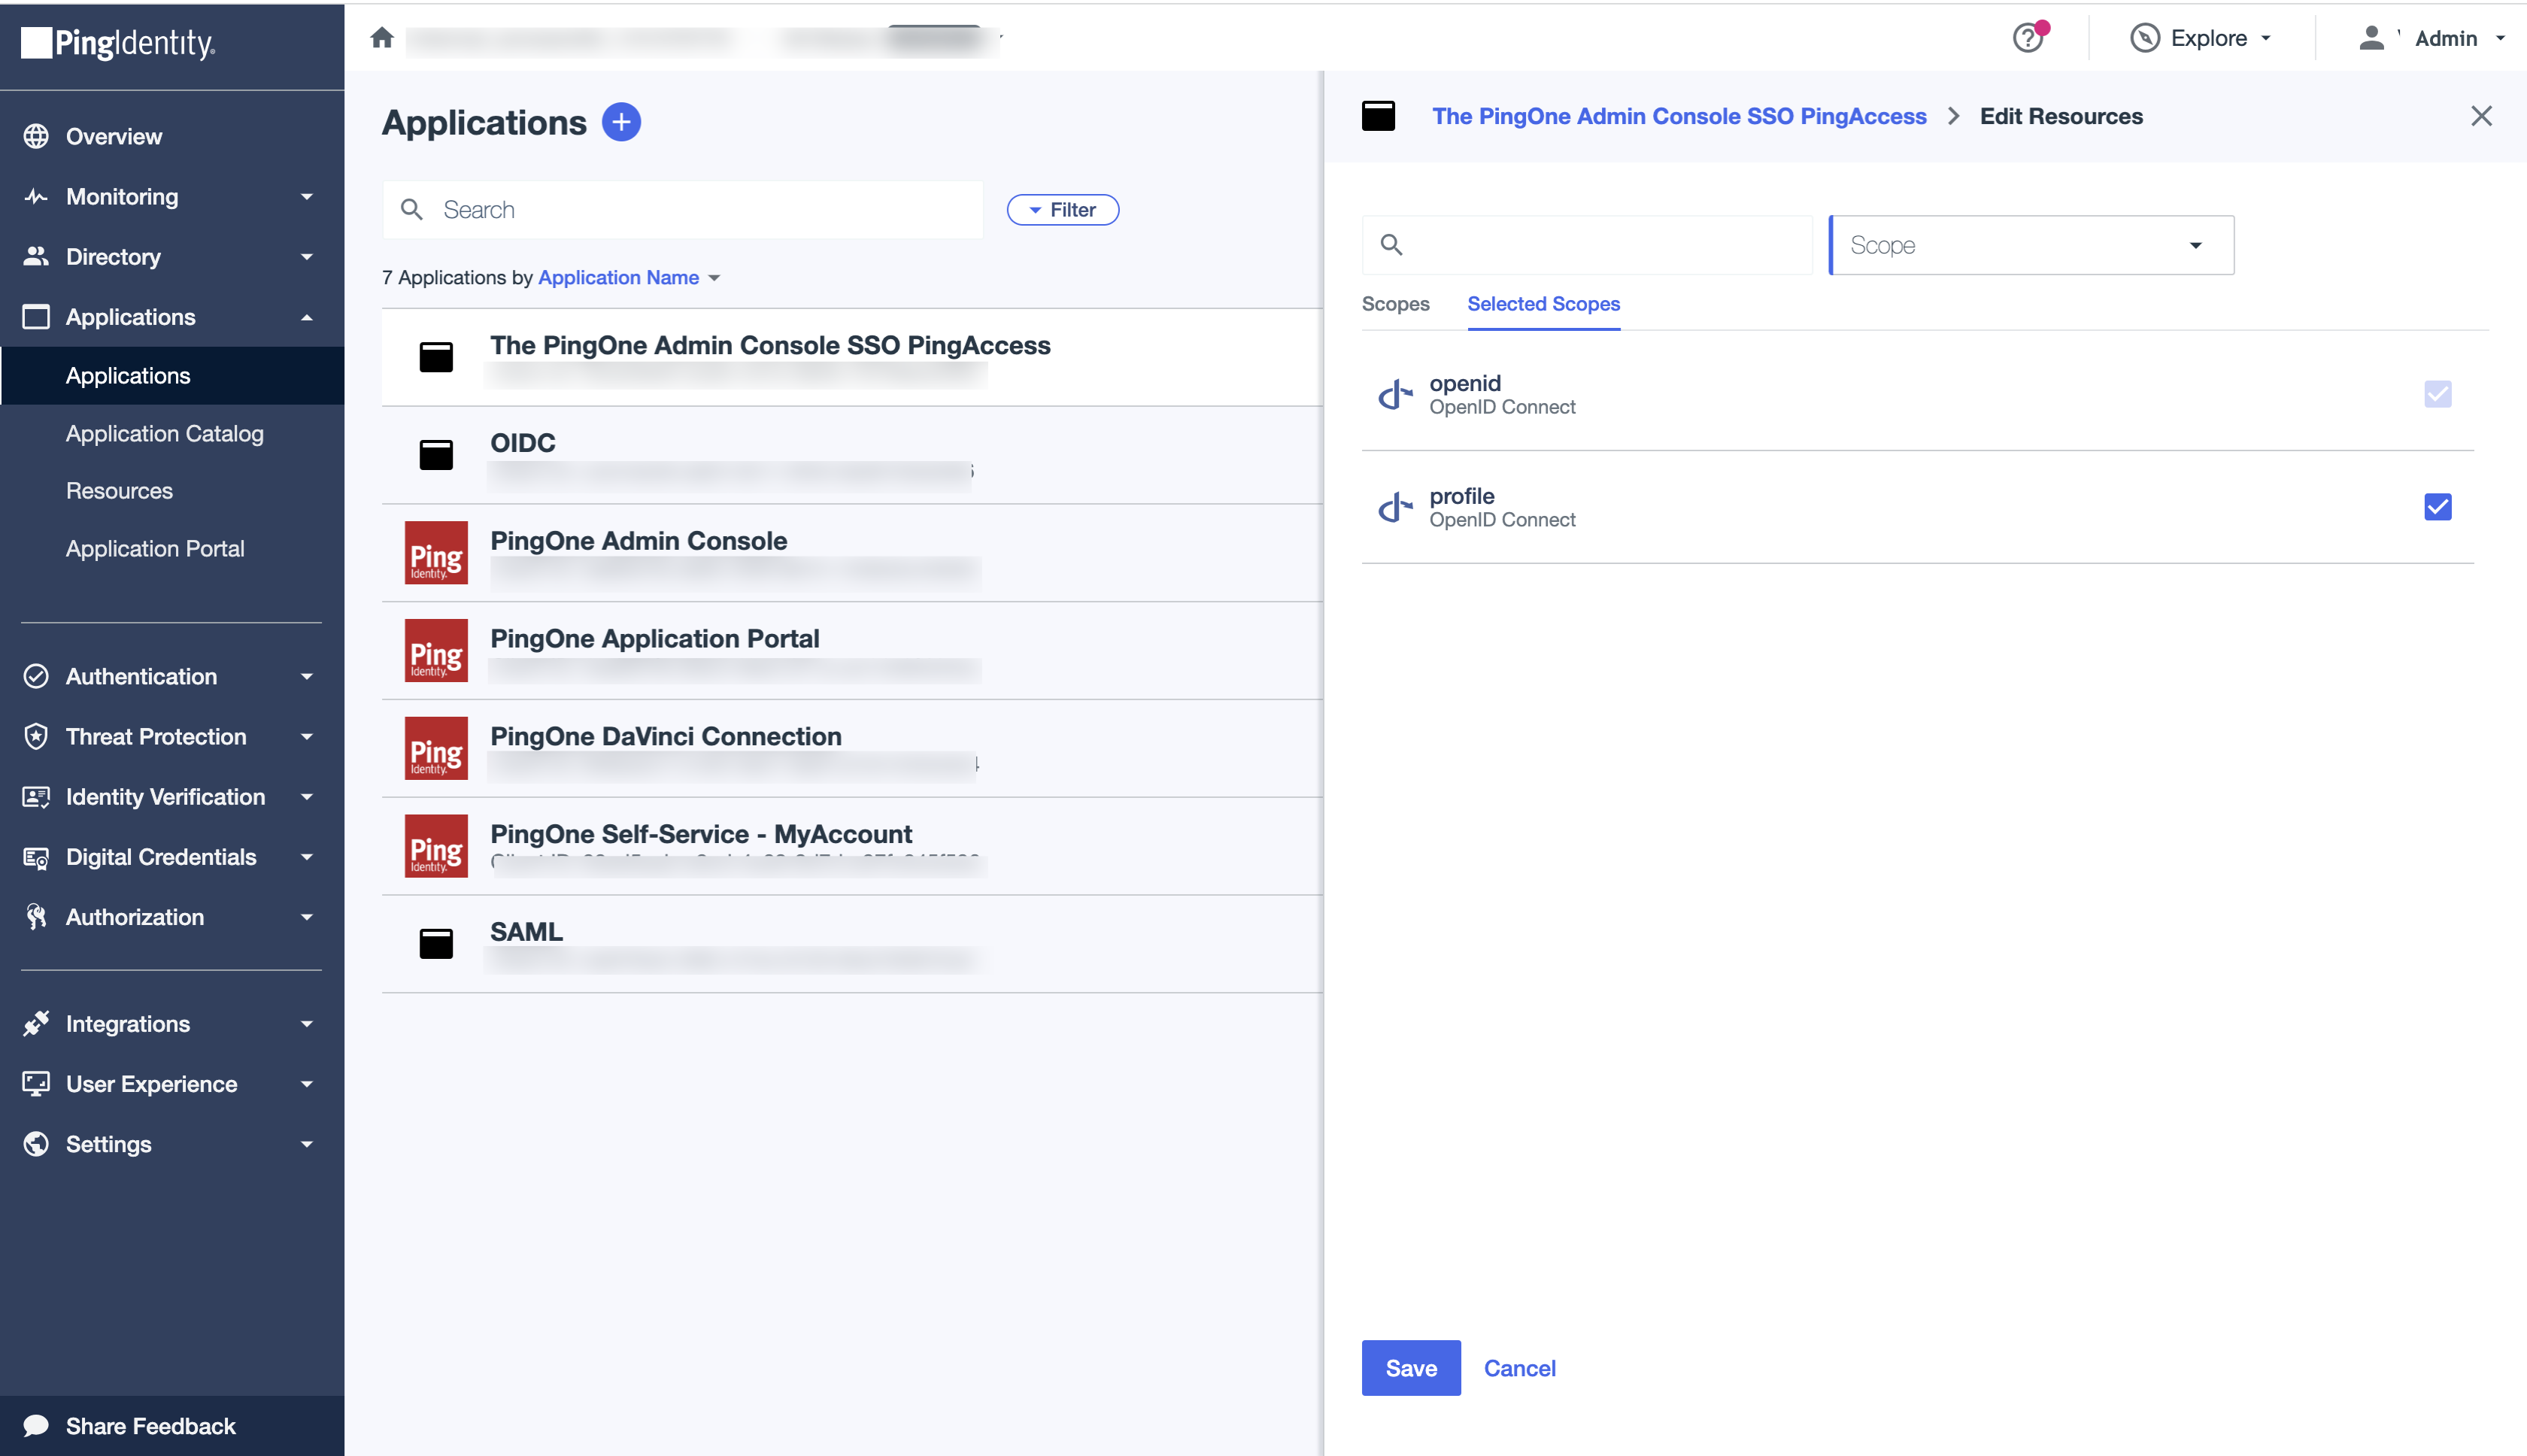
-
Click Save.
-
On the Attribute Mappings tab, click the Pencil icon.
-
Click Add and add the following attribute mapping:
Attributes PingOne Mappings PingAccess RolePingAccess Role
-
Click Advanced Configurations.
-
For the attributes you just mapped, select the Required checkbox.
-
Click Save.
-
-
To enable the application, click the toggle at the top of the details panel to the right (blue).
You can disable the application by clicking the toggle to the left (gray).
-
Add a new PingAccess administrator and define their role and responsibilities.
-
Go to Directory > Users and click .
-
On the Add User panel, enter a username for a PingAccess administrator with the Administrator role assigned in PingAccess and select a population to which the administrator should belong.
Learn more in Admin UI SSO authentication in the PingAccess documentation.
-
Click Save.
-
In the Profile tab, click the Pencil icon and, in the Custom Attributes section, click Add.
-
In the New Attribute list, select PingAccess Role and enter
fullAdmin. -
Click Save.
-
In the user details panel, go to the Roles > Administrator Roles tab, and click Grant Roles.
If there aren’t any application roles available in the environment, the settings are on the Roles tab.
-
In Available Responsibilities, click Environment Admin and select the checkboxes for the organizations and environments where the administrator should have this role.
-
Click Save.
-
Click the More Options (⋮) icon and select Reset Password.
-
Select Force password reset on next sign on.
-
Click Save.
-
-
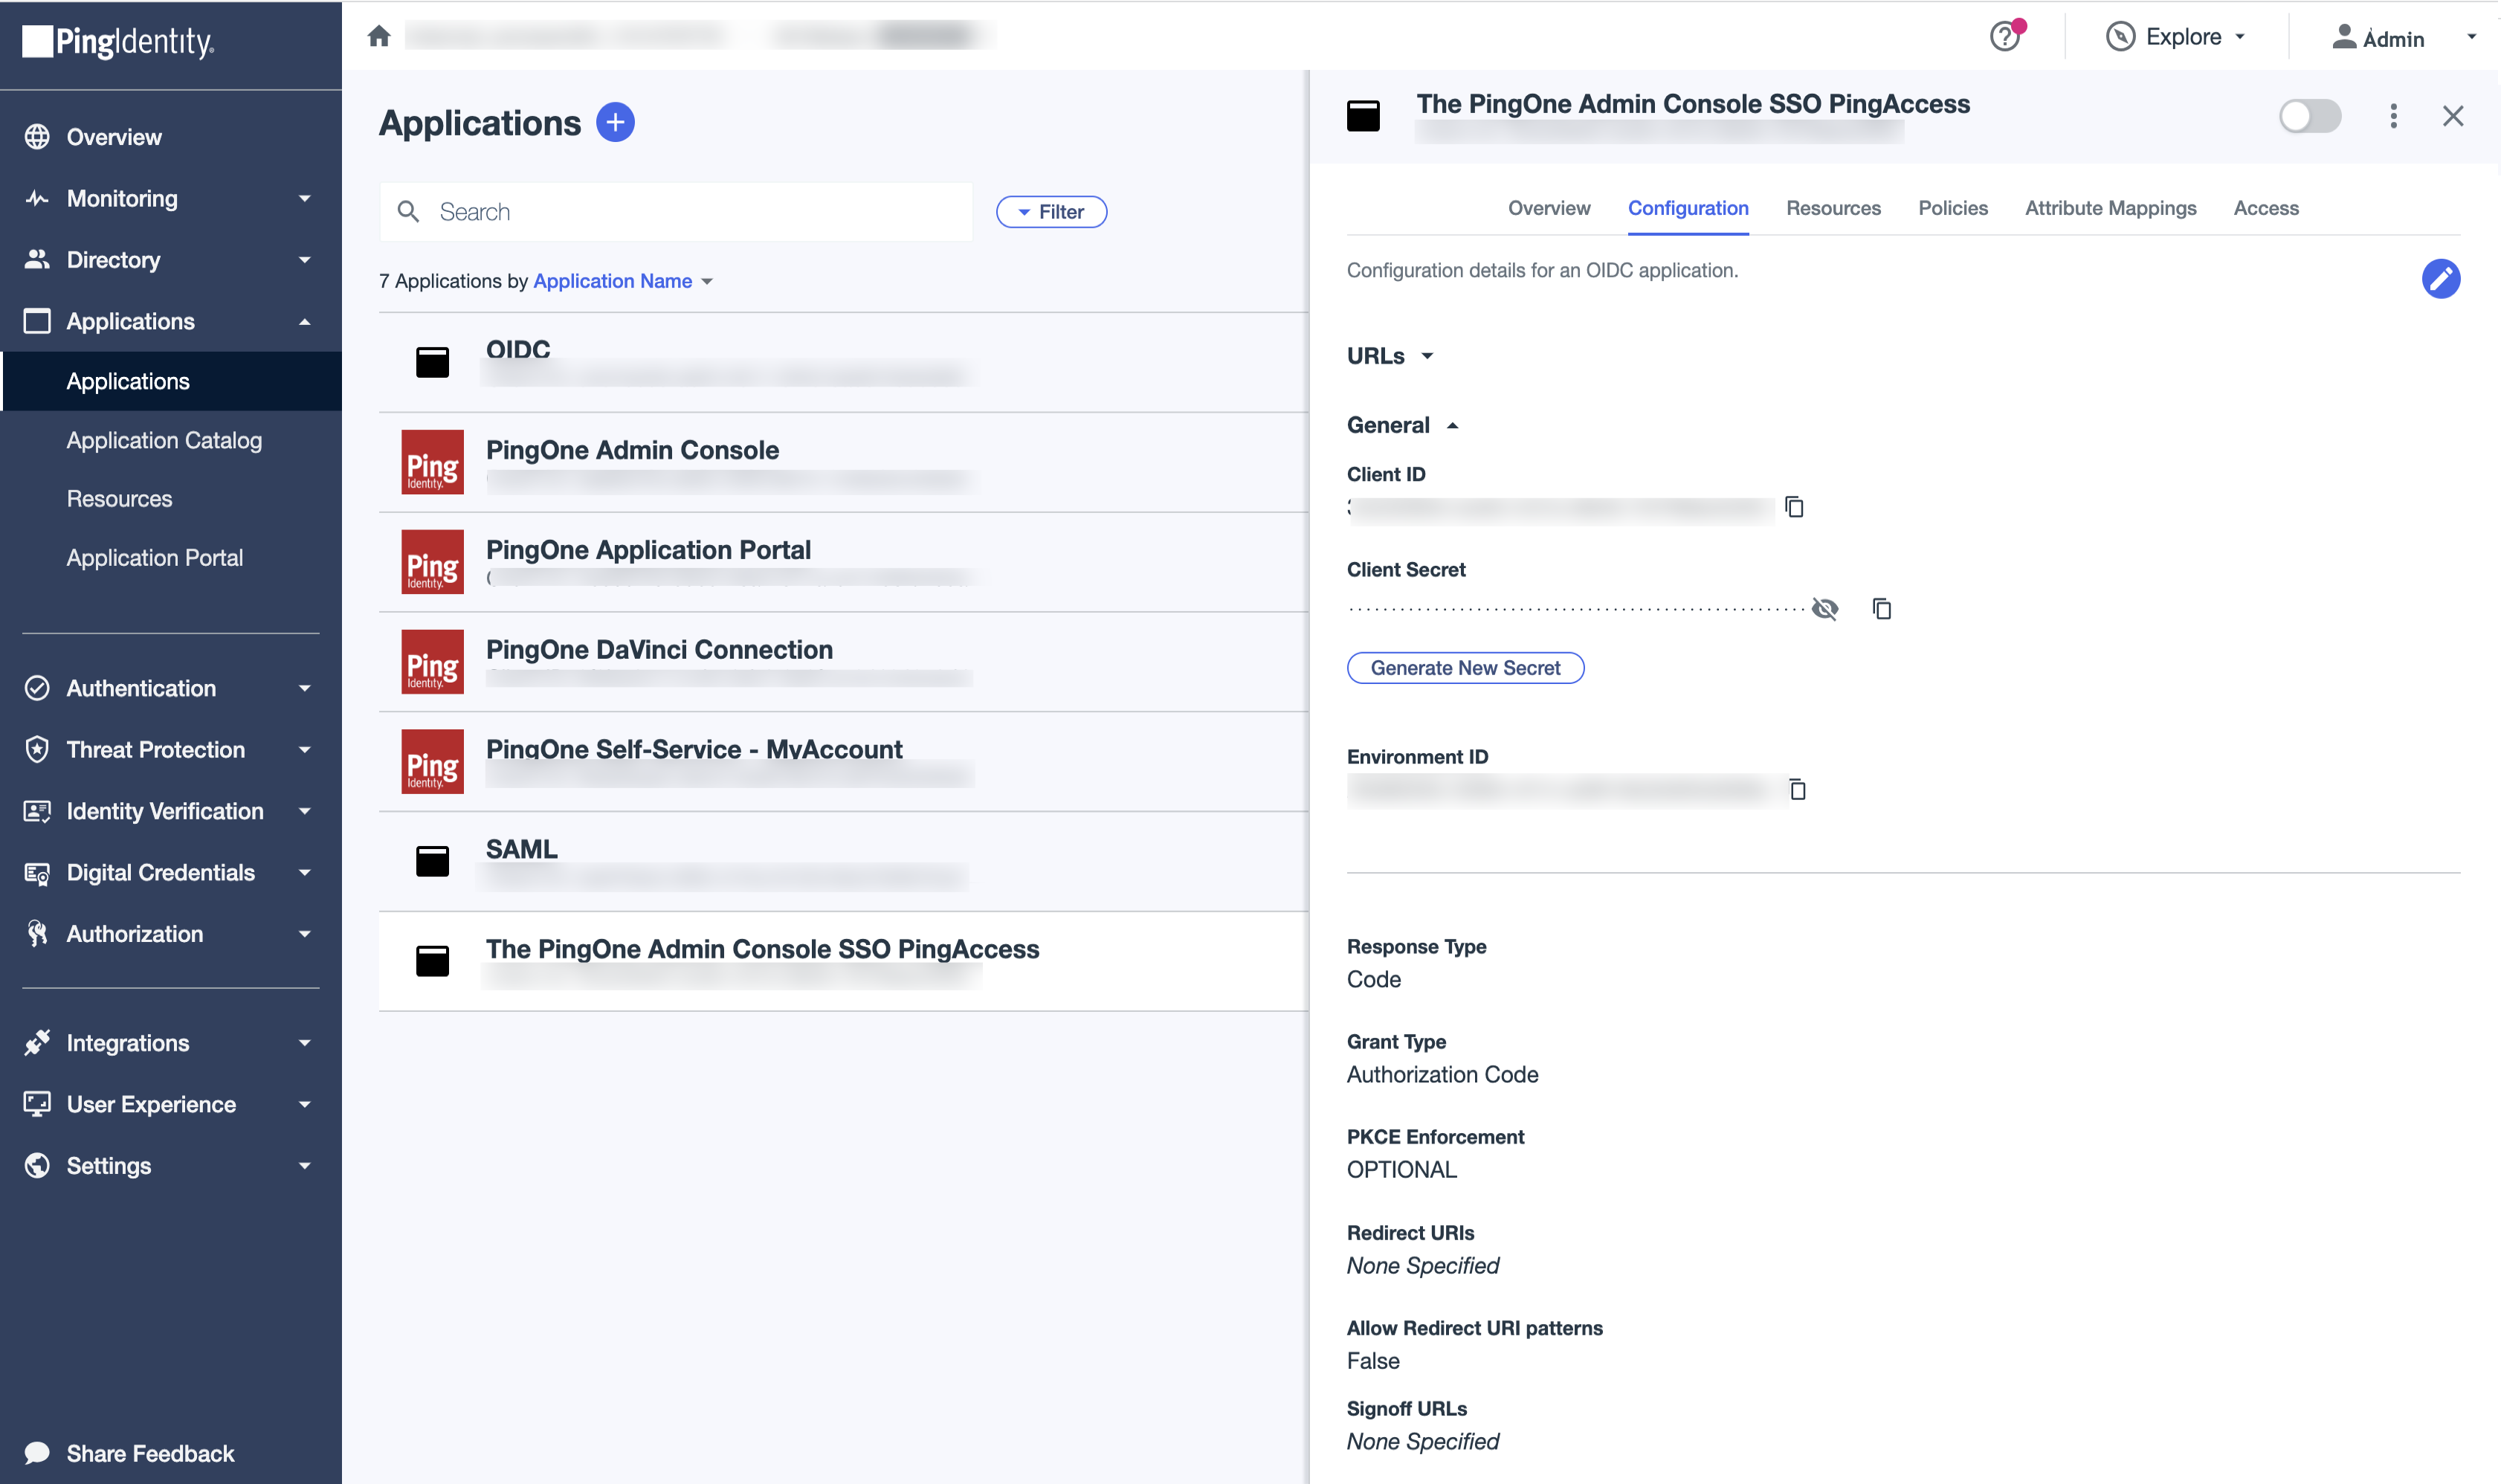
Go to Applications > Applications and locate the application you created earlier.
-
Click the application entry to open the details panel.
-
On the Configuration tab, review the configuration information.
You need this configuration information to configure PingAccess for SSO, so keep this browser window open.
Configuring PingAccess
After configuring PingOne for SSO, configure PingAccess.
Steps
-
In the PingAccess administrative console, go to Settings > System > Token Provider.
-
On the Token Provider page, select PingOne SSO as the token provider.
-
In the Issuer field, enter the Issuer ID for the connection you created in PingOne.
You can find this URL on the Overview tab of the application in PingOne.
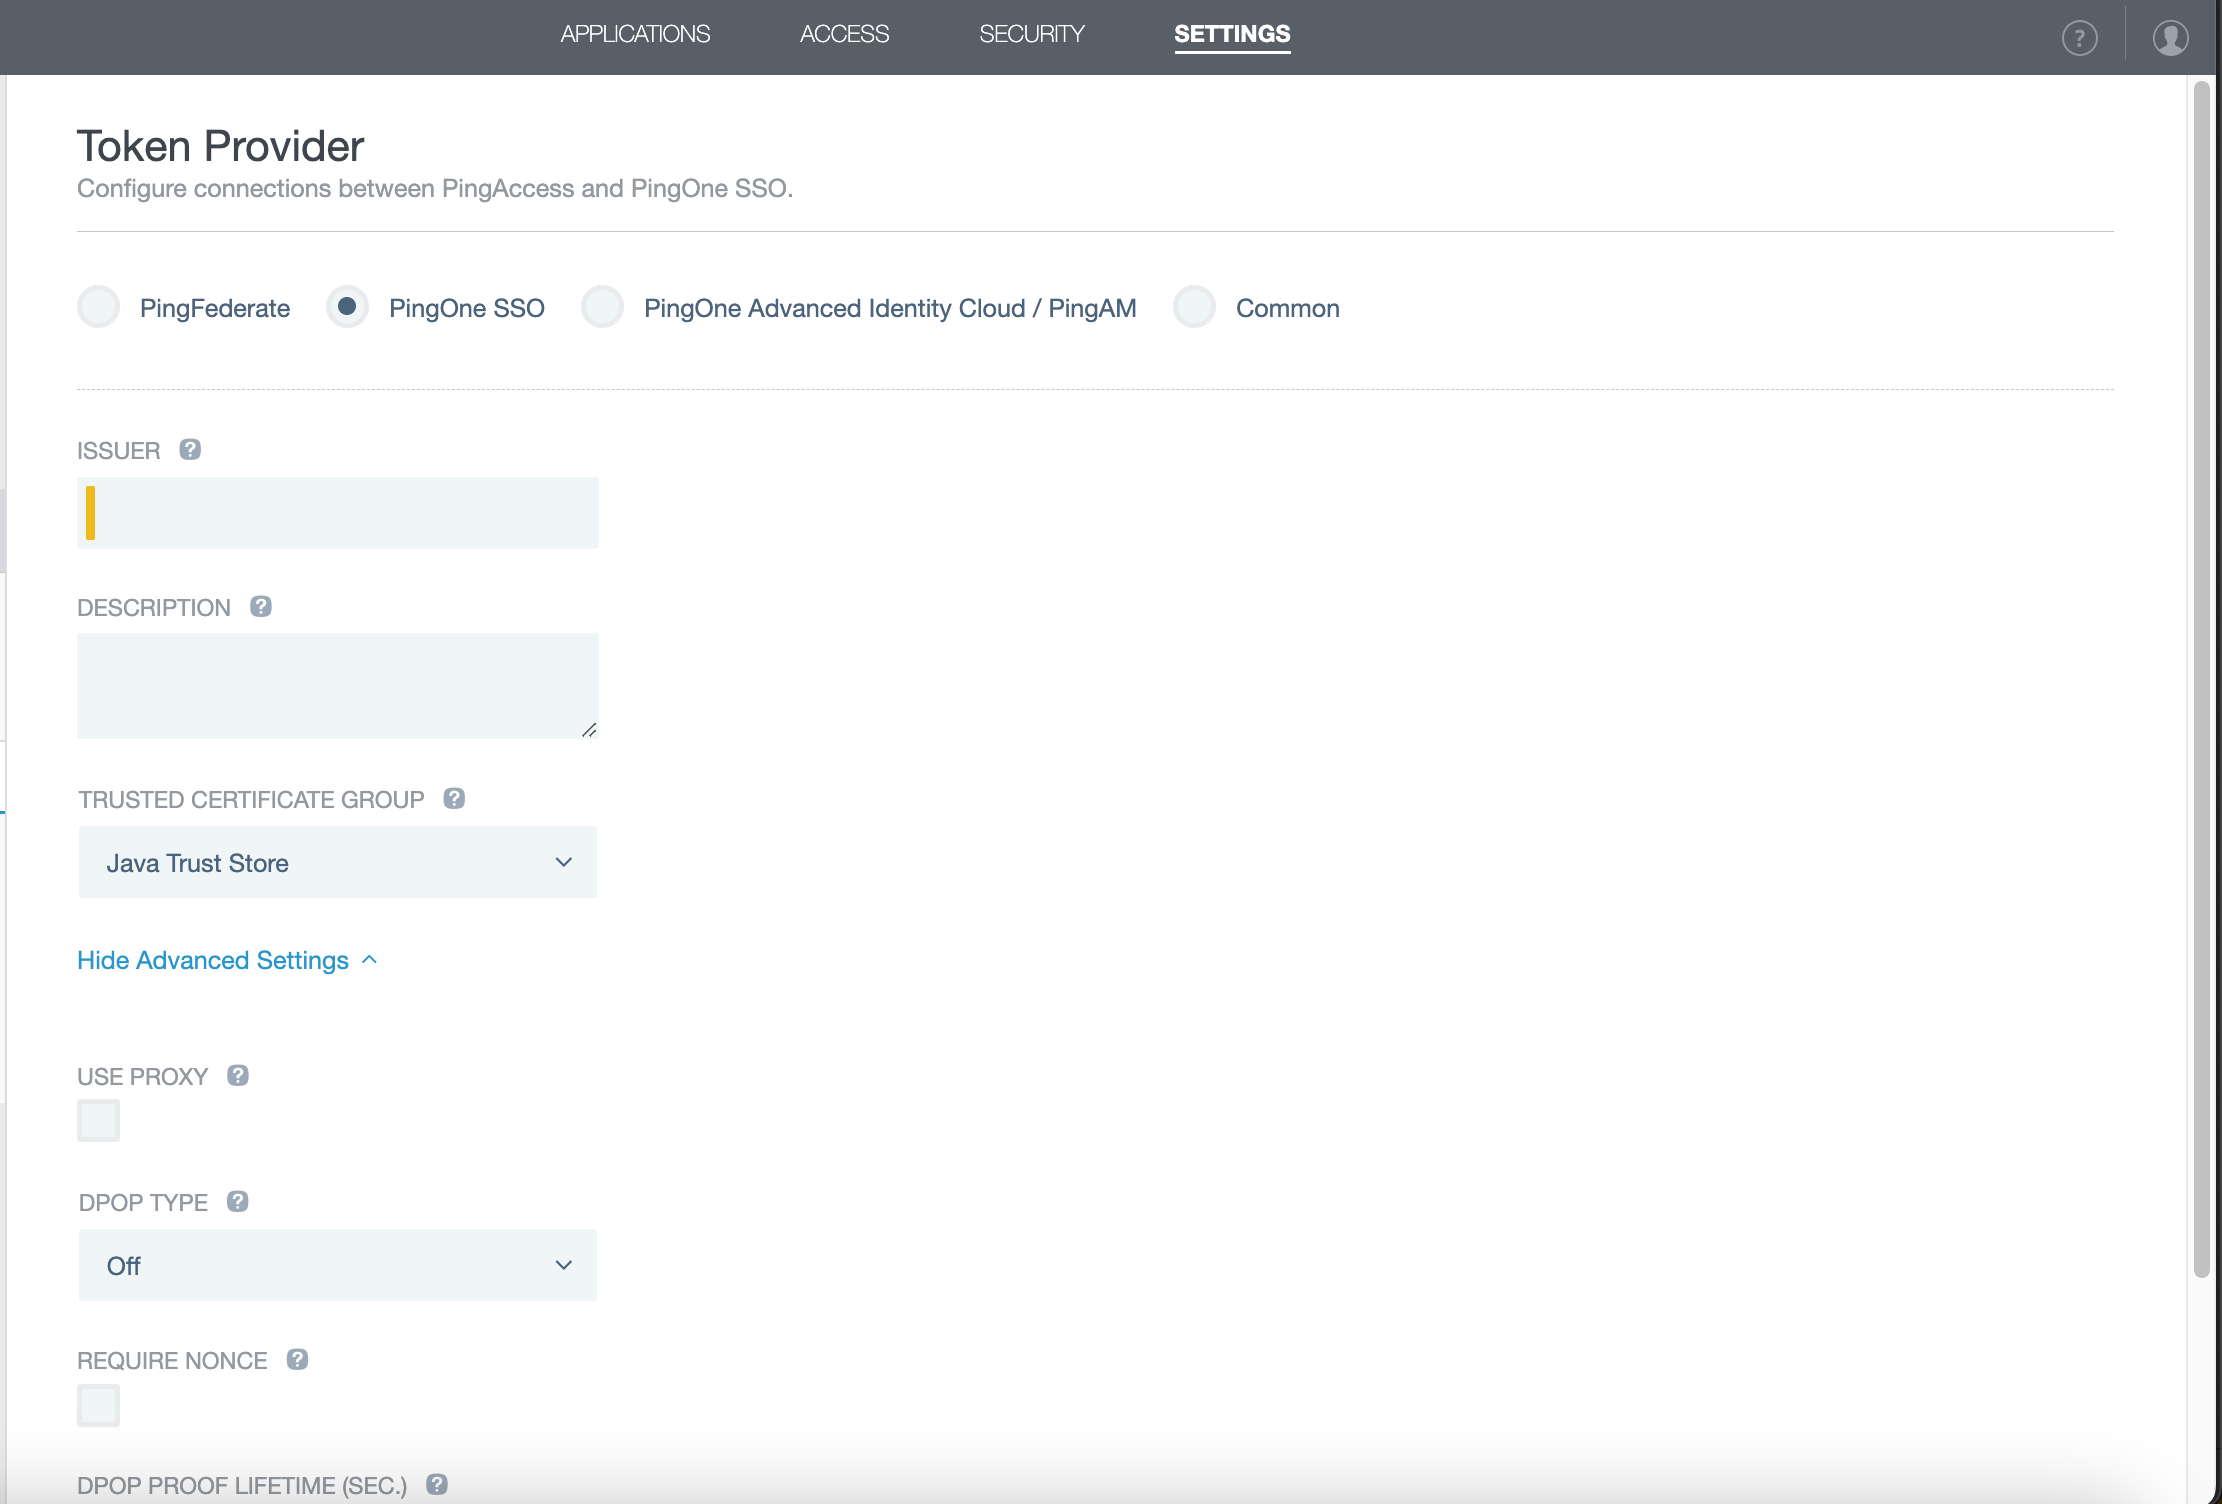
Learn more in Configuring PingOne in the PingAccess documentatation.
-
Go to Settings > Admin Authentication > UI Authentication.
-
On the Authentication Method page, select Single Sign-On and enter or edit the following:
-
For OpenID Connect Login Type, select Code.
-
In the Client ID field, enter the Client ID for the connection you created in PingOne.
You can find Client ID on the Overview tab of the application in PingOne.
-
For Client Credentials Type, select Secret and enter the Client Secret for the connection you created in PingOne.
You can find Client Secret on the Overview tab of the application in PingOne.
-
Click Save.
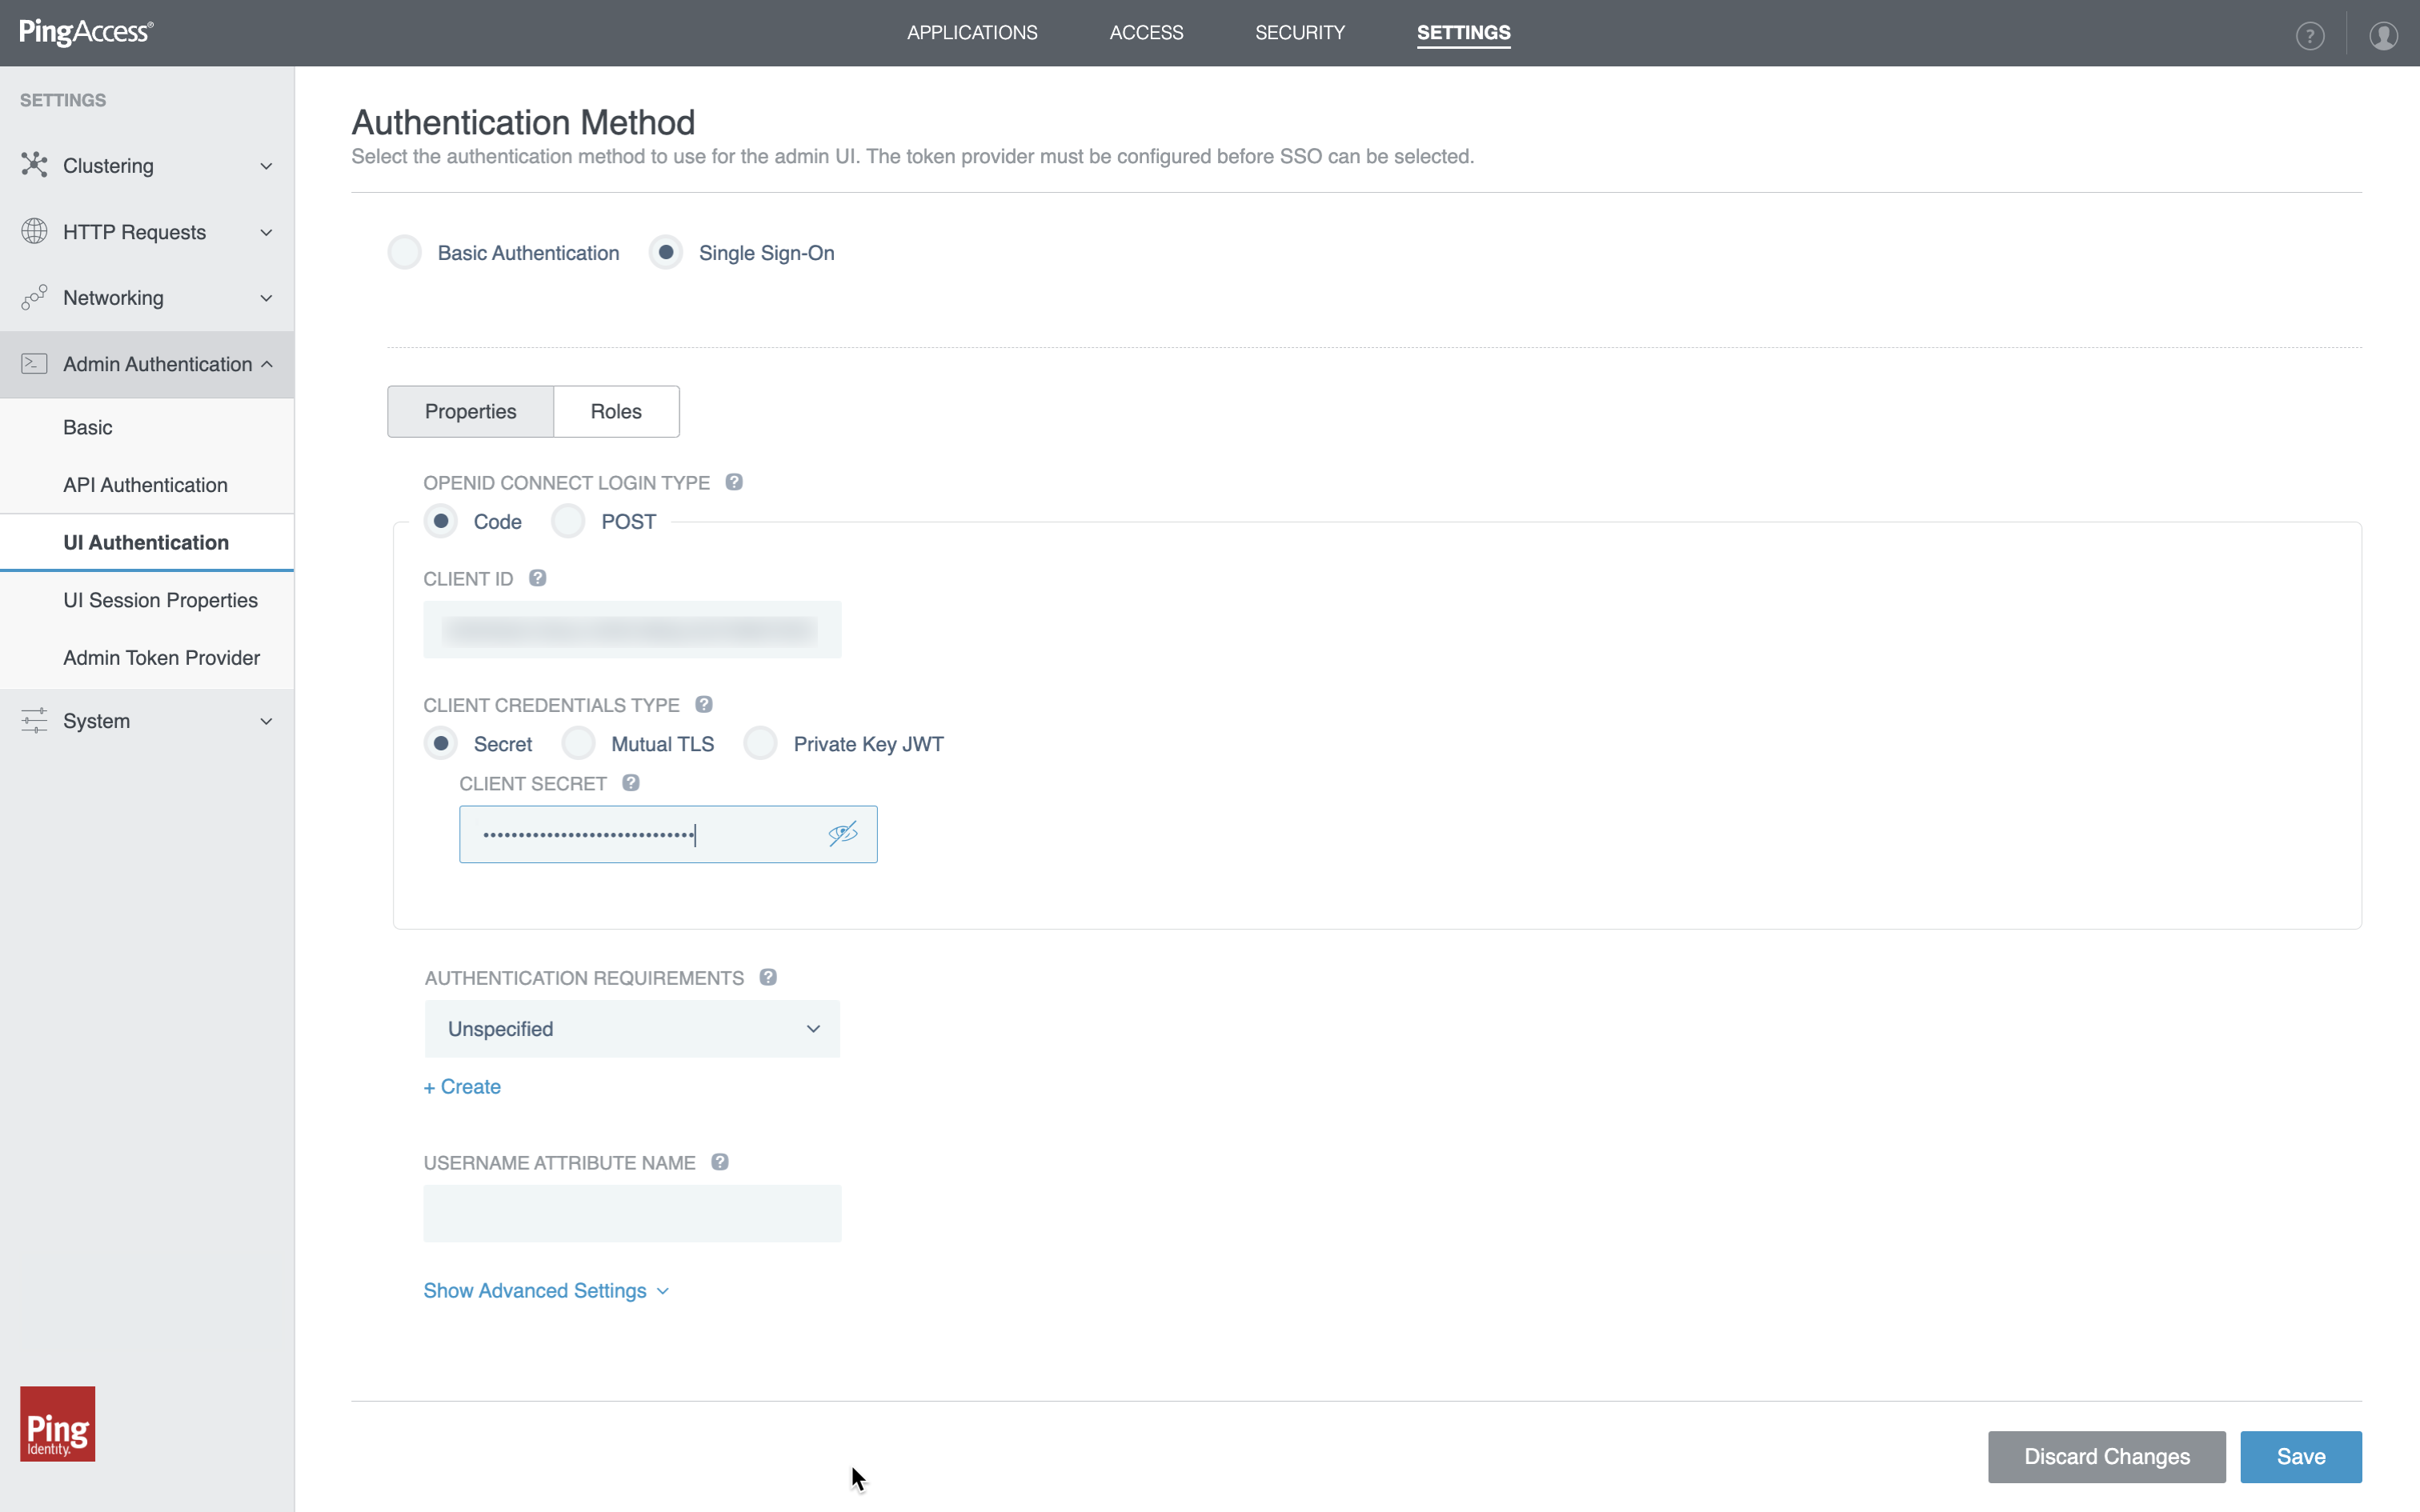
Learn more in Admin UI SSO authentication in the PingAccess documentation.
-
Testing SSO to PingAccess
After configuring PingOne and PingAccess, test SSO to PingAccess.
Steps
-
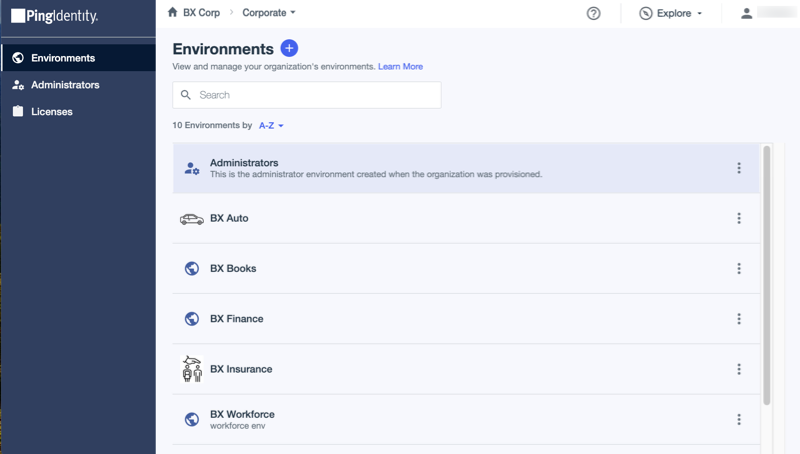
In the PingOne admin console, click the Ping Identity logo.
Result:
The admin console displays the environments to which you have access.
-
On the Environments page, click the environment to open the details panel.
-
Click Manage Environment to go to the Overview page for the environment.
-
In the Services section, click the PingAccess icon.
Result:
The PingAccess administrative console opens.
Troubleshooting:
If the OpenID Connect (OIDC) token provider is unreachable:
-
Review the reason for the failure in the
pingaccess.logfile. -
Enable the default administrator authentication by setting the
admin.authproperty in the<PA_HOME>/conf/run.propertiesfile.Learn more in Editing
run.propertiesto disable SSO in the PingAccess documentation. -
In the PingAccess administrative console, edit the admin UI SSO or token provider settings to address the issue.
-
In the
run.propertiesfile, setadmin.authback todefault.![A screen capture of the PingAccess [.filepath]``run.properties`` file with the authentication method paramety highlighted.](_images/p1_pingaccess_troubleshooting.png)
-
Restart PingAccess to test.
-