Adding an environment
For the purposes of this tutorial, add an environment that includes the PingOne MFA service. A setup assistant guides you through this process.
Before you begin
If you created an environment as part of the Starting a PingOne trial process, you can use that environment for this tutorial assuming you’ve selected the Customer use case and included PingOne MFA in the environment. Skip this section and go to Creating a registration application.
If you want to create a new environment for the tutorial, complete the steps in these instructions.
|
You must have the Organization Admin role or a custom role with equivalent permissions to create an environment. |
Steps
-
In the PingOne admin console sidebar, click the Ping Identity logo to open the Environments page.
-
Click the Plus icon ().
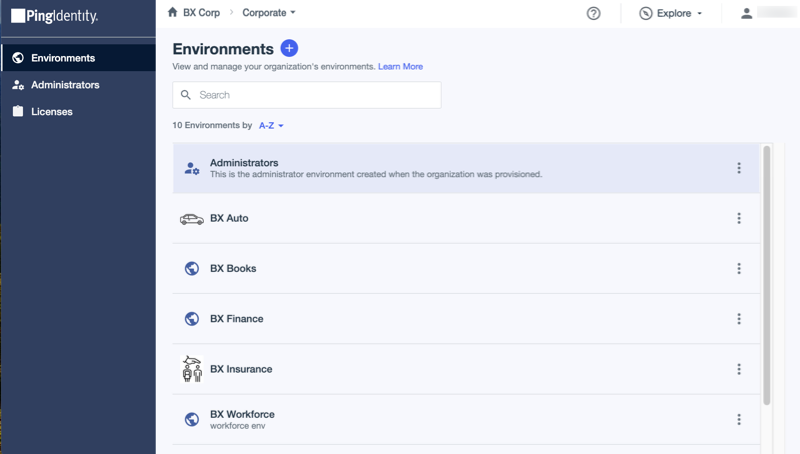
Result:
The Add New Environment setup assistant starts.
-
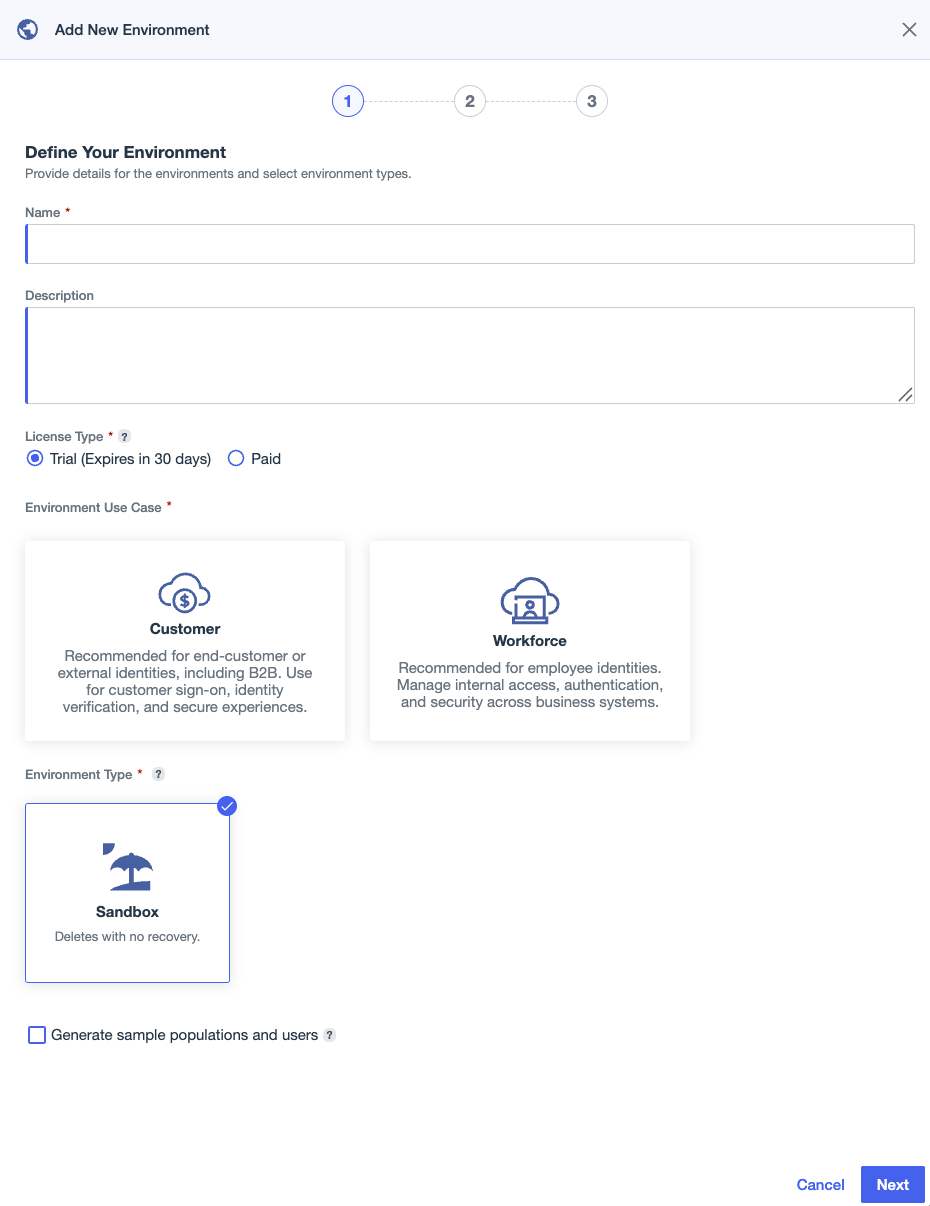
Define your environment by entering the following:
Field Description Name
A unique identifier for the environment.
Description (optional)
A brief description of the environment.
License Type
Select Trial or Paid.
If you don’t already have a trial license for PingOne, selecting the Trial option creates a 30-day trial environment which you can use to test and evaluate PingOne services you haven’t yet purchased.
Select Paid to assign a paid license to the environment. Learn more in Licenses and Platform Limits.
Environment Use Case
Select Customer.
This option allows you to design registration and subsequent sign-on experiences for your customers.
Environment Type
Select Sandbox or Production.
Sandbox environments are typically used for configuration and testing before deployment.
If you selected Trial for the License Type, only Sandbox is available.
Production environments are typically used for live configurations that are deployed for real-world use. Learn more about environment types in Sandbox and Production environments.
Generate sample populations and users
Select this checkbox to generate two populations and 40 sample users in the new environment.
-
Click Next.
-
The next steps depend on the License Type you selected in step 3:
License Type Next Steps Trial
-
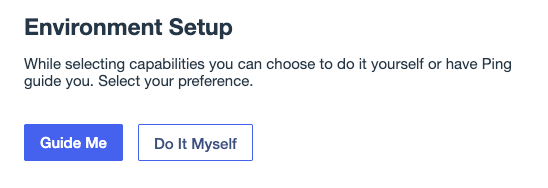
Click an option on the Environment Setup modal:
-
Guide Me: PingOne selects capabilities for you.
You’ll have the option to remove any of these capabilities before you finalize the environment.
-
Do It Myself: You select the capabilities you want to add to the environment.
-
-
Select capabilities based on the option you selected in the previous step:
-
If you selected Guide Me, a bundle of services applicable to workforce environments is automatically added to the environment, and you can select optional capabilities that might be useful for advanced use cases.
The bundle includes:
-
PingOne SSO
-
PingOne MFA
-
PingOne Protect
-
PingOne DaVinci
-
PingOne Verify
-
-
If you selected Do It Myself, you can select from a list of capabilities available for the customer environment use case.
Ensure that you select Multi-Factor Authentication (MFA).
-
-
Click Next.
Paid
-
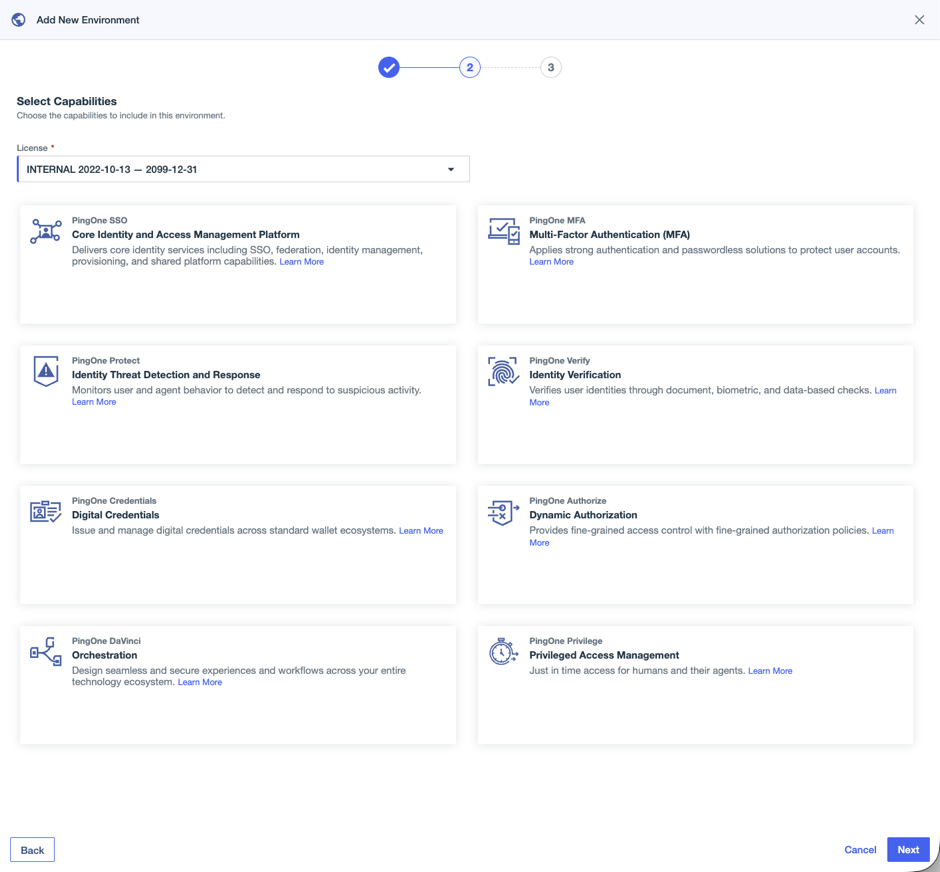
On the Select Capabilities page, select a License in the list.
The capabilities available for the selected license are listed.
For organizations in the Singapore or Canada geographies, the license selection determines the version of PingOne MFA that is available for the environment.
-
Select the capabilities you want to include in the new environment.
Ensure that you select Multi-Factor Authentication (MFA).
-
Click Next.
-
-
On the Finalize Setup page, review the details about the new environment and clear the checkboxes next to any capabilities that you don’t want to include.
-
Click Save to create the new environment.
Result
The new environment is created in your PingOne organization and the Environments page opens.