Managing populations
PingOne allows you to organize users into populations to simplify user and policy management.
Click the appropriate tab for instructions on:
-
Viewing your existing populations and their details
-
Adding a new population
-
Making changes to a population
-
Deleting an unused population
-
Viewing populations
-
Adding a population
-
Editing a population
-
Deleting a population
Viewing populations
Use the Populations page to view populations in PingOne.
Steps
-
In the PingOne admin console, go to Directory > Populations and browse or search for the population that you want to view.
-
Click the population entry to open the details panel.
Result
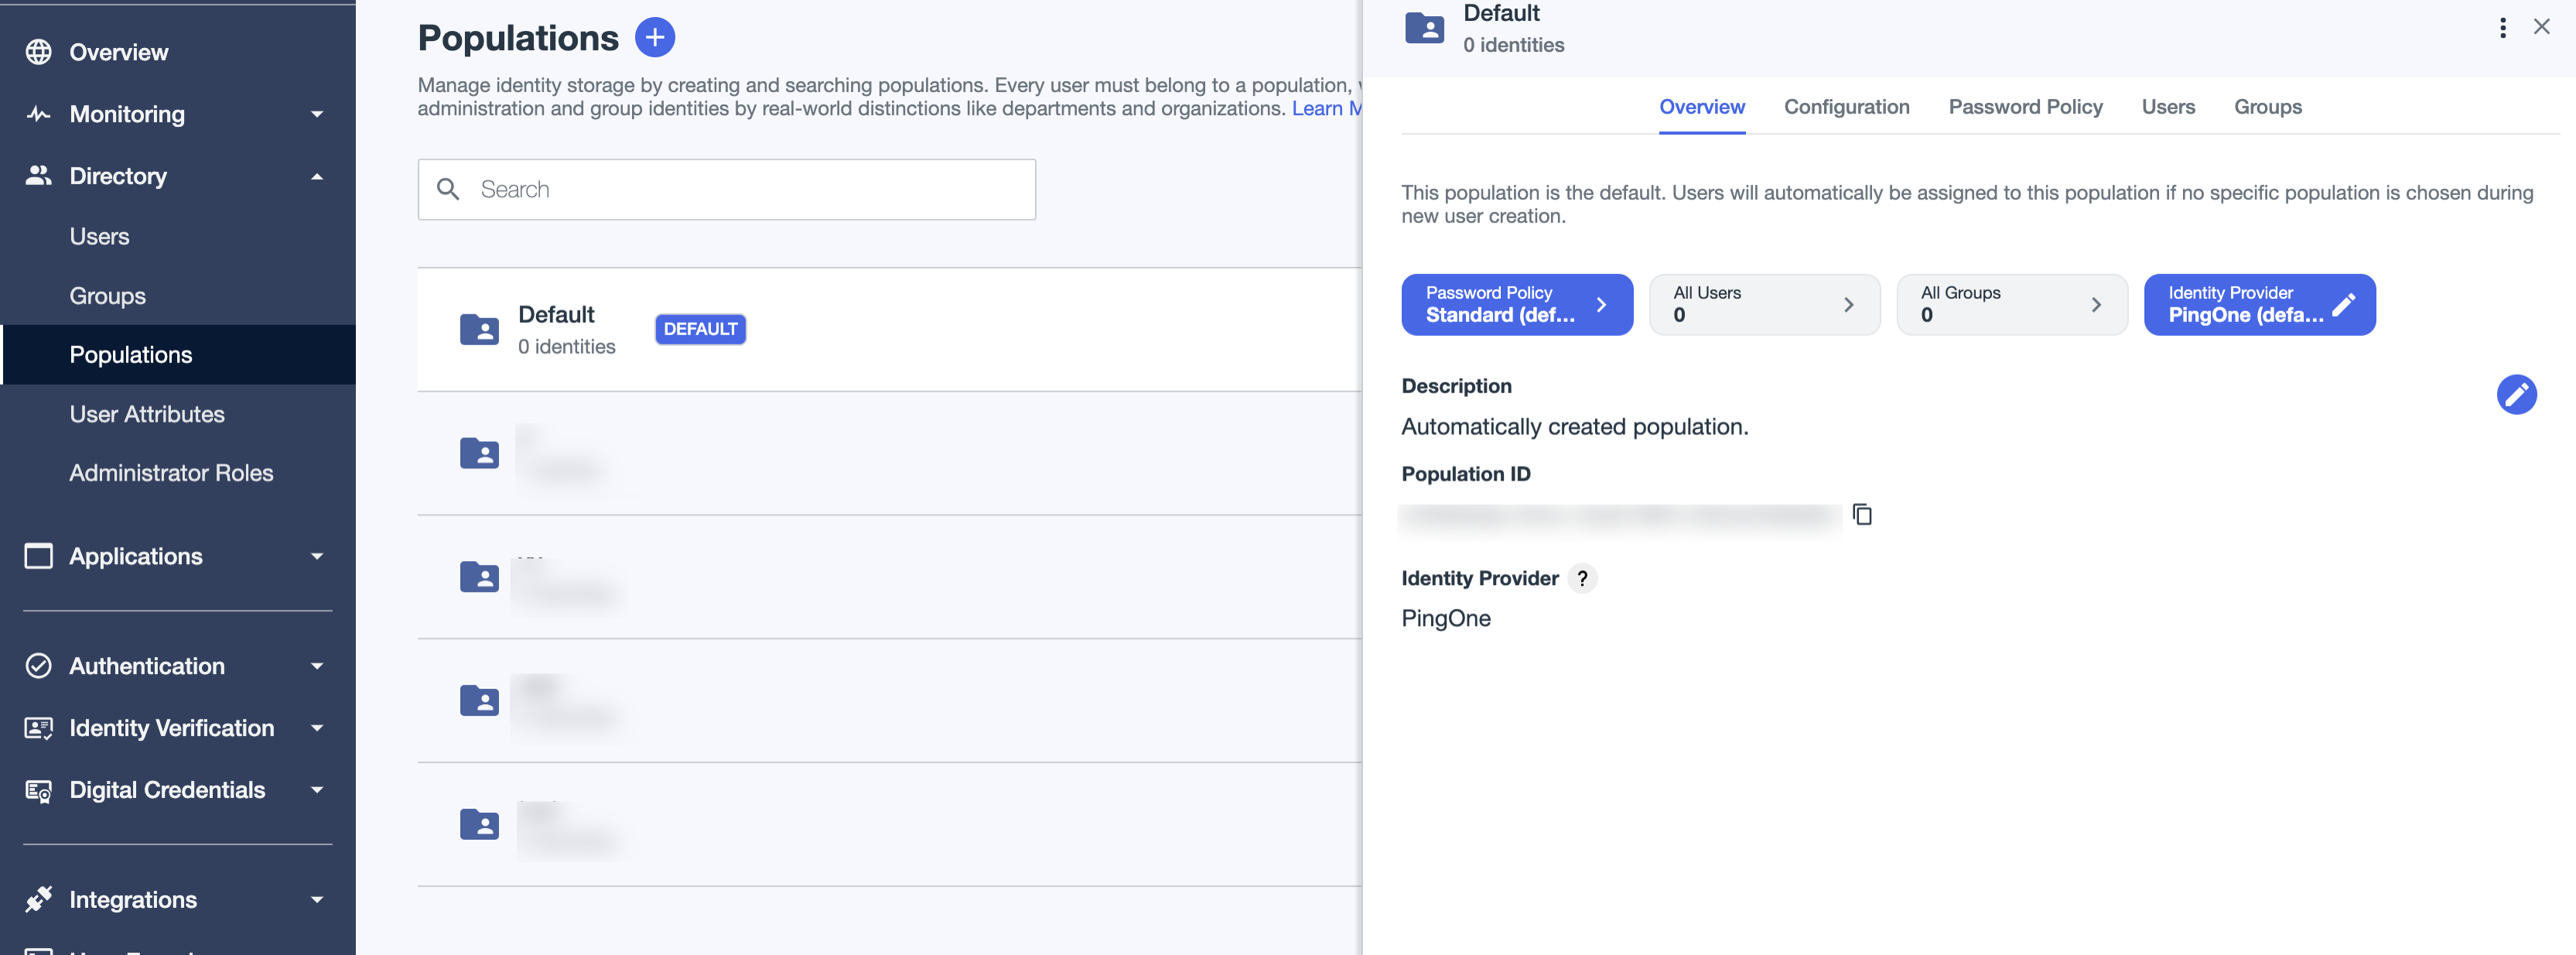
The population details panel shows information about the population on the following tabs:
Overview
The Overview tab shows general information about the population.
| Field | Description | ||
|---|---|---|---|
Population Name |
A unique label for the population. |
||
Description |
A brief description of the population, if one was entered. |
||
Population ID |
A unique identifier for the population.
|
||
Identity Provider |
The default identity provider (IdP) for the population if one was selected. When nothing else is selected, PingOne is used as the default IdP during the runtime. Click the title to go to the specific identity provider. If your IdP isn’t enabled, the word Disabled displays next to the title. Manage your IdPs from Integrations > External IdPs. |
Configuration
The Configuration tab displays information about settings that apply only to DaVinci. These settings are not used in sign-on policies.
| Field | Description | ||
|---|---|---|---|
Alternative Identifiers |
A domain, ID, or custom value used to identify the population. |
||
Language |
The preferred language for this population. Learn more in Languages.
|
||
Theme |
The default branding theme for this population. Learn more in Branding and themes and Adding a theme.
|
Password Policy
The Password Policy tab shows detailed information about the password policy in use for the population.
| Field | Description |
|---|---|
Password Policy |
The password policy assigned to the population. Click the link to go to the Password Policies page. |
Description |
A brief description of the password policy. |
Password Policy ID |
The ID of the password policy assigned to the population. Click the password ID to copy it to the clipboard. |
Password Requirements |
The requirements for the password. For example, the password must be 12 characters long, or it requires special characters. |
Password Policy Rules |
The password rules for the policy. For example, a rule that requires the user change their password every 6 months. |
Account Lockout Rules |
The lockout rules for the account. For example, after five incorrect password entries, the user is locked out for a period of time. |
Users
The Users tab shows the list of users currently in the population.
Groups
The Groups tab shows the list of groups currently in the population.
Adding a population
Use the Populations page to add a population in PingOne.
Steps
-
In the PingOne admin console, go to Directory > Populations.
-
Click the icon to add a population.
-
Enter the following:
Field Description Population Name
A unique label for the population.
Description (optional)
A brief description of the population.
Default Population
Select the checkbox to specify the current population as the default population. Users created without a specified population are added to the default population.
If you are changing the default population, PingOne shows a confirmation message. Click Confirm.
-
Click Save.
Editing a population
Use the Populations page to edit existing populations.
Steps
-
In the PingOne admin console, go to Directory > Populations and browse or search for the population you want to edit.
-
Click the population entry to open the details panel.
-
On the Overview tab, click the Pencil icon, edit or enter the following, then click Save:
Field Description Population Name
A unique label for the population.
Description (optional)
A brief description of the population.
Identity Provider (optional)
The default IdP for the population.
If you are changing the default IdP, PingOne shows a confirmation message. Validate the IdP configuration to avoid lockout and click Confirm.
This setting is used at runtime for users in the population who do not have Authoritative Identity Provider configured in their user profile, and only for as long as they remain in the population. When a user doesn’t have an IdP configured in their user profile, the default IdP from the population PingOne is used. If Authoritative Identity Provider is set on the user profile, that setting is used to authenticate the user. The user profile setting is not updated or changed by the setting on the population.
You must have the Identity Data Admin role or a custom role with equivalent permissions to configure this setting. Learn more in Authoritative identity providers.
Default population
Select the checkbox to specify the current population as the default population. Users created without a specified population are added to the default population.
If you change the default population, PingOne shows a confirmation message. Click Confirm.
-
(Optional) On the Configuration tab, click the Pencil icon, edit or enter the following, then click Save.
These settings apply only to DaVinci and aren’t used in sign-on policies.
Field Description Alternative Identifiers
A domain, ID, or custom value used to identify the population.
Language
The preferred language for this population. Learn more in Languages.
If you don’t select a language, the default language for the environment is used.
Theme
The default branding theme for this population. Learn more in Branding and themes and Adding a theme.
If you don’t select a theme, the active theme for the environment is used.
-
(Optional) On the Password Policy tab, the Standard default policy shows. Click the Pencil icon, select a different password policy that is configured in your environment, then click Save.
Learn more in Password policies.
-
(Optional) On the Users tab, browse or search for a user. Click the More Options (⋮) icon and click Manage User Profile.
Result:
The Users page opens, and the user details panel shows.
Learn more in Changing a user’s population.
Users are added to the default population when a population isn’t specified during the new user creation.
-
(Optional) On the Groups tab, browse or search for a group. Click the More Options (⋮) icon and click Manage Group.
Result:
The Groups page opens, and the group details panel shows.
Learn more in Managing groups.
-
Click Save.
Deleting a population
Use the Populations page to remove populations that you no longer need.
Before you begin
-
To delete a population, you must have the Environment Admin role or a custom role with equivalent permissions.
-
You must remove all users from a population before you can delete it.
Steps
-
In the PingOne admin console, go to Directory > Populations and browse or search for the population you want to delete.
-
On the right side of the population entry, click the More options (⋮) icon and then click Delete.
-
On the confirmation message, click Delete.