Adding an attribute
Learn how to use the Trust Framework to add an attribute that you can use in a dynamic authorization policy.
About this task
You need to know the payment amount to determine if it’s greater or less than $10,000 USD, so let’s add an attribute for the amount to the Trust Framework.
The Trust Framework provides an enterprise-wide view of your data and service ecosystem. It’s where your organization’s technical people capture definitions for digital assets, services, and users across all domains in your organization, including:
-
Attributes used in policies
-
Connections to APIs
-
Information points used as data sources for attributes
When you use business-friendly names to define resources in the Trust Framework, policy authors can easily refer to these resources without worrying about how the information is retrieved and populated.
Steps
-
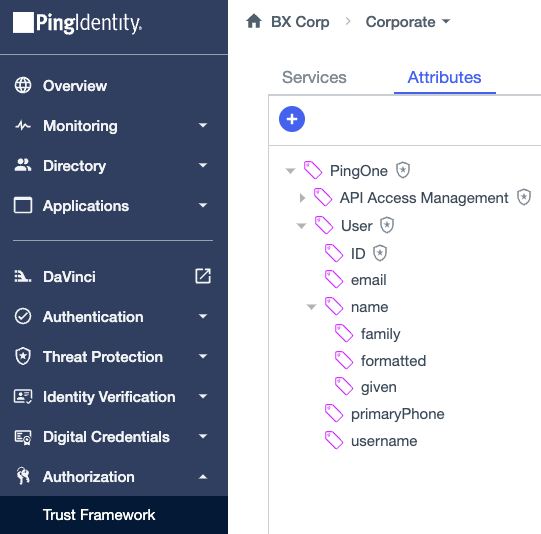
In PingOne, go to Authorization > Trust Framework.
-
If it is not already displayed, click the Attributes tab.
You can see the built-in User attributes that come with PingOne Authorize. You’re going to add a new attribute for the amount.

-
Click the icon and select Add new Attribute.
-
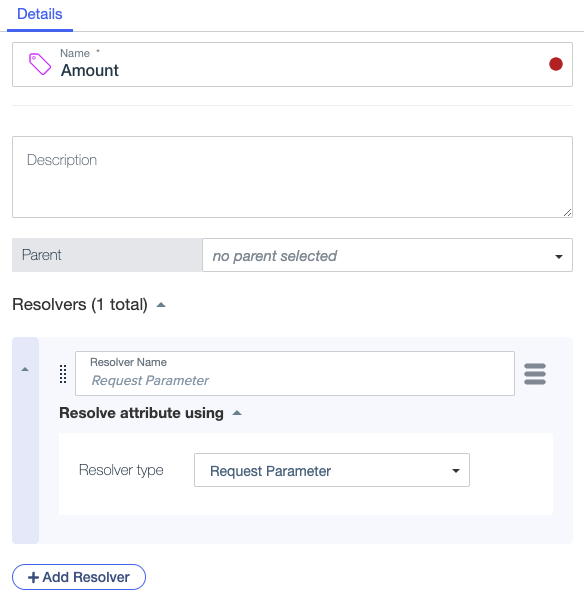
For the attribute Name, enter
Amount.If you selected another attribute before you added
Amount,Amountis nested under the parent attribute. Nesting helps group related attributes together. To keep things simple, you won’t nest theAmountattribute in this tutorial. -
Verify that there is no Parent selected. If a parent exists, click the Delete icon to remove it.
To get the payment amount, which is the value of the attribute, you’ll add a resolver. Resolvers define where the initial data for an attribute comes from.
-
Click Add Resolver.
Keep the default Resolver type of Request Parameter so that the value of your attribute comes from a parameter in the decision request. Later in the tutorial, you’ll use a field in the decision request body to provide a value for the request parameter. So far your attribute looks like this.

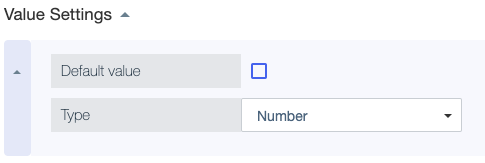
Next let’s make sure that the value of the attribute is a number.
-
In Value Settings, for the Type, select Number.

-
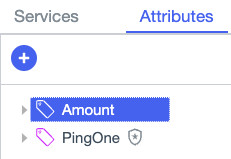
Click Save Changes.
Result:
Your new attribute is displayed in the attribute list.

Next steps
You used the Trust Framework to create a simple attribute that represents the payment amount. Now that you’ve added an attribute, you’re ready to use the attribute in a policy.