Adding application permissions
Define application permissions for the application resources that you want to protect.
Before you begin
-
Add a custom resource for your protected endpoints.
About this task
Application resources are features that users want to access, such as checking and savings accounts, an investment services add-on, or an invoicing module in a business application.
|
PingOne platform resources, such as identities and PingOne APIs, are protected by PingOne platform roles and permissions. Application resources protect access to resources that are developed by your organization’s engineering teams. |
An application permission is the combination of an action and a resource. Think of permissions as actions that can be taken on a resource. Configure application permissions by assigning actions to application resources.
|
You can add up to 128 application resources and 128 application permissions in each PingOne environment. |
For example, consider a business application called BizPro that has invoicing capabilities. Endpoints for the associated invoicing API allow the following actions on the invoices resource:
-
Read invoices:
GET /bizpro/invoices -
Create an invoice:
POST /bizpro/invoices -
Update an invoice:
PUT /bizpro/invoices/\{{invoiceId}} -
Pay an invoice:
POST /bizpro/invoices/\{{invoiceId}}/pay -
Void an invoice:
POST /bizpro/invoices/\{{invoiceId}}/void
To control access to invoices, you create corresponding application permissions:
-
Invoices:Read -
Invoices:Write -
Invoices:Update -
Invoices:Pay -
Invoices:Void
Steps
-
Go to Applications > Resources and browse or search for the custom resource for your protected endpoints.
-
Click the custom resource to open the details pane, then click the Permissions tab.
-
(Optional) To include user permissions in access tokens created for this custom resource, click the Include user permissions in Access Token toggle.
Permissions for the authenticated user are included in the
p1.permissionsclaim in the access token.
If your organization requires a large number of permissions, consider using permissions-based rules for permissions enforcement. Learn more in Application permissions.
-
Click Add Permissions.
-
To create an application resource, enter a unique Name and an optional Description. Click Next.
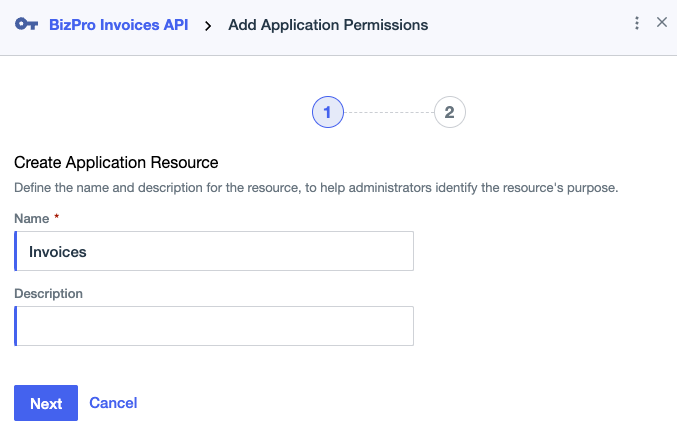
The name can include Unicode letters, marks, numbers, spaces, forward slashes, dots, apostrophes, underscores, and hyphens, with a maximum length of 20 characters.
-
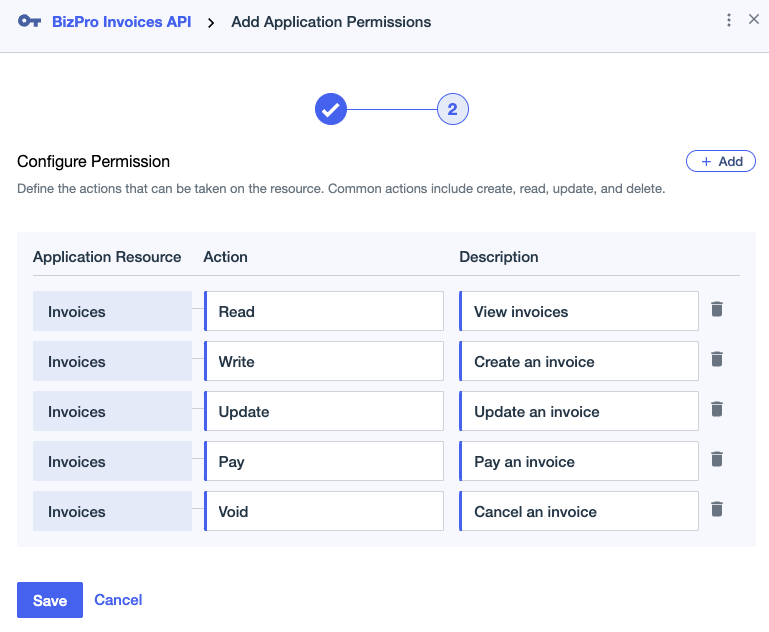
Configure permissions for the application resource:
-
Click Add to add an Action that you want to protect with a permission.
The action can include Unicode letters, with a maximum length of 20 characters.
-
(Optional) Enter a Description for the action.
-
To add more actions, click Add.
-
-
Click Save.
Next steps
Add application roles to simplify the assignment of application permissions to users. For example, David, an invoicing processor, might have permissions to create and pay invoices, while Melissa, the billing supervisor, can view and void invoices. Learn more in Adding an application role.