OIDC authentication
Adding Microsoft as an external identity provider (IdP) gives your users the option to sign on with their Microsoft accounts when accessing your application.
Registering your application with Microsoft
Register an application in Microsoft Entra. Learn more in Quickstart: Register an application with the Microsoft identity platform in the Microsoft Entra documentation.
Before you begin
Ensure that you have:
-
A Microsoft Entra account with an active subscription
-
An Entra tenant
Steps
-
Go to the Microsoft Entra admin center and sign on to your account.
If you don’t have a Microsoft Entra account, you can create one now.
-
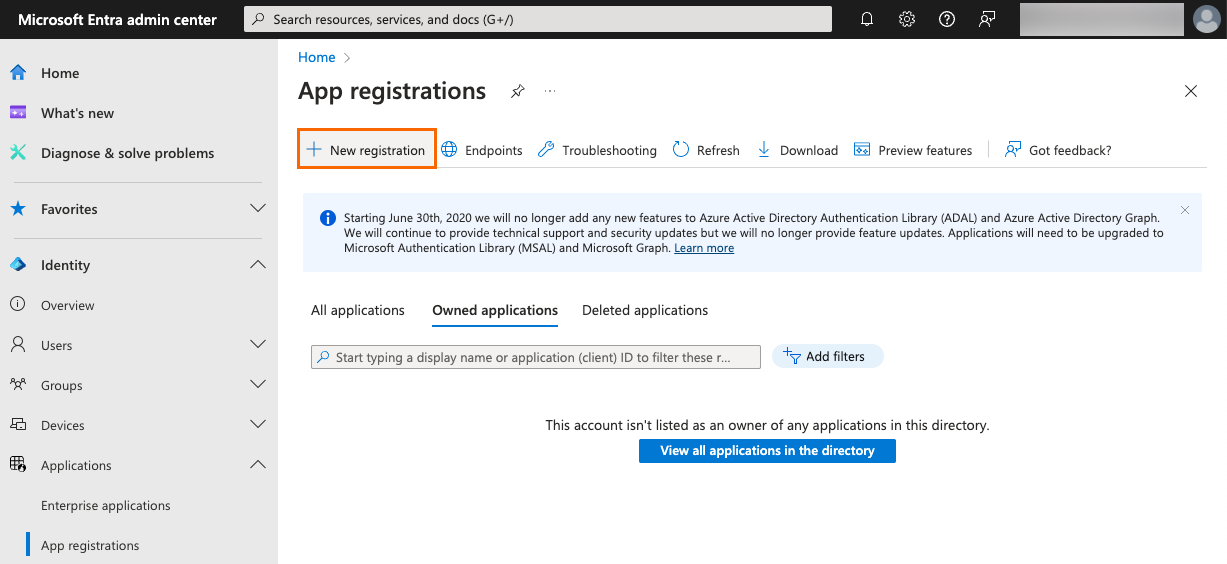
In the sidebar, go to Identity > Applications > App registrations.
-
Click New registration.
-
Enter and configure the following:
-
Name: Enter a user-facing display name for the application.
-
Supported account types: Select either of the following, depending on the needs of your organization:
-
Accounts in this organizational directory only (<Your Entra tenant name> only - Single tenant): Select this option if you’re working with only identities from your environment.
-
Accounts in any organizational directory and personal Microsoft accounts
-
-
Redirect URI: Select Web as the platform and enter the authorization URL of your PingOne environment.
You can find this URL on the Overview tab of any OIDC application in the PingOne admin console in the Connection Details section.
The format is
<issuer>/authorize.Example 1:
https://auth.pingone.<region>/<envID>/as/authorizeExample 2:
https://<customDomain>/as/authorizeif you set up a custom domain. Learn more in Setting up a custom domain.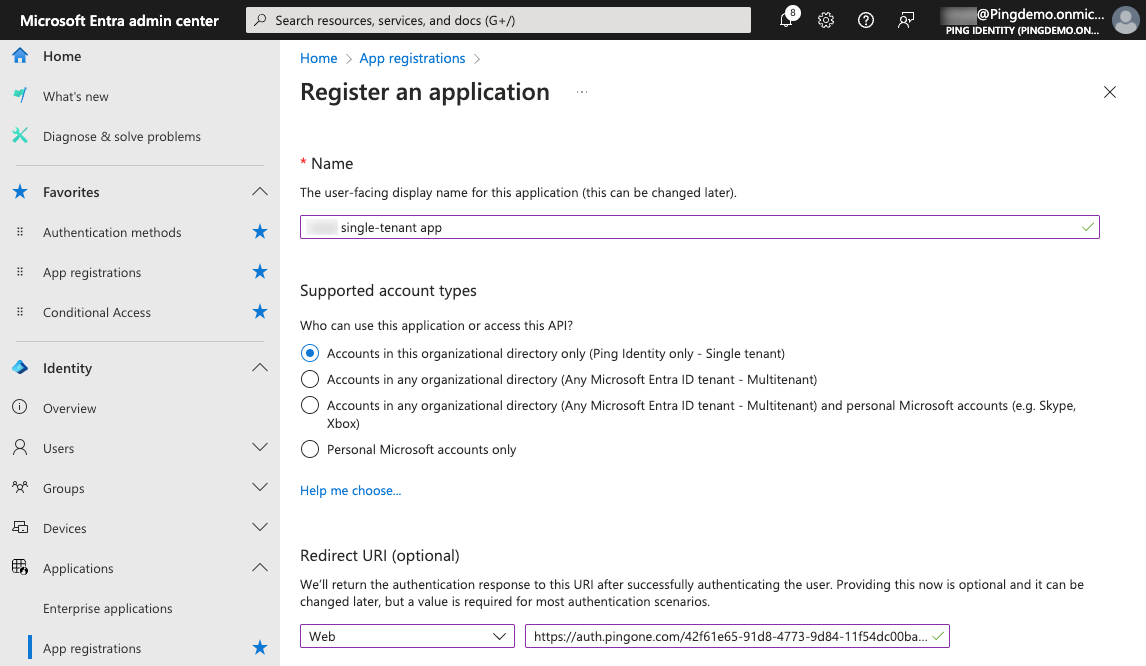
-
-
Click Register.
Enabling the implicit grant
After registering an application in Entra, enable the implicit grant type for your application.
Steps
-
Go to the Microsoft Entra admin center.
-
In the sidebar, go to Identity > Applications > App registrations and click your application.
-
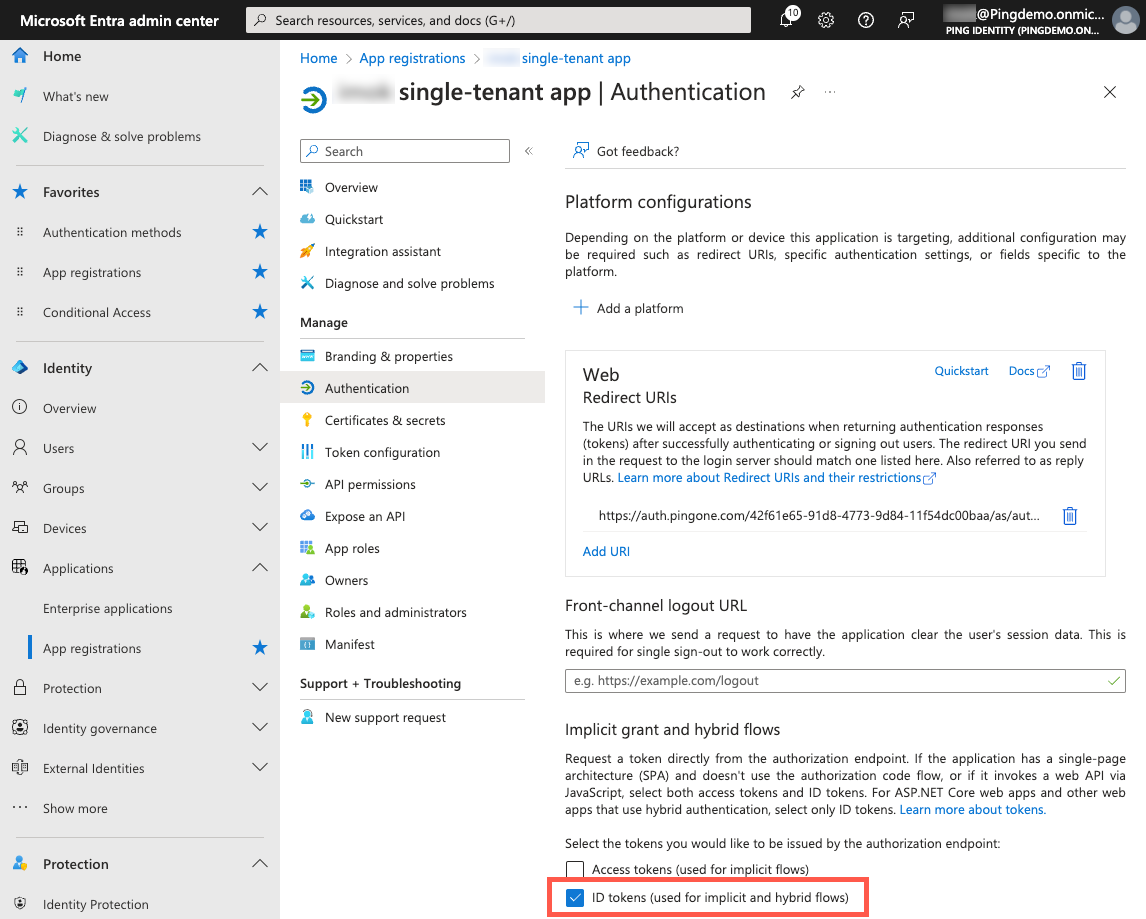
On the App registrations page, in the Manage section, click Authentication.
-
In the Implicit grant and hybrid flows section, select the ID tokens checkbox for the token type to be issued by the authorization endpoint.
-
Click Save.
Getting the client ID and client secret for your application
When you register your application with Microsoft, Microsoft generates an application (client) ID and application secret for the application.
You’ll copy these values and enter them into PingOne.
Steps
-
Go to the Microsoft Entra admin center.
-
In the sidebar, go to Identity > Applications > App registrations and click your application.
-
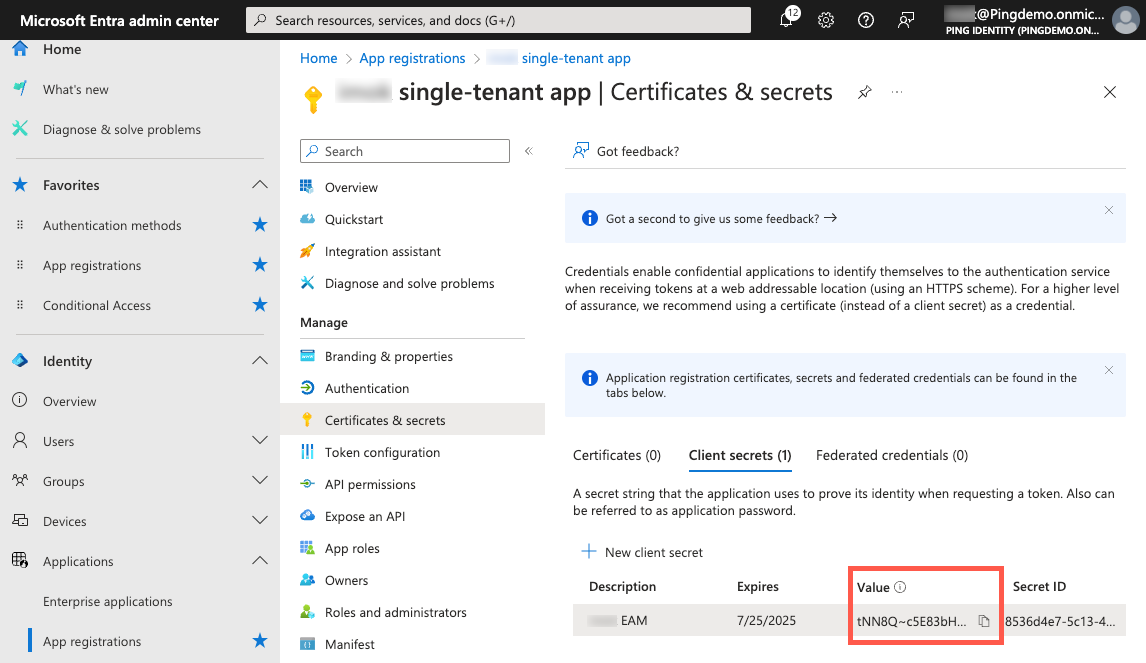
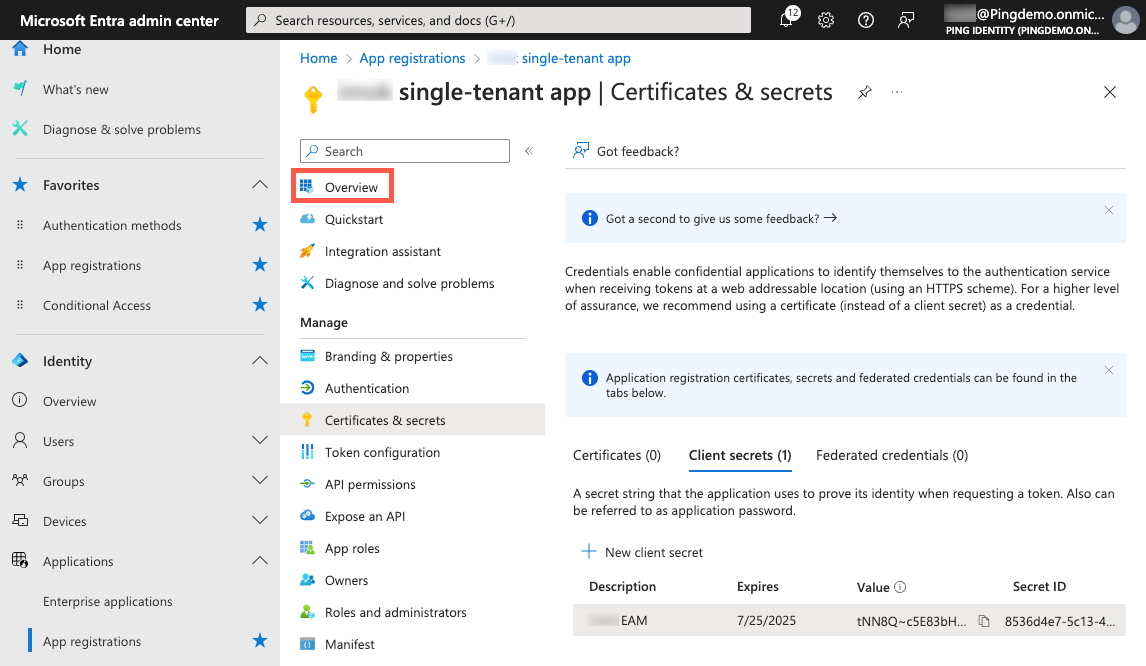
On the App registrations page, in the Manage section, click Certificates & secrets.
-
On the Client secrets tab, click New client secret.
-
Enter the following:
-
Description: A brief description of the client secret.
-
Expires: Select the duration of the certificate based on the needs of your organization.
-
-
Click Add.
-
On the Client secrets tab, click the Copy icon () for the Value and paste it in a secure location.
-
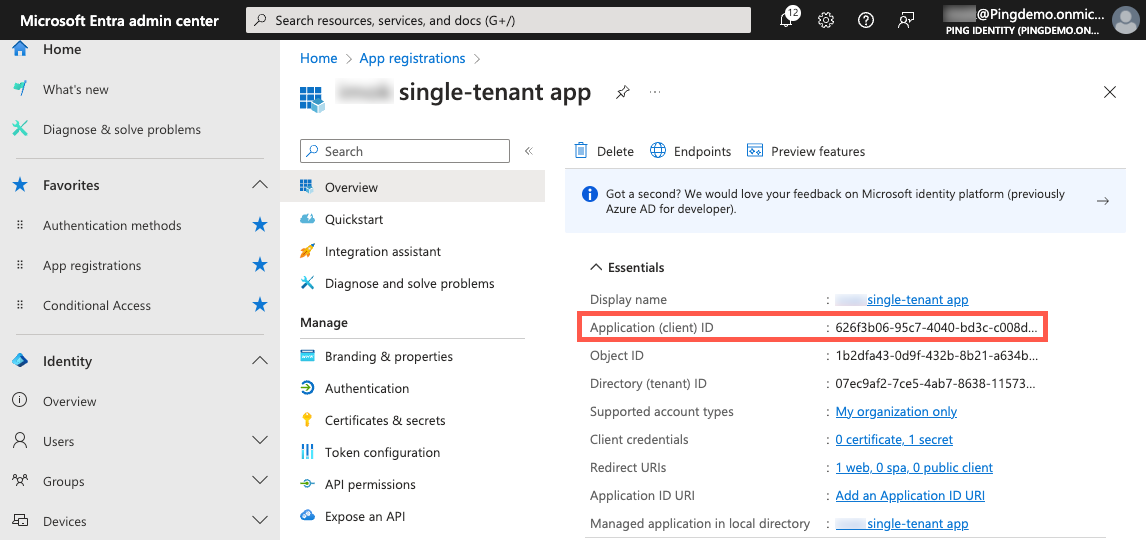
In the App registrations sidebar, click Overview.
-
Copy the Application (client) ID and paste it in a secure location.
Setting up API permissions
Adding Microsoft as an external IdP requires certain API permissions that you’ll need to enable in your application.
Steps
-
Go to the Microsoft Entra admin center.
-
In the sidebar, go to Identity > Applications > App registrations and click your application.
-
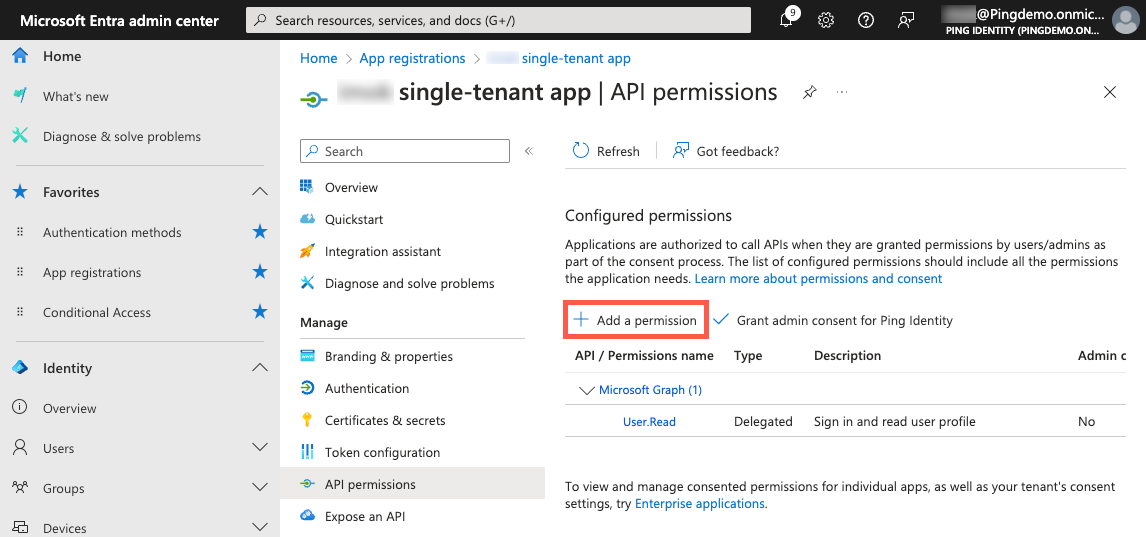
On the App registrations page, in the Manage section, click API permissions.
-
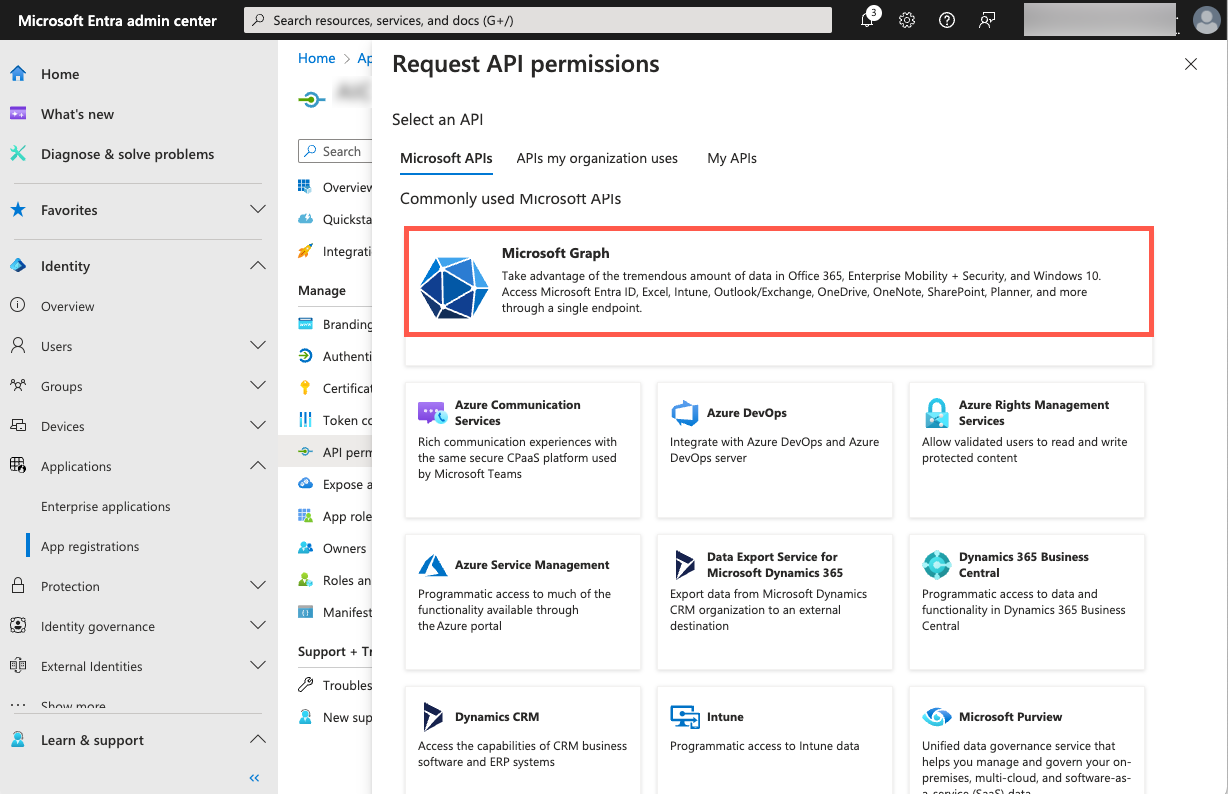
Click Add a permission.
-
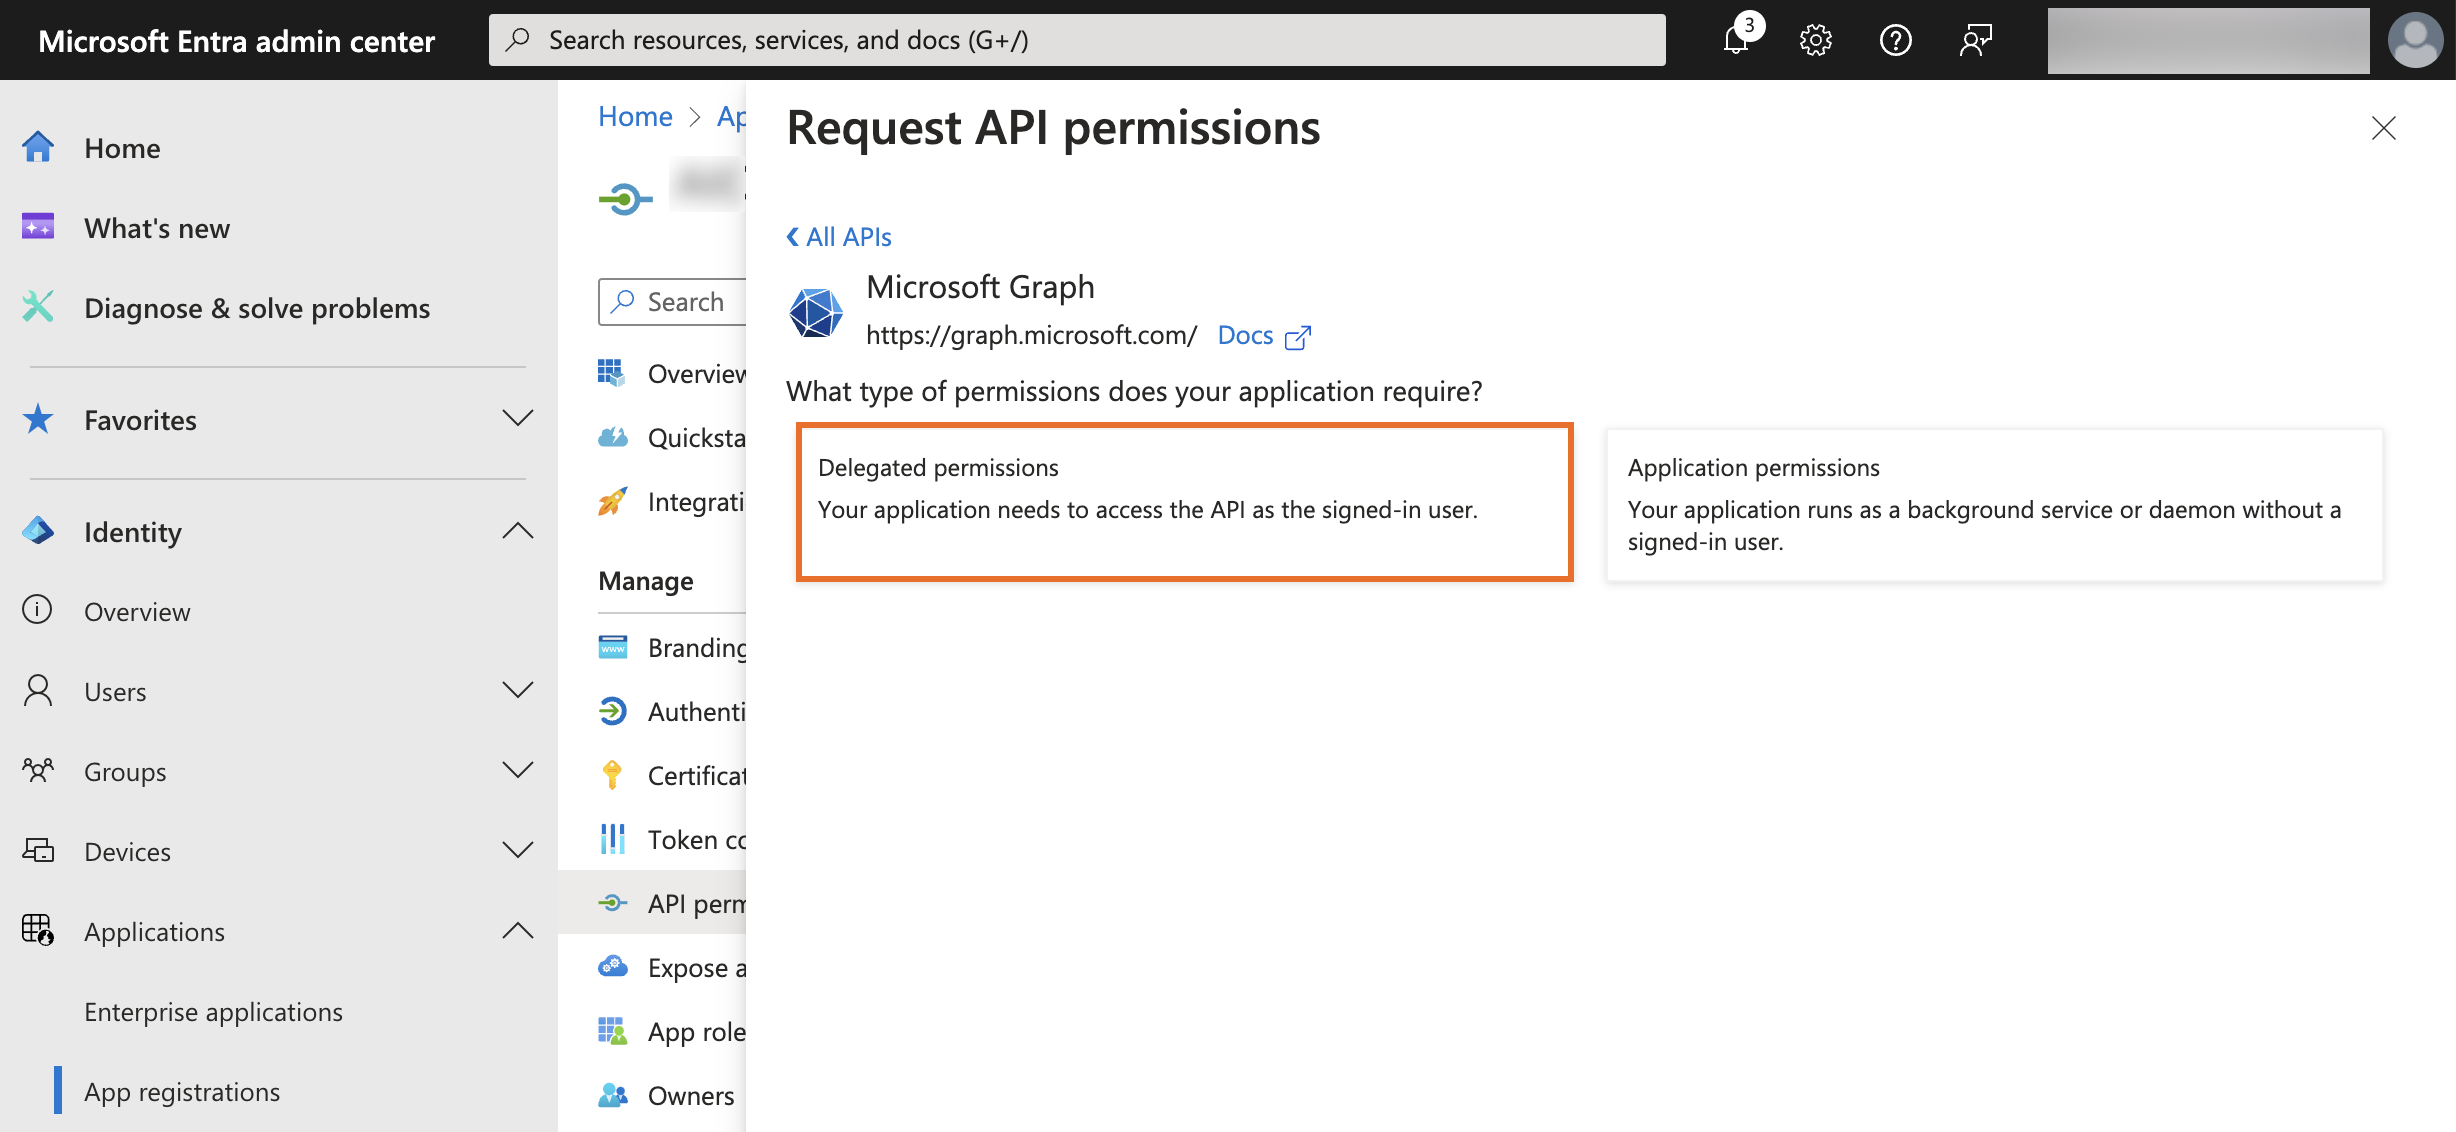
On the Request API permissions panel, click Microsoft Graph.
-
Click Delegated permissions for the type of permissions to allow for your application.
-
Expand Openid permissions.
-
Select the following:
-
email -
offline_access -
openid -
profile -
User.ReadUser.Readis included by default and should remain selected.
-
-
Click Add permissions.
Adding Microsoft as an identity provider in PingOne
Configure the IdP connection in PingOne.
Steps
-
In the PingOne admin console, go to Integrations > External IdPs and click the icon.
-
Click Microsoft as the Identity Provider Type.
-
Click Next.
-
In the Create Profile step, enter the following information:
-
Name: A unique identifier for the IdP.
-
Description (optional): A brief description of the IdP.
-
Population: Select a population that overrides the authentication policy’s registration population and enables just-in-time (JIT) registration from the IdP.
You can’t change the Icon and Sign-on button, in accordance with the provider’s brand standards.
-
-
Click Next.
-
In the Connection Details step, enter the following information:
-
Client ID: The application ID from the Microsoft Entra admin center that you copied earlier. You can find this information on the Microsoft Entra admin center.
-
Client secret: The application secret from the Microsoft Entra admin center that you copied earlier. You can find this information on the Microsoft Entra admin center.
-
Tenant ID: The tenant ID of your Entra tenant from the Microsoft Entra admin center that you copied earlier. You can find this information on the Microsoft Entra admin center.
-
Callback URL: Copy the Callback URL and paste it in a secure location. You’ll add this value in the Microsoft Entra admin center later.
-
-
Click Next.
-
Define how the PingOne user attributes are mapped to IdP attributes. Learn more in Mapping attributes.
-
Leave the default PingOne user profile attributes and the external IdP attributes:
-
Preferred Username (from Microsoft) as the source of the PingOne Username
-
Email (from Microsoft) as the source of the PingOne Email Address
-
-
To add an attribute, click Add.
-
To use the advanced expression builder, click the Gear icon (). Learn more in Using the expression builder and Using expressions to retrieve Microsoft Entra attributes.
-
Select the update condition, which determines how PingOne updates its user directory with the values from the IdP. The options are:
-
Empty only: Update the PingOne attribute only if the existing attribute is empty.
-
Always: Always update the PingOne directory attribute.
-
-
-
Click Save.
Adding the callback URL to the Microsoft Entra admin
Add the callback URL from the Microsoft IdP connection to the application you registered in the Microsoft Entra admin center.
Steps
-
Go to the Microsoft Entra admin center.
-
In the sidebar, go to Identity > Applications > App registrations and click your application.
-
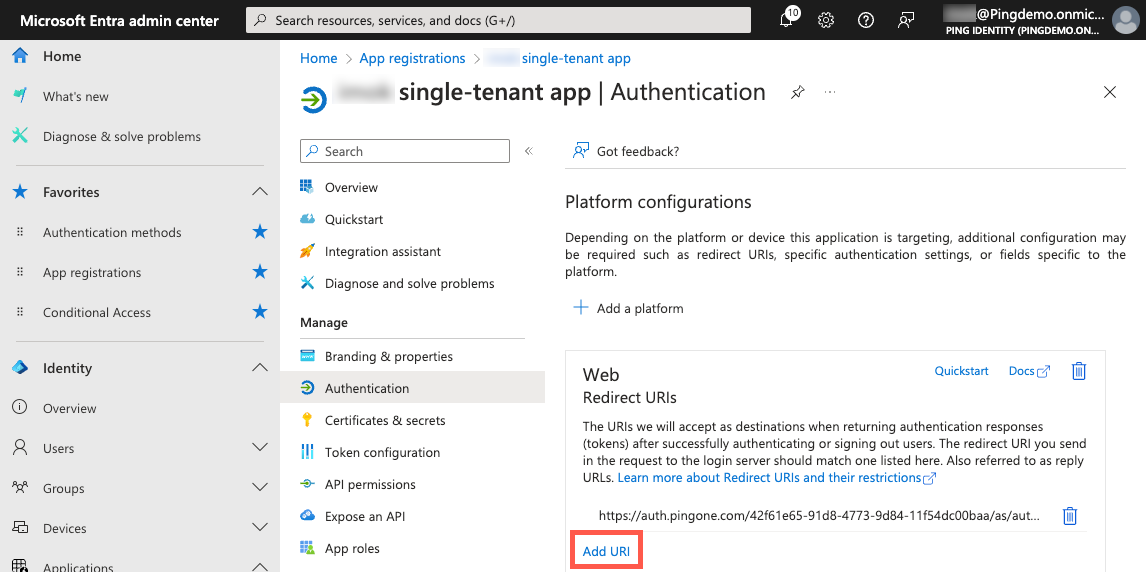
On the App registrations page, in the Manage section, click Authentication.
-
In the Platform configurations > Web > Redirect URIs section, click Add URI.
-
Paste the Callback URL that you copied from the PingOne admin console.
The following examples show the URL format:
Example 1:
https://auth.pingone.<region>/<envID>/rp/callback/microsoftExample 2:
https://<customDomain>/rp/callback/microsoft -
Click Save.
Next steps
-
Add the Microsoft IdP to an authentication policy followed by an MFA step.
-
Ensure that registration is enabled in the authentication policy. Learn more in Authentication policies and Add the authentication policy to your application.