Setting up SSO to PingCentral
To set up single sign-on (SSO) access from the PingOne admin console to PingCentral, configure PingOne and PingCentral and test the sign-on experience.
Before you begin
Ensure that you have:
-
A licensed version of PingCentral
-
A PingOne account
-
A text editor or terminal
|
When SSO is enabled for PingCentral, auto-provisioning is also enabled, which currently causes sign-on issues. New users are created during this process even if those users already have PingCentral accounts. |
Configuring PingOne for SSO in PingCentral
Steps
-
In the PingOne admin console, add a new attribute to PingCentral administrator roles:
-
Go to Directory > User Attributes and click .
Result:
The Add Attribute panel opens.
-
In the Add Attribute panel, select Declared and click Next.
Declared attributes maintain the values of the claims that authorize access to other products.
-
Enter the following information:
-
Name:
PingCentral-Role(this value is case sensitive) -
Display Name:
PingCentral Role -
Description (optional): Enter a brief description of this attribute that distinguishes it from others.
-
-
Click Save.
-
-
Create a new connection:
-
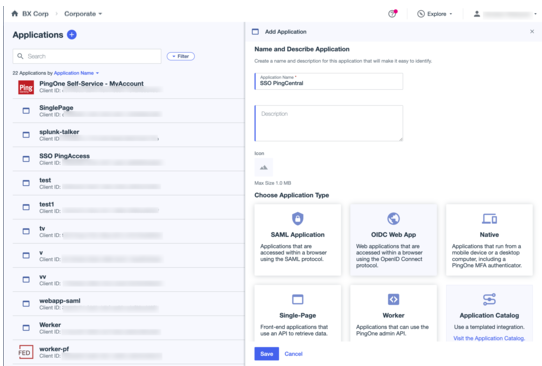
Go to Applications > Applications and click .
Result:
The Add Application panel opens.
-
Enter the following information:
-
Application Name: Enter a name that helps you recognize this connection, such as
PingOne administrator console SSO PingCentral. -
Description (optional): Enter a brief description of this application that distinguishes it from others.
-
-
For Application Type, select OIDC Web App and click Save.
-
In the application details panel, on the Configuration tab, click the Pencil icon.
-
Locate the Redirect URIs field and enter the appropriate URL.
Example:
For example,
https://<FQDNofServer>:9022/login/oauth2/code/pingcentral, where <FQDNofServer> is either the machine name or fully qualified domain name of your PingCentral server, such ashttps://localhost:9022/login/oauth2/code/pingcentral. -
Click Save.
-
On the Resources tab, click the Pencil icon.
-
In the Scopes list, locate Profile scope and select the checkbox to add it to the Allowed Scopes section.
The
openidscope is included by default.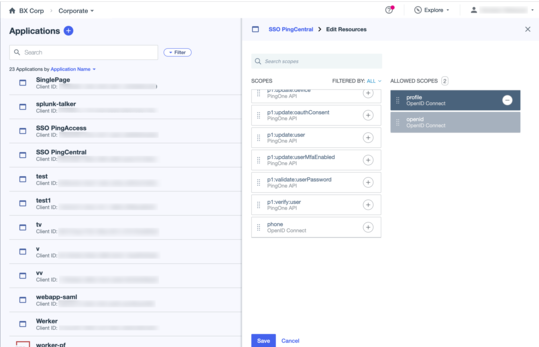
-
Click Save.
-
On the Attribute Mappings tab, click the Pencil icon.
-
Click Add and add the following attribute mapping:
Attributes PingOne Mapping PingCentral RolePingCentral Role
-
Click the Advanced Configurations button.
-
For the PingCentral Role attribute, select the Required checkbox.
-
Click Save.
-
-
To enable the application, click the toggle at the top of the details panel to the right (blue).
You can disable the application by clicking the toggle to the left (gray).
-
Add a new PingCentral administrator in PingOne and define their role and responsibilities.
-
In the PingOne admin console, go to Directory > Users and click .
-
On the Add User panel, enter the following information:
-
Given Name and Family Name (optional): Enter the user’s name in these fields.
-
Username: Enter a username for the PingCentral administrator who has the IAM Admin role.
-
-
Click Save.
-
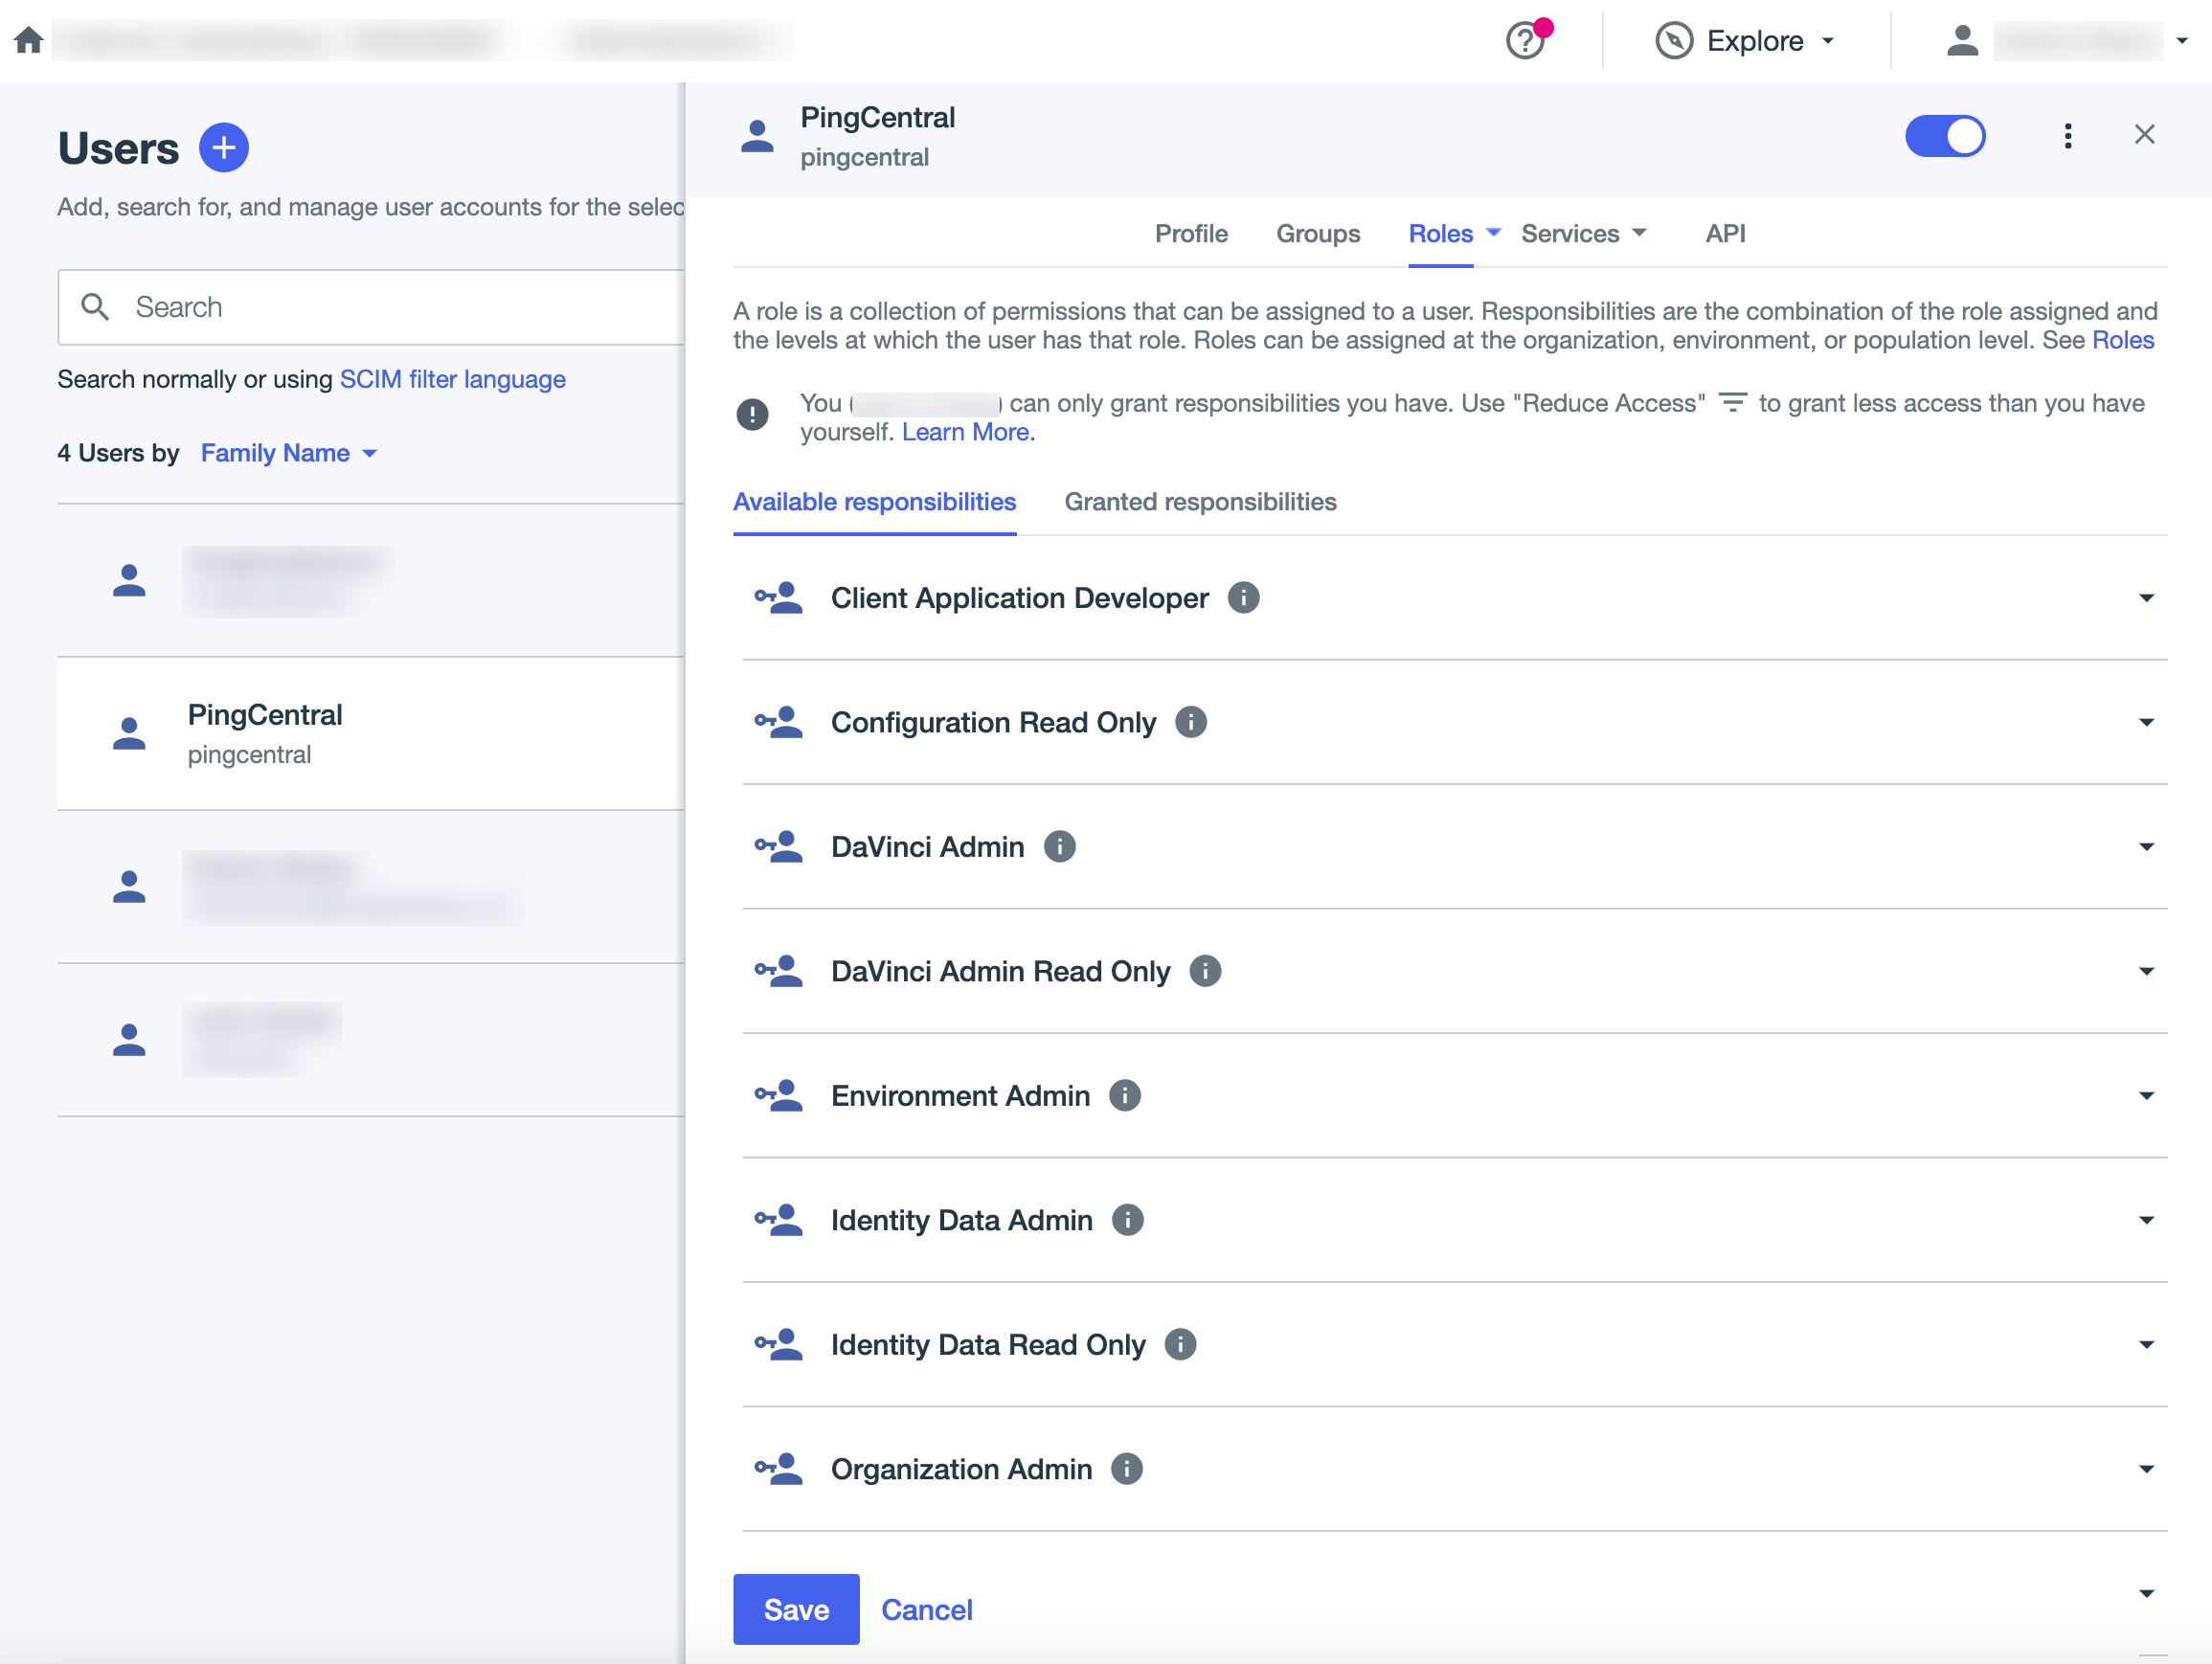
In the user details panel, on the Roles tab, click Grant Roles.
-
In Available Responsibilities, click Client Application Developer and select the checkboxes for the organizations and environments where the administrator should have this role.
-
Click Identity Data Admin and select the checkboxes for the organizations and environments where the administrator should have this role.
-
Click the More Options (⋮) icon and select Reset Password.
-
Select Force Password reset on next sign on.
-
Click Save.
-
-
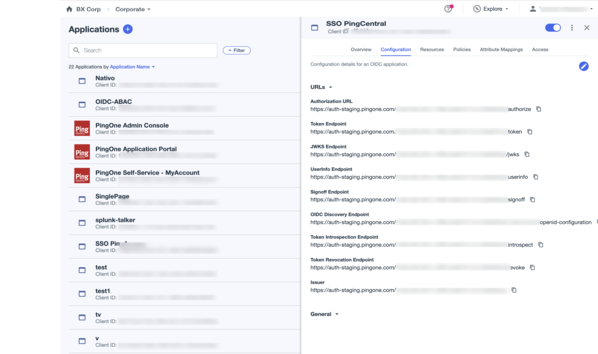
Go to Applications > Applications, and locate the application you created earlier.
-
Click the application entry to open the details panel.
-
On the Configuration tab, review the configuration information.
You need this configuration property information to configure PingCentral for SSO, so keep this browser window open.
Configuring PingCentral
After configuring PingOne for SSO, configure PingCentral.
Steps
-
In a text editor, open the
<pc-path>conf/application.propertiesfile. -
Use the configuration information on the Applications page in the PingOne admin console to update the following values in the
application.propertiesfile.Watch for unwanted line breaks when pasting values into this file.
PingOne attribute application.propertiesfile attributeAttribute Example pingcentral.sso.oidc.enabled
true
pingcentral.sso.oidc.enabled=trueIssuer
pingcentral.sso.oidc.issuer-uri
Issuer
pingcentral.sso.oidc.issuer-uri=https://auth.pingone.com/3c2f30a3-7a92-406e-b8f2-6a181e56f46b/asClient ID
pingcentral.sso.oidc.client-id
Client ID
pingcentral.sso.oidc.client-id=5be9323a-e953-4aa6-8db3-5f4113a73f83Client Secret
pingcentral.sso.oidc.client-secret
Client Secret
pingcentral.sso.oidc.client-secret=cigVeh5py8IC2~ViGMmM3sslpYyMLCWr5SnmjXwvHUG-r4CYjtoOMAlNSPqZ4bc9 -
Save and close the file.
-
Restart PingCentral.
Testing SSO to PingCentral
After configuring PingOne and PingCentral, test the sign-on experience to PingCentral.
Steps
-
In the PingOne admin console sidebar, click the Ping Identity logo to open the Environments page and browse or search for the applicable environment.
-
On the Environments page, click the environment to open the details panel.
-
Click Manage Environment to go to the Overview page for the environment.
-
In the Services section, click the PingCentral icon.
Result:
The PingCentral admin console opens.