Starting a PingOne trial
Signing up for a 30-day free trial version is a great way to experience the power of PingOne for yourself.
Your trial organization includes:
-
One trial license.
-
Up to five environments in one geography, including the Administrators environment, which is created when the new trial starts.
-
An administrative user who has all the roles necessary to manage the organization and add other administrators.
-
Up to 1000 active identities for the duration of the trial.
Even if you already have a PingOne license, you can still start a PingOne trial and evaluate additional services. Follow the appropriate set of instructions:
Existing PingOne customers
To sign up for the 30-day free trial, create a new PingOne environment in your organization and add the services that you want to evaluate.
|
You must have the Organization Admin role or a custom role with equivalent permissions to create an environment. |
Steps
-
In the PingOne admin console sidebar, click the Ping Identity logo to open the Environments page.
-
Click the Plus icon ().
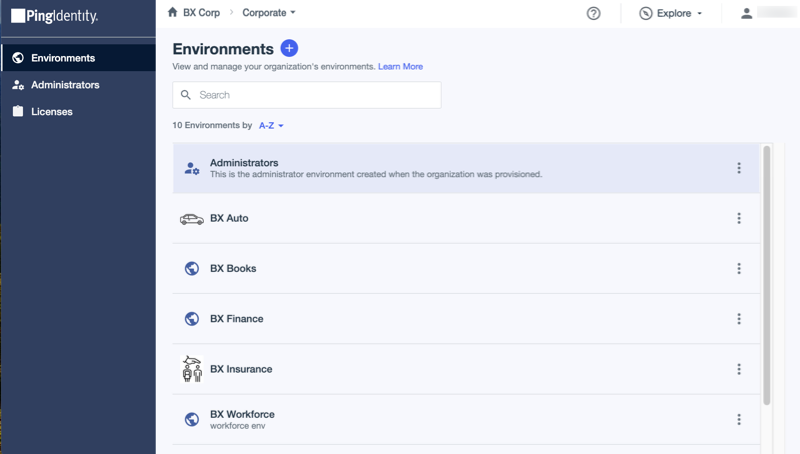
Result:
The Add New Environment setup assistant starts.
-
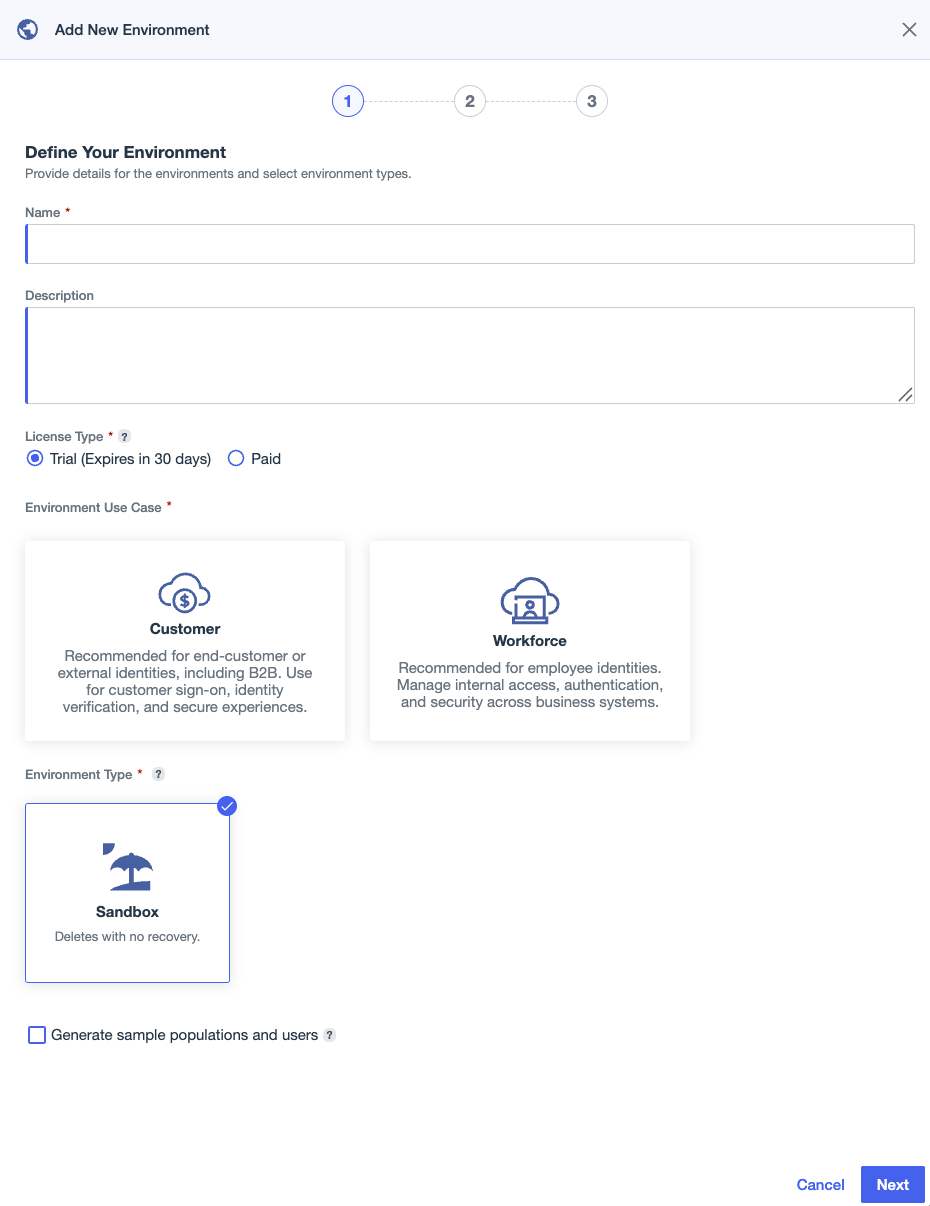
Define your environment by entering the following:
Field Description Name
A unique identifier for the environment.
Description (optional)
A brief description of the environment.
License Type
Select Trial.
If you don’t already have a trial license for PingOne, selecting the Trial option creates a 30-day trial environment which you can use to test and evaluate PingOne services you haven’t yet purchased.
Environment Use Case
Select Customer or Workforce.
Customer allows you to design registration and subsequent sign-on experiences for your customers.
Workforce allows you to design single sign-on experiences for your employees.
Environment Type
Sandbox is the only option for Trial licenses.
Include DaVinci flows for getting started
(Workforce only) Select this checkbox to include DaVinci flows in the new environment that are used in the getting started experience. This option is only available if you have a license that includes DaVinci.
Generate sample populations and users
Select this checkbox to generate two populations and 40 sample users in the new environment.
-
Click Next.
-
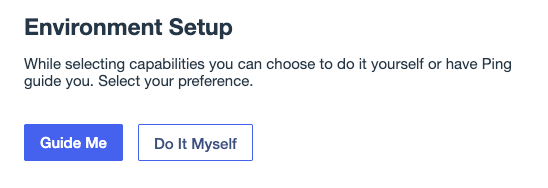
Click an option on the Environment Setup modal:
-
Guide Me: PingOne selects capabilities for you.
You’ll have the option to remove any of these capabilities before you finalize the environment.
-
Do It Myself: You select the capabilities you want to add to the environment.
-
-
Select capabilities based on the option you selected in the previous step:
-
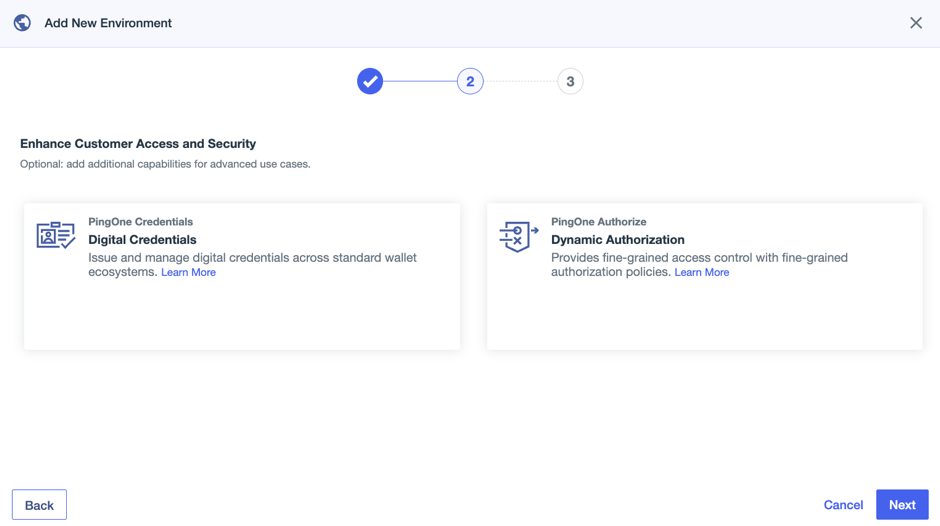
If you selected Guide Me, a bundle of services applicable to the Environment Use Case you selected previously is automatically added to the environment. You can select optional capabilities that might be useful for advanced use cases.
-
If you selected Do It Myself, you can select from a list of capabilities available based on the Environment Use Case you selected.
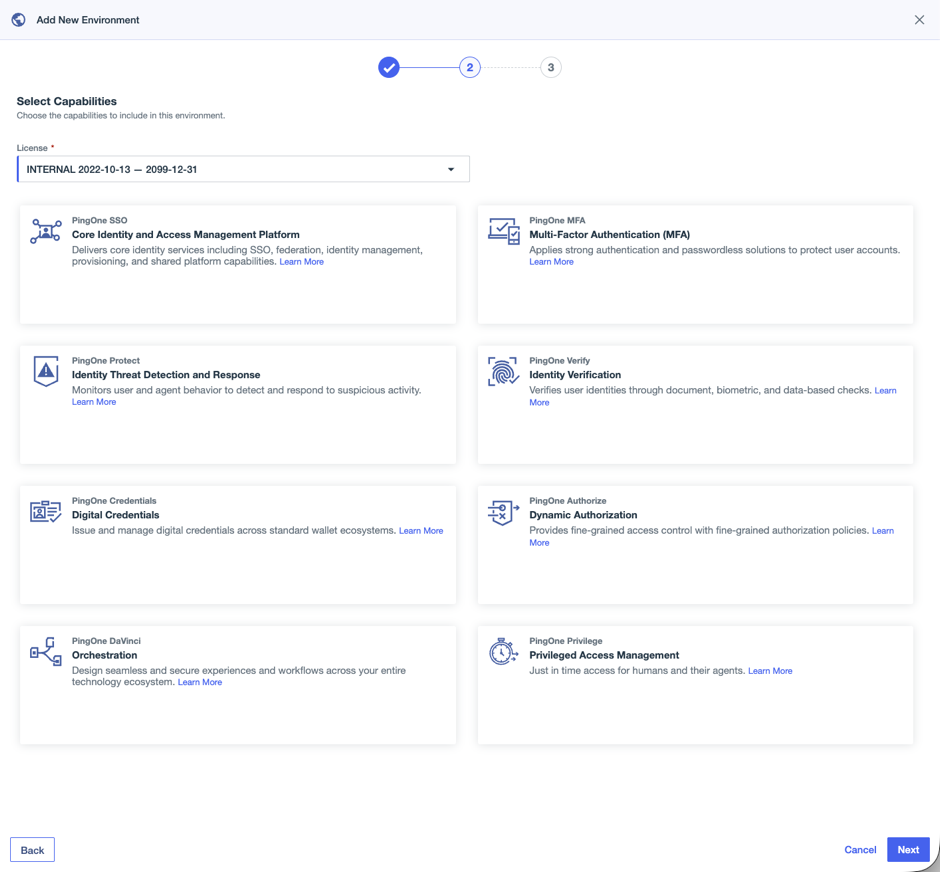
When you’re done, click Next.
-
-
On the Finalize Setup page, review the details about the new environment and clear the checkboxes next to any capabilities that you don’t want to include.
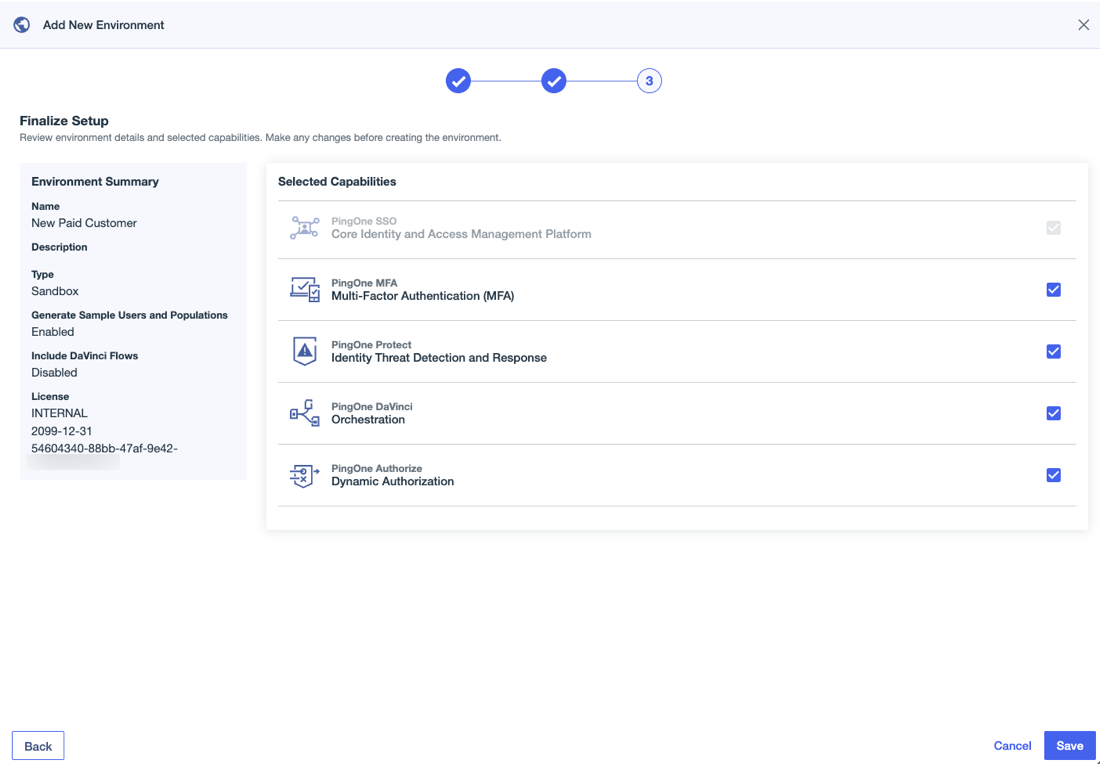
-
(Workforce only) The next step depends on the geography in which your organization resides:
-
Singapore or Canada: Click Save to create the new environment. Learn more in Multi-factor authentication (MFA).
-
All other geographies:
A new instance of PingID is created automatically and integrated with your new PingOne environment.
Click Save to create the new environment.
-
Result
The new environment is created in your PingOne organization and the Environments page opens. You’ll also see the new license listed on the Licenses page.
Customers new to PingOne
To sign up for the free 30-day PingOne trial, provide your name and business email address, and verify your email. You’ll receive access to a new PingOne organization and be prompted to sign on with the credentials you create during registration.
Steps
-
Go to pingidentity.com and click Try Ping on the right side of the page.

-
To activate your trial, check your email inbox and click Verify Email in the email sent to you.
-
Enter your first and last name, job title, and phone number in the appropriate fields. Note that you will be granted the Organization Admin role by default, which allows you to create, update, and delete environments and configure your organization to meet your needs.
-
Select the region available in the list, which is determined by your PingOne organization.
PingOne data centers are available all over the world. For optimum performance, use the data center closest to your geographic region. Learn more in Organizations.
-
Create a password, select the checkbox to agree to the terms and conditions, and click Start Trial.
-
Enter the username and password you just created and click Sign On.
-
You’re required to enroll in MFA to enhance your account security. Click Continue.
-
Select the MFA method that you want to use to authenticate:
-
Email: You’ll provide your email address, receive an email with a passcode, and enter the passcode to sign on.
-
Authenticator App: You’ll access the mobile authenticator app, receive a passcode, and enter the passcode to sign on.
-
Passkey: You’ll create a passkey on your device using a biometric sensor or PIN and use that sensor or PIN to sign on.
-
Result:
After you complete the registration process, you’ll be redirected to the Environments page, where you can begin creating identity solutions that meet your specific needs.
Next steps
Now, you can either add other administrators to the Administrators environment or create a new environment. Learn more in Managing administrators and Creating an environment.