Getting started with PingOne Verify
You can integrate identity verification directly into your mobile app using PingOne Verify.
The PingOne Verify mobile SDK prompts end users to provide proof of identity, streamlining the verification process to prevent fraud and abuse by:
-
Capturing a live facial image of the end user
-
Scanning and validating the end user’s government-issued identity documents
-
Confirming data matching
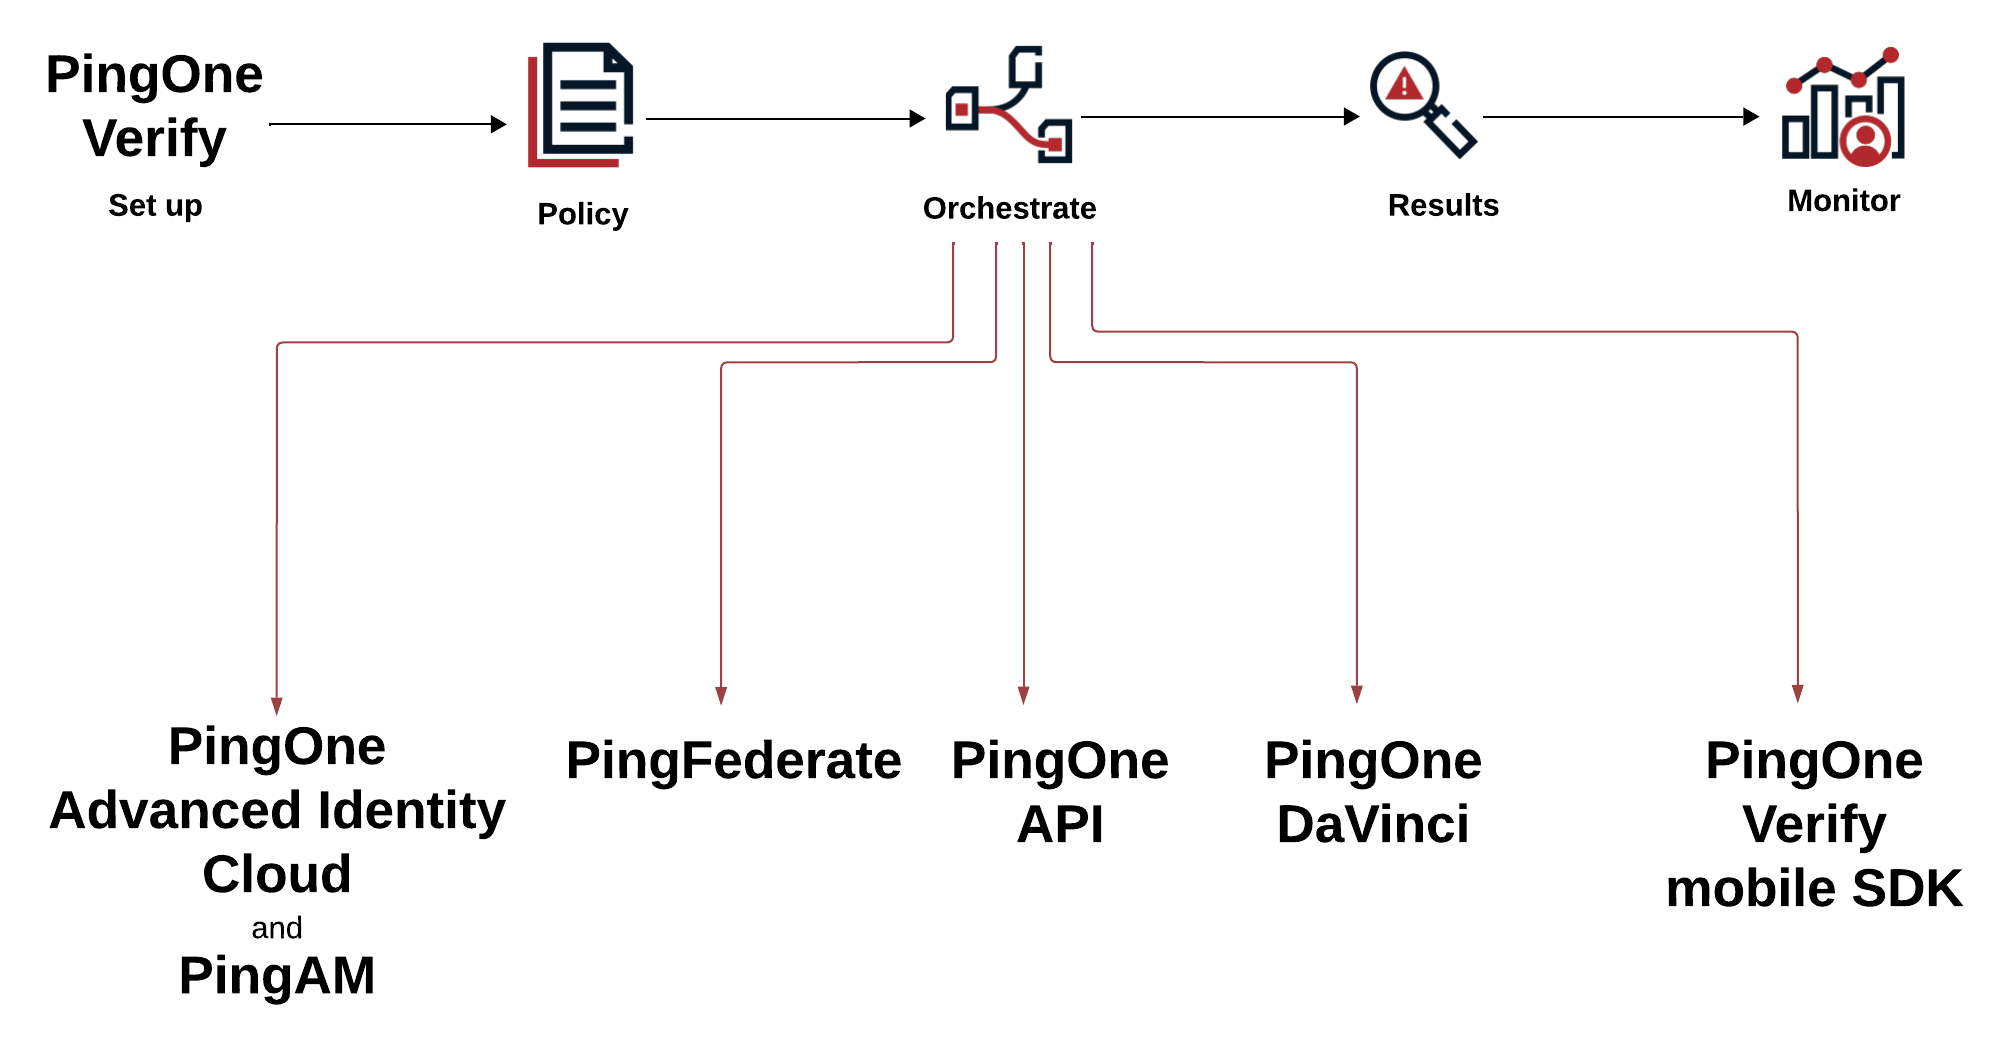
Configuring and orchestrating PingOne Verify
Configure PingOne Verify and orchestrate the verification flow to manage how a verify transaction is triggered and processed for end users.
Before you begin
Regardless of the configuration method you choose, you’ll need:
-
A PingOne account with at least one environment that includes the PingOne Verify service. Learn more in Starting a PingOne trial and Creating an environment.
-
A PingOne Verify policy, which can be the default policy you modify or a new policy. Learn more in Creating a verify policy.
Steps
-
You can choose one of the following methods to orchestrate a verify transaction:
Choose from:
-
API integration
-
PingOne DaVinci
-
PingFederate Integration Kit
-
Mobile SDK
-
PingOne Advanced Identity Cloud and PingAM
-
-
PingOne API
-
PingOne DaVinci
-
PingFederate
-
Mobile SDK
-
PingOne Advanced Identity Cloud and PingAM
To configure PingOne Verify with the PingOne REST API:
Steps
-
Create your theme in PingOne Branding and themes to brand the PingOne Verify web experience for your end users.
-
(Optional) Use language localization to configure one or more languages and modify the PingOne Verify text fields that are presented to end users.
-
(Optional) If you enabled one-time passcode (OTP) through phone or email verification in your policy, create notification templates.
-
Trigger your first verify transaction:
-
Download the PingOne Postman collection.
-
Note the Variables you must value.
-
Obtain a PingOne access token.
Your {{authPath}} environment variable in Postman should begin with
auth.pingone. See Variables you must value in the PingOne API documentation to determine the correct {{authPath}} for your geography. Note that nothing trails the domain in the {{authPath}} variable. -
Create a new verify transaction with the Create Verify Transaction API call.
Your {{apiPath}} environment variable in Postman should begin with
api.pingone. See Variables you must value in the PingOne API documentation to determine the correct {{apiPath}} for your geography. Note that the trailing/v1is required (for example,api.pingone.com/v1).Learn more in PingOne API requests.
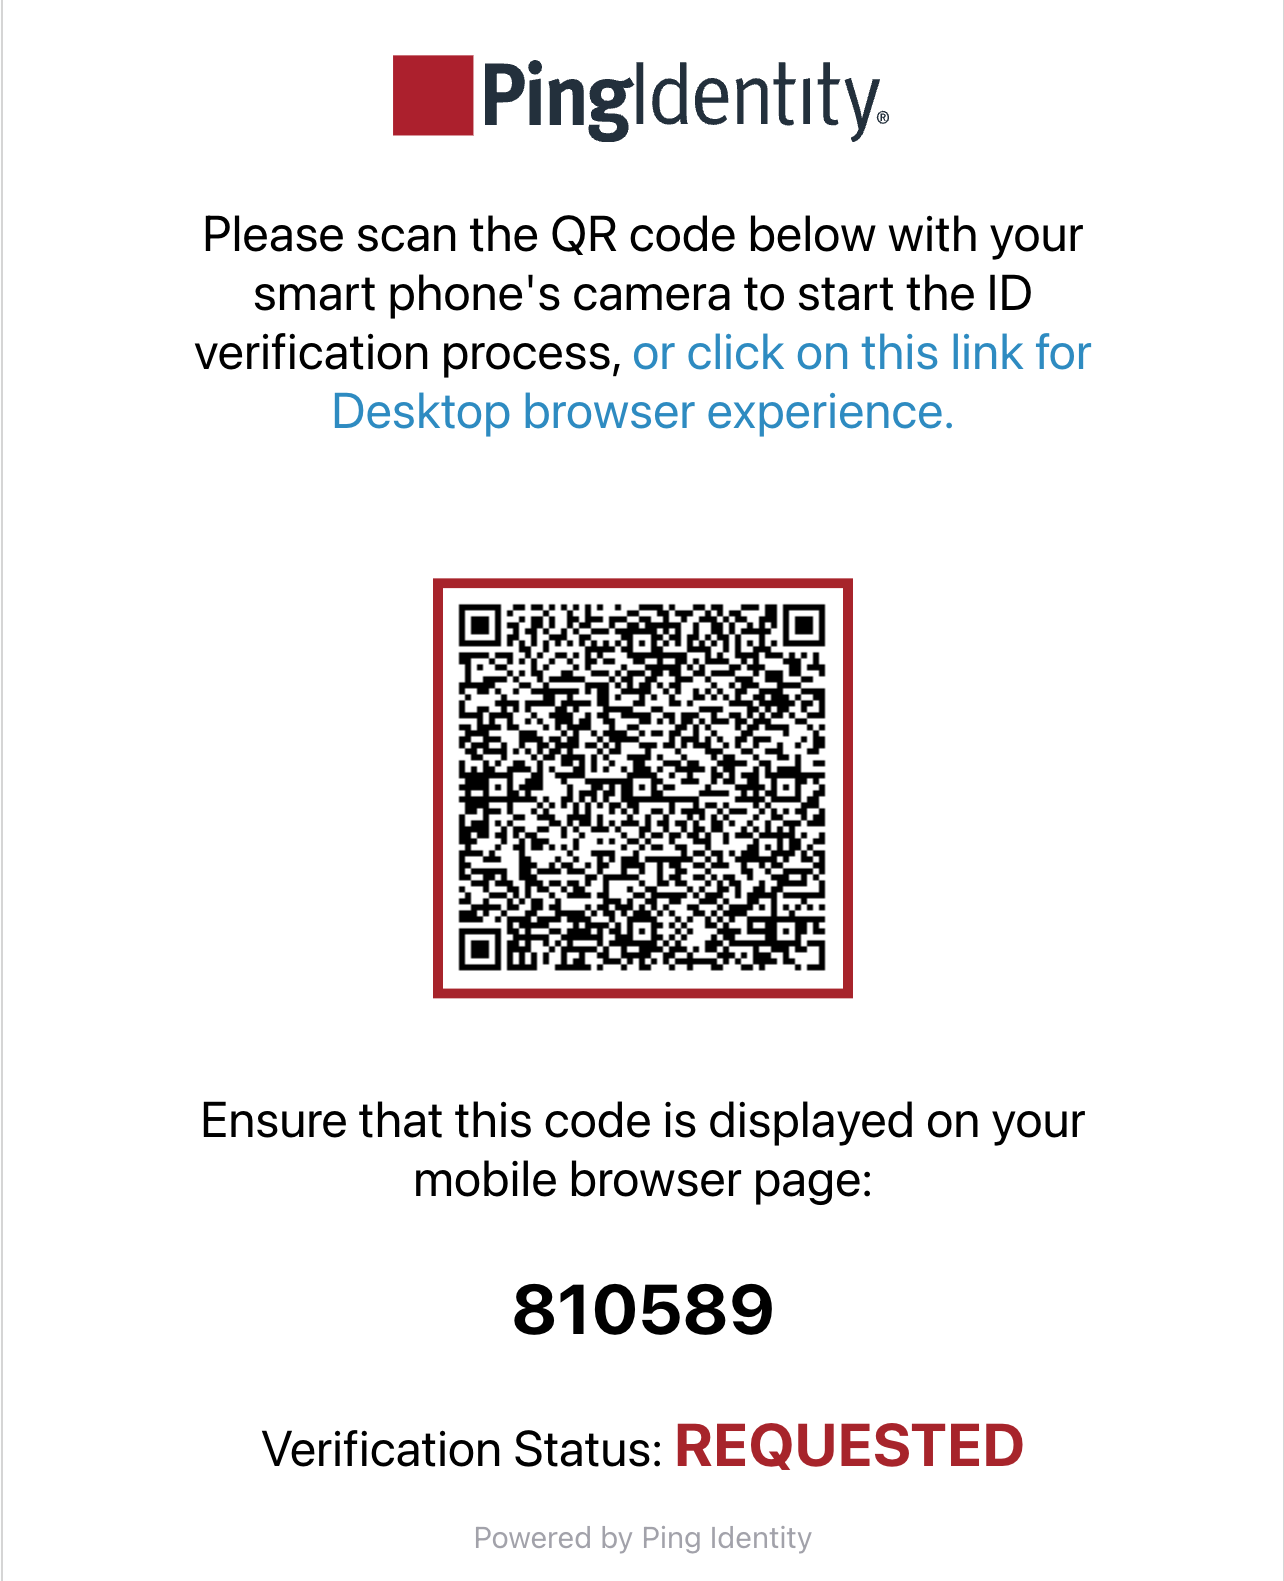
Result:
Postman renders a QR code.
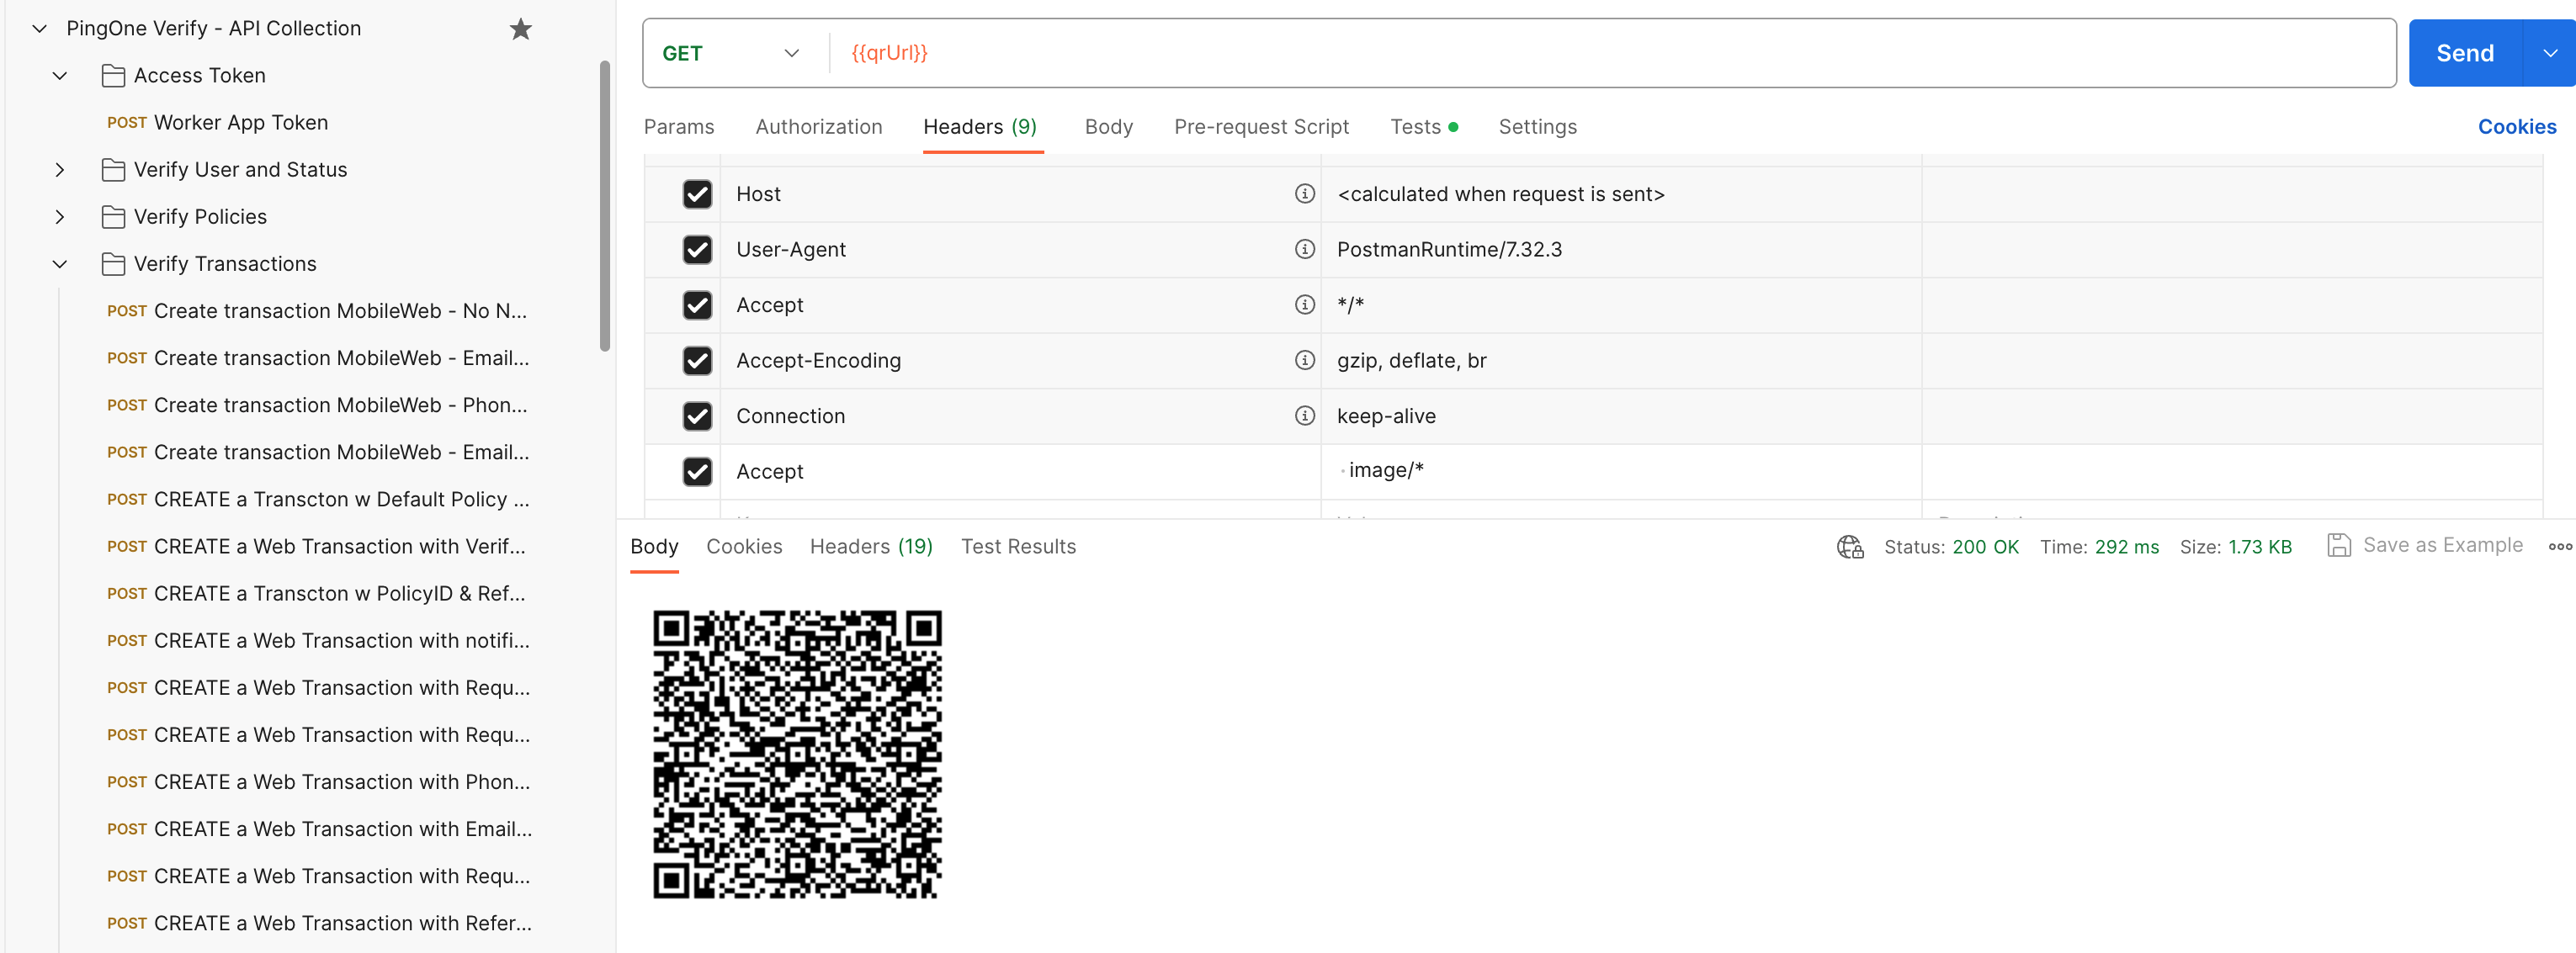
-
Scan the QR code with a smartphone camera to try the mobile web flow.
-
View the data submitted in the transaction and the scores returned from verification services.
Choose from:
-
Using the API: Use the Verified Data and Verification Metadata endpoints.
-
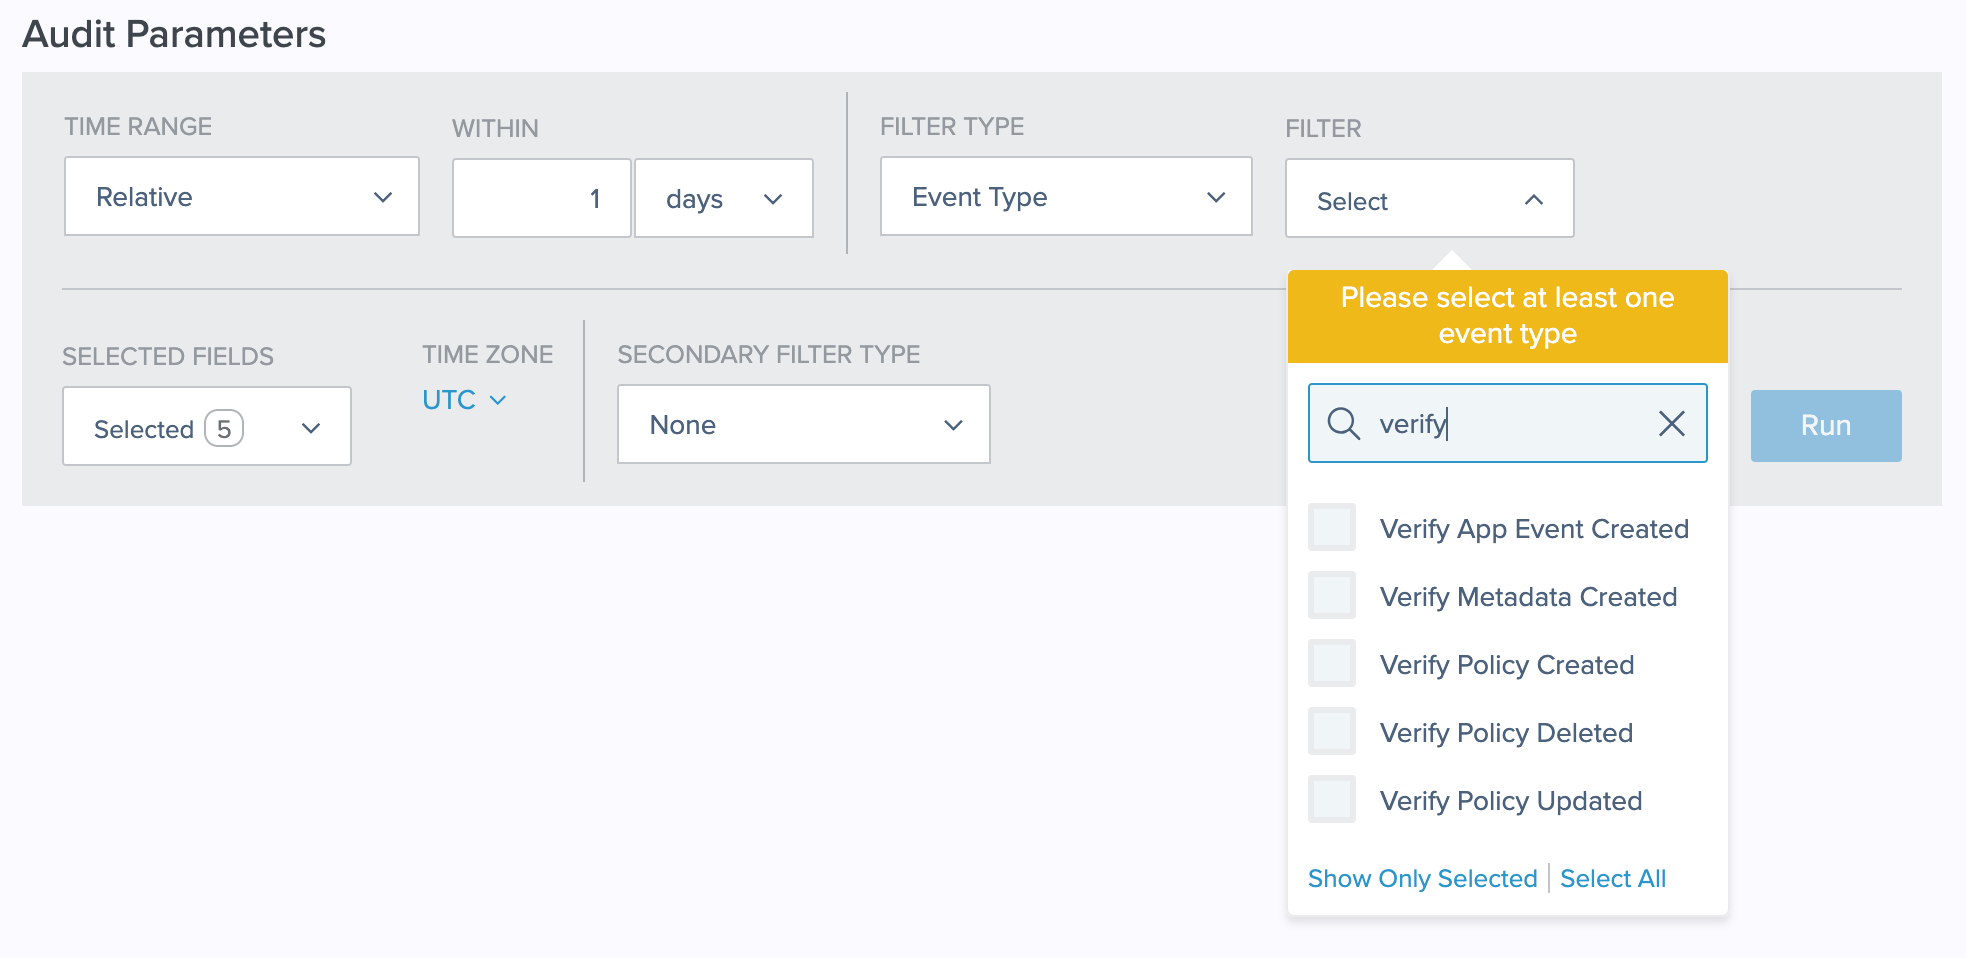
Using the PingOne admin console:
-
In PingOne, go to Environment → Audit.
-
Edit the Time Range and Within fields as needed.
-
For Filter Type, select Event Type.
-
For Filter, enter
verifyin the Search Filter Type field. -
Select any of the Verify event types.
You can find a complete list of events logged in PingOne in Audit Reporting Events in the PingOne API documentation.
-
Click Run.
-
To view the specific data and scores from an event, click View in the Details column in the report summary.
-
-
To configure PingOne Verify using PingOne DaVinci:
Before you begin
Add PingOne DaVinci to your PingOne environment. Learn more in Creating an environment.
Steps
-
Create your theme in PingOne Branding and themes to brand the PingOne Verify web experience for your end users.
-
(Optional) Use language localization to configure one or more languages and modify the PingOne Verify text fields that are presented to end users.
-
(Optional) If you enabled OTP through phone or email verification in your policy, create notification templates.
-
Import the PingOne Verify quick start flow template in PingOne DaVinci by downloading it from the Ping Identity Marketplace.
-
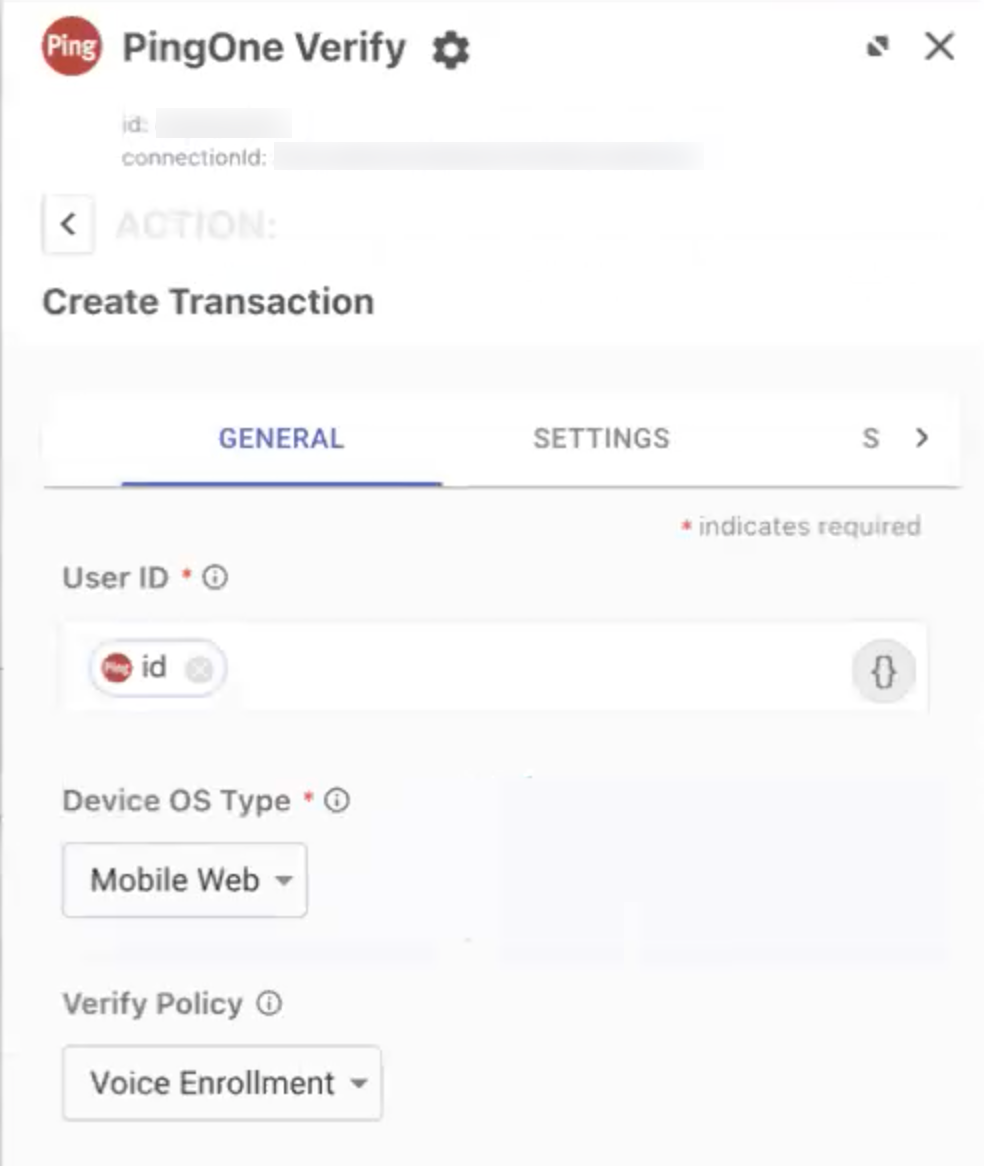
Update the flow with your PingOne Verify policy:
-
Click the PingOne Verify
Create transactionnode in the flow. -
In the Verify Policy list, select the policy to use.
-
-
To run the flow and trigger a PingOne Verify transaction, click Try Flow.
Result:
PingOne DaVinci renders a QR code.
-
Scan the QR code on your mobile device to try the mobile web flow.
-
View the data submitted in the transaction and the scores returned from verification services.
Choose from:
-
Using the API: Use the Verified Data and Verification Metadata endpoints.
-
Using the PingOne admin console:
-
In PingOne, go to Environment → Audit.
-
Edit the Time Range and Within fields as needed.
-
For Filter Type, select Event Type.
-
For Filter, enter
verifyin the Search Filter Type field. -
Select any of the Verify event types.
You can find a complete list of events logged in PingOne in Audit Reporting Events in the PingOne API documentation.
-
Click Run.
-
To view the specific data and scores from an event, click View in the Details column in the report summary.
-
-
Using PingFederate
To use PingFederate to configure the PingOne Verify Integration Kit:
Steps
-
Download PingFederate and the PingOne Verify Integration Kit from the PingFederate Downloads website.
You’ll need to work with your Ping Identity account team to start a trial license for PingFederate.
Learn more about getting started in the PingOne Verify Integration Kit documentation.
Using the PingOne Verify mobile SDK
Mobile application developers use the PingOne Verify mobile SDK for iOS and PingOne Verify mobile SDK for Android to create the PingOne Verify app for their users. The app is a self-service app for iOS or Android devices that guides the user through the process of taking photos of their ID and a selfie and submitting the photos to PingOne for verification.
To use the PingOne Verify mobile SDK:
Steps
-
Run the sample app from Github:
-
Integrate the PingOne Verify mobile SDK into your own app:
Integrating with PingOne Advanced Identity Cloud and PingAM
Advanced Identity Cloud is a digital identity and access management (IAM) software as a service (SaaS) solution for any identity, workforce, or consumer.
PingAM software manages access to resources, such as web pages, applications, or web services available over a network. PingAM centralizes access control by handling both authentication and authorization.
To take advantage of PingOne Verify features, you can integrate PingOne Verify nodes into your Advanced Identity Cloud and PingAM journeys. Learn more in Journeys.
Before you begin
Make sure you have:
-
A PingOne Advanced Identity Cloud or PingAM account. Getting started with PingOne Advanced Identity Cloud.
-
A PingOne account. Learn more in Starting a PingOne trial.
-
A verify policy configured in PingOne (or use the default verify policy).
-
A worker application with the Identity Data Admin role assigned in PingOne.
Steps
-
Configure the PingOne service in Advanced Identity Cloud.
-
Set up your user journey in Advanced Identity Cloud or PingAM with PingOne Verify nodes in the journey:
-
The PingOne Verify Evaluation node to start a new identity verification with PingOne Verify.
-
The PingOne Verify Completion Decision node to check the status of the last verify transaction.
-
The PingOne Verify Authentication node to integrate biometric authentication functionality in your journey.
-
The PingOne Verify Proofing node to integrate verification functionality using Government ID, Facial Comparison, and Liveness in a journey.
For self-managed deployments, these nodes are available only PingAM 8.0 or later. If you’re using an earlier version of PingAM, use Marketplace nodes, such as the PingOne Verify Authentication node.
-
-
Validate that the PingOne Verify Evaluation node is working by doing the following:
-
Configure the node with Store Verification Metadata and Store Verified Data enabled.
-
Use a Scripted Decision node to return the node state and make sure the values of the
pingOneVerifyMetadata,pingOneVerifyVerifiedData, andpingOneVerifyEvaluationFailureReasonproperties are what you expect. You can also run the journey with Debugging enabled. -
Add message nodes attached to individual results outputs to understand the flow.
-
-
Validate that the PingOne Verify Completion Decision node is working by doing the following:
-
Use logger messages in your Completion processing script to determine the processing goals and outcomes, and monitor the log.
-
Evaluate the
nodeStatevalues of the PingOne Verify nodes that were set in the script using a Scripted Decision node that returns the nodeState, or with the Debugger enabled -
Add message nodes attached to individual results outputs to understand the flow.
-
Next steps
After you’ve familiarized yourself with how PingOne Verify works and have it running:
-
Learn more about ID verification.
-
Learn more about monitoring verify transactions in Using the Identity Verification Dashboard.
-
Learn more about your PingOne Verify license and the quota of transactions allowed in Viewing license information.