Integrating a PingID account with a new PingOne environment
You can integrate an existing PingID account with a new PingOne environment.
Before you begin
|
|
Integration with a PingOne environment should be considered as a permanent change. After integration, unlinking your PingID account from PingOne deletes the PingOne environment and can result in the deletion of the PingID account, with the following qualifications:
|
Before the integration process starts, PingOne performs several validations to ensure the PingID account is compatible with the PingOne environment. Before you start the integration process, you can do several checks to minimize the possibility of the validation failing. Make sure that:
-
Your PingOne license covers the same number of users that exist in your PingID account and that your PingID account license is still valid.
-
You are using a paid PingOne license. You can’t integrate an existing PingID account using a trial PingOne license.
-
The PingOne environment that you create is in the same geography as your PingID environment. The environment must not be in the Singapore or Canada geographies, because they don’t include the PingID service.
-
The user accounts in your PingID environment do not include any duplicate users or usernames that contain unsupported characters. You’ll have opportunity to fix issues during the PingID account validation process. Learn more about how to fix issues before you begin and find more detailed technical information in "Duplicate users found" error when attempting to connect a PingID environment to PingID in the Ping Identity Support Portal.
-
Some policy rules are deprecated in PingOne. You’ll need to remove them from the legacy PingID web portal before you start the integration:
-
Remove the Mobile OS version rule from any PingID polices.
-
Remove the location-based part of the following rules:
-
Access from the company network rule
-
Recent authentication from the office rule
-
Recent authentication from company network rule
-
-
In PingOne environments, the Limit Push Notification Rule is updated to a configuration in the MFA policy. If you have the rule defined in the PingID admin portal, you’ll be asked to redefine it during the integration process.
-
Integrate your existing PingID account with a new PingOne environment so that you can:
-
Manage PingID users from PingOne
-
Allow users to manage their devices using MyAccount.
-
Apply a FIDO policy to PingID user accounts.
-
Implement a Windows login passwordless flow.
If you want to create a new PingID environment, refer to Setting up an environment for strong authentication (MFA).
|
You must have the Organization Admin role or a custom role with equivalent permissions to create an environment. |
Steps
-
In the PingOne admin console sidebar, click the Ping Identity logo to open the Environments page.
-
Click the Plus icon ().
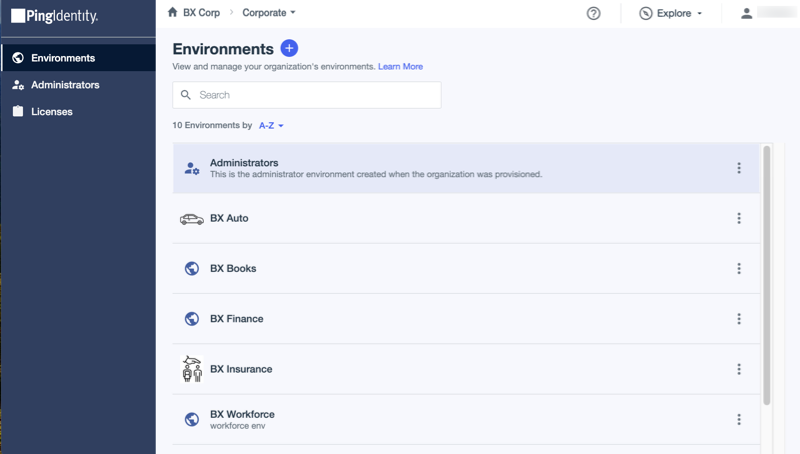
Result:
The Add New Environment setup assistant starts.
-
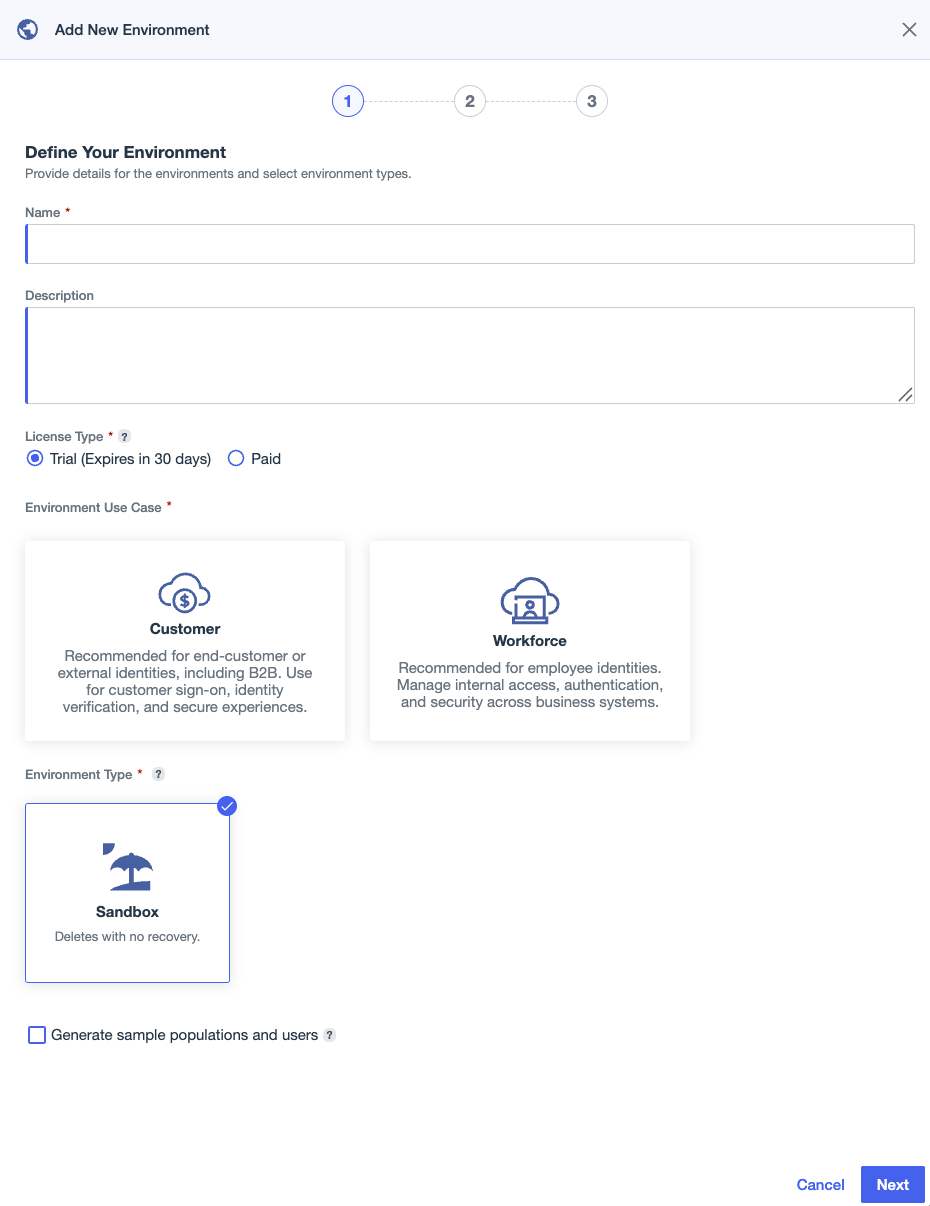
Define your environment by entering the following:
Field Description Name
A unique identifier for the environment.
Description (optional)
A brief description of the environment.
License Type
Select Paid.
Selecting Paid allows you to assign a paid license to the environment. Learn more in Licenses and Platform Limits.
Environment Use Case
Select Workforce.
This option allows you to design single sign-on experiences for your employees.
Environment Type
Select Sandbox or Production.
Sandbox environments are typically used for configuration and testing before deployment.
You must select Sandbox as the environment type to benefit from the 14-day grace period.
Production environments are typically used for live configurations that are deployed for real-world use. Learn more about environment types in Sandbox and Production environments.
Include DaVinci flows for getting started
Select this checkbox to include DaVinci flows in the new environment that are used in the getting started experience. This option is only available if you have a license that includes DaVinci.
Generate sample populations and users
Select this checkbox to generate two populations and 40 sample users in the new environment.
-
Click Next.
-
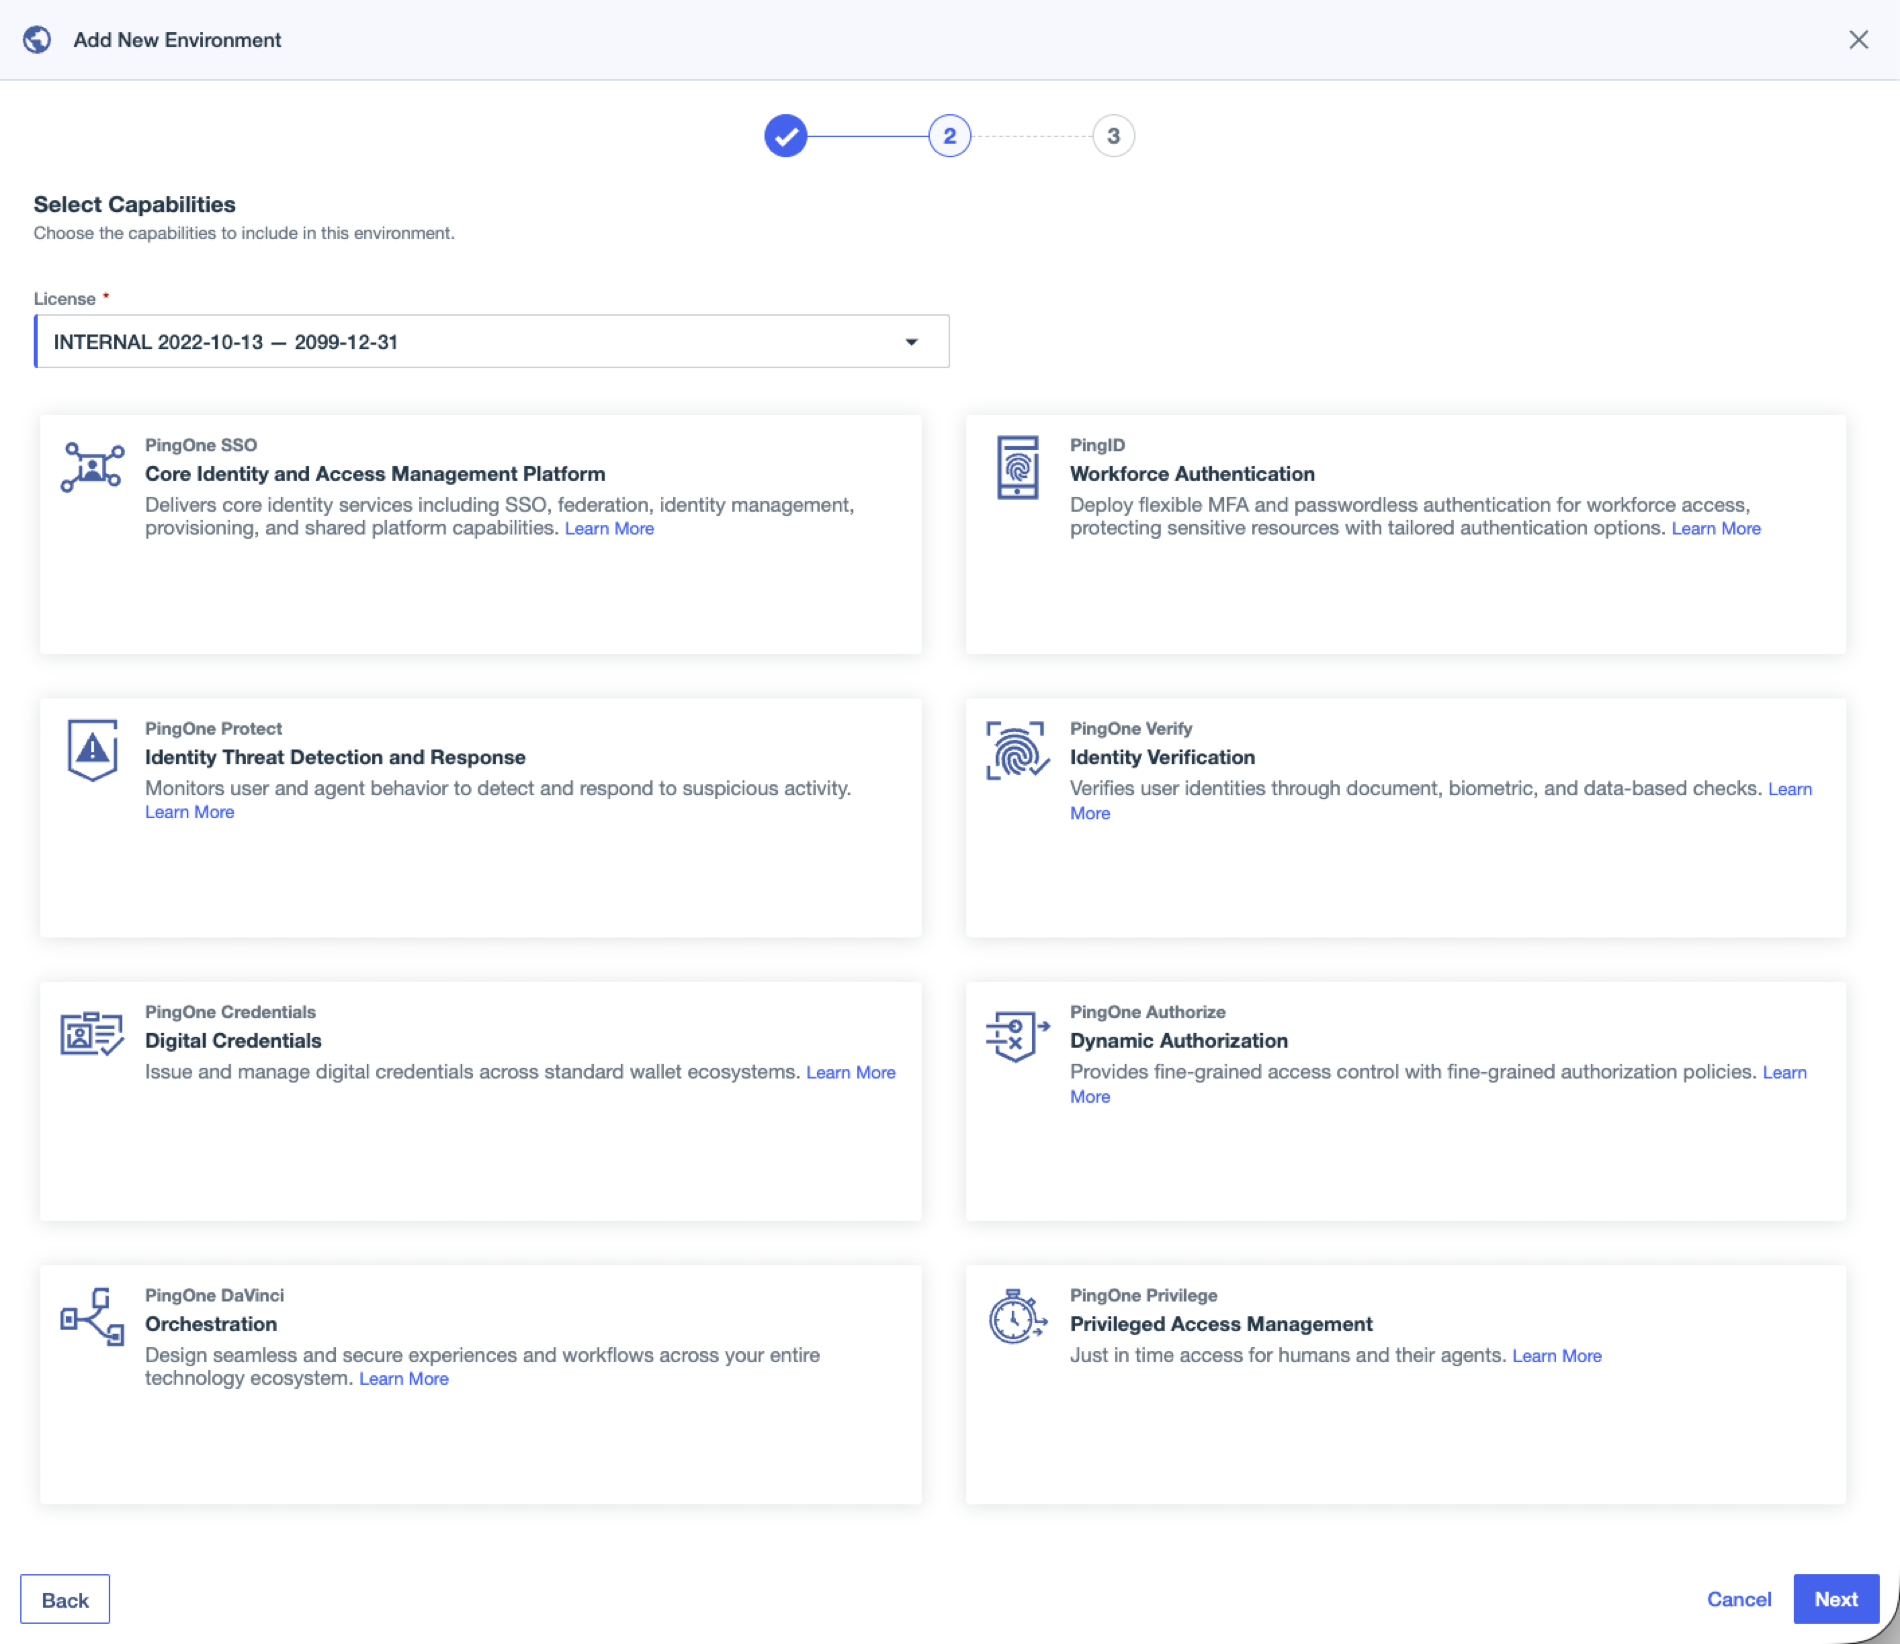
On the Select Capabilities page, select a License in the list.
The capabilities available for the selected license are listed.
-
Select the capabilities you want to include in the new environment.
Ensure that you select Workforce Authentication (PingID).
When you select Workforce Authentication (PingID), PingOne SSO is selected automatically and can’t be removed.
-
Click Next.
-
On the Finalize Setup page, review the details about the new environment and clear the checkboxes next to any capabilities that you don’t want to include.
-
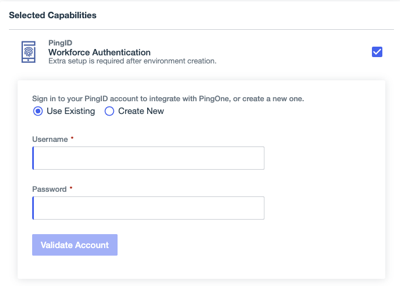
To complete the PingID integration with your existing PingID environment, locate PingID in the Selected Capabilities list and click Use Existing.
If you’re using a trial license for the environment, a new instance of PingID is created automatically and integrated with your new PingOne environment. Click Save to create the new environment and go to the next section of the tutorial.
Carefully review Integrating a PingID account with a new PingOne environment before you proceed so that you can properly prepare for this integration.
-
Enter the username and password for the PingID account you want to integrate, and then click Validate Account.
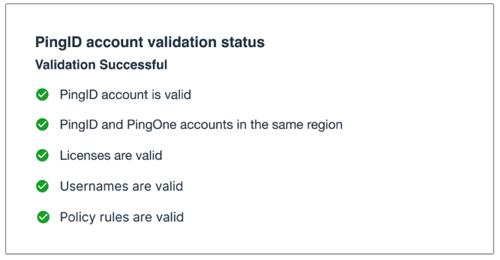
PingOne performs a validation of your PingID and PingOne accounts.
This step can take several minutes. Don’t close the window during the validation process. If you need to fix any issues, follow the instructions in the validation wizard to fix them, and then rerun the validation.
A Validation Successful status displays.
-
Click Save to create the new environment.
Result
You can now manage your users through PingOne. Although most of the PingID APIs are still supported, you should use the PingOne APIs when working out of PingOne. Learn more: What you need to know before integrating or migrating a PingID account into a PingOne environment.
Learn more
Learn more about:
-
Post-requisites that might be required for your environment.
-
Allowing your users to manage their devices using MyAccount.
-
Implementing a Windows login passwordless flow in PingOne in the best practices documentation.