Configuring single sign-on in Slack
To allow PingFederate to manage authentication, enable single sign-on (SSO) in Slack.
Configuring SSO in Slack Standard or Plus
If you use Slack Standard or Plus, configure SSO as follows.
About this task
For help, see the Plus plan tab in SAML single sign-on in the Slack documentation.
Steps
-
Sign on to Slack as a Workspace Owner.
-
Click your workspace name, and then click Administration > Workspace Settings.
-
In the navigation pane, click Authentication.
-
On the Settings & Permissions page, for SAML Authentication, click Configure.
-
Select Custom SAML 2.0 and click Configure.
-
In the SAML 2.0 Endpoint (HTTP) field, enter
https://pf_host:pf_port/idp/SSO.saml2.For example:
https://pf.example.com:9031/idp/SSO.saml2 -
In the Identity Provider Issuer field, enter the SAML 2.0 Entity ID that you created in Enabling provisioning and single sign-on in PingFederate.
-
In the Public Certificate field, enter the contents of your PingFederate signing certificate.
To get your certificate, see Exporting a certificate in Managing digital signing certificates and decryption keys in the PingFederate documentation.
-
Click Save Configuration.
-
Sign out of Slack, and then sign back on using SSO.
Result:
This saves your configuration and sends an email to team members inviting them set up SSO with their Slack accounts.
Configuring SSO in Slack Enterprise Grid
If you use Slack Enterprise Grid, configure SSO as follows.
About this task
For help, see the Enterprise Grid plan tab in SAML single sign-on in the Slack documentation.
Steps
-
Sign on to Slack Enterprise Grid as a Workspace Owner.
-
Go to Manage Organization > Security > SSO Settings > Configure SSO.
-
In the SAML 2.0 Endpoint (HTTP) field, enter
https://pf_host:pf_port/idp/SSO.saml2.For example:
https://pf.example.com:9031/idp/SSO.saml2 -
In the Identity Provider Issuer field, enter the SAML 2.0 Entity ID that you created in Enabling provisioning and single sign-on in PingFederate.
-
In the Service Provider Issuer URL, use the default value of https://slack.com.
-
In the Public (X.509) Certificate field, enter the contents of your PingFederate signing certificate.
To get your certificate, see Exporting a certificate in Managing digital signing certificates and decryption keys in the PingFederate documentation.
-
Enable authentication request signing.
-
Select the Sign the AuthnRequest check box.
-
Copy the certificate text.
-
Create a new
.crtfile on your computer and paste the certificate text. -
In PingFederate, import the
.crtfile as a trusted certificate authority.
For help, see Manage trusted certificate authorities in the PingFederate documentation.
-
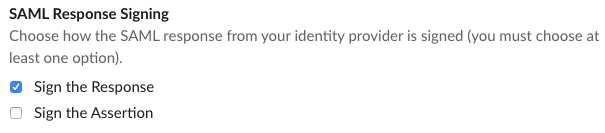
-
Clear the Sign the Assertion check box.
-
Click Test Configuration.
-
Save your configuration.
-
Sign out of Slack, and then sign back on using SSO.
Result:
This saves your configuration and sends an email to team members inviting them set up SSO with their Slack accounts.