Adding risk level results to your authentication policy
By modifying your PingFederate authentication policy to include the Result from PingOne Risk, you can dynamically change authentication requirements based on security risk level.
Before you begin
The steps in this topic assume that an HTML Form Adapter exists for login purposes. Learn more about creating an HTML Form Adapter for login in Configuring an HTML Form Adapter instance.
About this task
These steps are designed to help you add to an existing authentication policy. Learn more about configuring authentication policies in PingFederate authentication API in the PingFederate documentation.
For new deployments, you should allow for a training period. To do this, configure your policy to pass traffic through the PingOne Risk IdP Adapter and continue regardless of the Result result. When you are ready to end the training period, adjust your authentication policy as described here.
|
When the authentication flow finishes, PingFederate informs PingOne Risk whether the user ultimately succeeded or failed. This is an important consideration when designing your authentication flow. For example, a user receives a Result of |
Steps
-
In the PingFederate administrative console, go to the Policies tab.
Choose from:
-
For PingFederate 10.1 or later: go to Authentication > Policies > Policies.
-
For PingFederate 10.0 or earlier: go to Identity Provider > Authentication Policies > Policies.
-
-
Select the IdP Authentication Policies checkbox.
-
Open an existing authentication policy, or click Add Policy.
Learn more in Defining authentication policies in the PingFederate documentation.
-
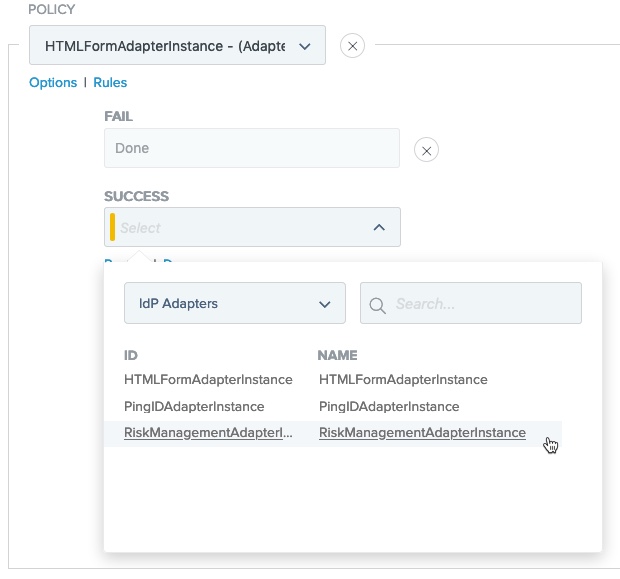
In the Policy area, in the Select list, select a PingOne Risk IdP Adapter instance.
-
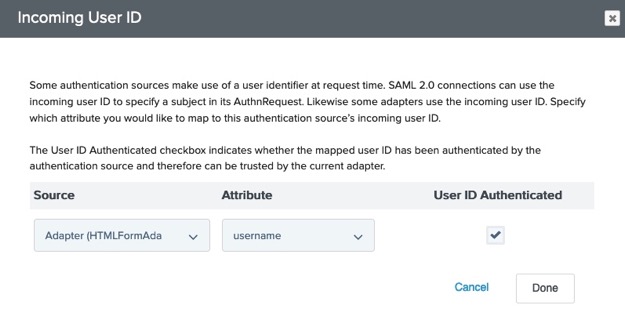
Map the user ID into the PingOne Risk IdP Adapter instance.
-
Under the PingOne Risk IdP Adapter instance, click Options.
-
In the Options dialog, in the Source list, select a previous authentication source that collects the user ID.
-
In the Attribute list, select the user ID. Click Done.
-
-
Define policy paths based on risk results.
-
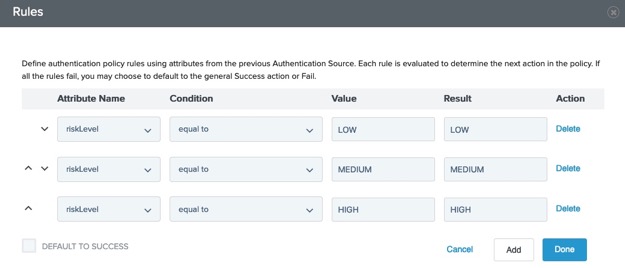
Under the PingOne Risk IdP Adapter instance, click Rules.
-
In the Rules dialog, in the Attribute Name list, select riskLevel or riskValue.
-
In the Condition list, select equal to.
-
In the Value field, if you selected riskLevel, enter
LOW,MEDIUM, orHIGH.If you selected riskValue, enter one of the risk values that you configured in PingOne.
-
In the Result field, enter a name.
This appears as a new policy path that branches from the authentication source.
-
Optional: To add more policy paths, click Add and repeat steps 6b-6e.
-
Optional: Clear the Default to success check box.
-
Click Done.
-
-
Complete the authentication policy:
-
Configure each of the policy paths.
-
Optional: To allow users to continue to sign on by satisfying stricter authentication requirements when PingOne Risk is unreachable or returns an error, do one of the following:
Choose from:
-
In your PingOne Risk IdP Adapter instance, set the Failure mode as shown in PingOne Risk IdP adapter settings reference.
-
In your authentication policy, set the Fail outcome of the PingOne Risk IdP Adapter instance to point to a second authentication factor, as shown in the following image.

-
-
-
Click Done.
-
In the Policies window, click Save.