Configure an SSO connection
Steps
-
Create a new SP connection or select an existing SP connection from the SP Configuration menu.
-
On the Connection Template screen, select Use a template for this connection and choose Office 365 from the Connection Template drop-down list.
You will be asked to provide the
federationmetadata.xmlfile you obtained earlier in Download Office 365 SAML 2.0 metadata file.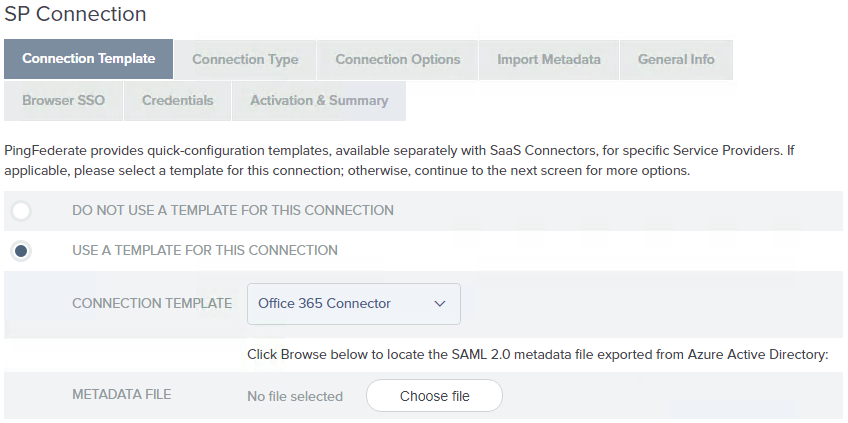
If this selection is not available, verify the connector installation and restart PingFederate.
-
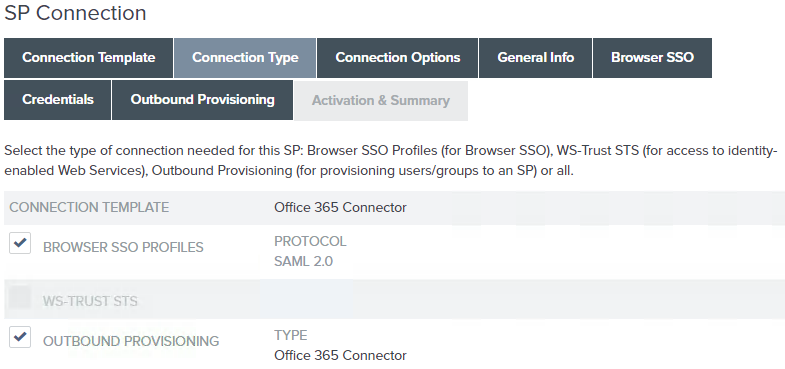
On the Connection Type screen, ensure that the Browser SSO Profiles checkbox is selected and click Next.
If outbound provisioning will also be used, select Outbound Provisioning profile as well. The screenshot below shows an example where both are selected.
-
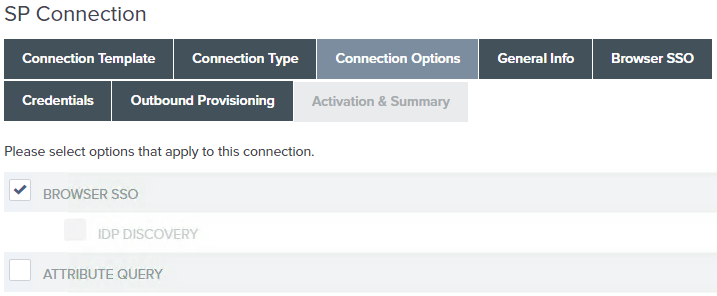
On the Connection Options screen, ensure Browser SSO is selected and click Next.
-
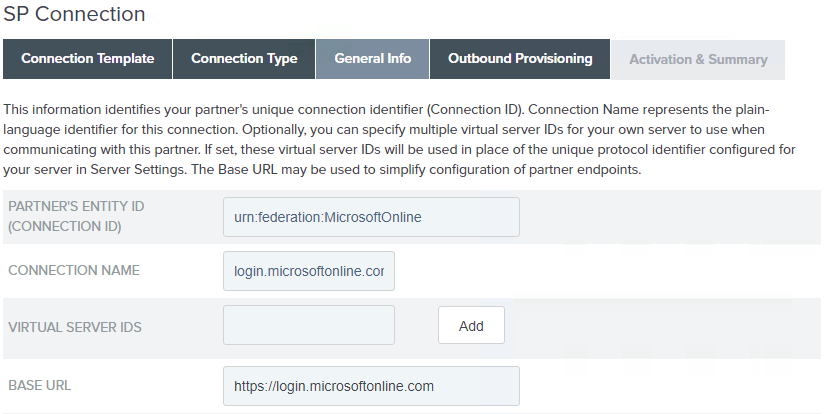
On the General Info screen, ensure that the Partner’s Entity ID (Connection ID) and the Connection Name are accurate. Change details if required and click Next.
By default, some fields are pre-populated as a result of using the Office 365 Connector template.
-
On the Browser SSO screen, click Configure Browser SSO.
-
On the Assertion Creation screen, click Configure Assertion Creation.
-
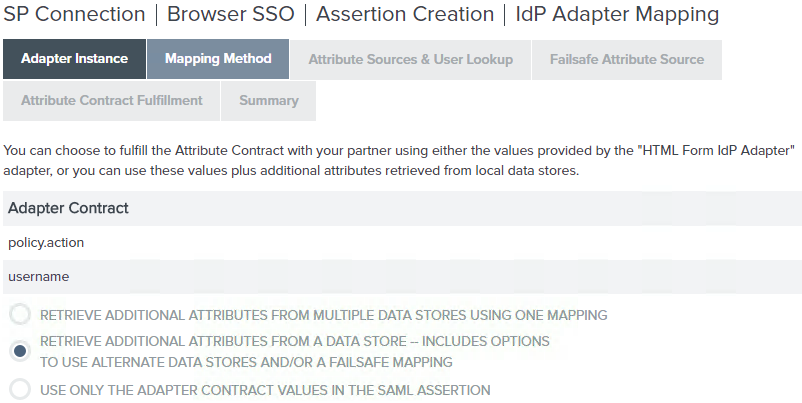
On the IdP Adapter Mapping screen, click Map New Adapter Instance. If an HTML form adapter form already exists, select it from the drop down list and click Next. Otherwise, perform the following steps to create a new HTML form adapter:
-
If an LDAP instance has not been configured in PingFederate, follow the instructions in Configuring an LDAP connection.
-
If a credential validator has not already been created, follow the instructions in Configure the LDAP Username Password Credential Validator.
-
Complete the creation of the HTML form adapter using the instructions in Configuring an HTML Form Adapter instance.
-
Once the above are completed, return to the IdP Adapter Mapping screen and click Next.
-
-
On the Mapping Method screen, select Retrieve additional attributes from a data store—includes options to use alternate data stores and/or a failsafe mapping. Click Next.
-
Click Add Attribute Source.
-
Fill in the Attribute Source Description field with an identifier of your choosing. Select the desired source datastore in the Active Data Store drop down list, then click Next.
-
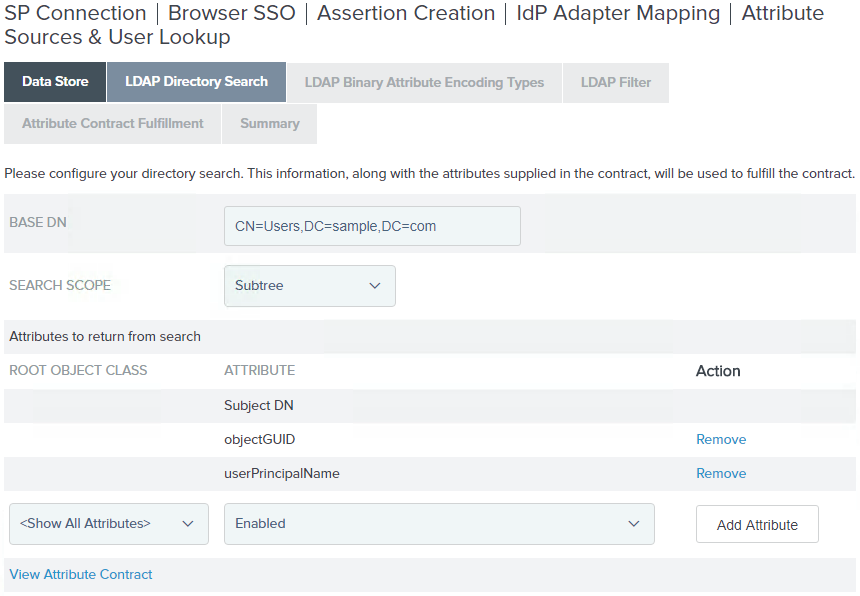
On the LDAP Directory Search screen, enter the following values:
-
Base DN: where the users are found in the source datastore
-
Search Scope: select the appropriate value
-
Attributes to return from search:
-
objectGUID
-
userPrincipalName
-
-
-
Click Next.
-
If you are in the LDAP Binary Attribute Encoding Types screen, confirm
objectGUIDis set to Base64, click Next.If you are NOT in the LDAP Binary Attribute Encoding Types screen, then
objectGUIDis not currently retrieved in binary format and the datastore settings must be updated. To updateobjectGUIDin LDAP perform the following steps:-
Open a new private browser session and log in to the PingFederate Admin Console
-
Click Data Stores, then Manage Datastores
-
Select your source datastore
-
Click LDAP Configuration
-
Click Advanced
-
Select the LDAP Binary Attributes tab
-
Enter
objectGUIDin the BINARY ATTRIBUTE NAME field and click Add -
Click Done, Done, and Save
-
Return to the LDAP Binary Attribute Encoding Types screen
-
Confirm
objectGUIDis set to Base64 and click Next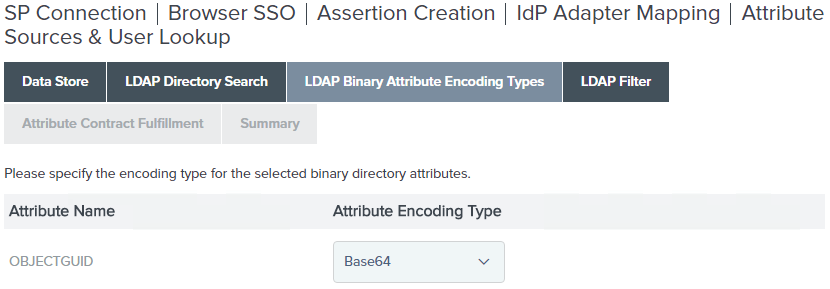
-
-
On the LDAP Filter screen, enter
userPrincipalName=${username}in the Filter field.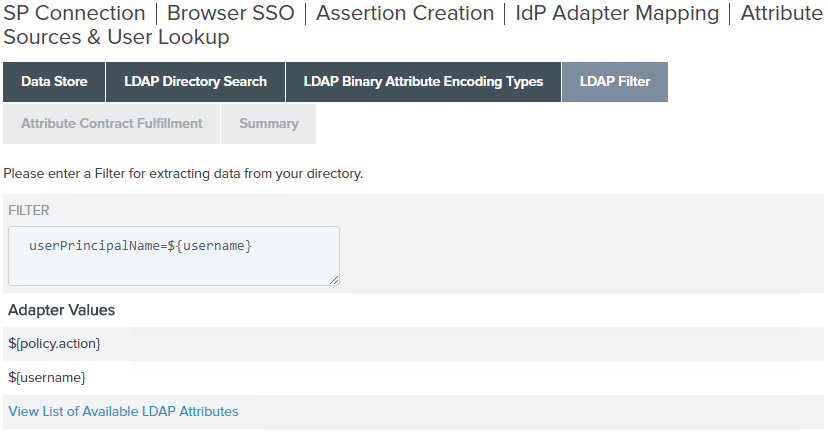
-
Click Next.
-
On the Attribute Contract Fulfillment screen, set the following values:
Attribute Contract Source Value IDPEmail
LDAP
userPrincipalName
SAML_NAME_FORMAT
Text
urn:oasis:names:tc:SAML:2.0:nameid-format:persistent
SAML_SUBJECT
LDAP
objectGUID
-
Click Next.
-
On the Attribute Source Summary screen, click Done.
-
On the Attribute Sources & User Lookup screen, click Next.
-
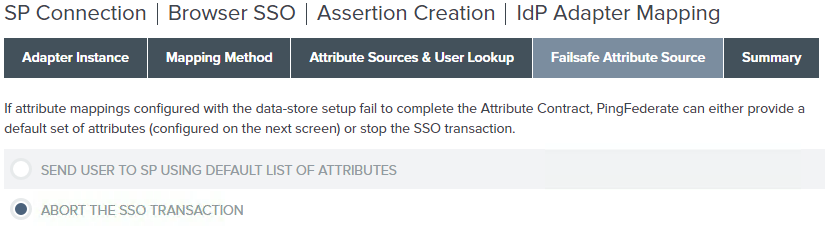
On the Failsafe Attribute Source screen, select Abort the SSO transaction and click Next.
-
On the IdP Adapter Mapping summary screen, click Done.
-
On the Authentication Source Mapping screen, click Done.
-
On the Assertion Creation screen, click Done.
-
On the Protocol Settings screen, click Configure Protocol Settings.
-
On the Assertion Consumer Service URL screen, delete the binding
urn:oasis:names:tc:SAML:2.0:bindings:HTTP-POST-SimpleSignand click Done. PingFederate does not support this binding and as such, it may result in validation errors. -
On the Protocol Settings screen, click Done.
-
On the Browser SSO screen, click Next.
-
On the Credentials screen, click Configure Credentials.
-
On the Credentials > Digital Signature Settings screen, select the signing certificate and click Next.
-
On the Signature Verification Settings screen, click Manage Signature Verification Settings.
-
On the Trust Model screen, select the appropriate value and complete the steps for configuring the trust model and signature verification according to instructions in Managing signature verification settings.
-
On the Signature Verification Summary screen, click Done.
-
On the Credentials screen, click Next.
-
On the Activation & Summary screen, set Connection Status to Active, then click Save.