Configure PingFederate for SSO
About this task
To configure a connection for single sign-on (SSO) to Evernote, follow the instructions in this section. Outbound provisioning details are managed within a service provider (SP) connection and can be added to an existing SP connection.
|
SSO is required for SCIM provisioning with Evernote. SCIM is available only in Evernote Teams accounts created on or after September 15, 2017. Learn more in How to determine when an Evernote Teams account was created in the Evernote documentation. |
Steps
-
Create a new SP connection or select an existing SP connection from the SP Configuration menu.
-
On the Connection Template screen, select Use a template for this connection and choose Evernote Connector in the Connection Template list. When asked during the connection configuration steps, import the
evernote-saml-metadata.xmlpackaged with this connector.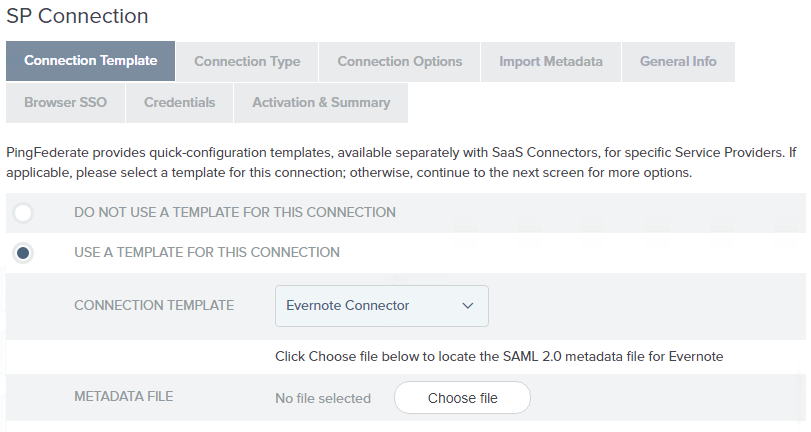
If this selection is not available, verify the connector installation and restart PingFederate.
-
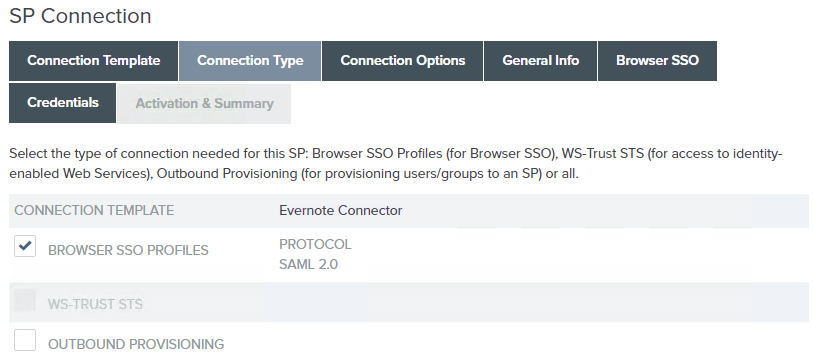
On the Connection Type screen, ensure that the Browser SSO Profiles checkbox is selected and the Outbound Provisioning checkbox is cleared.
-
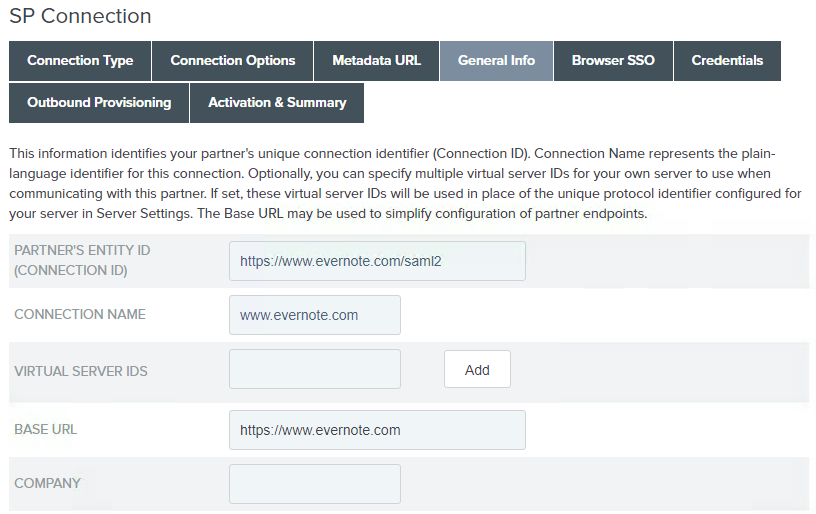
On the General Info screen, the default values are taken from the metadata file you selected in an earlier step. We recommend using the metadata default values.
-
Click Next to continue the Browser SSO configuration.
Learn more in the following sections under Identity provider SSO configuration in the PingFederate documentation:
-
On the Attribute Contract screen, set the Subject Name Format for SAML_SUBJECT to the below value:
-
urn:oasis:names:tc:SAML:1.1:nameid-format:emailAddress
-
-
On the authentication adapter’s Attribute Contract Fulfillment screen, map SAML_SUBJECT to email address. Evernote requires SAML_SUBJECT to contain the user’s email address, which must match the Evernote user’s business email address.
-
On the Credentials > Digital Signature Settings screen, select the signing certificate.
-
On the Activation & Summary screen, set Connection Status to ACTIVE, then click Save.
If you are not ready to complete the SSO configuration, you can click Save and return to the configuration page later. To return to the configuration page, select the connection from Identity Provider > SP Connections > Manage All.