Building a flow in DaVinci
To integrate with PingFederate, configure your DaVinci flow to expect the parameters that you defined in the PingOne DaVinci IdP Adapter and end the flow with a JavaScript Object Notation (JSON) response.
About this task
|
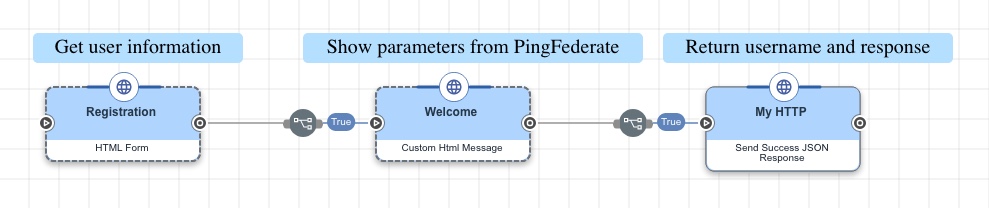
The following example builds and configures a widget-based DaVinci flow for integration with PingFederate. To show that the integration works, it displays the passed PingFederate values in a user-facing page. Flows can have different user-facing elements or none at all, depending on whether you build a widget-based flow or an API-based flow. |
Steps
-
In the DaVinci admin portal, go to Flows, and open the blank flow that you created in Adding an application in DaVinci.
-
Add PingFederate to your flow’s input schema.
-
Go to Flow Options ( ) > Input Schema.
-
Click Add.
-
In the Parameter Name field, enter the exact name that you defined in the DaVinci Parameter Name column in your DaVinci adapter configuration.
You must add
nonceas a parameter with the Data Type set to String.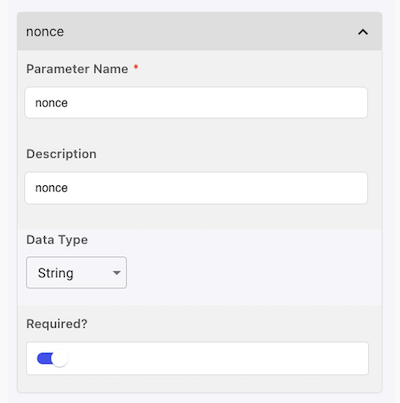
-
Repeat steps b-c for each parameter that you defined in the Simple Parameter Mappings and Advanced Parameter Mappings tables.
-
Click Save.
-
-
Optional: If you’re building a widget-based flow, create a registration form.
This example node represents the functional part of the flow. When you build your own flow, this step is where you customize the flow.
-
On the flow canvas, add the HTTP connector and select the HTML Form capability. Select the node that appears in your flow.
-
In the Title field, enter a title, such as
Registration. -
In the Fields List section, add fields for the following:
-
Username
-
Password
For help, see the HTTP connector.
-
-
In the Next Button Text field, enter
Sign Up. -
Click Apply.
-
-
Optional: For widget-based flows, show the parameters DaVinci received from PingFederate.
This node is for demonstration purposes only. You don’t need it when you build your own flow.
-
Following your HTML Form node in your flow, add the HTTP connector and select the Custom HTML Message capability. Select the node that appears in your flow.
-
In the Title field, enter a title, such as
Welcome. -
In the Message field, enter the following:
Confirm your information: Chained Attributes Specified chained val: Extended Properties Specified extended array: PAR Object Specified PAR: Server Base URL: -
Populate the message by clicking {} and inserting variables from your flow’s input schema.
-
In the Next Button Text field, enter
Sign Up. -
Click Apply.
-
-
Send a JSON response back to PingFederate.
When you build your own flow, make sure that you end the flow with this node.
-
Following the Custom HTML Message node in your flow, add the HTTP connector and select the Send Success JSON Response capability. Select the node that appears in your flow.
-
Make sure that Return Request Parameters is enabled.
-
In the Additional Fields in the Response section, click Field.
-
In the Value field, click \{} and select the username variable from your HTML Form node.
-
In the Name of the field containing the additional properties field, enter
additionalProperties.If you customized the Additional Properties Attribute field in your PingOne DaVinci IdP Adapter configuration, enter the same value here.
-
Make sure Signed Response is enabled.
-
Click Apply.
-
-
If you’re building a widget-based flow, on the HTTP node, click the Gear icon to open the connector configuration. In the Select an OpenID token management connection for signed HTTP responses list, select Token Management.
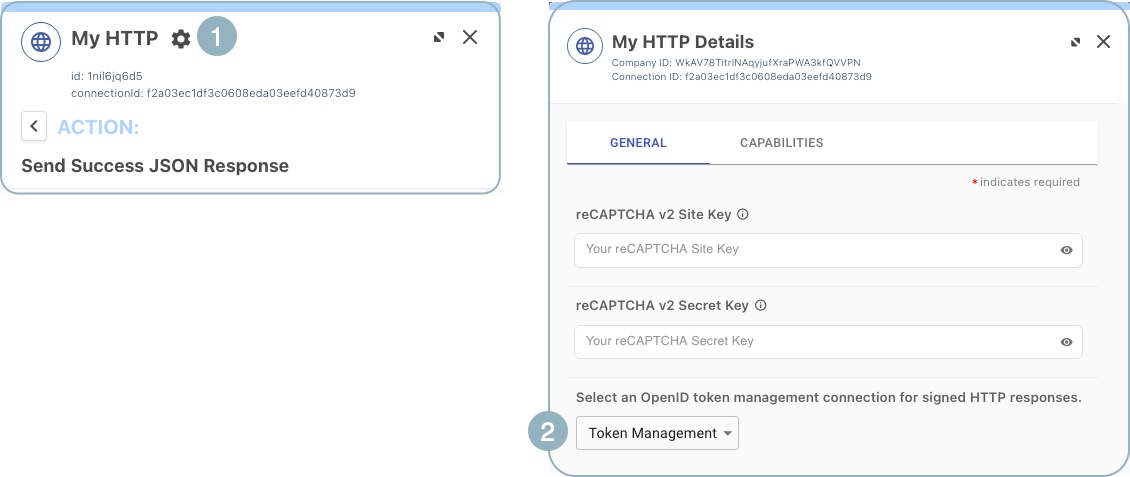
If your list doesn’t have a token management connector to select, save your flow, go to Connections > New Connection, and then add a Token Management connection.
-
Save and deploy your flow.