Creating a CIBA authentication policy in PingOne
Create a multi-factor authentication (MFA) authentication policy in PingOne MFA to handle client-initiated backchannel authentication (CIBA) authentication requests.
About this task
|
If you already created an MFA authentication policy in PingOne, you can skip the following steps and use the same policy for CIBA authentication requests if:
|
Steps
-
In the PingOne MFA console, go to Authentication > Authentication and click Add Policy.
-
Enter a unique policy name and note it.
You will use this name in Configuring a CIBA authenticator instance.
-
In the Step Type list, select Multi-factor Authentication.
-
In the MFA Policy list, select an MFA policy that has a Mobile Application configured in the Allowed Authentication Methods section.
CIBA doesn’t support number matching, so make sure to select an MFA policy with number matching cleared.
-
In the None Or Incompatible Methods section, select a default behavior for cases where the user does not have a valid authentication method set up:
Choose from:
-
Block: If the user doesn’t have a valid authentication method set up, MFA fails.
-
Bypass: If the user doesn’t have a valid authentication method set up, they continue to the next step as if they completed MFA successfully.
-
-
(Optional) In the Required When section, configure authentication triggers.
The None Or Incompatible Methods and Required When sections have no effect on CIBA requests.
-
Click Save.
Next steps
-
Add the policy to your native OIDC application that you created in Creating a web or native OIDC application in PingOne:
-
In the PingOne MFA console, go to Applications > Applications and expand your application.
-
On the Policies tab, click Add Policies or click the Pencil icon, then select the checkbox for the policy that you created.
-
Click Save.
-
-
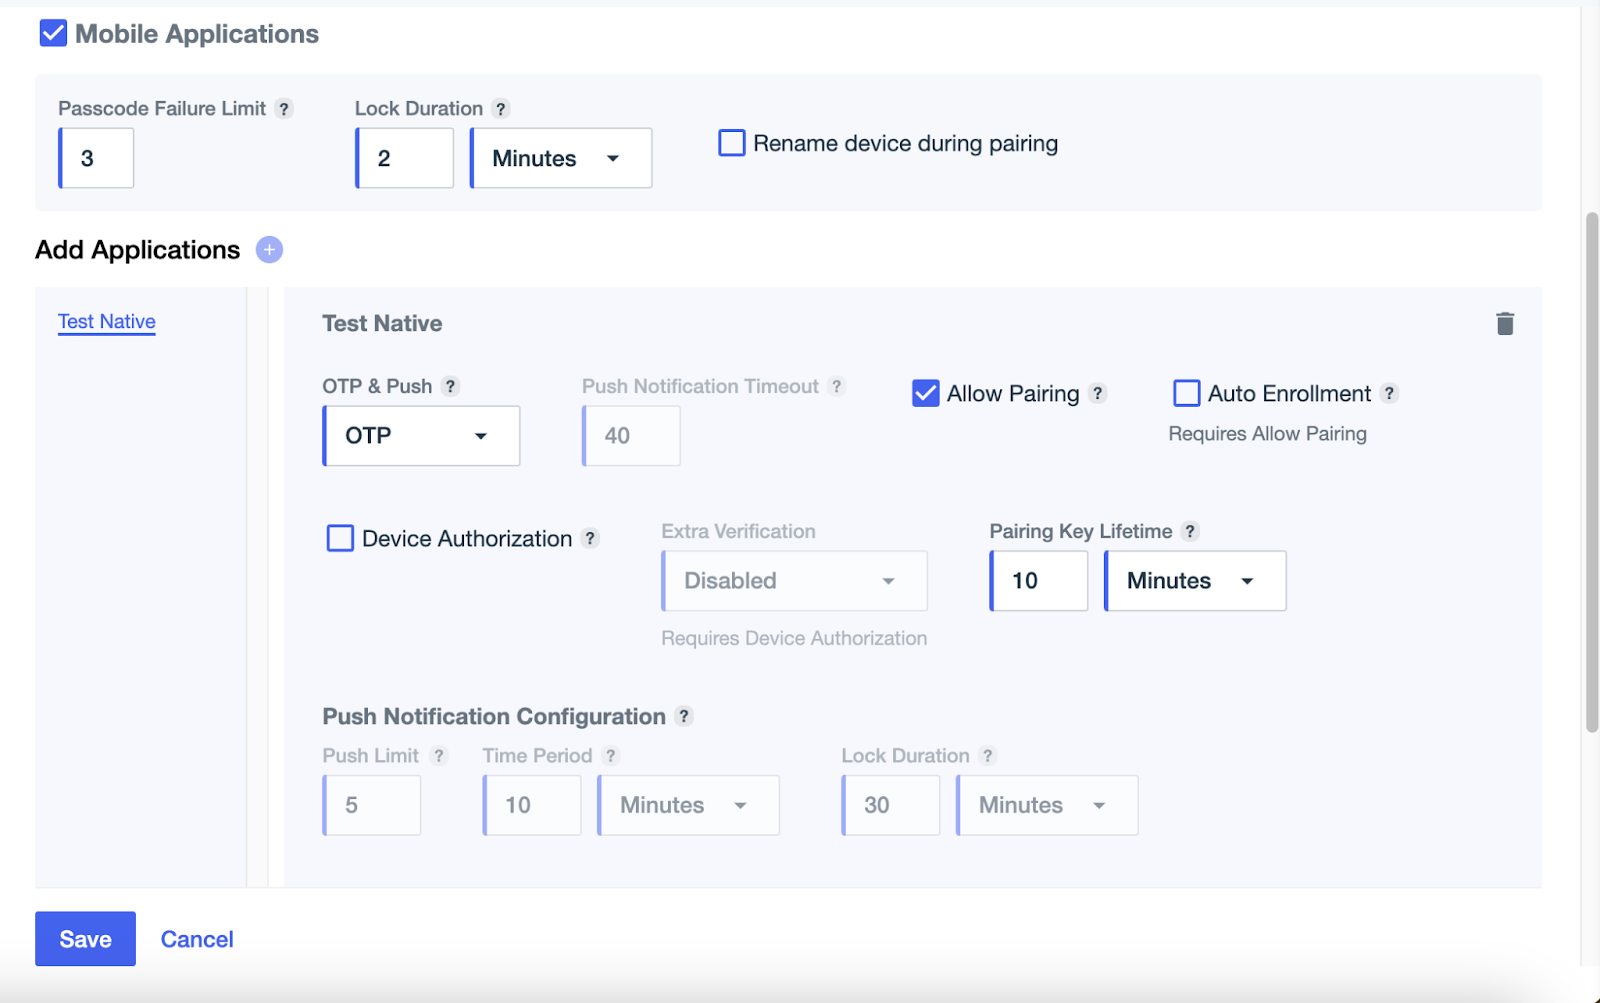
To configure settings for the mobile application attached to the MFA policy you selected in step 4:
-
In the PingOne MFA console, go to Authentication > MFA, open the corresponding MFA policy, and click the Pencil icon:
-
In the Mobile Applications section, click the + icon next to Add Applications, then select the native OIDC application that you created in Creating a web or native OIDC application in PingOne.
-
Leave the Auto Enrollment and Device Authorization checkboxes cleared.
-
Click Save.
-