Integrating a PingID account with a new PingOne environment
You can integrate an existing PingID account with a new PingOne environment.
Before you begin
Make sure that:
-
Your PingOne license covers the same number of users that exist in your PingID account, and that your PingID account license is still valid.
-
The PingOne environment that you create is in the same region as your PingID environment.
-
The user accounts in your PingID environment do not include any duplicate users or usernames that contain unsupported characters. You’ll have opportunity to fix issues during the PingID account validation process. Learn more about fixing issues before you begin and find more detailed technical information in "Duplicate users found" error when attempting to connect a PingID environment to PingOne in the Ping Identity Support Portal.
|
You can unlink your PingID account for up to 14 days after completing the integration with PingOne (by deleting the PingOne environment). However, if you have updated FIDO devices to use the FIDO2 authentication method it is not possible to unlink the PingID account, and deleting the PingOne environment will also delete the PingID account. |
About this task
Integrate your existing PingID account with a new PingOne environment, so that you can:
-
Manage PingID users from PingOne
-
Allow users to manage their devices using MyAccount.
-
Apply a FIDO policy to PingID user accounts.
-
Implement a Windows login passwordless flow.
If you want to create a new PingID environment, see Creating a new PingOne environment with MFA.
Steps
-
In the PingOne admin console, click Add Environment > Build your own solution > PingID, and then click Next. PingOne SSO is automatically included in the selection.

-
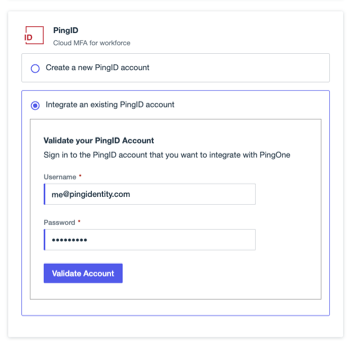
Select I want to integrate with an existing account, enter the user name and password for the PingID environment that you want to integrate and then click Next. PingOne performs a validation of your PingID and PingOne accounts.
This step can take several minutes. Do not close the window during the validation process. Result:
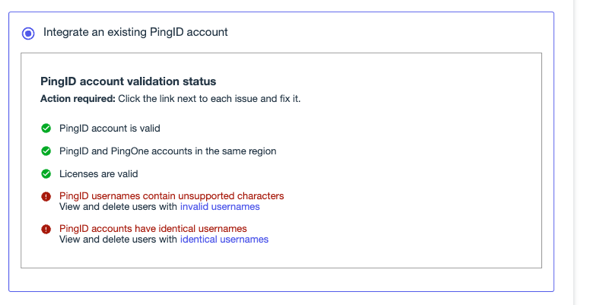
You’ll see a PingID account validation status summary when the process is complete.

-
If any actions are required by the summary status, perform them now.
-
License validation: If one or more of your licenses are not valid or do not cover sufficient users to allow the integration to continue, contact your Ping Identity account team to update your license.
-
Region validation: Make sure that your PingID and PingOne environments are located in the same region.
-
Unsupported characters: If your PingID account includes user accounts with unsupported characters, you’ll see a window that displays all affected accounts. Review the list and click Delete to delete all accounts with unsupported characters.
-
Identical Usernames: During migration, PingOne removes any spaces that appear in a PingID user name. All PingID user names that would appear as duplicate entries in PingOne as a result are listed in the PingID Accounts with Identical User names table. Usually only one of the accounts with duplicate user names is the active account.
-
For each duplicate entry, use the details shown in the table to choose the account that you want to keep.
-
When you have selected the user account you want to keep from each of the duplicate user names listed, click Delete to remove all other (duplicate) entries.
Result:
After solving all validation issues, you’ll see a validation successful status and the Services window opens.
-
-
-
In the Services window enter the following information:
-
Environment Name: Enter a name for your PingOne environment.
-
Description (optional): Enter a description for the environment.
-
Environment Type: Select either Sandbox or Production
-
Region: The region should match the region in which your PingID environment is located.
-
License: Select the relevant license.
-
-
Click Finish.
Result
You can now manage your users through PingOne.
Learn more about allowing your users to manage their devices using MyAccount in Self service.
Learn more about creating and managing FIDO policies in FIDO policies.
Learn more about implementing a Windows login passwordless flow in Creating and configuring a passwordless Windows login application in PingOne