Setting up SSO to PingAuthorize
To set up single sign-on (SSO) access from PingOne to the PingAuthorize admin console, configure PingOne and PingAuthorize and test the sign-on experience.
Before you begin
Ensure that you have:
-
A licensed version of PingAuthorize.
-
The host name and port for the PingAuthorize Server.
-
A PingOne organization. Learn more in Starting a PingOne trial.
-
A PingOne environment with the PingOne SSO and PingAuthorize services added. Learn more in Adding a service to an environment.
Connecting PingOne to PingAuthorize
Make the PingAuthorize admin console accessible from PingOne.
Steps
-
In the PingOne admin console, go to Overview.
-
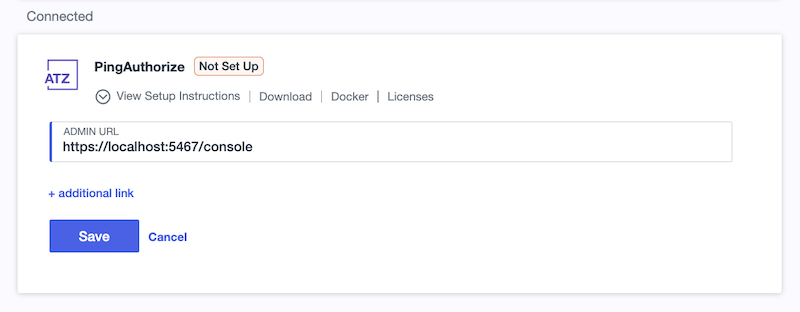
Under Services, locate the PingAuthorize tile and click Add Admin UI Link.
-
Enter the URL for the PingAuthorize admin console. For example: https://<hostname>:<port>/console.
You can specify the LDAP server to bind to by using the
ldap-hostnameandldaps-portquery parameters.By binding to the LDAP server, you can use a single admin console instance to administer multiple PingAuthorize Servers. The connection always uses LDAPS because SSO requires traffic between the console and LDAP server to be encrypted. Using these query parameters, provide the URL as follows:
https://<hostname>:<port>/console?ldap-hostname=<ldap-hostname>&ldaps-port=<ldaps-port>
-
Click Save.
Adding administrator accounts
For each admin user you want to have SSO access to PingAuthorize, create a corresponding root distinguished name (DN) user in the PingAuthorize Server.
Root DN users are privileged server accounts required to perform administrative operations, such as managing server configuration. Each root DN user must have a unique username. Learn more in Managing root user accounts in the PingDirectory documentation.
Steps
-
In the PingOne admin console, go to Directory > Users and browse or search for the user for which you want to enable SSO access.
-
Click the user entry to open the details panel.
-
On the Profile tab, copy the following values to a secure location:
-
Username
-
Given Name
-
Family Name
-
-
In a terminal instance, run the following command using the values you copied in the previous step:
~/<PingAuthorize_server_root>/bin/dsconfig create-root-dn-user \ --user-name <Username> \ --set first-name:<Given Name> \ --set last-name:<Family Name> \ -
In the
Root DN Userconfiguration menu, enterfto create the new root DN user:>>>> Configure the properties of the Root DN User >>>> via creating 'demoUser' Root DN User Property Value(s) -------------------------------------------------------------------- User Information 1) alternate-bind-dn This root user is allowed to bind only using the DN of the associated configuration entry. 2) description - 3) password - 4) first-name firstName 5) last-name lastName 6) user-id - 7) email-address - 8) work-telephone-number - 9) home-telephone-number - 10) mobile-telephone-number - 11) pager-telephone-number - [...] /) search objects and properties by name ?) help f) finish - create the new Root DN User a) show advanced properties of the Root DN User s) sort properties alphabetically d) display the equivalent dsconfig arguments that would create this object r) display the equivalent Configuration API arguments that would create this object q) quit Enter option [q]: f -
(Optional) Specify a reason for adding the user and press Enter.
Result
You’ll see:
The Root DN User was created successfully
Adding an OIDC application
Add an OpenID Connect (OIDC) application in PingOne to represent the PingAuthorize admin console as a relying party (RP). You’ll use the application’s client credentials and issuer URL in the next section to configure PingAuthorize to verify PingOne-issued ID tokens.
Steps
-
In the PingOne admin console, go to Applications > Applications and click the icon.
-
Enter the following:
-
Application Name: A unique identifier for the application.
-
Description (optional): A brief description of the application.
-
-
For the Application Type, click OIDC Web App.
-
Click Save.
-
On the Configuration tab, click the Pencil icon ().
-
Enter or edit the following:
-
Response Type: Select the Code checkbox.
-
Grant Type: Select the Authorization Code checkbox.
-
Redirect URIs: Enter
https://<hostname>:<port>/console/oidc/cb. -
Token Endpoint Authentication Method: Select Client Secret Basic in the list.
Learn more about configuring OIDC applications in Editing an application - OIDC.
-
-
Click Save.
-
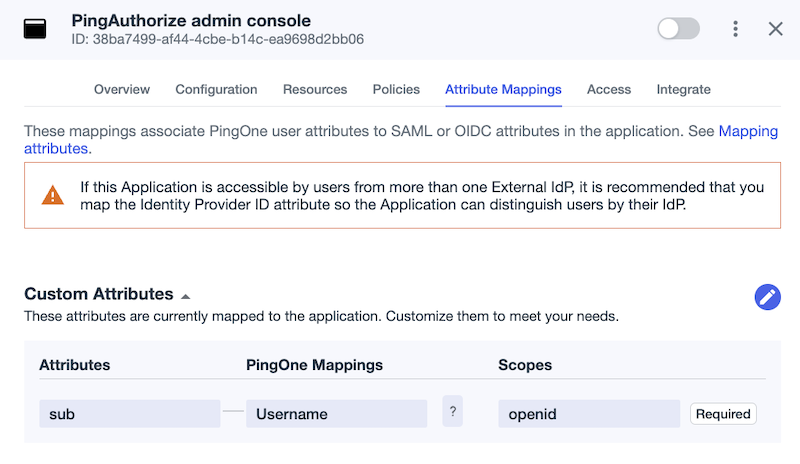
On the Attribute Mappings tab, click .
-
For the default sub attribute, select Username in the PingOne Mappings list.
-
Click Save.
-
To enable the application, click the toggle at the top of the details panel.
Configuring PingAuthorize for SSO
Configure PingAuthorize with the OIDC credentials from PingOne so that the server can verify PingOne-issued ID tokens and grant admin users SSO access to the console.
Steps
-
In the PingOne admin console, go to Applications > Applications and click the newly created OIDC application to open the details panel.
-
On the Overview tab, under Connection Details, copy the Issuer ID to a secure location.
-
On the Configuration tab, copy the following values to a secure location:
-
Client ID
-
Client Secret
-
-
In your PingAuthorize Server directory, make a copy of the
config/sample-dsconfig-batch-files/enable-pingone-admin-console-sso.dsconfigfile. -
Open the copy of the
configfile in a text editor. -
Update the placeholders with the values you copied in steps 2 and 3:
# Create an ID token validator suitable for verifying ID tokens generated # by the PingOne service. The "All Admin Users" identity mapper will be used # to match users that authenticate with PingOne to either root DN users or # topology admin users defined in the server configuration. dsconfig create-id-token-validator \ --validator-name "PingOne ID Token Validator" \ --type ping-one \ --set enabled:true \ --set "identity-mapper:All Admin Users" \ --set evaluation-order-index:1 \ --set issuer-url:[PING_ONE_APPLICATION_ISSUER_URL] [...] # Configure the Administrative Console with your application's client # credentials and issuer URI. dsconfig set-web-application-extension-prop \ --extension-name Console \ --set sso-enabled:true \ --set oidc-client-id:[PING_ONE_APPLICATION_CLIENT_ID] \ --set oidc-client-secret:[PING_ONE_APPLICATION_CLIENT_SECRET] \ --set oidc-issuer-url:[PING_ONE_APPLICATION_ISSUER_URL] -
Save the file changes.
-
Run the following command to apply the configuration changes:
~/<PingAuthorize_server_root>/bin/dsconfig \
  --batch-file config/sample-dsconfig-batch-files/enable-pingone-admin-console-sso-copy.dsconfig \
  --no-prompt
Testing SSO to PingAuthorize
Test the SSO connection to PingAuthorize from the PingOne admin console.
Steps
-
In the PingOne admin console, go to Overview.
-
Under Services, locate the PingAuthorize tile and click the PingAuthorize link.
-
Sign on using the credentials for the user account you configured previously.
Result
You’re signed on to the PingAuthorize admin console with your PingOne credentials. You can now manage your PingAuthorize Server and its resources based on the permissions of the user account you used to sign on.
Next steps
Learn about using the PingAuthorize admin console in the PingAuthorize Server Administration Guide.