Setting up SSO to PingOne for Enterprise
If your organization has set up PingOne for Enterprise, you can use single sign-on (SSO) from the PingOne admin console to the PingOne for Enterprise tenant. This allows organizations with multiple instances of PingOne for Enterprise to keep track of each environment without having to use a unique email address for each sign-on.
You’ll use SSO to PingOne for Enterprise by selecting the Enable SSO option on the sign-on page. Although user mapping is accomplished by an administrator signing on with an email address and password, SSO is set up using OpenID Connect (OIDC).
Before you begin
To set up SSO to PingOne for Enterprise, you must have the Organization Admin role assigned in PingOne. Learn more in Administrator Roles.
Steps
-
In the PingOne admin console, go to the Overview page.
-
In the Services section, click the PingOne for Enterprise icon.
If you don’t see the PingOne for Enterprise icon, your organization doesn’t have this services configured. Learn more in Building solutions.
Result:
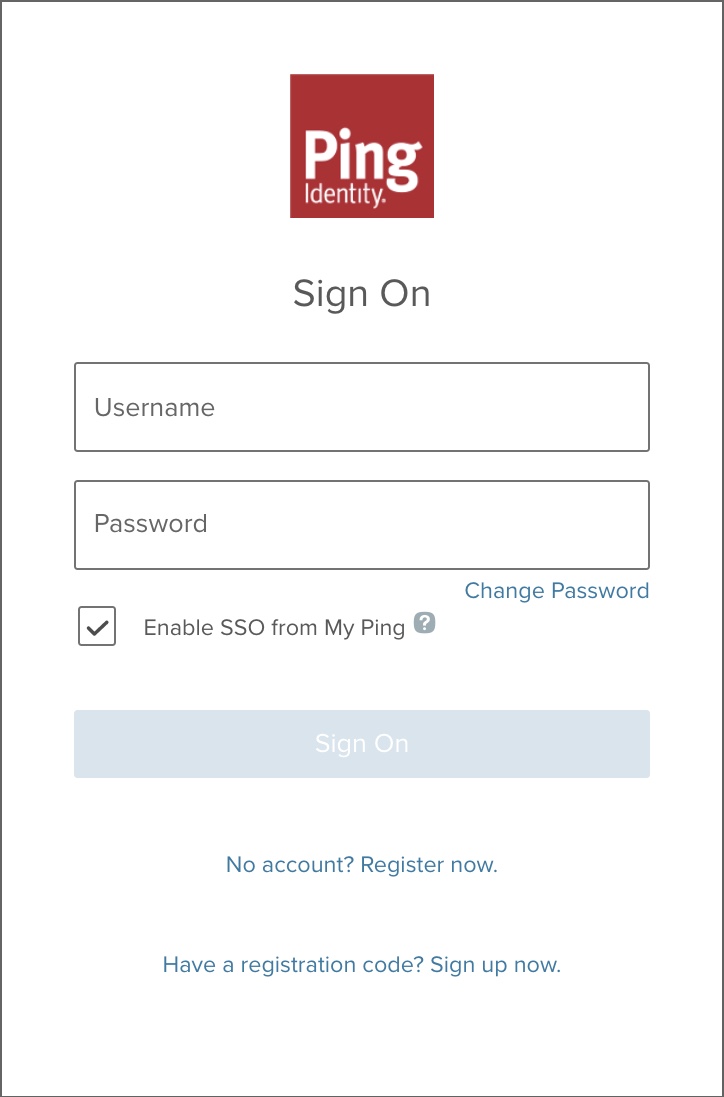
The Sign On modal opens.
-
Enter your username and password.
-
Select the Enable SSO from My Ping checkbox.
This checkbox displays only if you have an Organization Admin role.
-
Click Sign On.
Result:
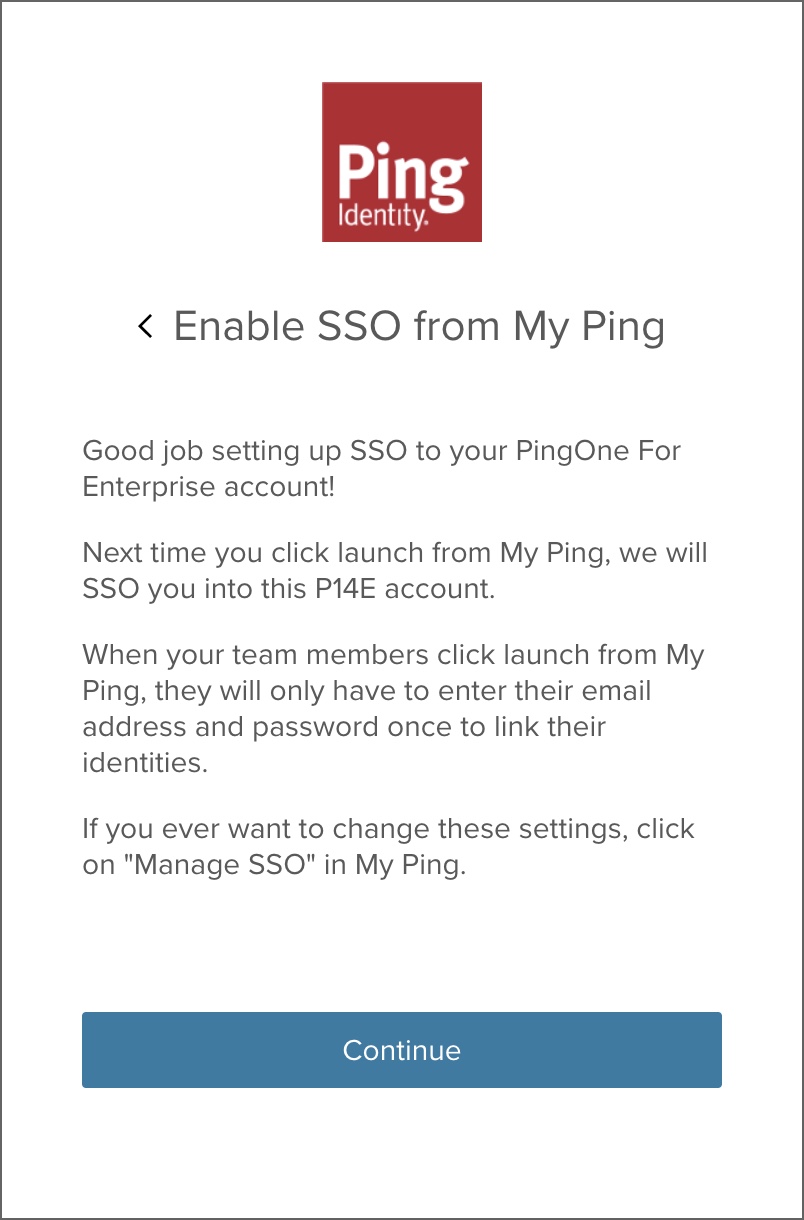
You see the following message:
-
Click Continue.
-
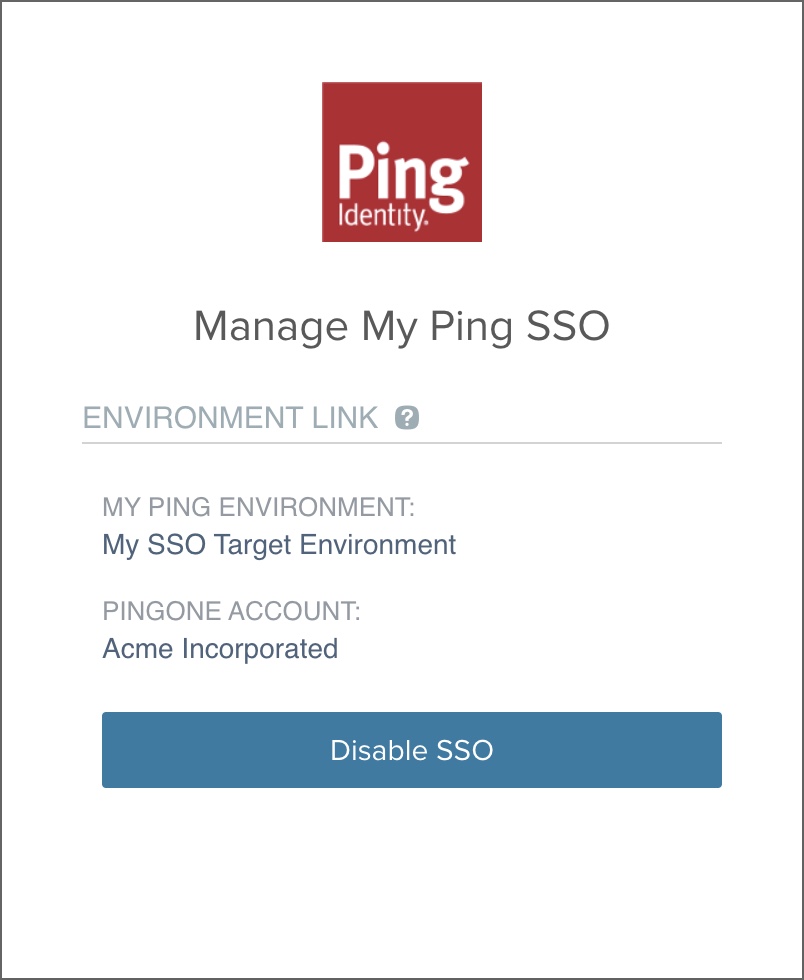
To remove the SSO link to your account or map to a different account, click the Manage SSO link.
The Manage SSO link allows you to unlink your username.
-
If you have the Organization Admin role and you want to unlink the environment for all administrator users, click Disable SSO.