Scenario 6: Sensitive variable creation (early access)
The goal of this scenario is to demonstrate the creation of sensitive variables when you select a configuration resource that requires them.
In this scenario, you’ll promote the Test IdP external identity provider (IdP) from the Promotion-Source environment to the Promotion-Target environment. This promotion requires the creation of a sensitive variable for the IdP’s client secret. For the purposes of this scenario, let’s assume you don’t account for that when you start creating variables, and show how the promotion workflow prompts you for it anyway.
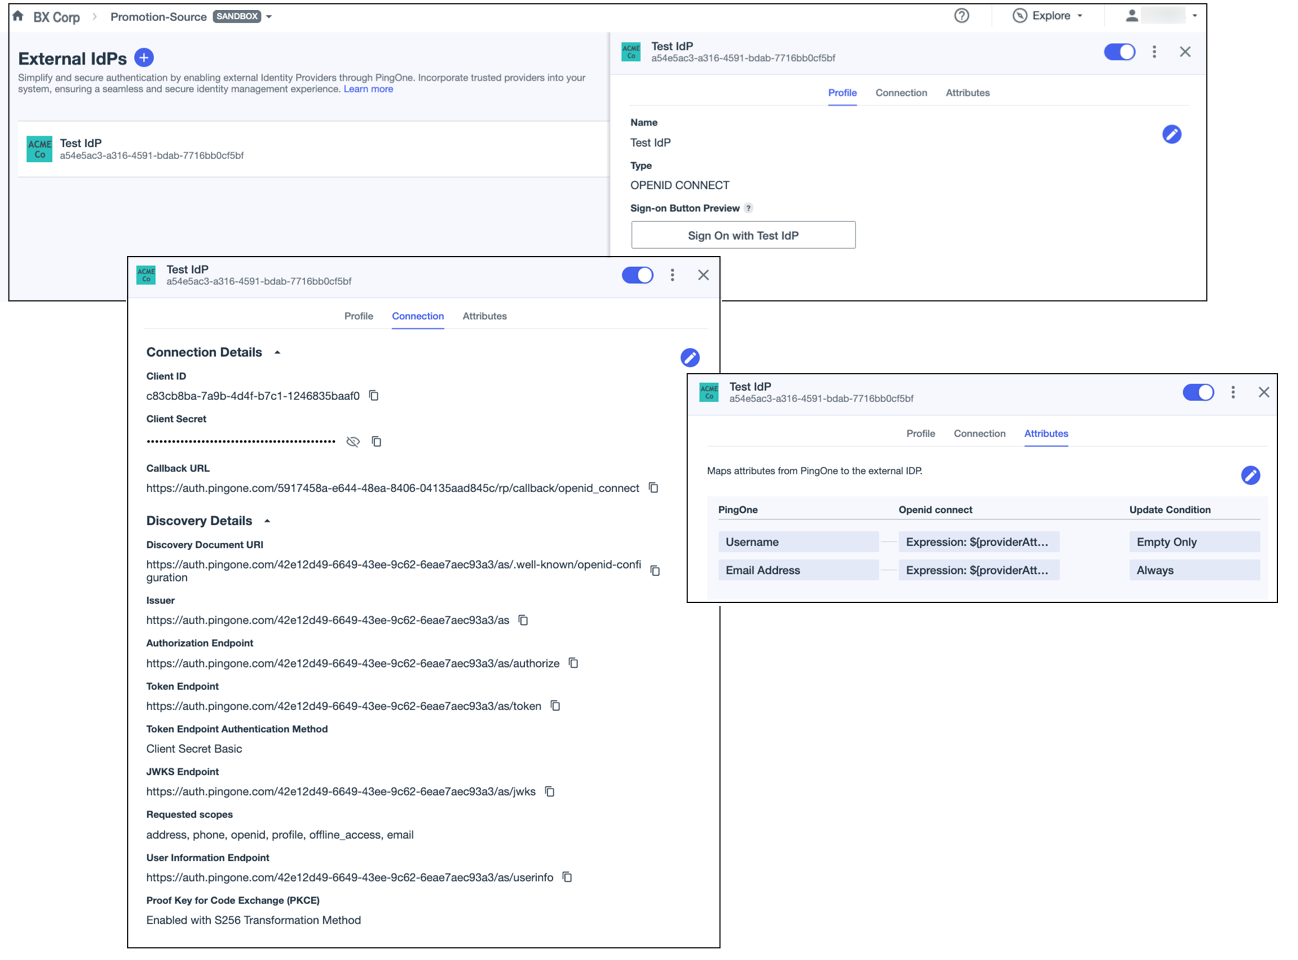
Configure promotion variables in the source environment
As you prepare for your promotion, you’ve determined that although you want most of the configuration for Test IdP to be the same in both the source and target environments, you want to use a different User Information Endpoint and Redirect URIs settings. You decide to create a promotion variable in the Promotion-Source environment.
Steps
-
Sign on to the PingOne admin console for the Promotion-Source environment.
-
Go to Promote > Promotion Variables and click Create Promotion Variable.
-
On the Select Target Environment modal, select Promotion-Target in the Target Environment list.
-
Select The correct environment is selected and I want to continue and click Confirm.
After you confirm the target environment, PingOne determines the resources for which you can create variables.
-
On the Create Variables page, in the Resource Details section, select IdentityProvider in the Category list.
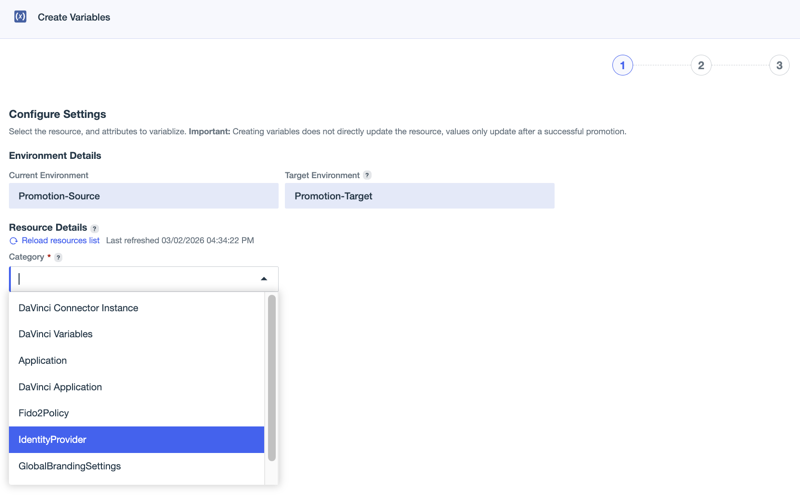
Categories allow you to narrow down the list and find what you’re looking for more easily.
You might need to click Reload resources list to pick up categories for configuration resources that were recently added to the environment.
Result
The subcategory auto-fills with OPENID_CONNECT because in this environment there is only one IdP configured, and it uses OIDC. Because there are no other IdPs in this environment, Test IdP is also selected automatically in the Resource list.
The Attributes list shows all of the IdP configuration attributes for which you can create variables.
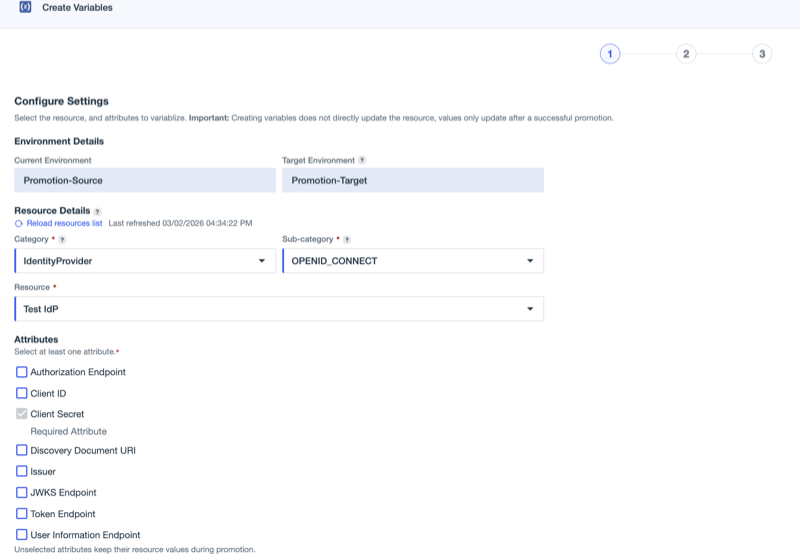
Note that Client Secret is selected and marked as required. Although you didn’t plan for the creation of this variable, it’s required, and you can’t continue without creating it. You can’t promote the client secret value from the source environment to the target environment.
-
Select User Information Endpoint, then click Next.
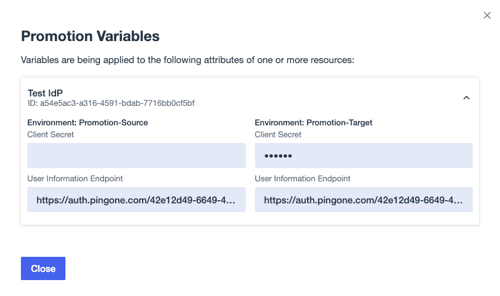
On the Set Variable Values for the Target Environment page, note that there’s no value in the Client Secret field in the Current Environment section. You can’t view or change the value for the source environment, because it’s a sensitive variable.
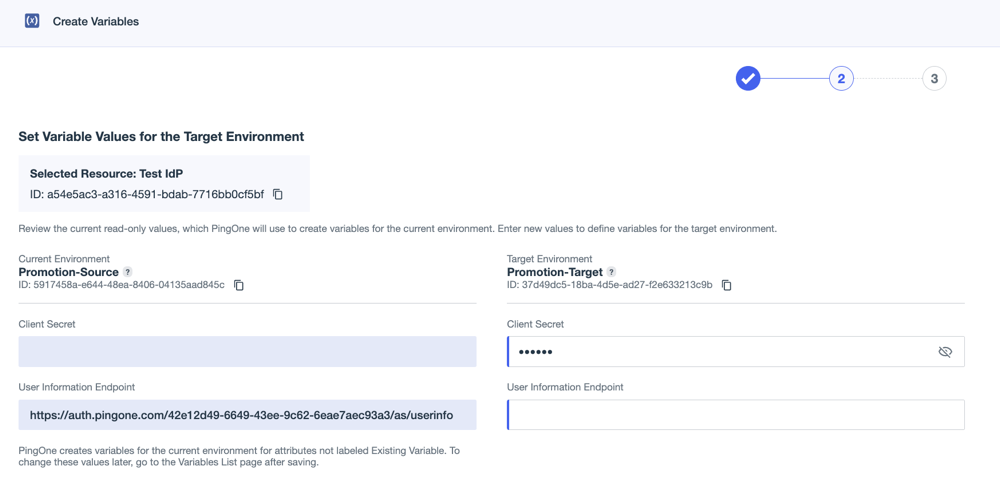
In the Client Secret field in the Target Environment section, you see only placeholders. If you click the Eye icon (), you’ll see only asterisks and no actual value. You must enter a value for the target environment to promote the IdP.
-
Set the following variable values to use in the Promotion-Target environment:
-
Client Secret:
TestSecret123!You can view the contents of the Client Secret field only until you click Next. After you save the variable, the value is hashed and can’t be viewed or copied.
Always save your client secrets and other sensitive variable values in a secure location outside of PingOne for future reference.
-
User Information Endpoint:
https://auth.pingone.com/42e12d49-6649-43ee-9c62-6eae7aec93a3/as/test.userinfo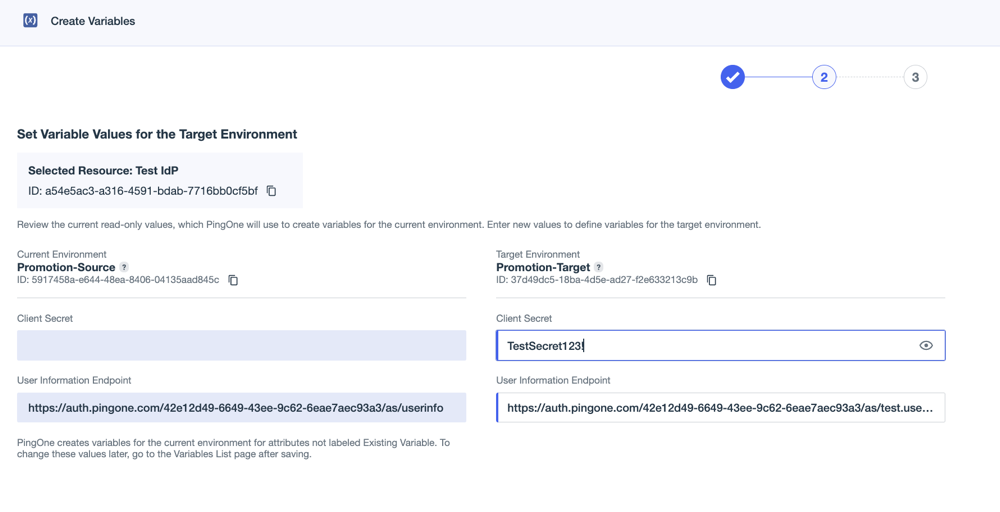
-
-
Click Next and confirm the variable configuration on the Review and Save page.
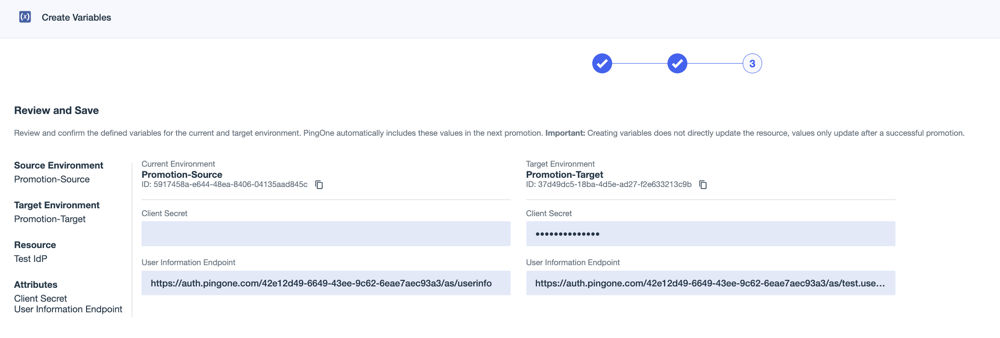
-
Click Save.
Result
You’re returned to the Promotion Variables page. Test IdP is listed in the Resources with Variables section.
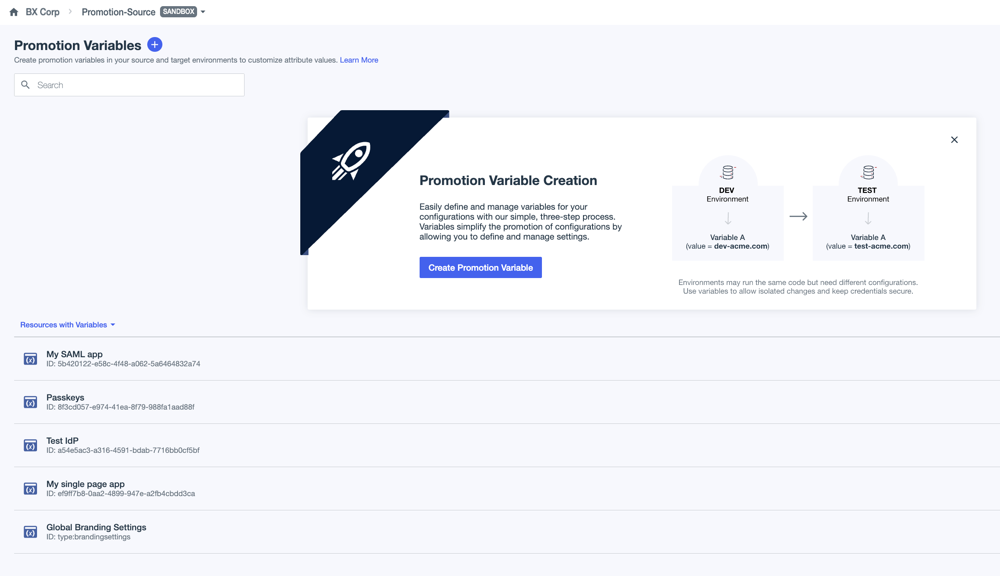
Configure and run the promotion in the source environment
To configure the promotion, you’ll confirm the target environment, select the resource to promote (Test IdP), and determine whether the resource should be created as new in the target environment or mapped to an existing resource. Then you’ll run the promotion.
Steps
-
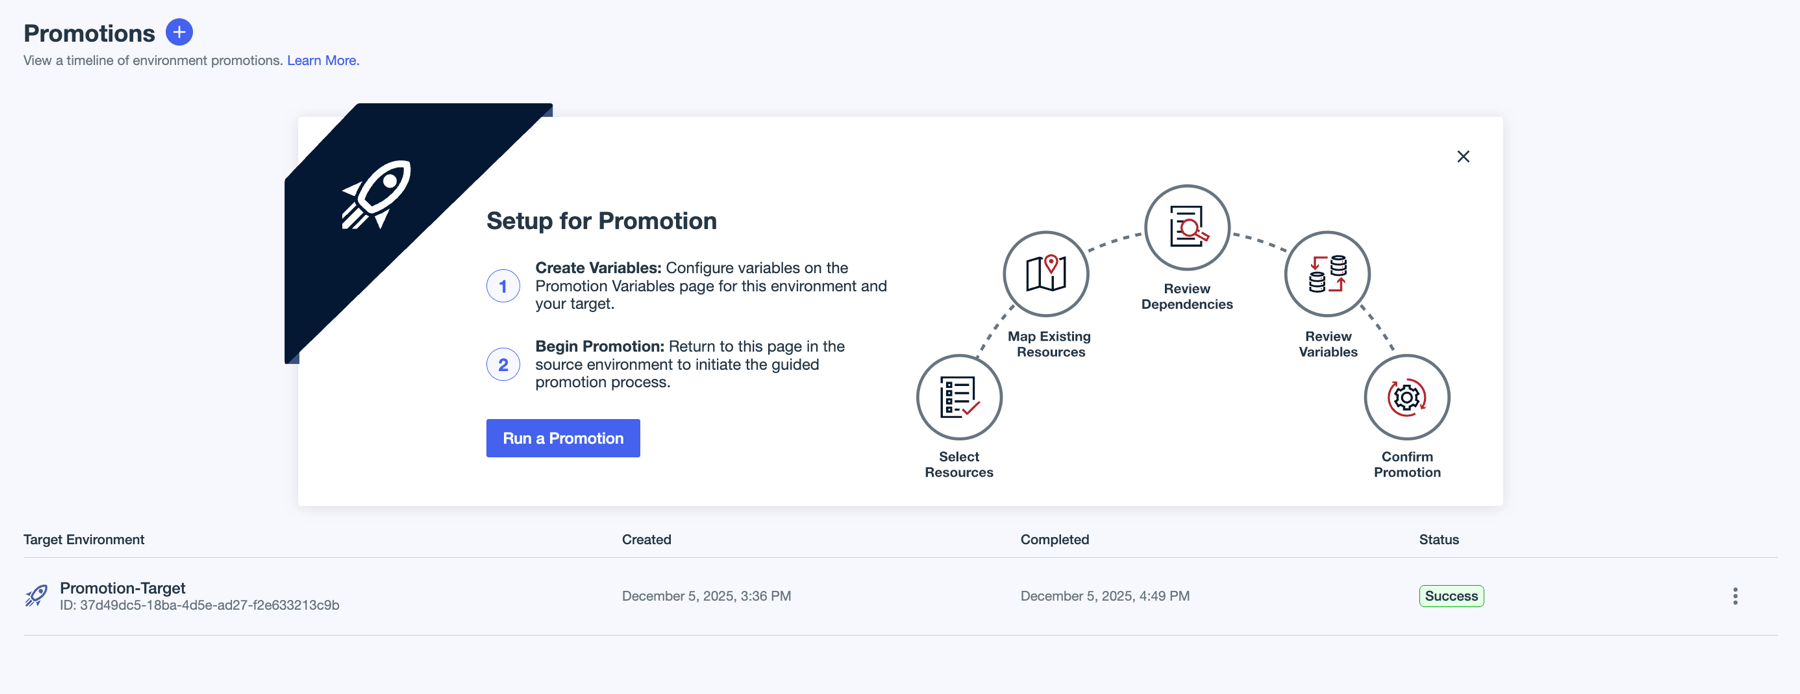
In the PingOne admin console for the Promotion-Source environment, go to Promote > Promotions.
-
Click Run a Promotion.
-
On the Confirm Target Environment modal, ensure that Promotion-Target is selected in the Target Environment list.
-
Select The correct environment is selected and I want to continue and click Confirm.
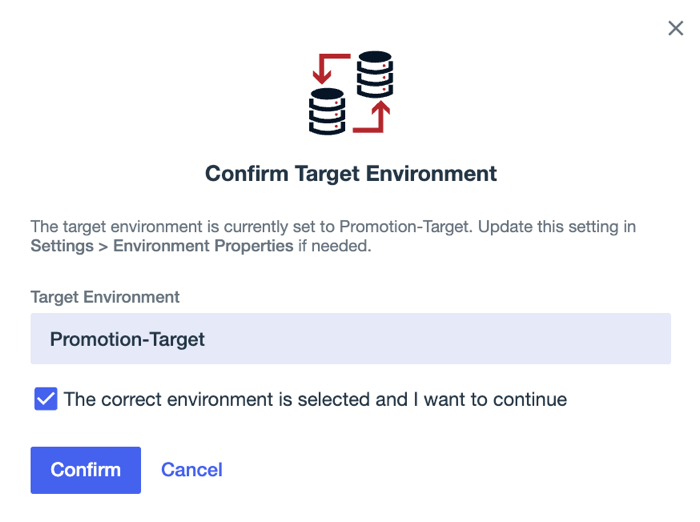
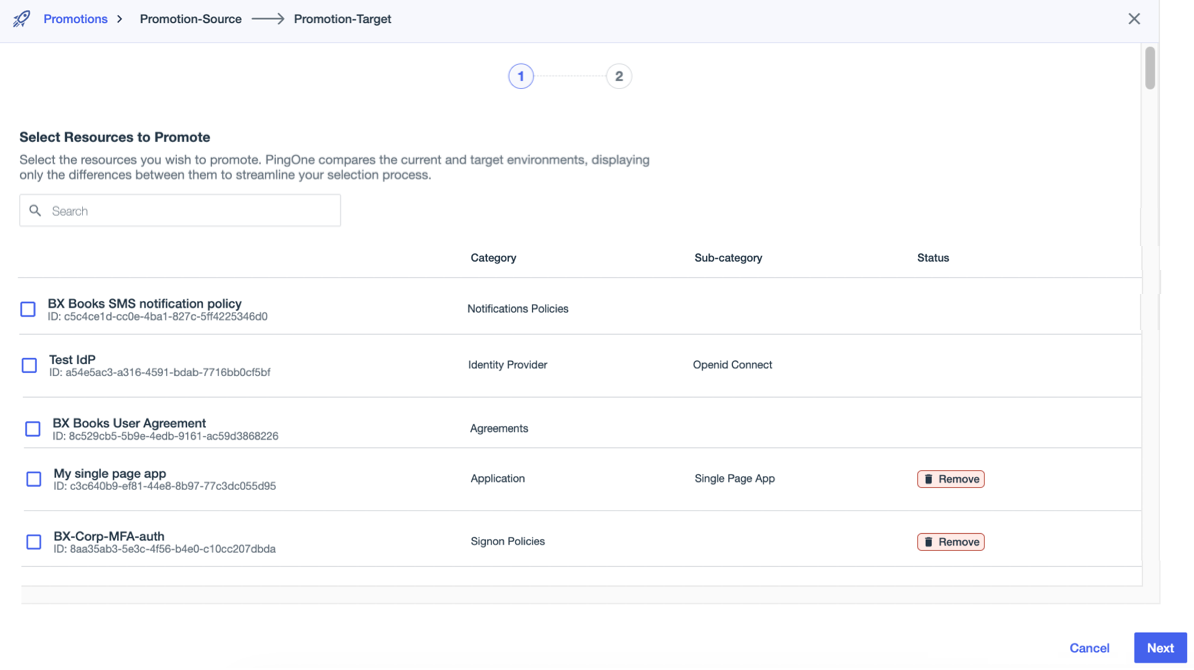
After you confirm the target environment, PingOne takes snapshots of both environments, compares configuration resources, and lists the resources that you can promote.
-
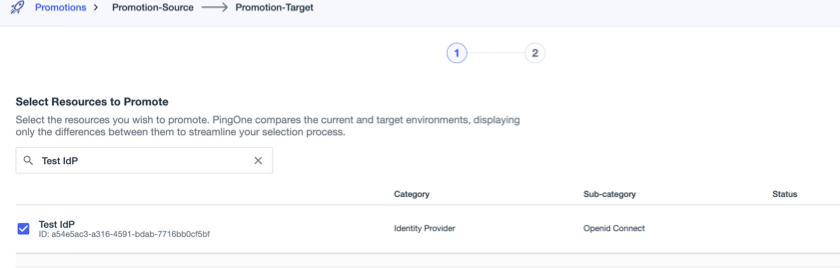
On the Select Resources to Promote page, search for Test IdP and select it.
-
Click Next.
-
If the Auto-Selected Dependencies modal opens, click Continue.
-
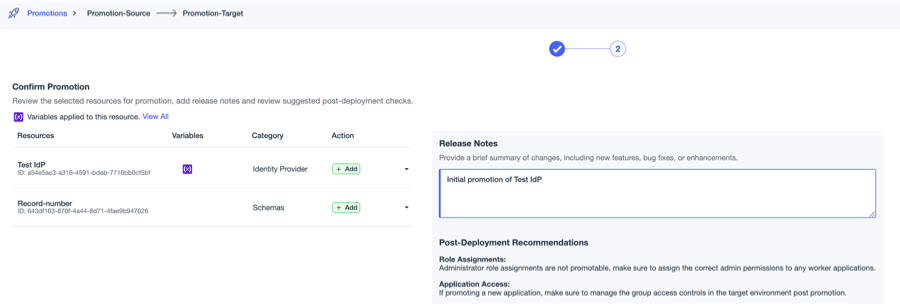
On the Confirm Promotion page, review the details for the promotion and add release notes.
-
Click the View All link next to Variables applied to this resource to open the Promotion Variables modal and click Test IdP to expand it and confirm the variables you created for this scenario.
-
Click Close to close the Promotion Variables modal.
-
Click Run Promotion.
Result
You’re returned to the Promotions page and the current promotion is listed with a status of In Progress. After about 30 seconds, refresh the page. The status will change to Success for a successful promotion.
Verify the promotion
To verify the results of the promotion, first confirm the details of the promotion in the source environment, then ensure that Test IdP exists in the target environment and that the variables match what you expect.
Steps
-
In the PingOne admin console for the Promotion-Source environment, go to Promote > Promotions.
-
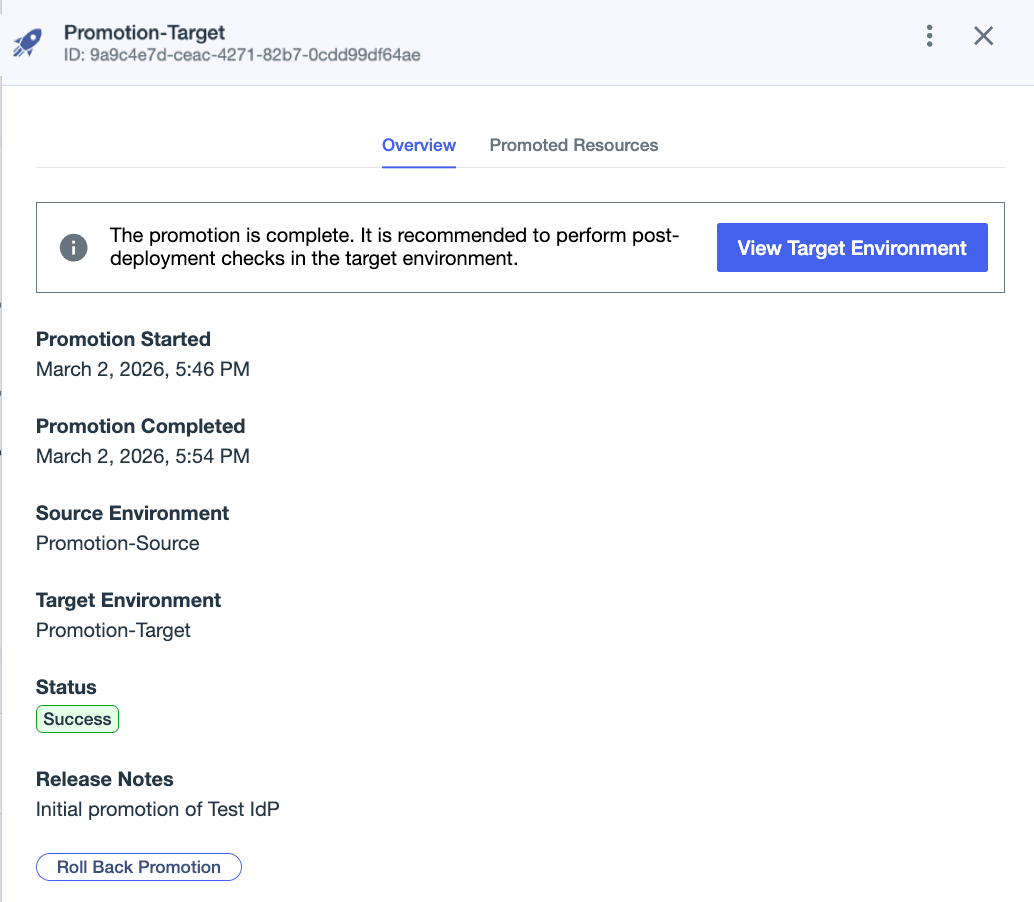
Locate the promotion in the list, click the More Options icon (⋮), and select View.
Promotions are listed in reverse chronological order, so the most recent promotion appears at the top of the list.
- Overview tab
-
The Overview tab shows information about when the promotion was started and completed, the source and target environments, the status of the promotion, and any release notes that were added.
- Promoted Resources tab
-
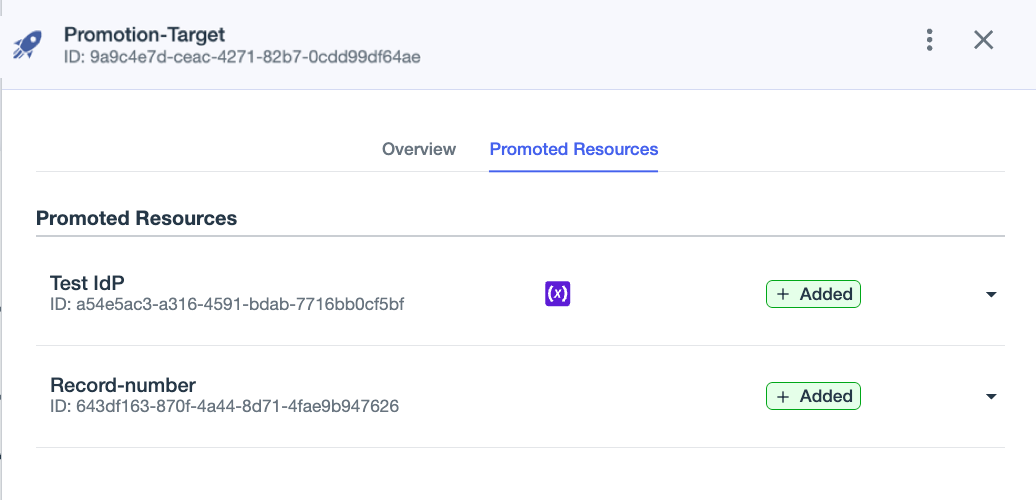
The Promoted Resources tab shows the details about the resources that were promoted.
-
On the Overview tab, click View Target Environment.
You’re taken to the PingOne admin console for the target environment so that you can confirm that the promoted resources exist and match what you expect.
-
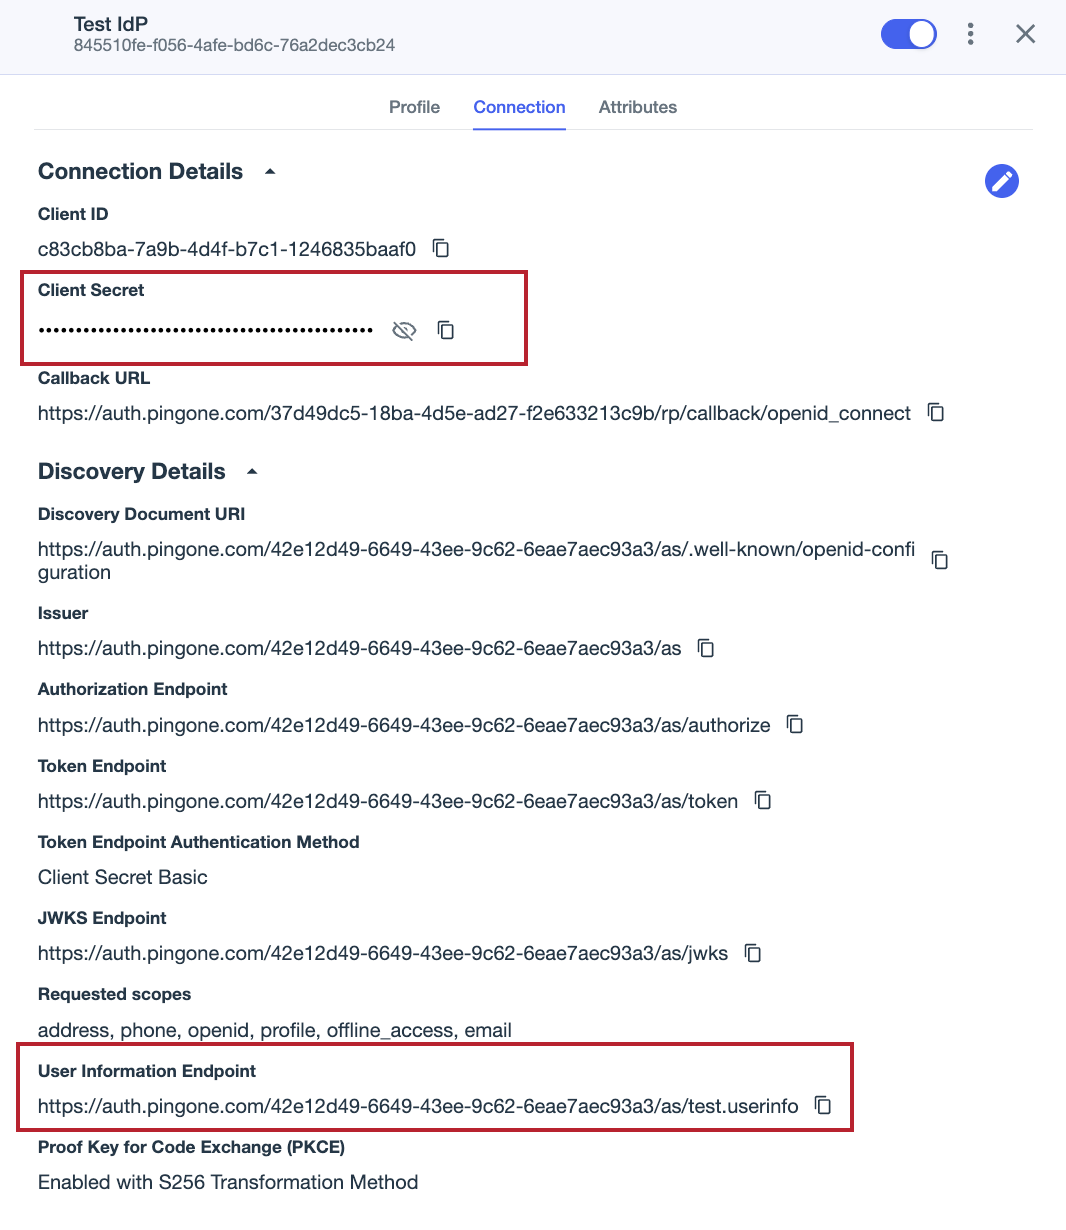
For this scenario, go to Integrations > External IdPs, browse or search for Test IdP, and click it to open the details panel.
Result
Test IdP now exists in the Promotion-Target environment, and the value for the User Information Endpoint matches the value you configured when you added variables for the promotion. You also see that the value for the Client Secret is hidden, which confirms that the sensitive variable you created for the promotion was used in the target environment.