Group-level role assignment scenarios
Group-level role assignment gives you have more flexibility to model the administration of PingOne resources and simulate the structure of your business. The following scenarios provide context and a starting point for you to consider when applying group-level role assignment in your organization.
Scenario 1: Administering users across multiple brands and Help Desks
In this scenario, a media company called BX Media runs multiple sites and apps for fans of various recording artists, and each artist brand has its own dedicated Advanced Help Desk Admin. However, each fan has a single account that they use to access media for multiple artists. The company wants to ensure that each Advanced Help Desk Admin can manage the users who are fans of their assigned artist brand, but who also might be fans of other artists in their catalog.
Before you begin
For the purposes of this scenario, assume the following:
-
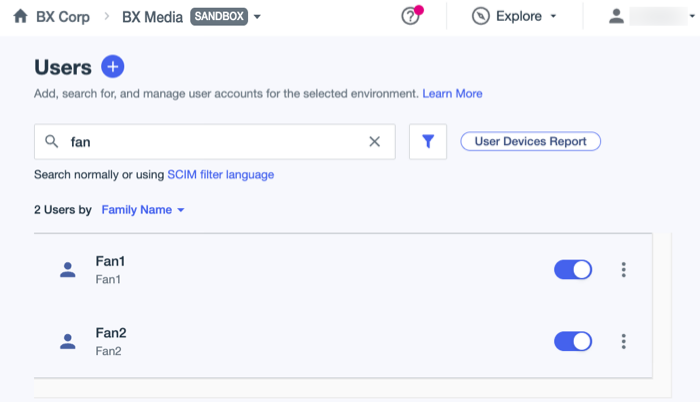
You have two end users in the BX Media environment who are fans of some of your artists:
-
Fan1: A fan of Artist 2 and Artist 3
-
Fan2: A fan of Artist 1 and Artist 3
Learn more about creating users in Adding a user in PingOne.
-
-
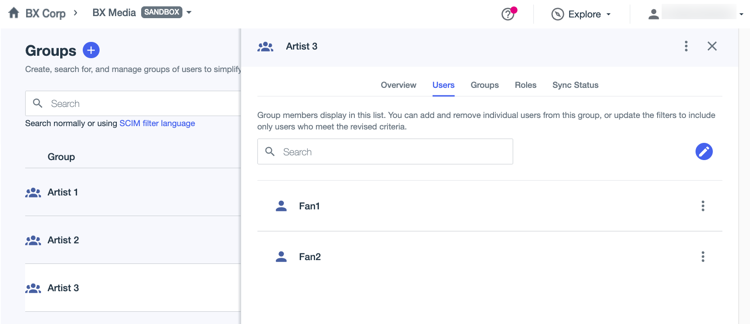
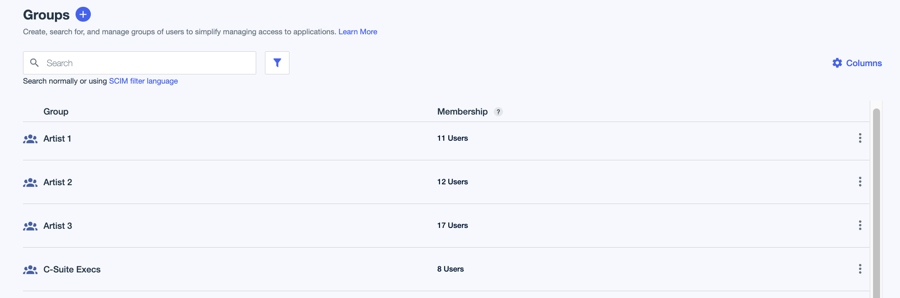
You have three groups in the BX Media environment, one for fans of each of the artists:
-
Artist 1
-
Artist 2
-
Artist 3

Learn more about creating groups in Creating a group.
-
-
You’ve added the fans to the applicable groups, based on their interests:
-
Fan1 is a member of the Artist 2 and Artist 3 groups
-
Fan2 is a member of the Artist 1 and Artist 3 groups
-
-
You have three administrator users in the Administrators environment:
-
Artist 1 Help Desk Admin
-
Artist 2 Help Desk Admin
-
Artist 3 Help Desk Admin
-
Now you’ll assign the Advanced Help Desk Admin to each administrator user and scope it to the applicable group for each.
Steps
-
In the PingOne admin console for the Administrators environment, go to Directory > Users and browse or search for the Artist 1 Help Desk Admin user.
-
Click the user entry to open the details panel, and then click the Roles tab.
-
Click Grant Roles, click the Advanced Help Desk Admin role to expand it, and click the Reduce access icon (
 ).
).
-
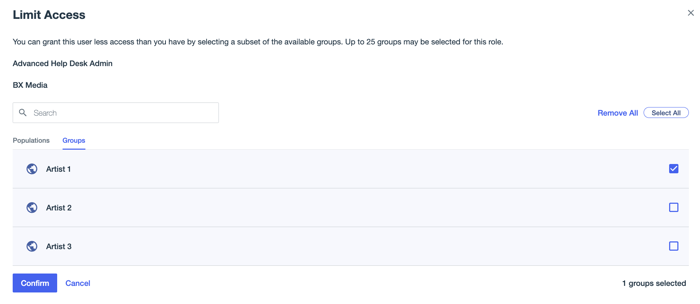
On the Limit Access modal, on the Groups tab, select the checkbox next to the Artist 1 group and click Confirm.
-
Repeat steps 1 - 4 for the Artist 2 Help Desk Admin and Artist 3 Help Desk Admin users, assigning the Advanced Help Desk Admin role to each and restricting the role as follows:
-
Artist 2 Help Desk Admin: Restrict to the Artist 2 group.
-
Artist 3 Help Desk Admin: Restrict to the Artist 3 group.
-
Result
By setting these roles at the group level, you give each administrator the ability to assist a user in a group for which they have explicit administrator privileges, even if that user also belongs to a group over which they don’t. You maintain a single user identity for each fan, while still giving each support team the access they need.
In practice, this means that:
-
Artist 3 Help Desk Admin can assist both Fan1 and Fan2, because both fans belong to the Artist 3 group.
-
Artist 1 Help Desk Admin can assist only Fan2 because Fan1 doesn’t belong to the Artist 1 group or another group over which Artist 1 Help Desk Admin has role permissions.
-
Artist 2 Help Desk Admin can assist only Fan1, because Fan2 doesn’t belong to both the Artist 2 group or another group over which Artist 2 Help Desk Admin has role permissions.
Scenario 2: Administering users for a specialized support team
In this scenario, BX Media has a small, expert support team that handles high-risk operations, such as managing MFA devices and escalated recovery flows for C-level executives. The executive users are in a group called C-Suite Execs.
Before you begin
For the purposes of this scenario, assume the following:
-
You have eight end users in the BX Media environment who belong to the C-Suite Execs group. Learn more in Managing groups.
-
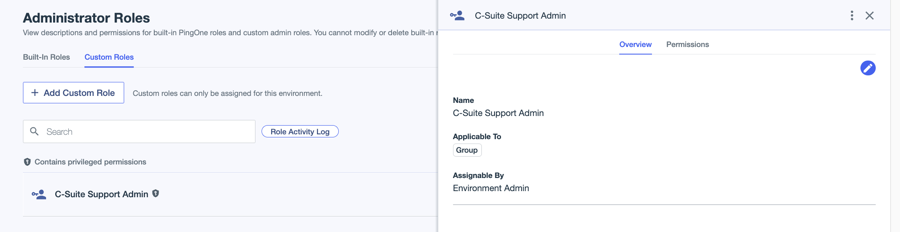
You’ve created a custom role called C-Suite Support Admin that has permissions to manage MFA devices and account recovery, along with other essential permissions, but no other user management permissions. This role can be assigned only at the group level. Learn more in Adding a custom administrator role.
Now you’ll assign the C-Suite Support Admin role to an administrator user and scope the role to the C-Suite Execs group.
Steps
-
In the PingOne admin console for the Administrators environment, go to Directory > Users and browse or search for a user to assign the new role.
-
Click the user entry to open the details panel, and then click the Roles tab.
-
Click Grant Roles, scroll to the Custom Roles section, and click it to expand it.
Because the role can only be assigned at the group level in the BX Media environment, that is the only environment listed. The Reduce access icon (
) shows, but there’s no checkbox for selecting the entire environment.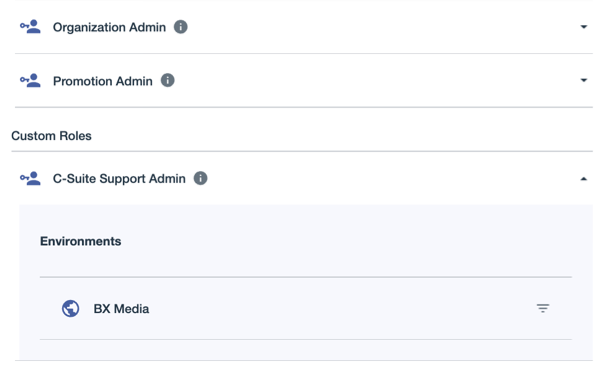
-
Click
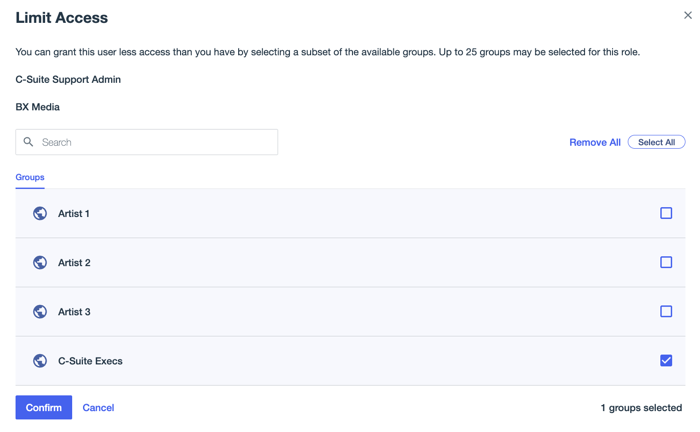
to open the Limit Access modal. -
Select the checkbox next to the C-Suite Execs group and click Confirm.
In this case, there’s only the Groups tab because the role can only be assigned at the group level.