Monitoring PingOne Verify transaction activity and license usage
Monitoring transaction activity and tracking license usage ensures your identity verification services remain operational, efficient, and within subscription limits.
Using the Identity Verification Dashboard
The Identity Verification Dashboard shows identity verification transaction activity for your organization filtered by your choice of date and PingOne Verify policy. You can use this information for managing both identify verification and the handling of accepted and failed verifications in PingOne. Learn more in Reviewing and managing verification.
Steps
-
To access the Identity Verification Dashboard, in the PingOne admin console, go to Monitoring > Identity Verification.
-
Click one of the tabs:
-
Verify Dashboard: Displays volume data and comprehensive trends for successful and failed identity verification transactions over the selected time range.
-
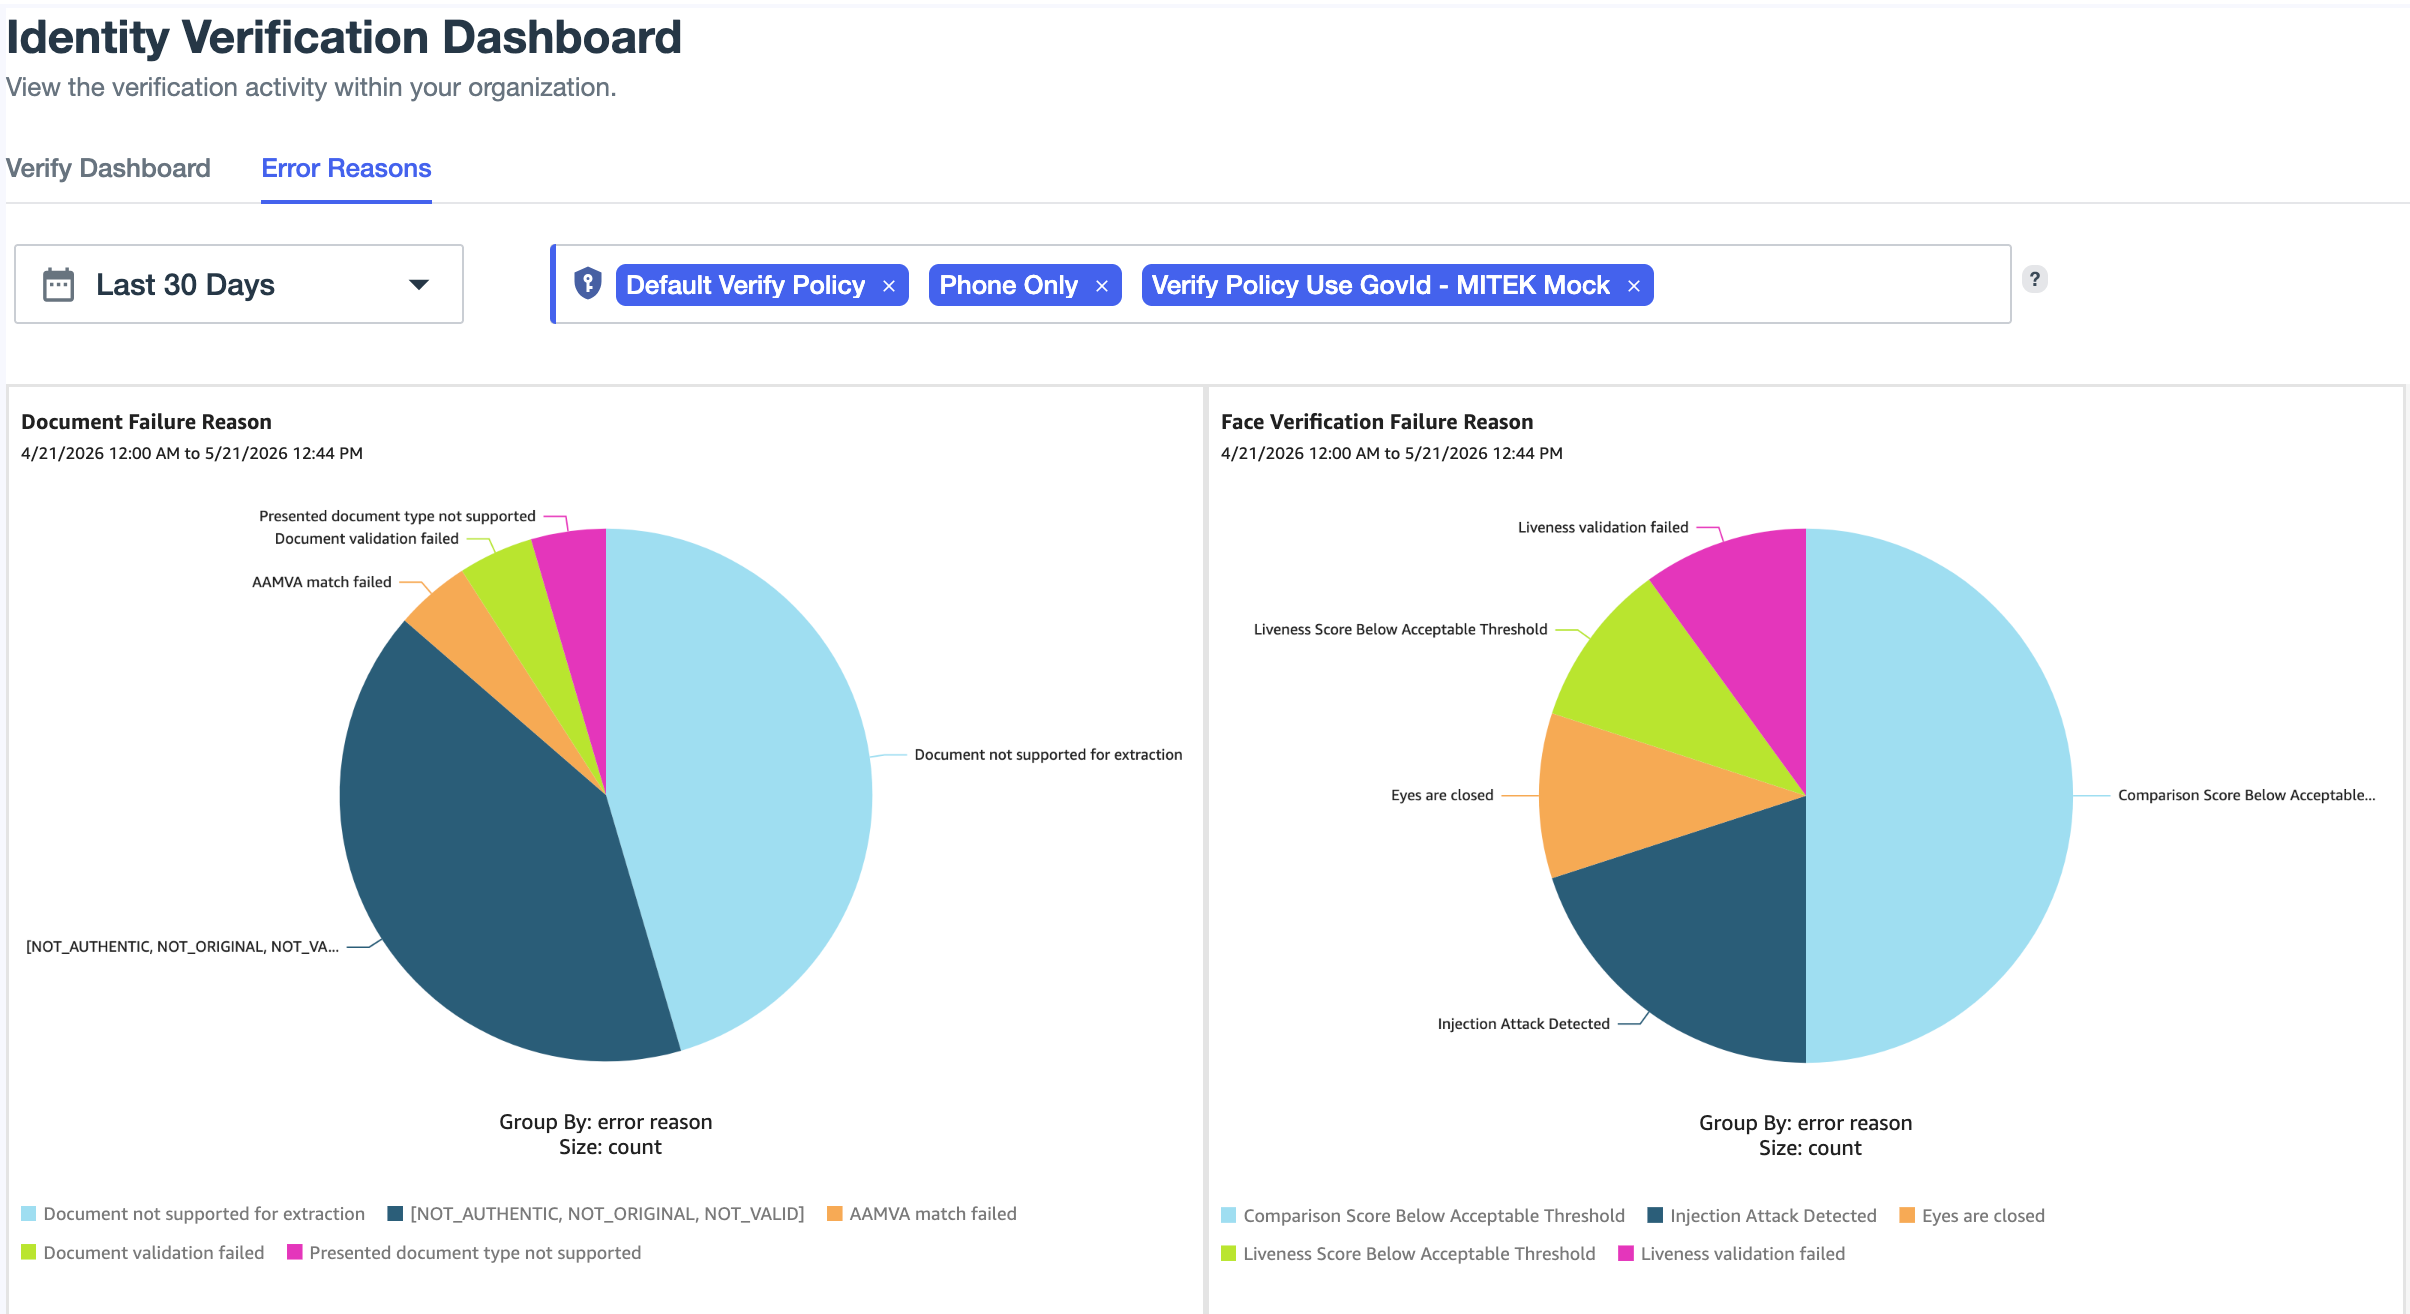
Error Reasons: Displays failure analysis data, providing a detailed breakdown of the specific reasons why verification transactions were rejected.
-
-
To apply filtering to refine the data displayed on the dashboard:
-
Select a specific time range.
You can limit the data to:
-
Today (Default)
-
Last 7 Days
-
Last 30 Days
-
6 Months
-
Custom Range
Data begins on February 27, 2024.
-
-
Click a policy.
Result:
Charts appear showing identity verification transaction activity for the selected time range.
-
-
To adjust the charts, use the following controls:
Icon Name Description 
Maximize
Expands the chart to fill the dashboard.
To minimize the chart, click the icon again.

Menu options
Click the icon to see the following options:
-
View summary data: Displays chart data as a table.
-
Export to CSV: Exports chart data to CSV format.
-
Charts
The Identity Verification Dashboard shows the following verification charts:
- Accepted Verifications
-
Shows hows the total number of accepted verification transactions that occurred during a selected time period. A successful transaction means a user has been validated by the service provider (SP) and verified by the ID verification service. Hover over the bar graph to get more information.
- Failed Verifications
-
Shows the total number of failed verification transactions that occurred during a selected time period. A failed transaction means a user has been rejected by the SP or ID verification service. Hover over the bar graph to get more information.
- Document Verification
-
Shows successful and failed documentation verification transactions that occurred during a selected time period.
- Facial Verification
-
Shows successful and facial verification transactions that occurred during a selected time period. Facial verification checks for the liveness of the user and then compares the selfie with the user’s picture on their government-issued ID.
- Document Failure Reason
-
Shows a breakdown of the specific reasons why government-issued documents failed validation, such as an expired ID, poor image quality, or unreadable barcodes, during the selected time period.
- Face Verification Failure Reason
-
Shows a breakdown of the specific reasons why facial verification checks failed, such as a portrait mismatch with the document photo, poor lighting, or a failed liveness check, during the selected time period.
Viewing license information
The PingOne Verify license is transaction-based. Your license information shows the quota for the total number of transactions that are allowed. The transactions can take place in any time period, with the limit enforced by the ID verification service.
Steps
-
Click the Ping Identity logo in the upper-left of the PingOne admin console.
-
Click Licenses.
The list shows only active licenses by default. To see expired licenses, click Show All Licenses.
If you have a currently active PingOne Verify license, the console shows the license quota and the current number of transactions used.
Next steps
To increase your license quota, click the Please Contact Me button. We’ll contact you to answer any licensing questions and increase your license quota. Learn more in Licenses and Platform Limits.